Transitional Tawny Tudor Gown

That’s a mouthful eh?

So the GBACG was going to see a Tudors exhibit at the Legion of Honor. I had planned to wear a this-old-thing Elizabethan gown, but a perfect combination of events:

  • I had been laid off, but found a new job, and had 6 weeks in between offer and starting
  • my kids stayed healthy so could be at school/daycare
  • I abandoned all household responsibilities except childcare

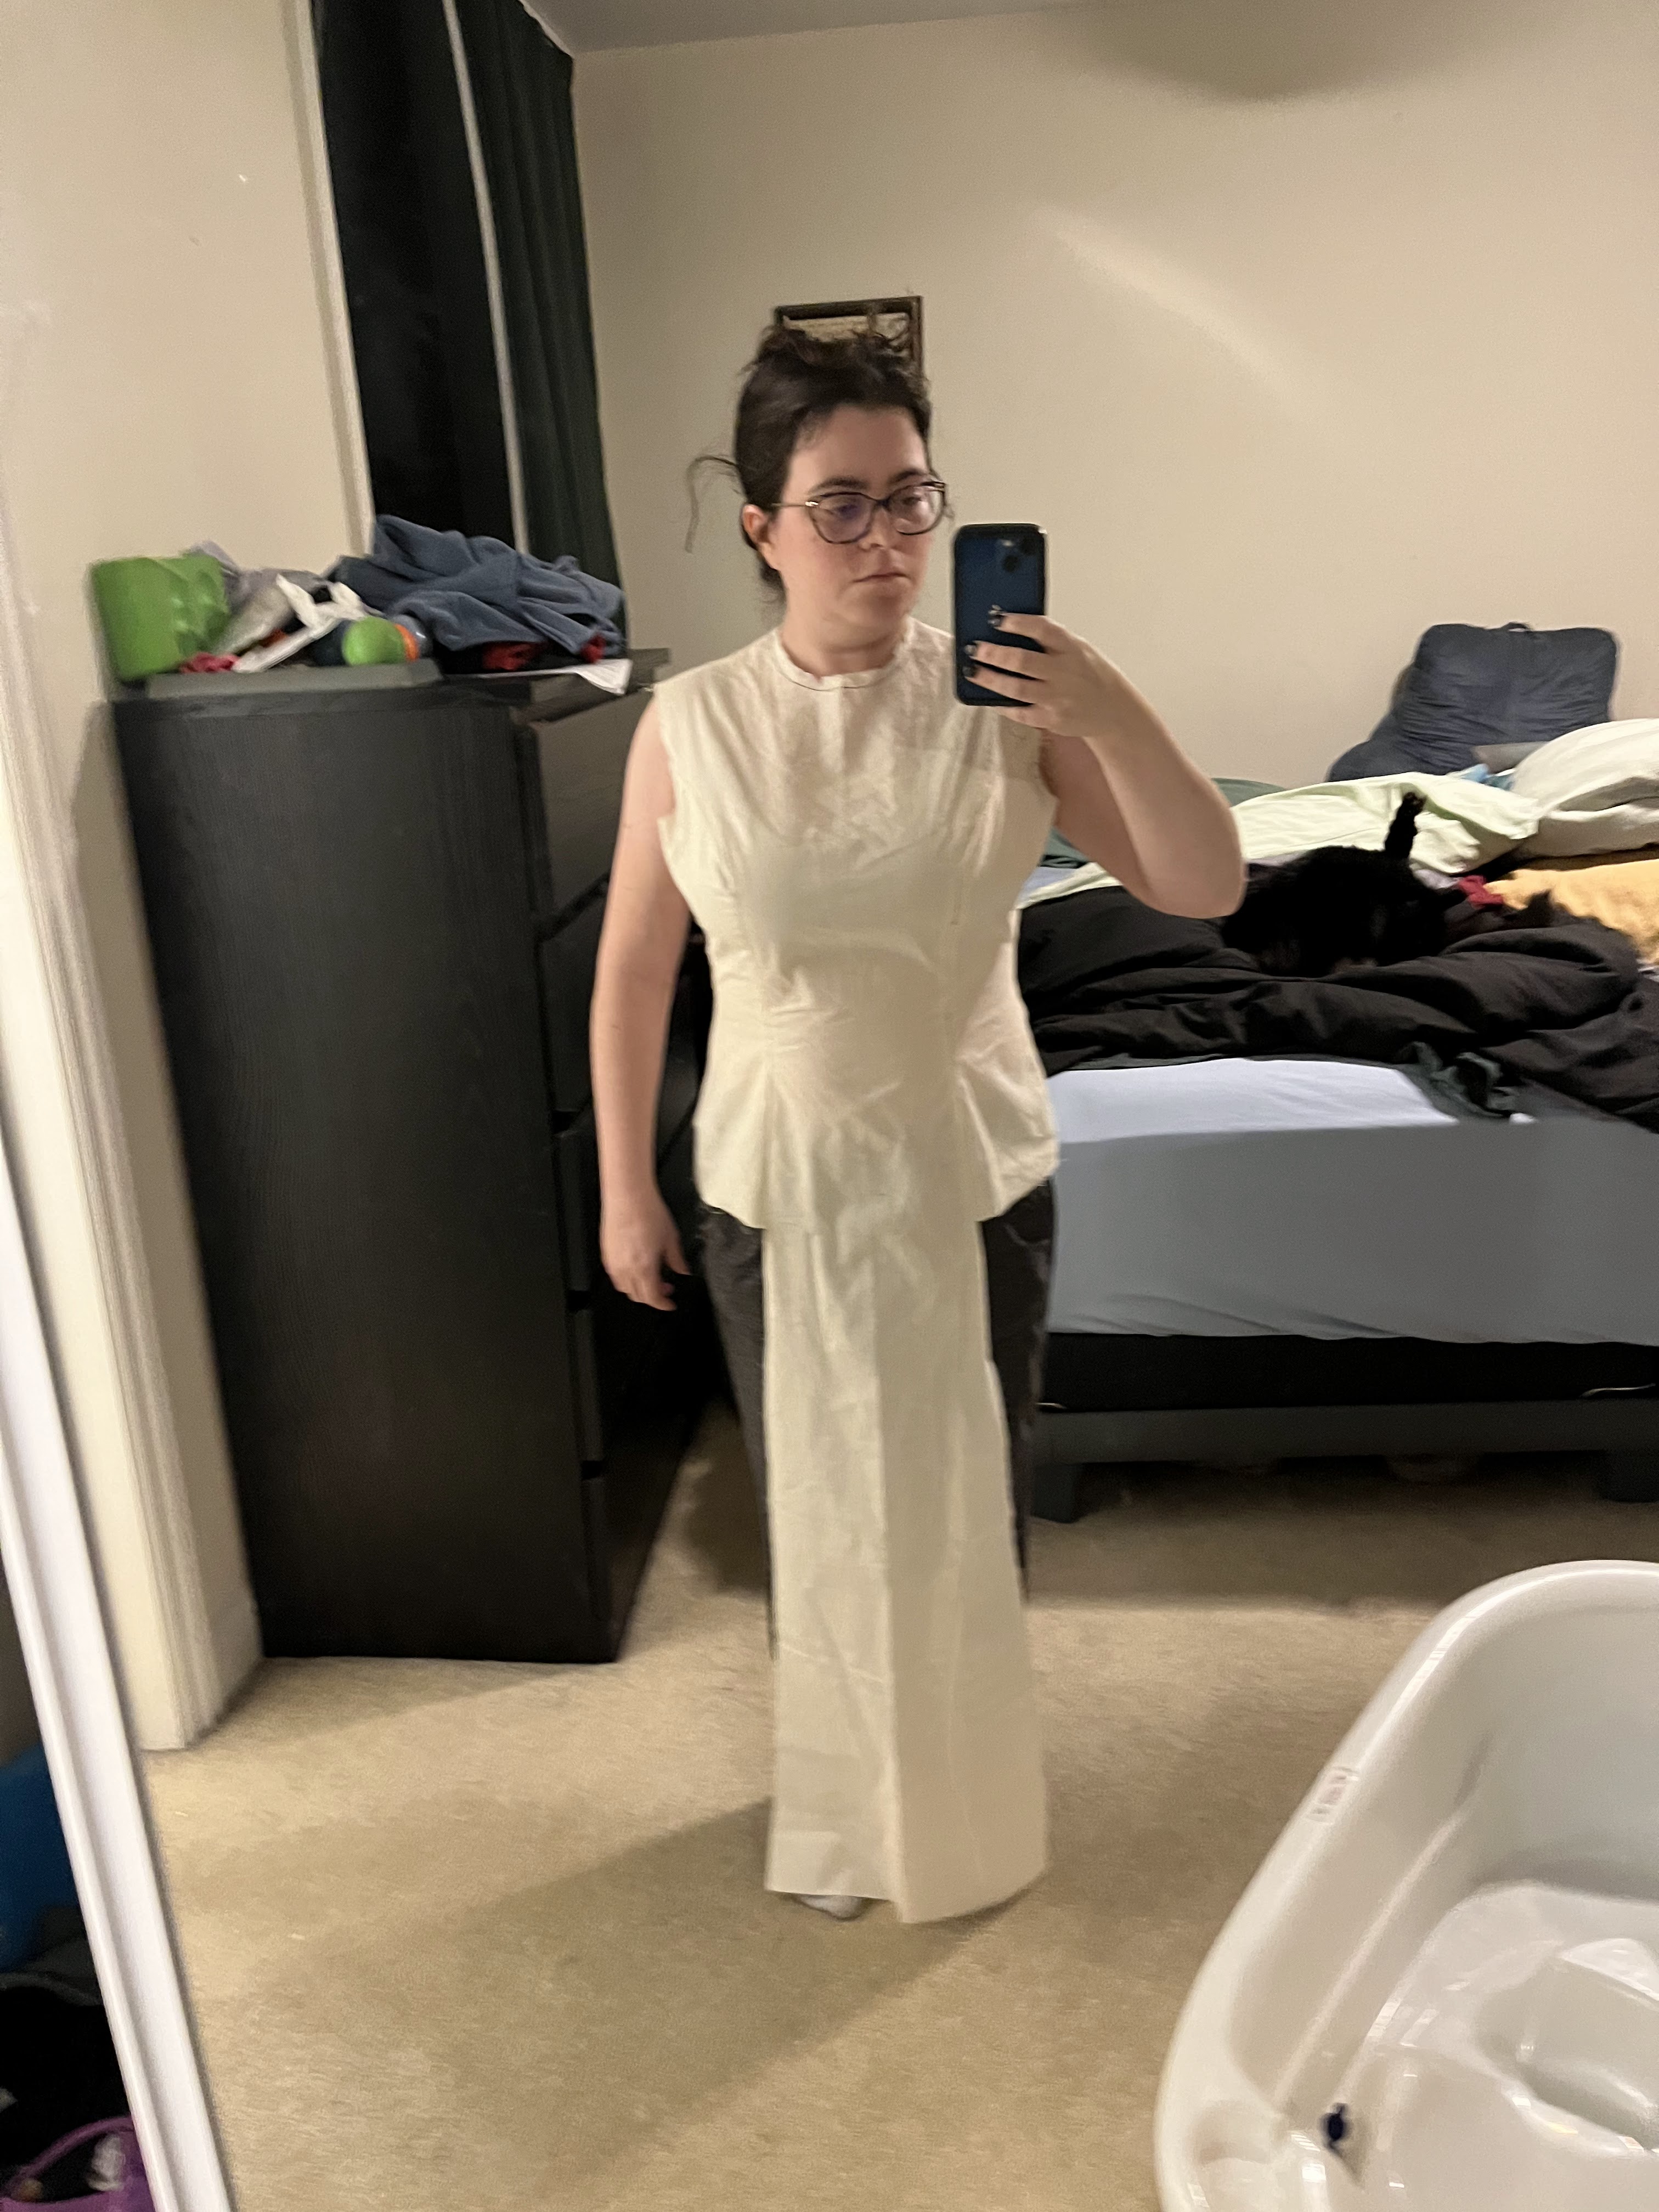
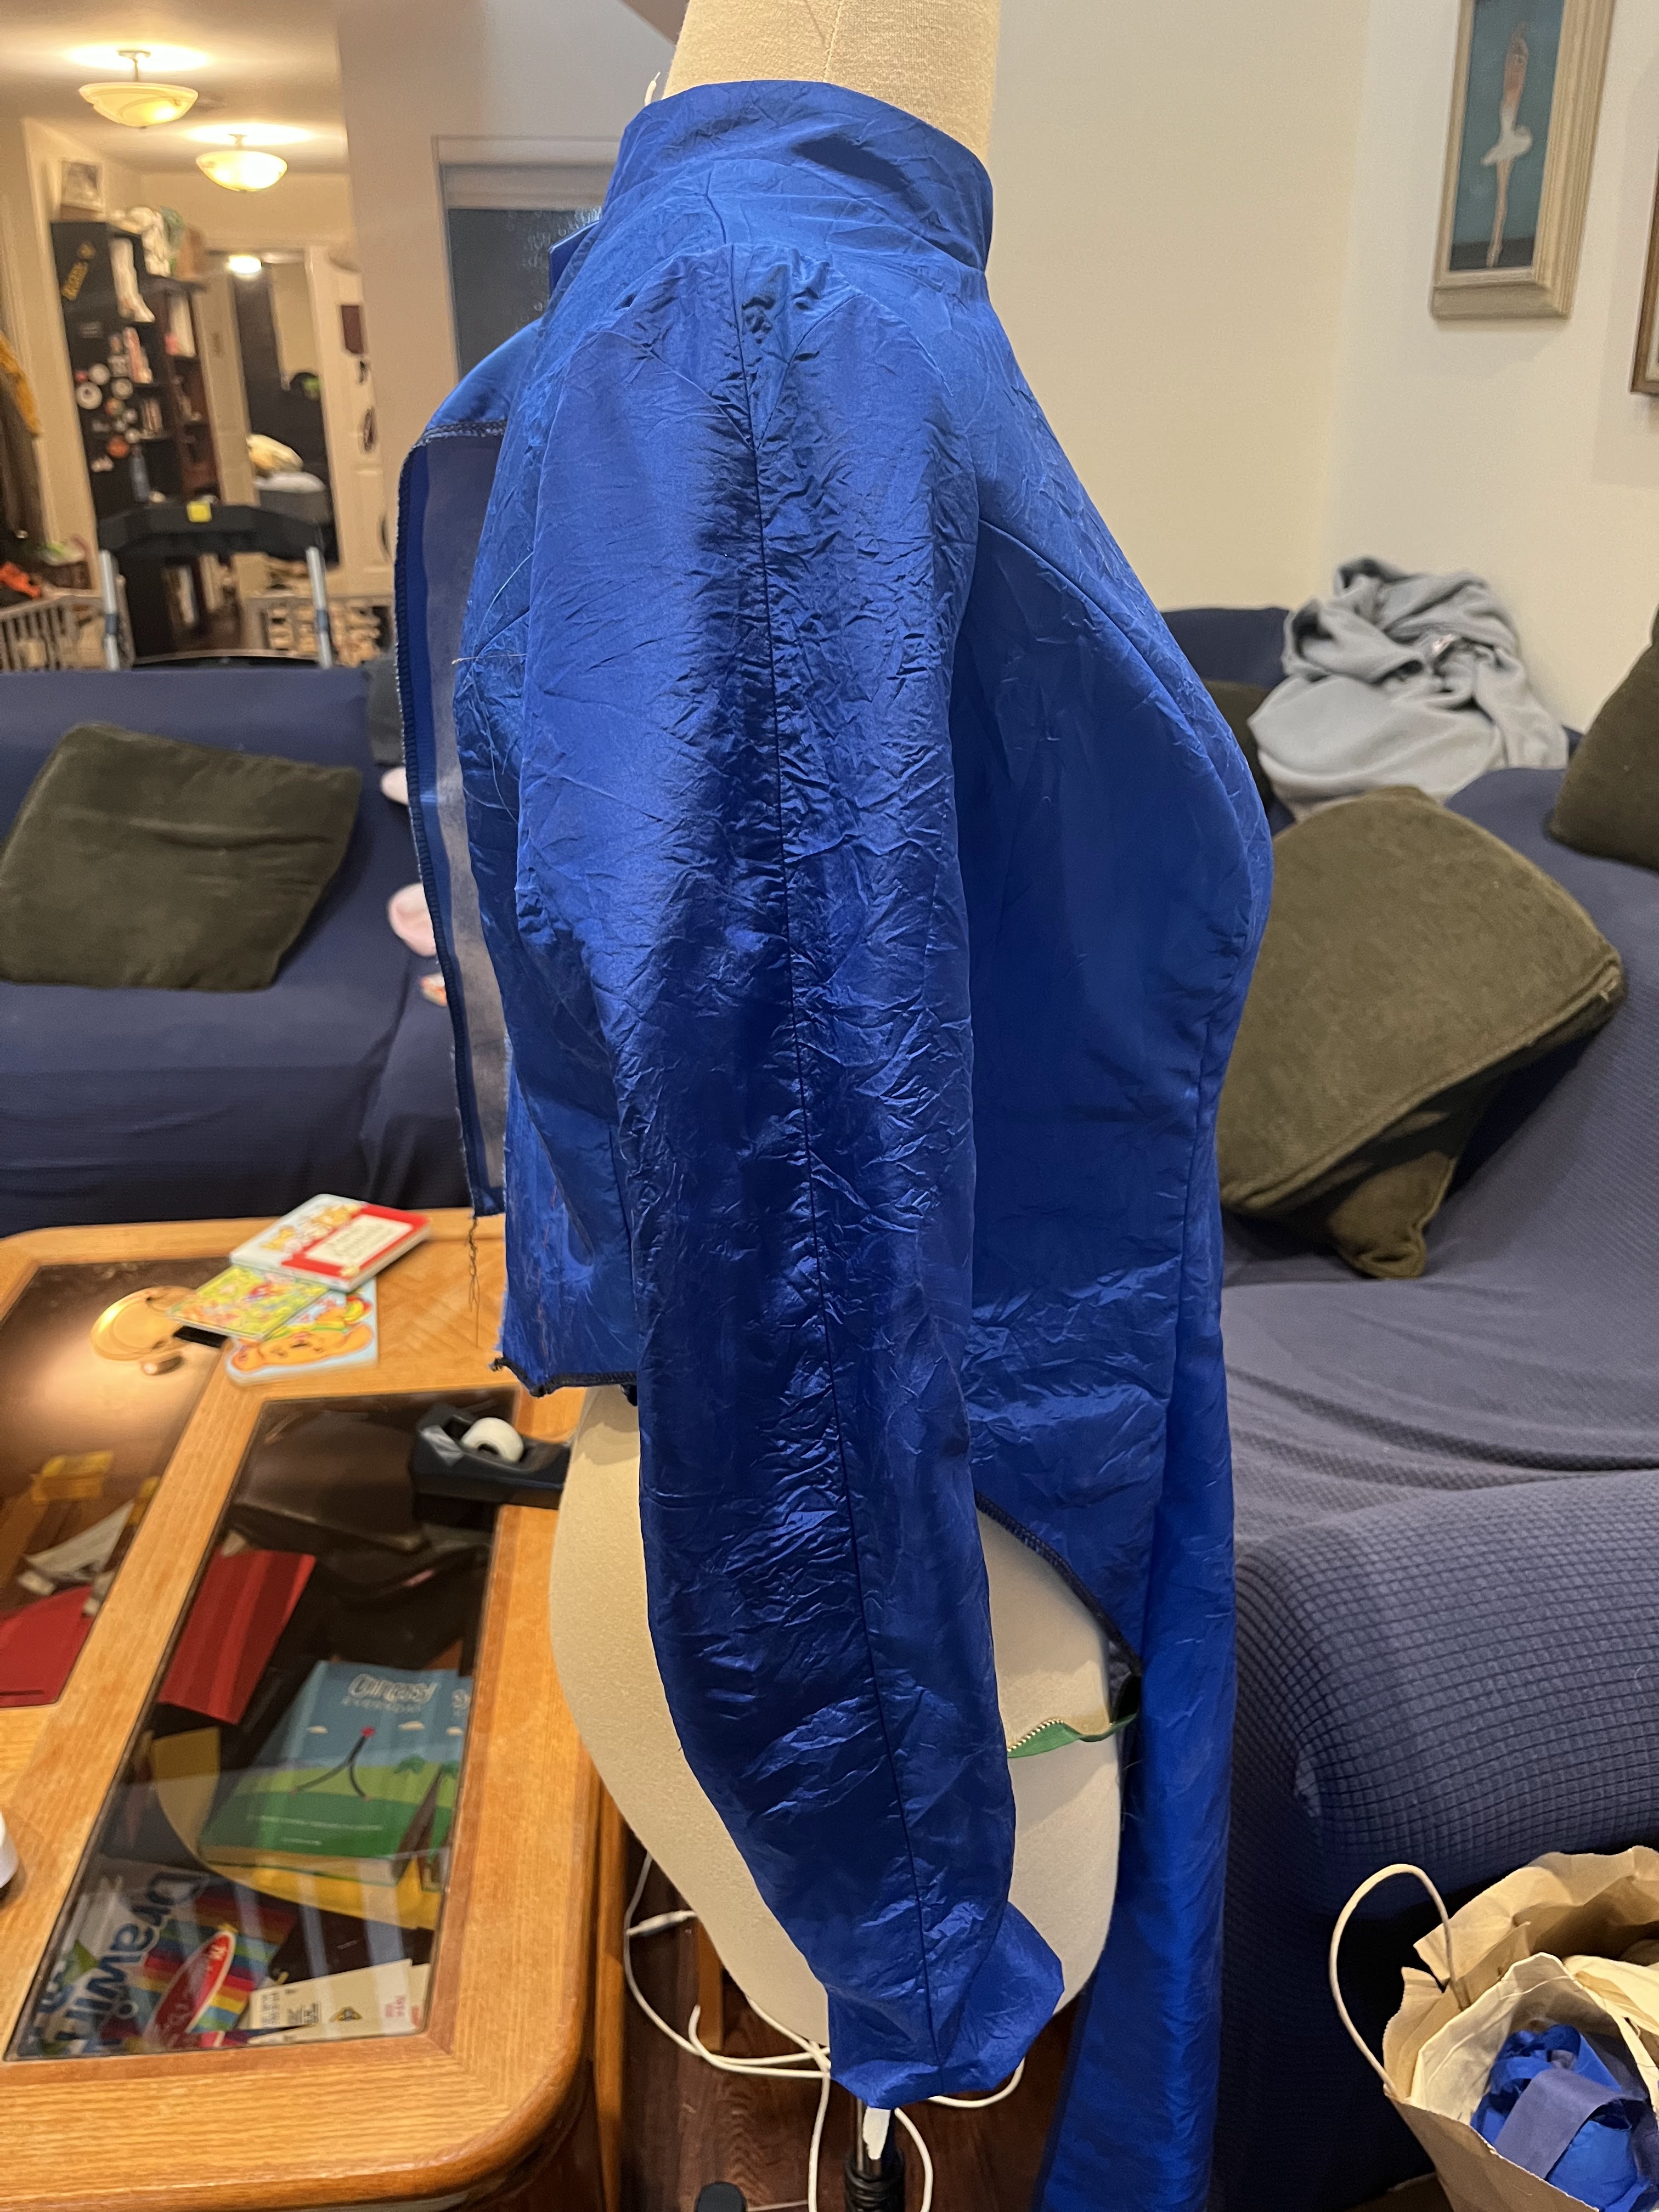
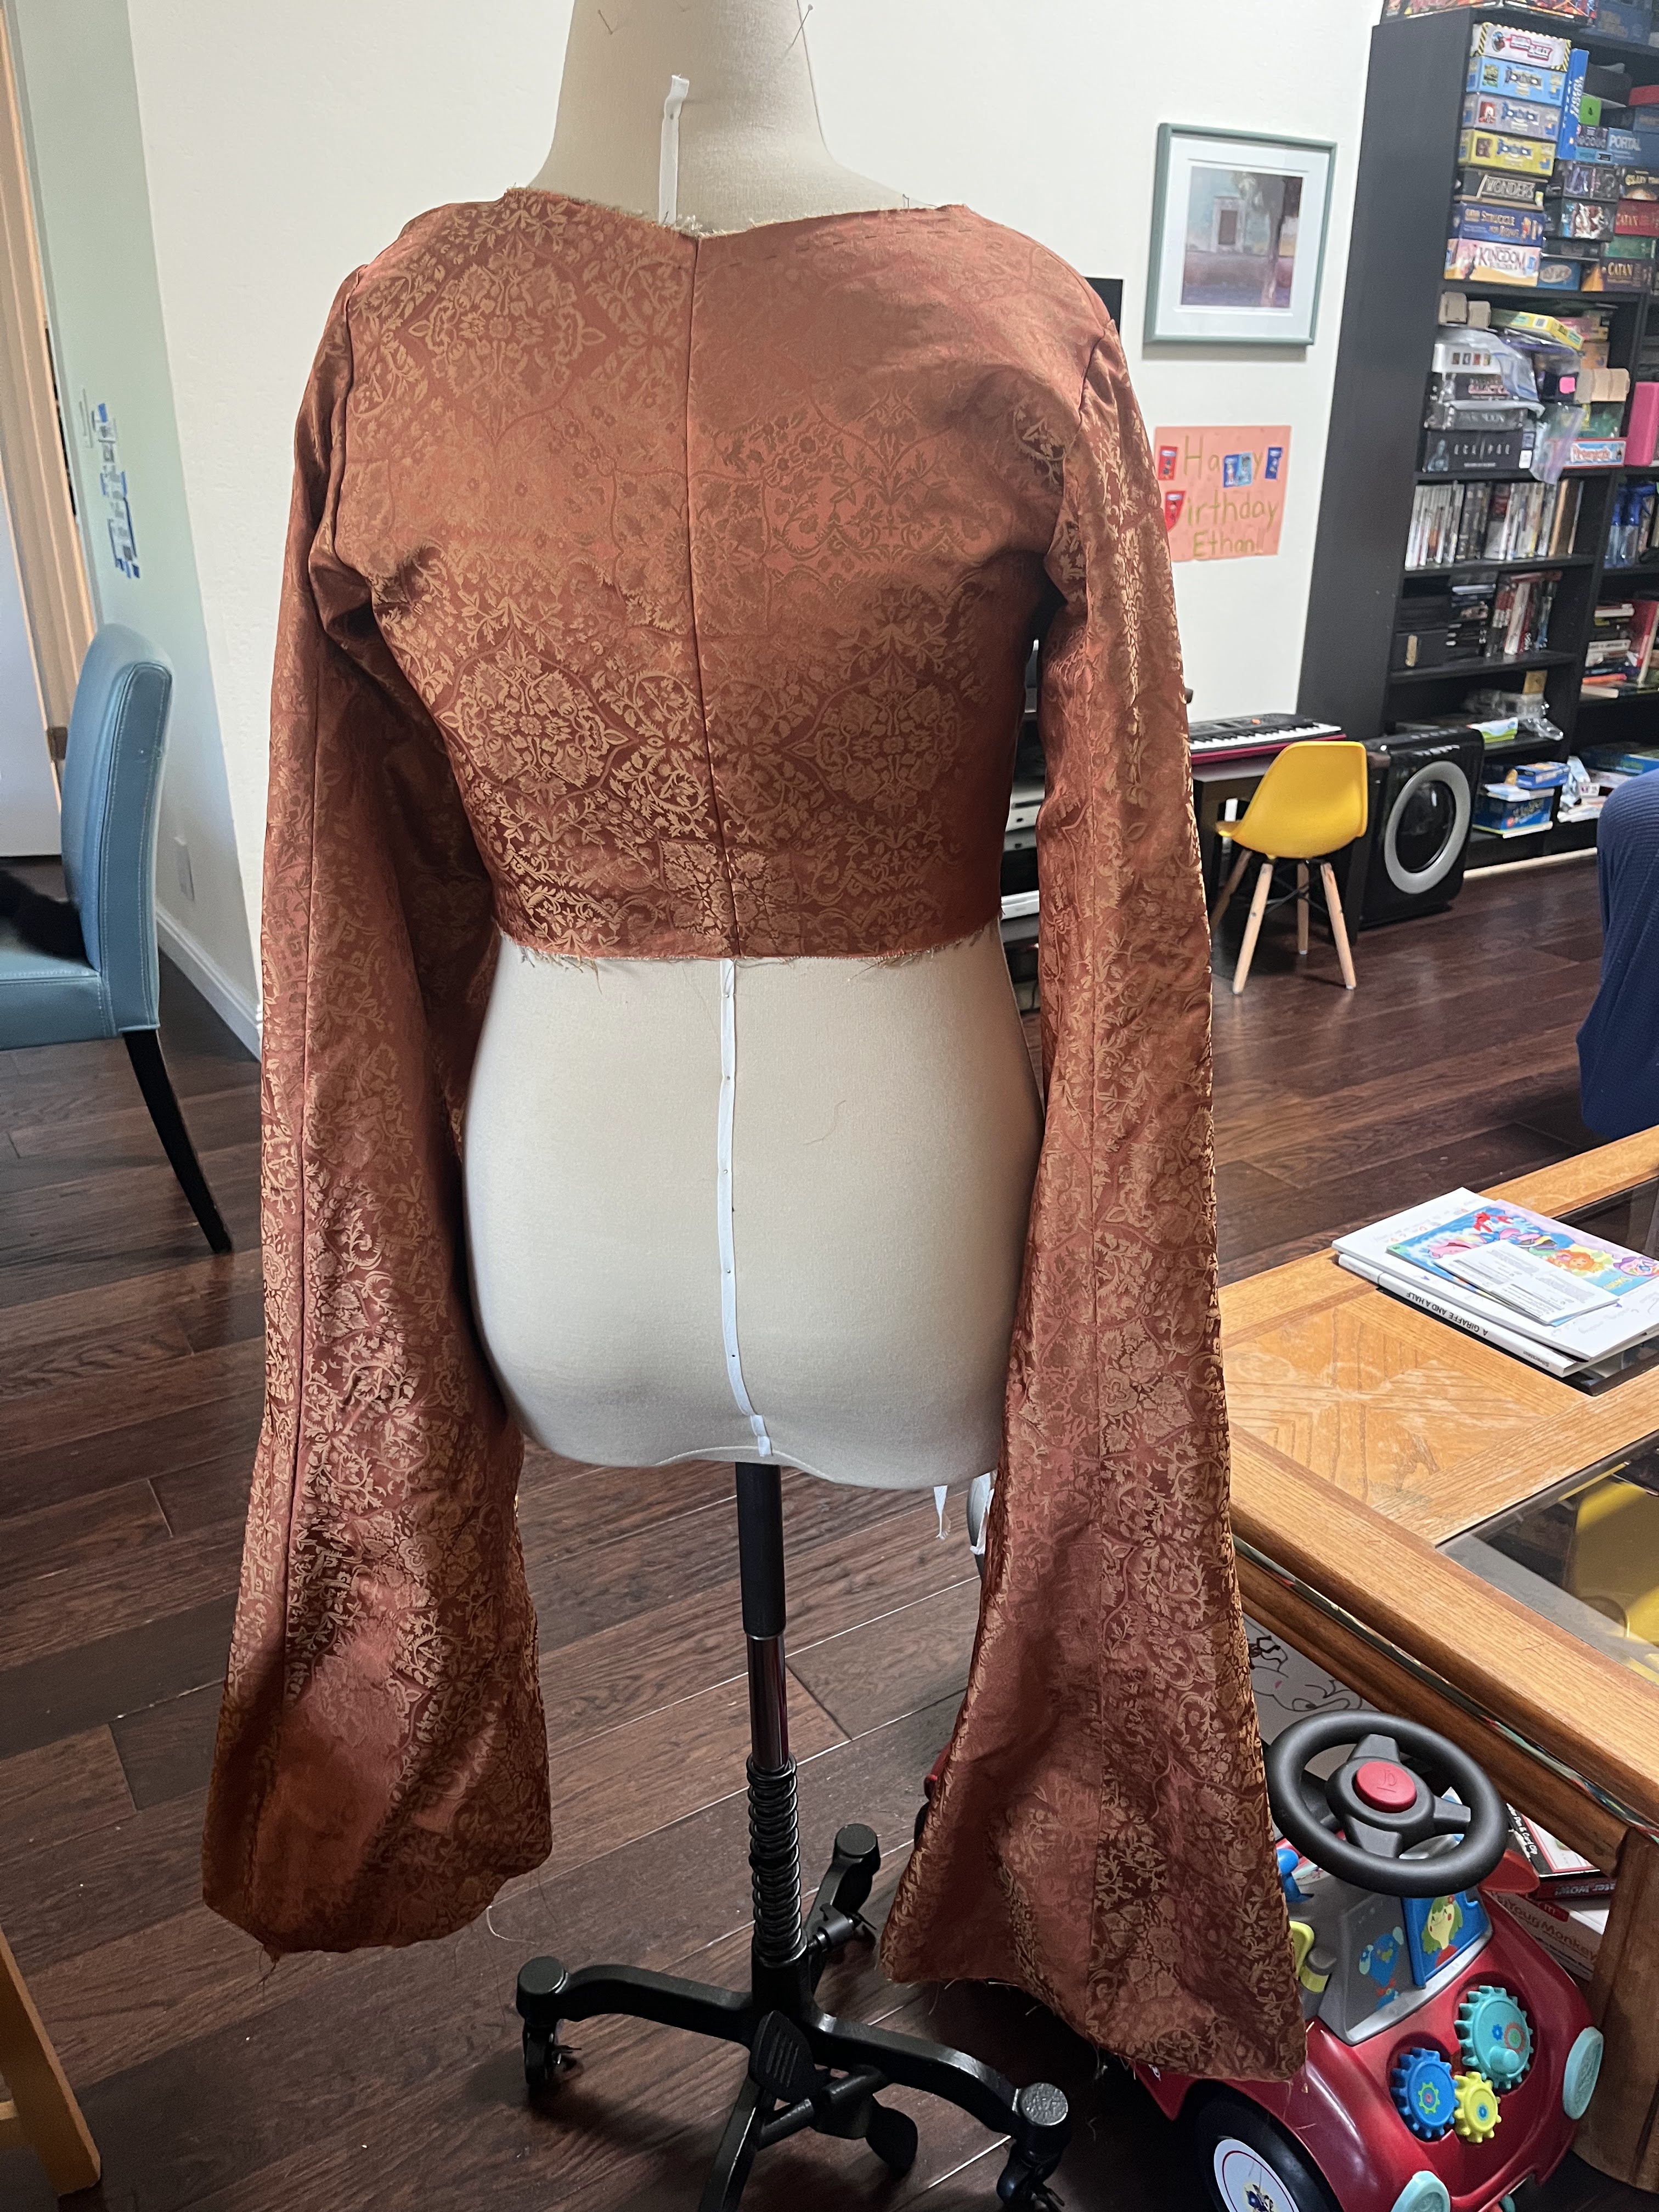
to quickly bang together what I’m calling my Transitional Tawny Tudor gown in two weeks.

The transitional part:

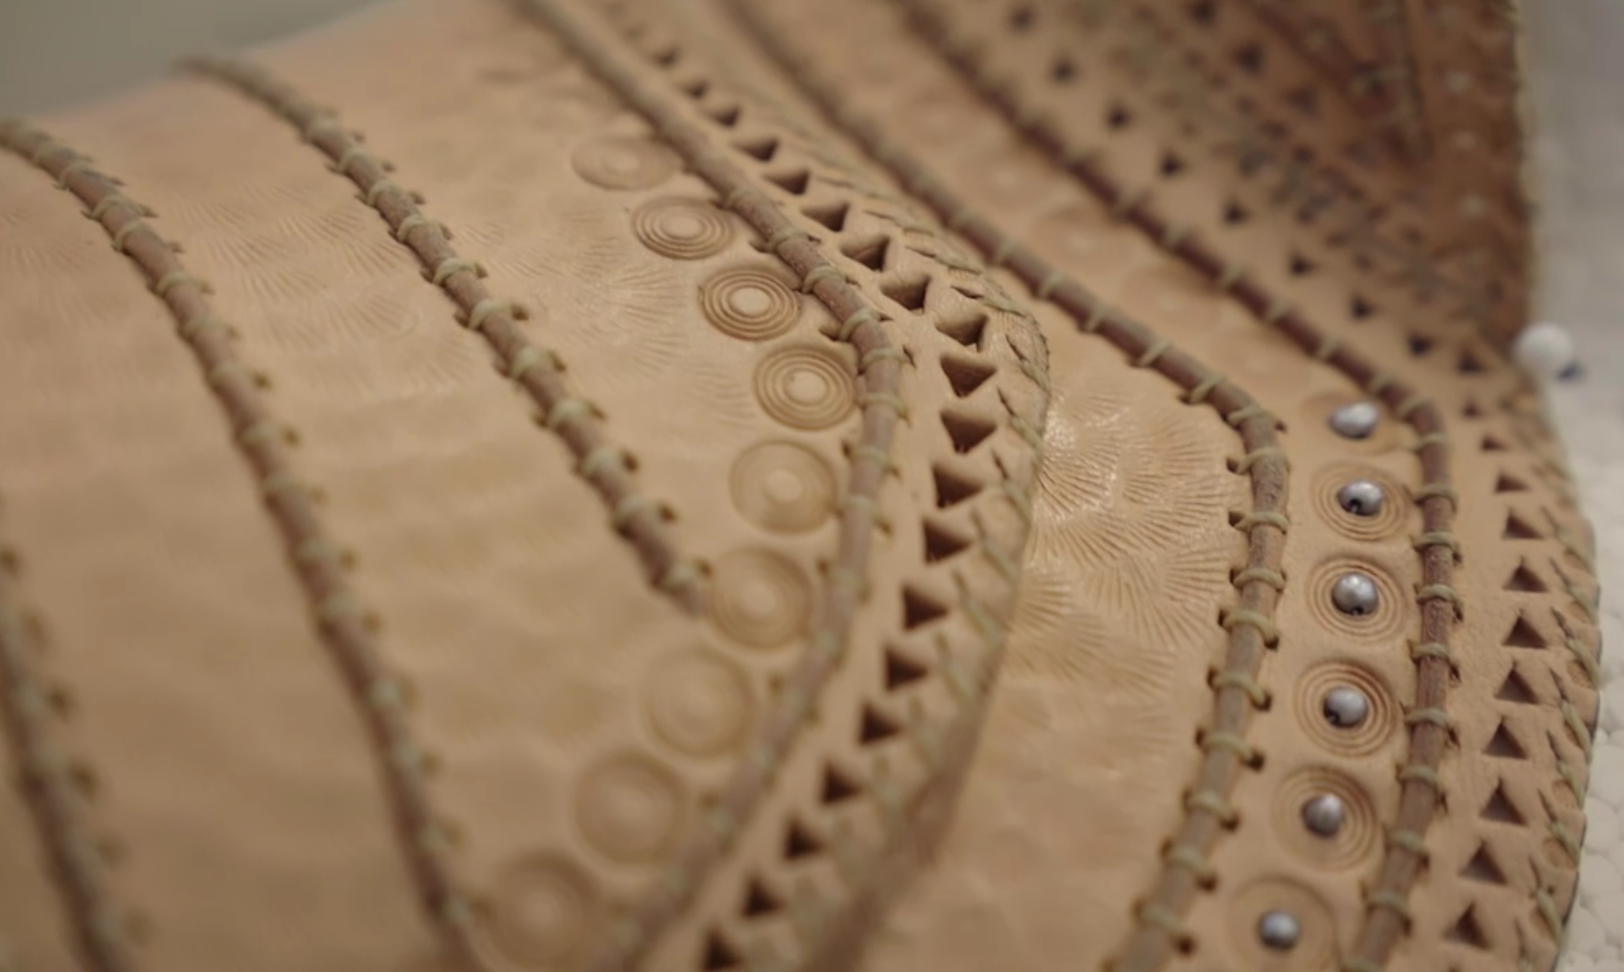
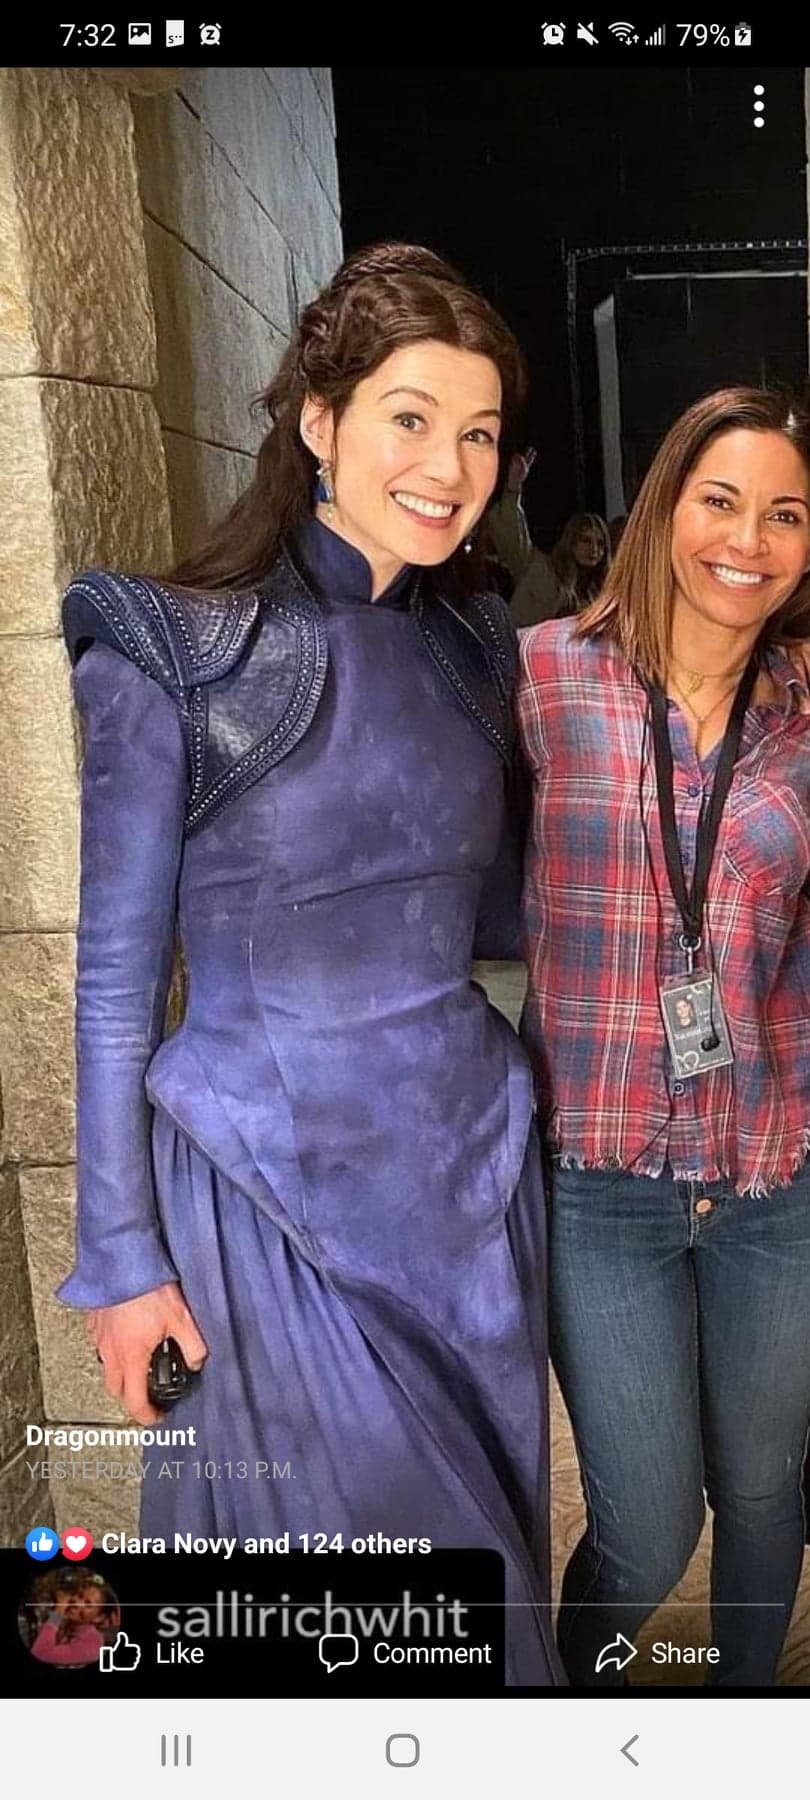
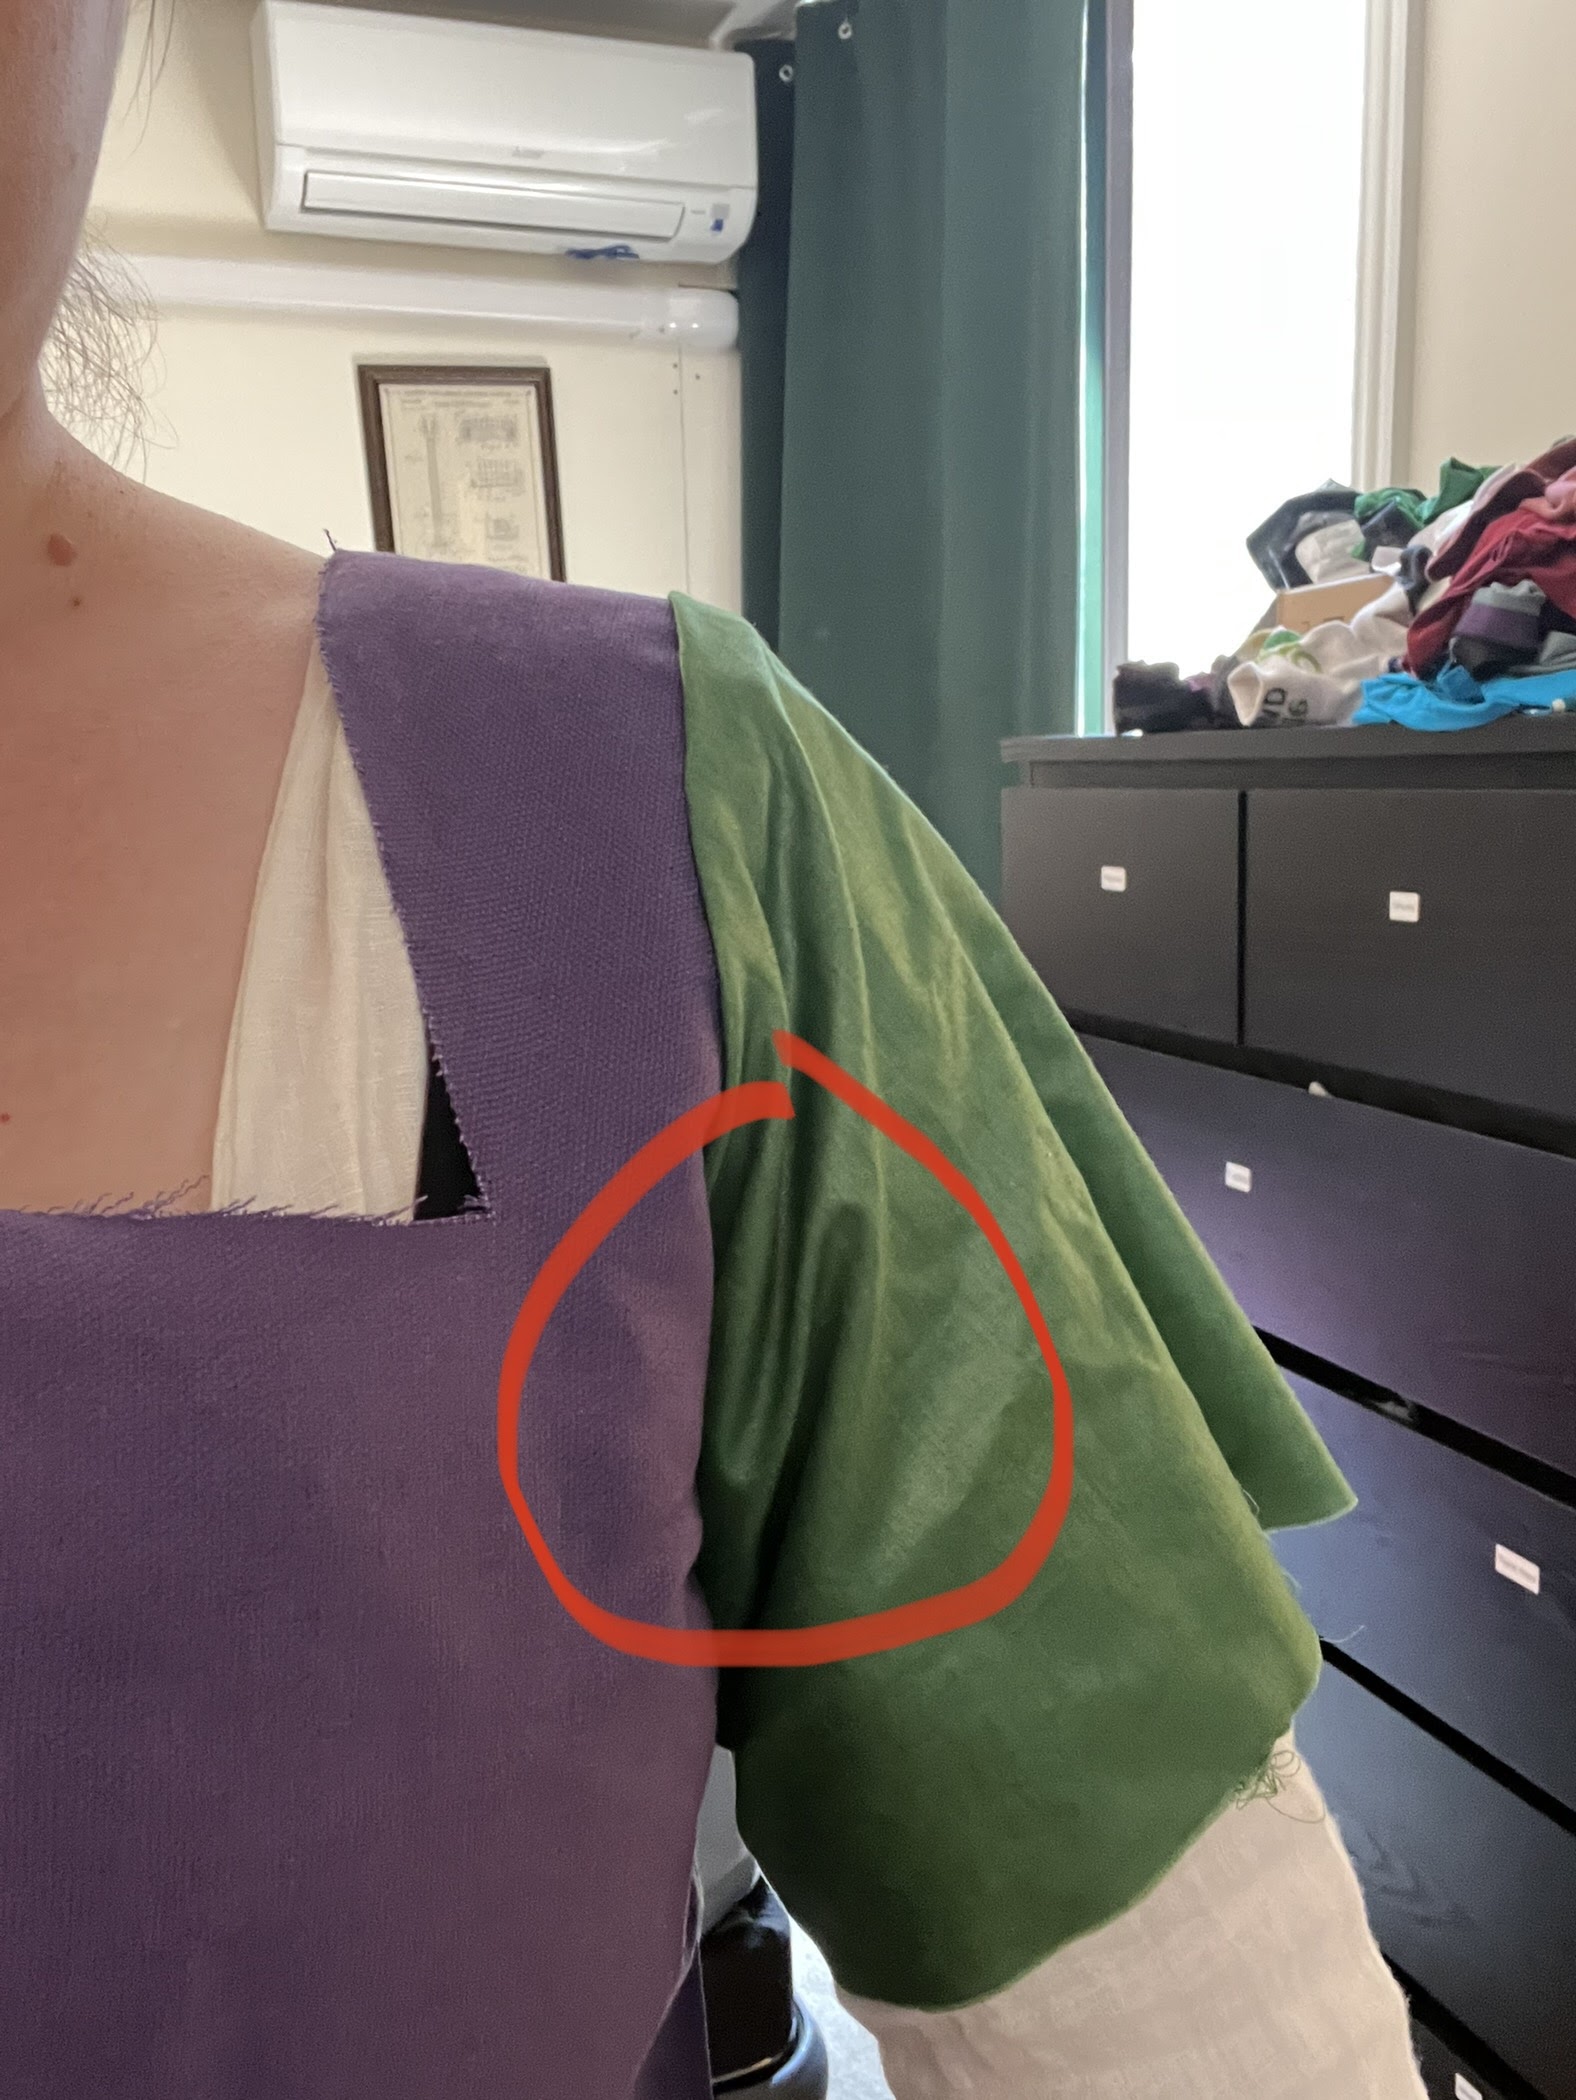
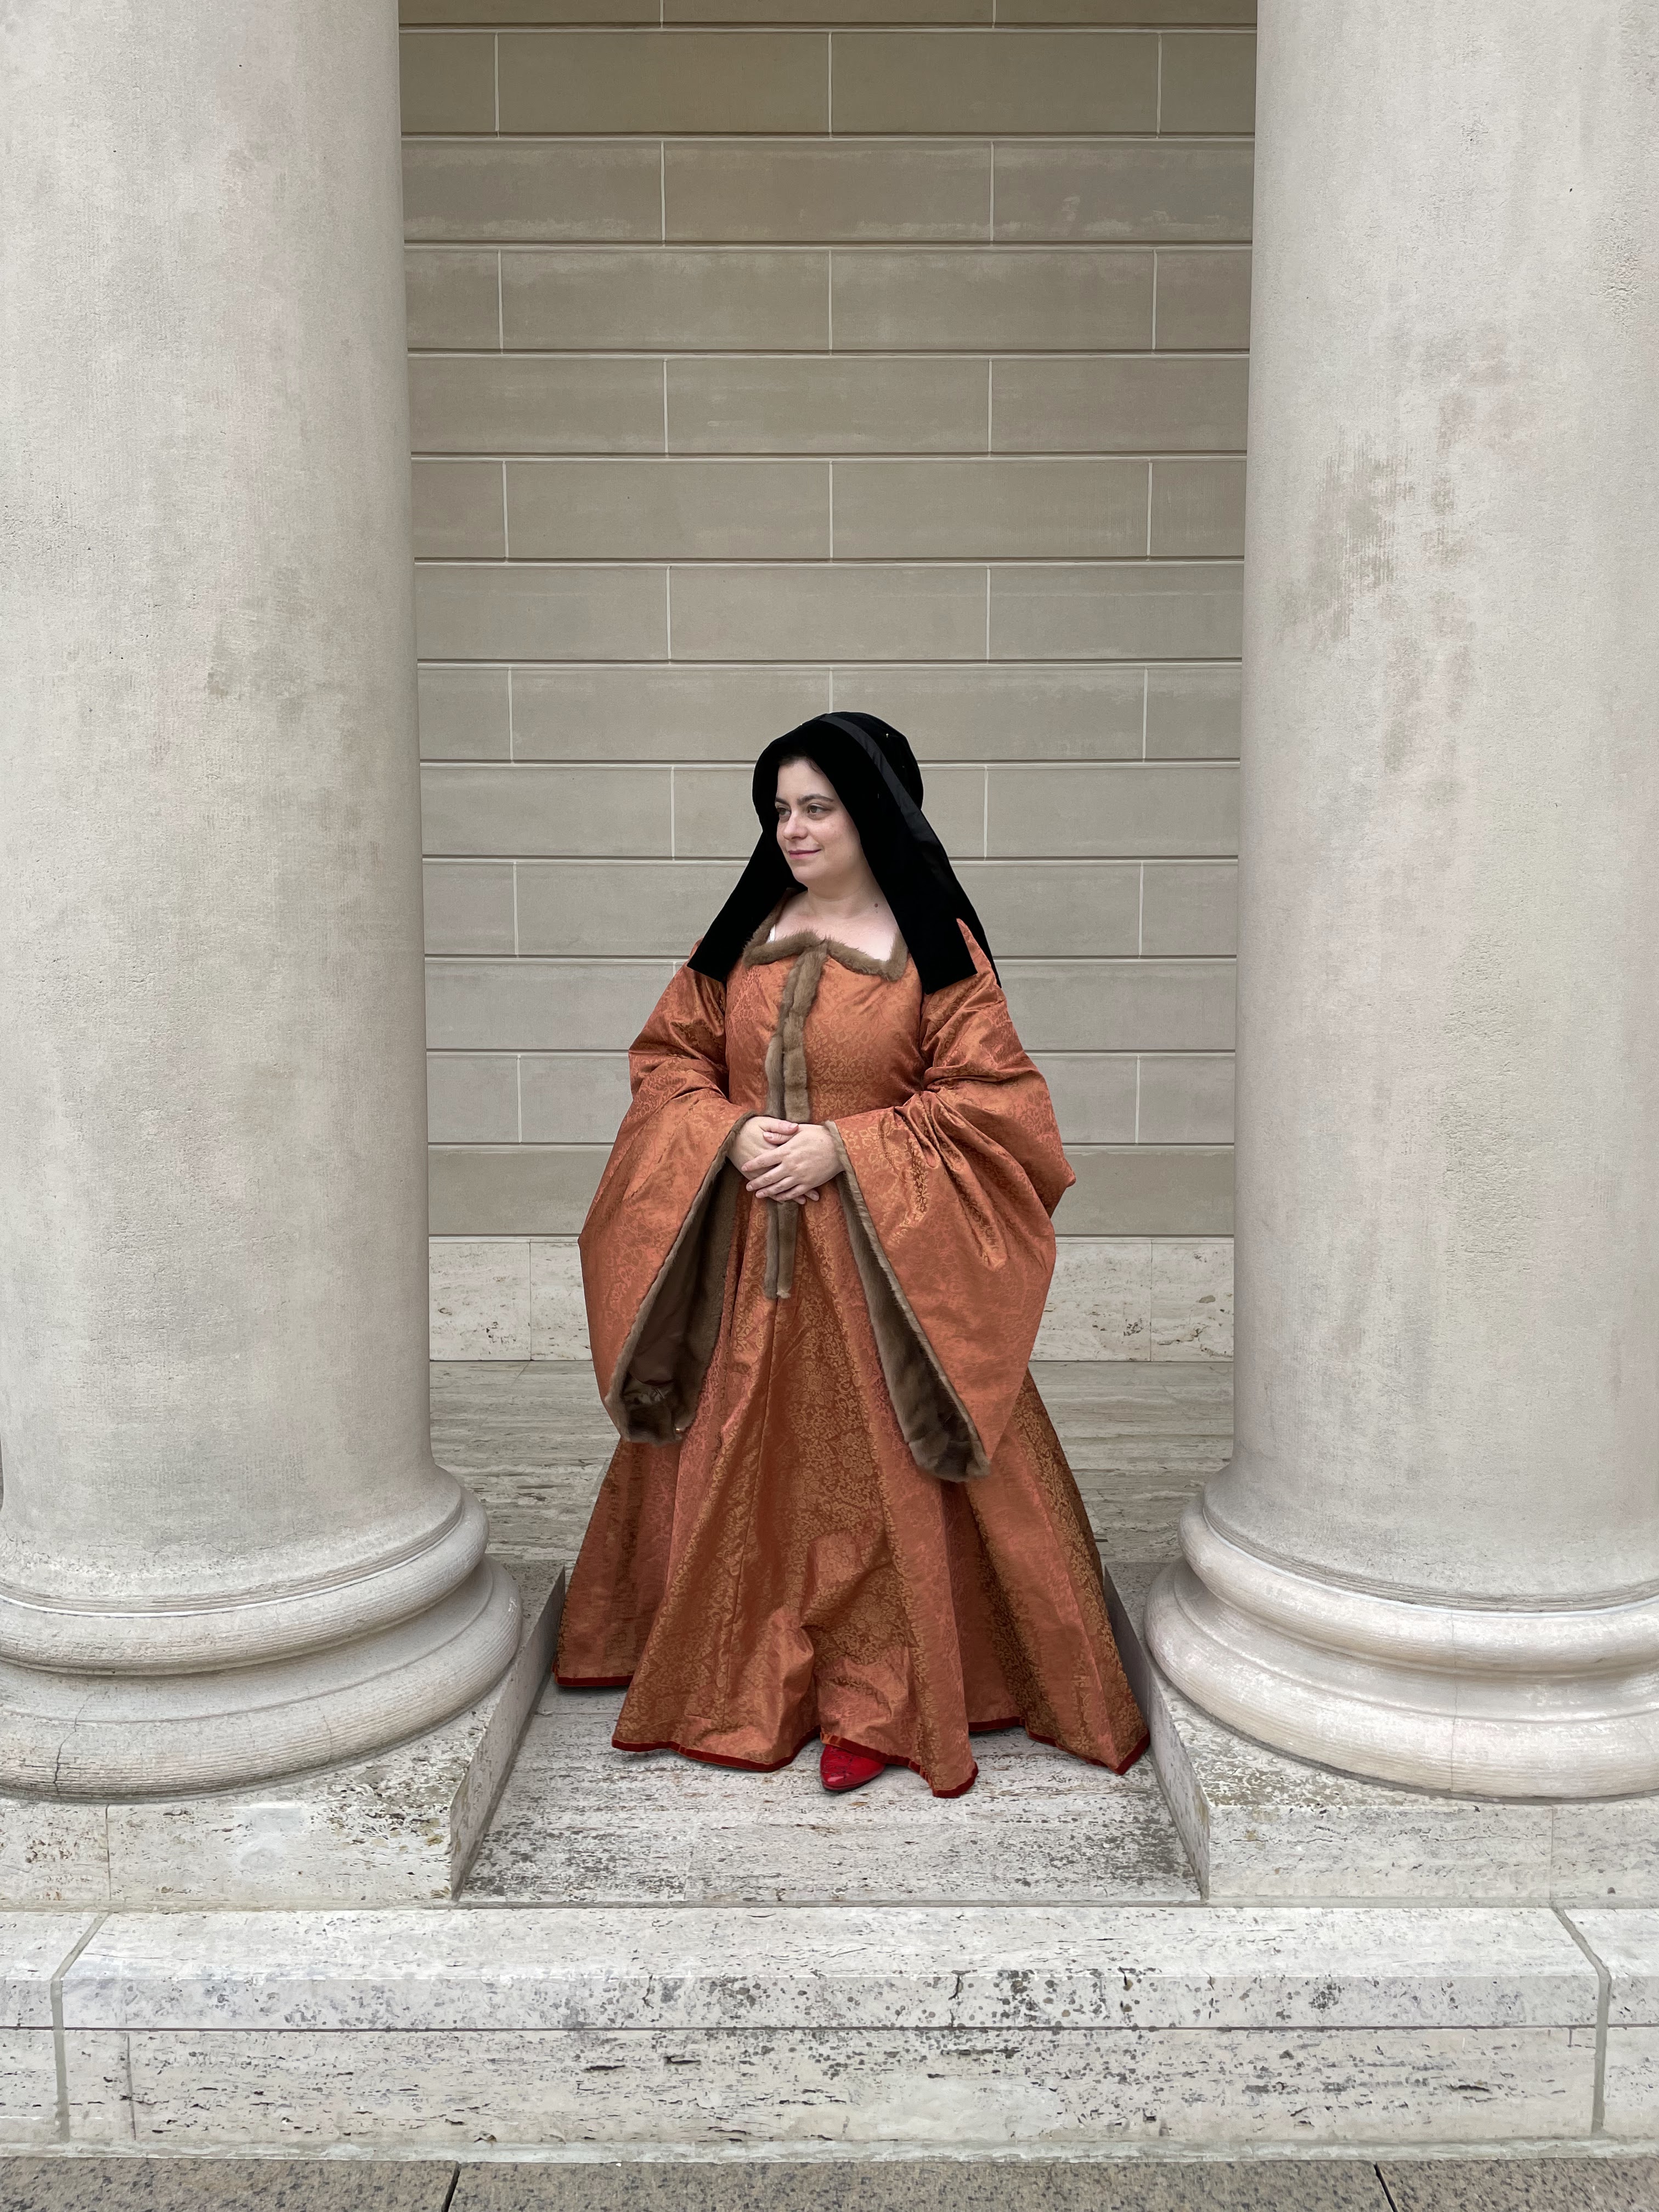
My inspiration was dresses like these between 1500-1510, which so clearly show the transition from what are traditionally considered medieval gowns (kirtles, fitted to the body), to the classic Tudor style (triangular skirt, square neckline, huge sleeves folded back).

Alas my pinterest link is erroring out, but says
Réunion des Musées Nationaux-Grand Palais
01-005022 folio 13R
Heures de Boussu (BNF). Intérieur d’une chambre4. (1490)
From “Hours of Joanna of Castile”, Master of the David Scenes in the Grimani Breviary and Workshop. Bruges or Ghent, Between 1496 and 1506. The British Library, Add. Ms. 18852.

And you can see more of these on my Pinterest board (I didn’t make this style, but can you believe how many are wrap gowns?!?)

The Tawny Part:

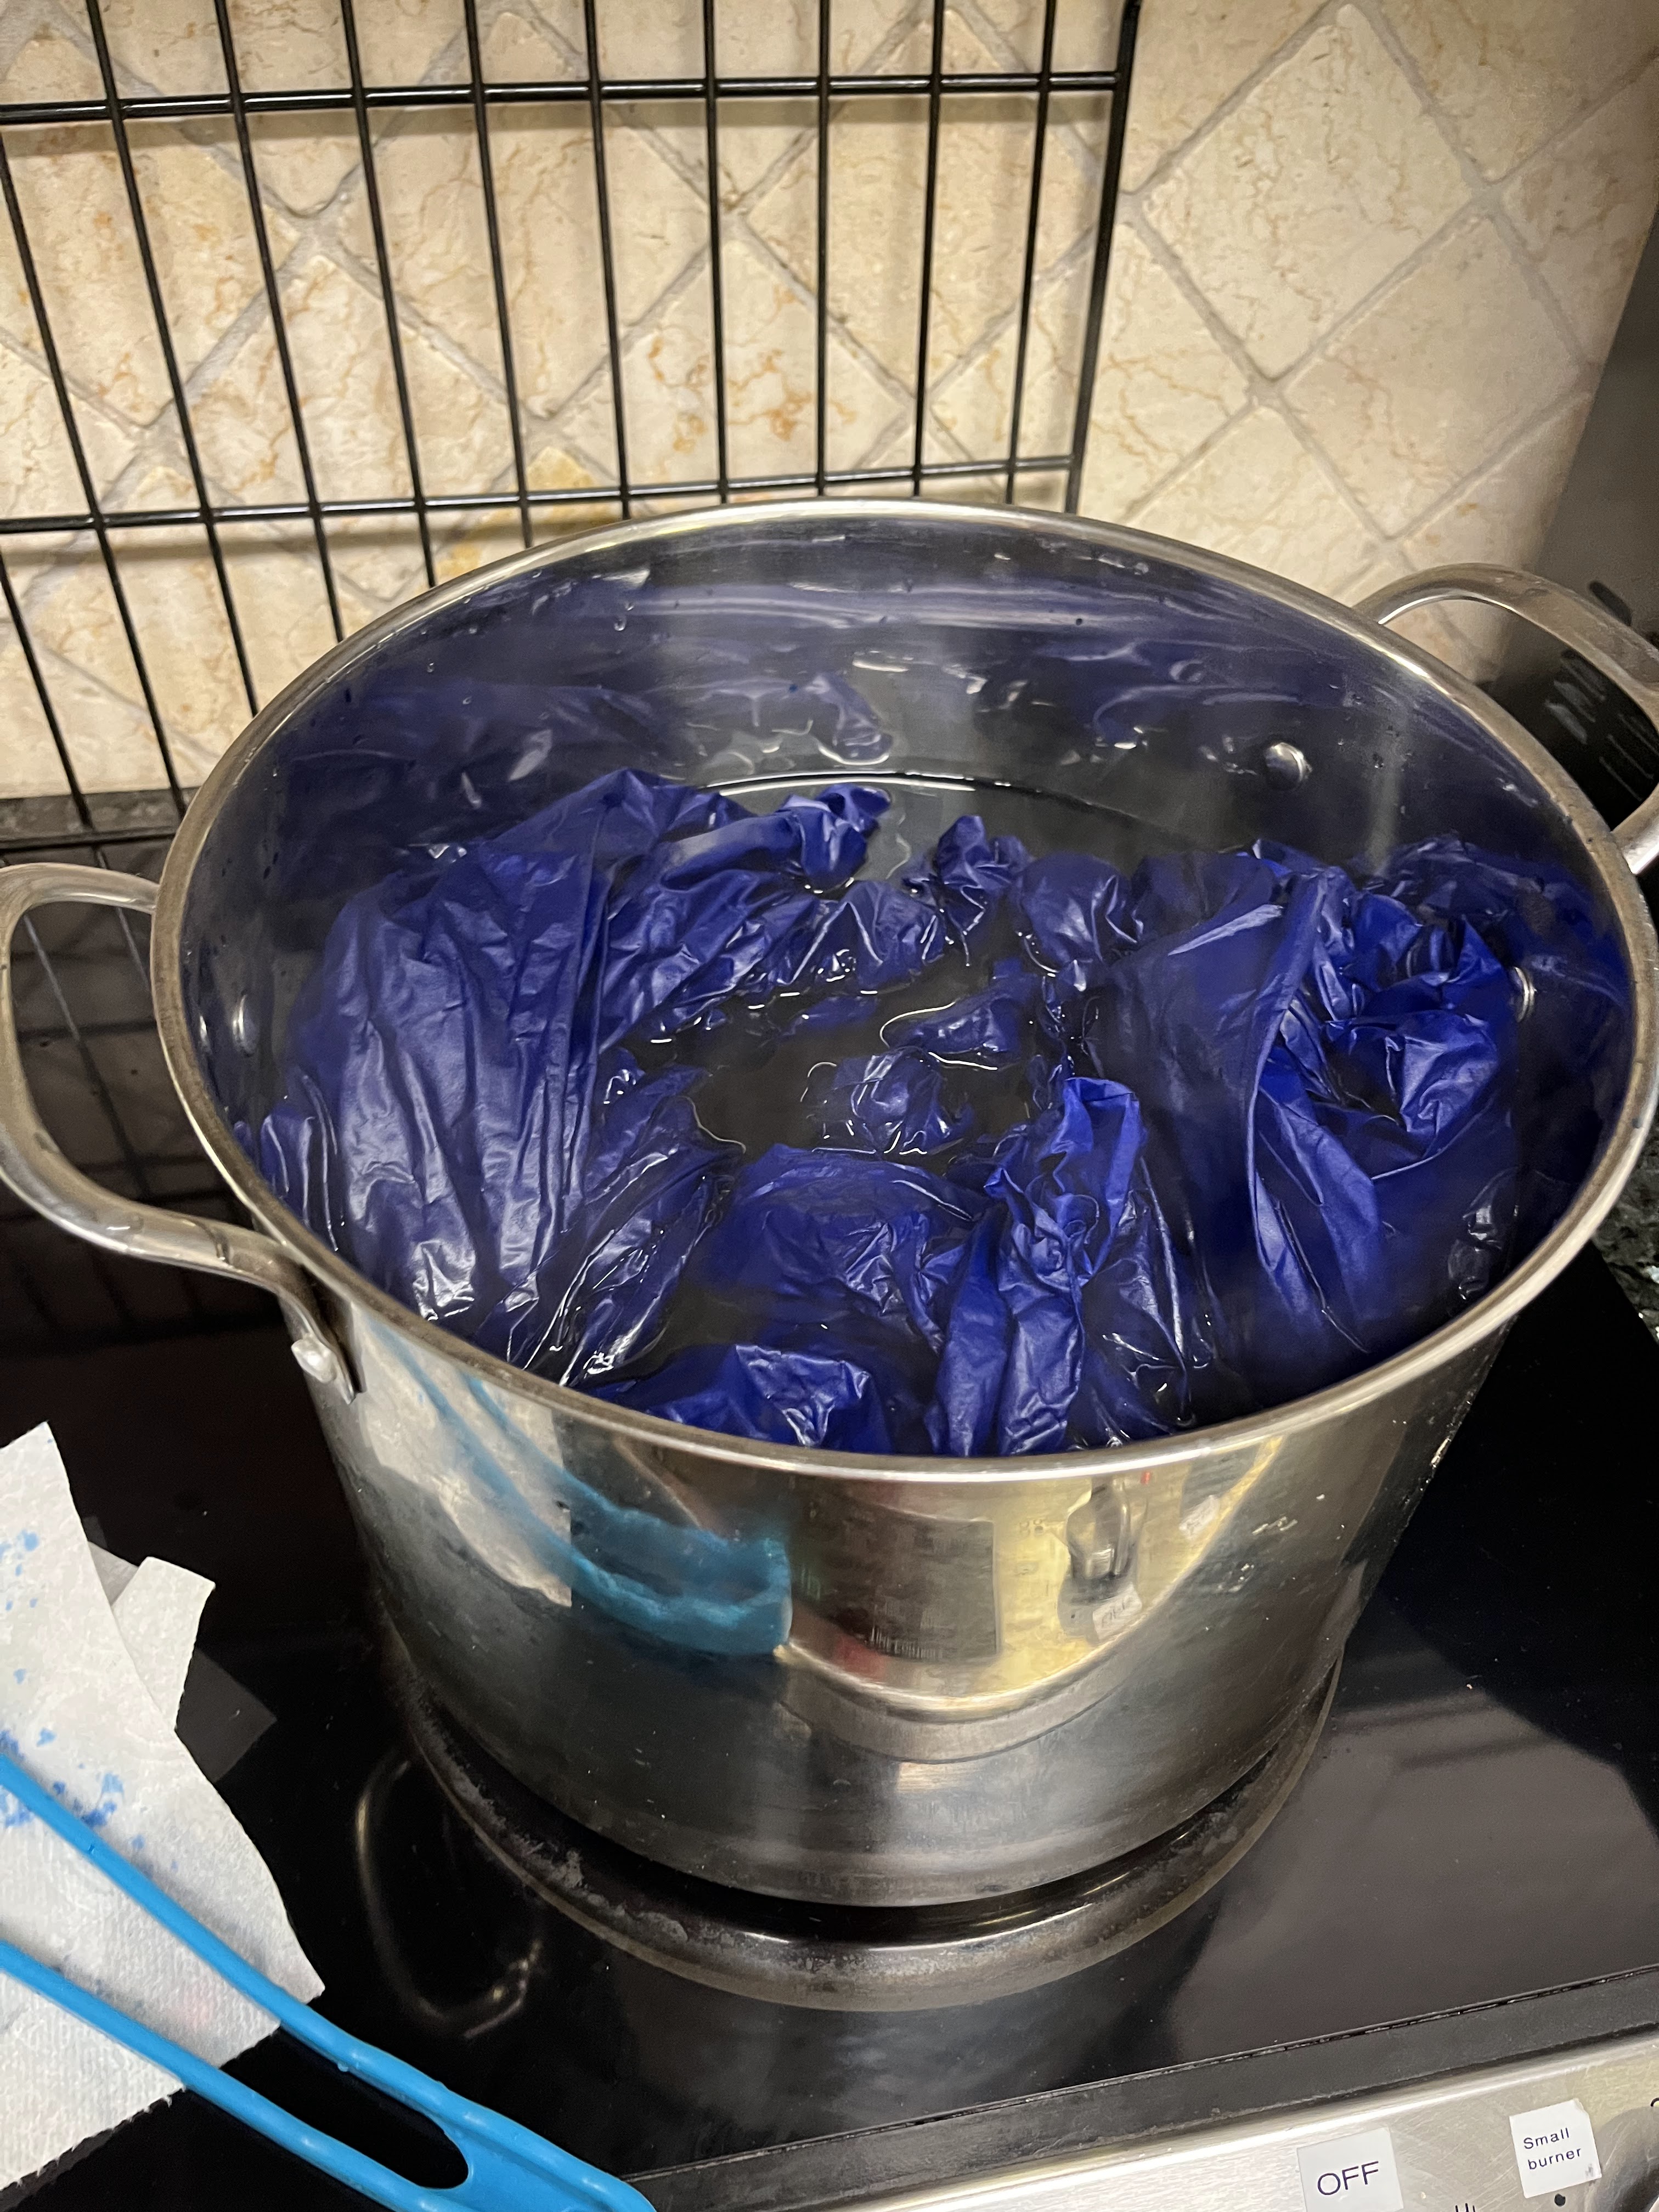
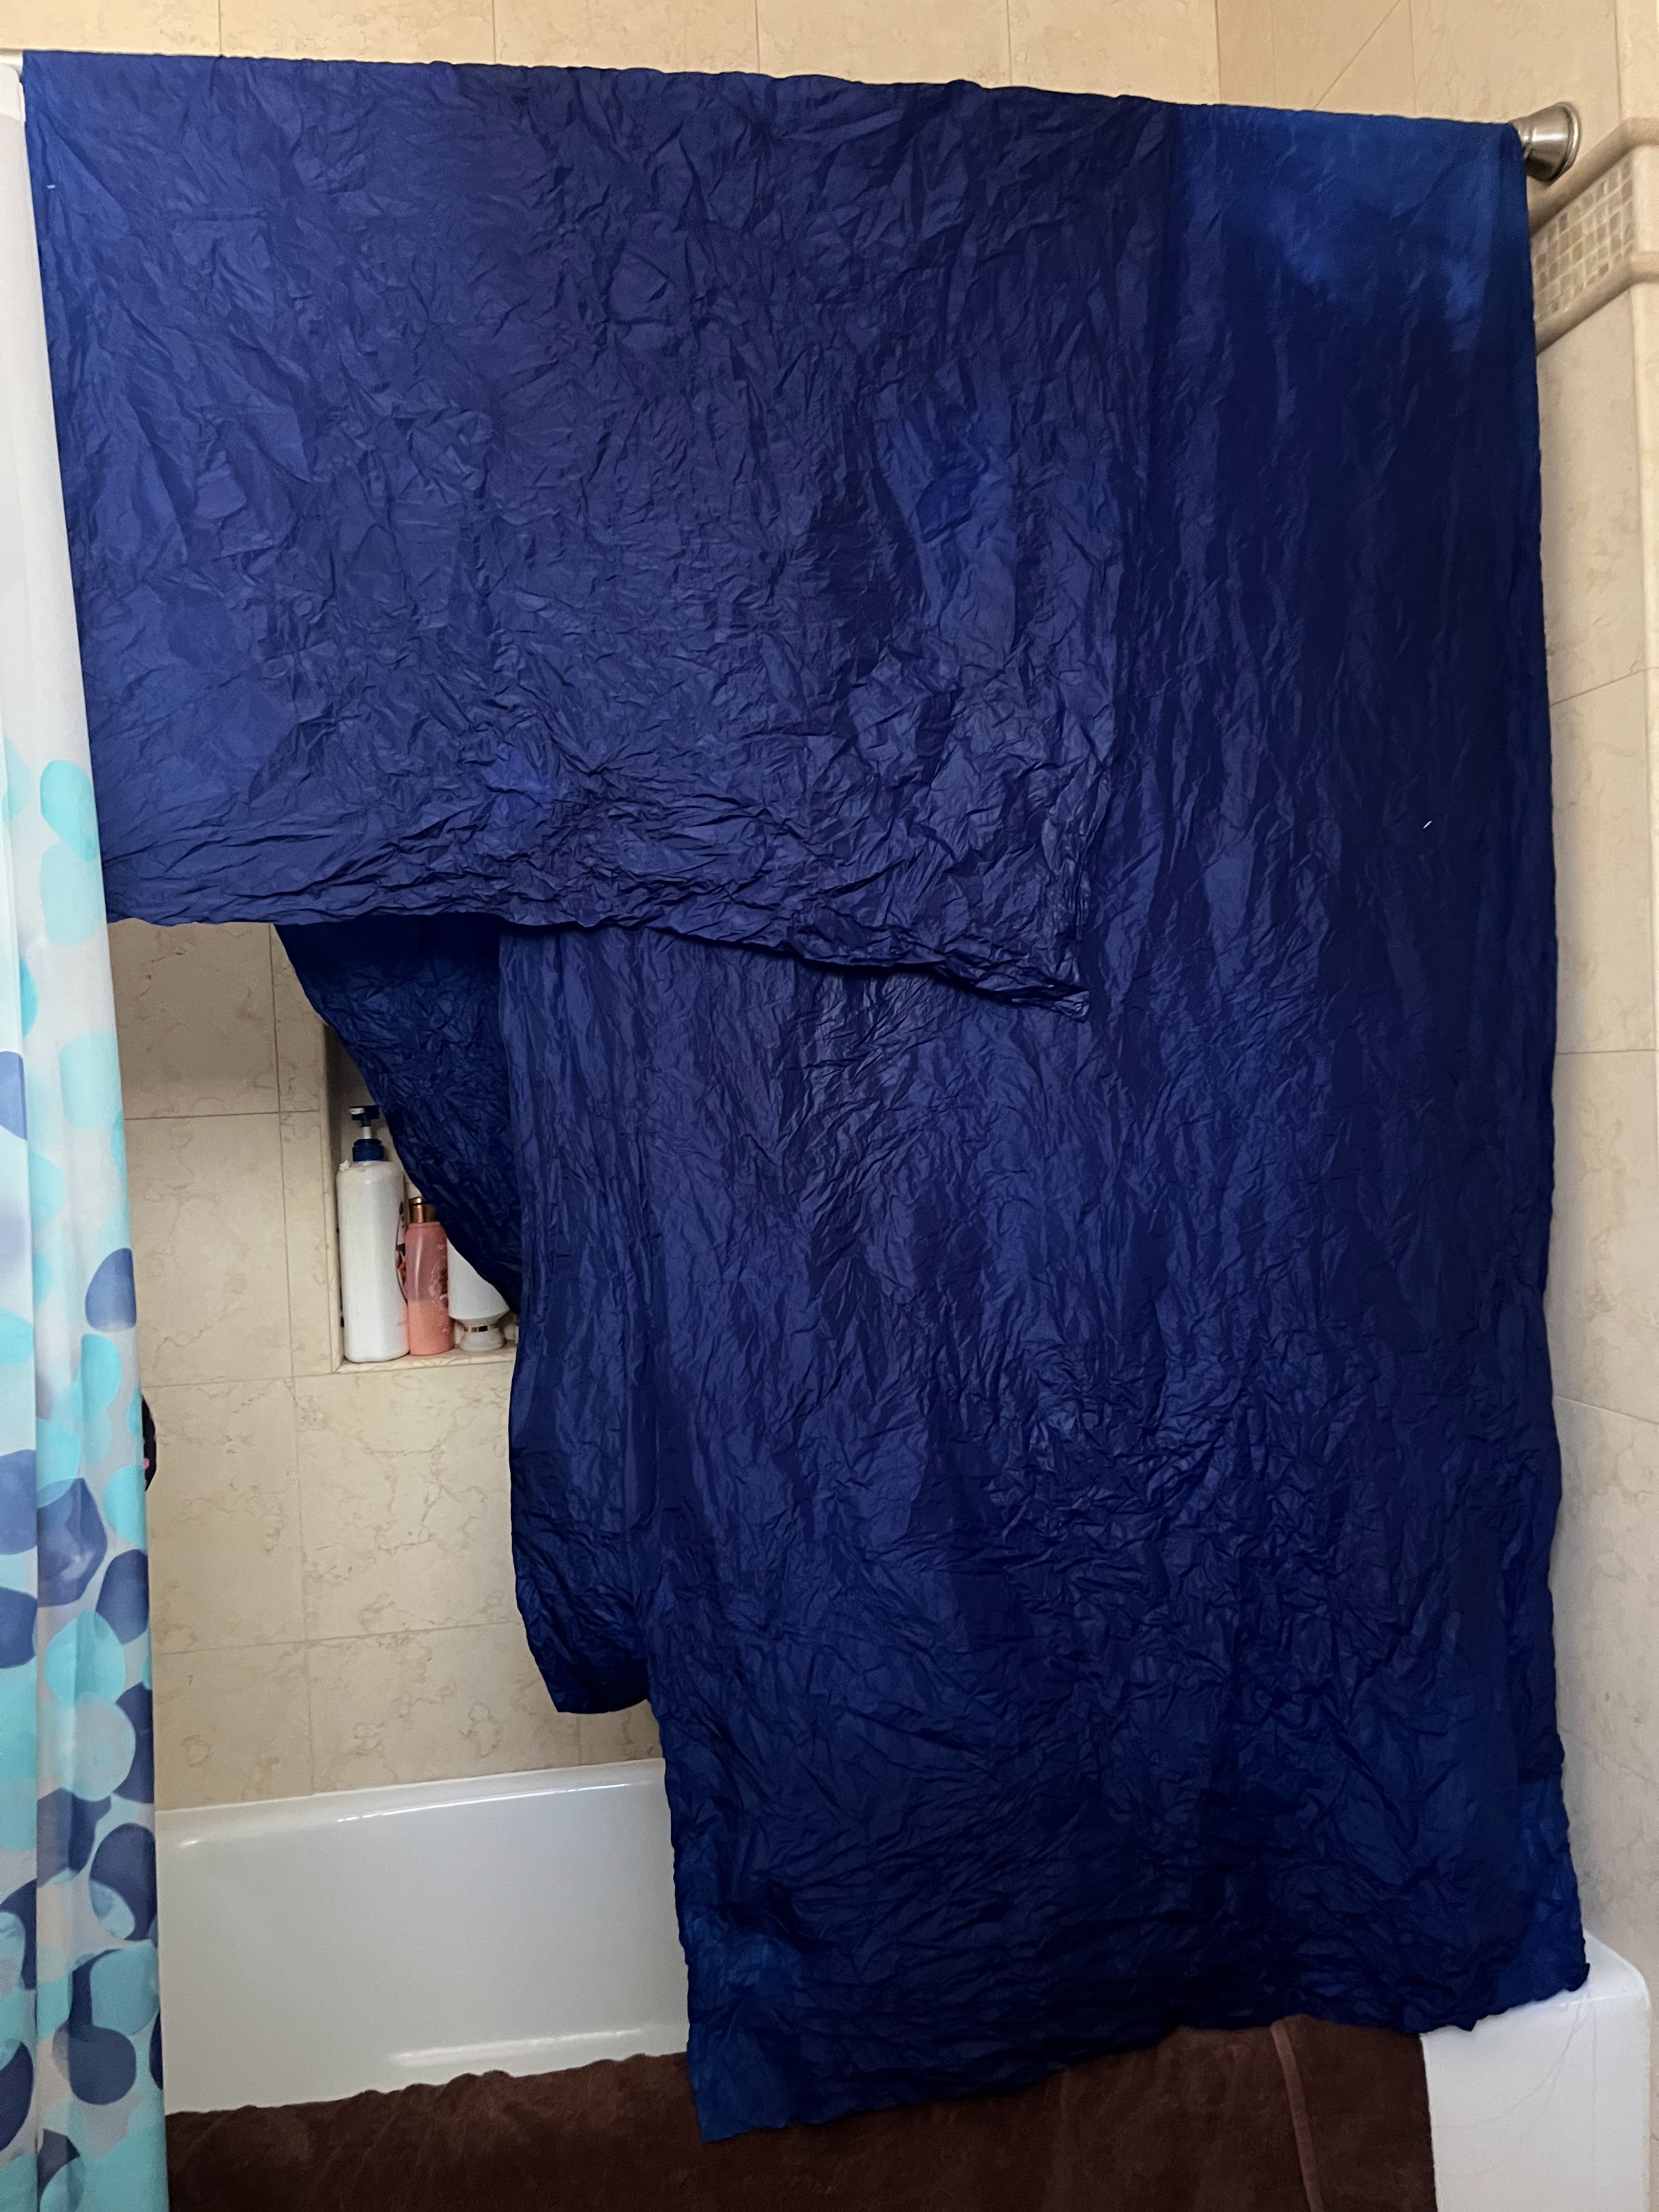
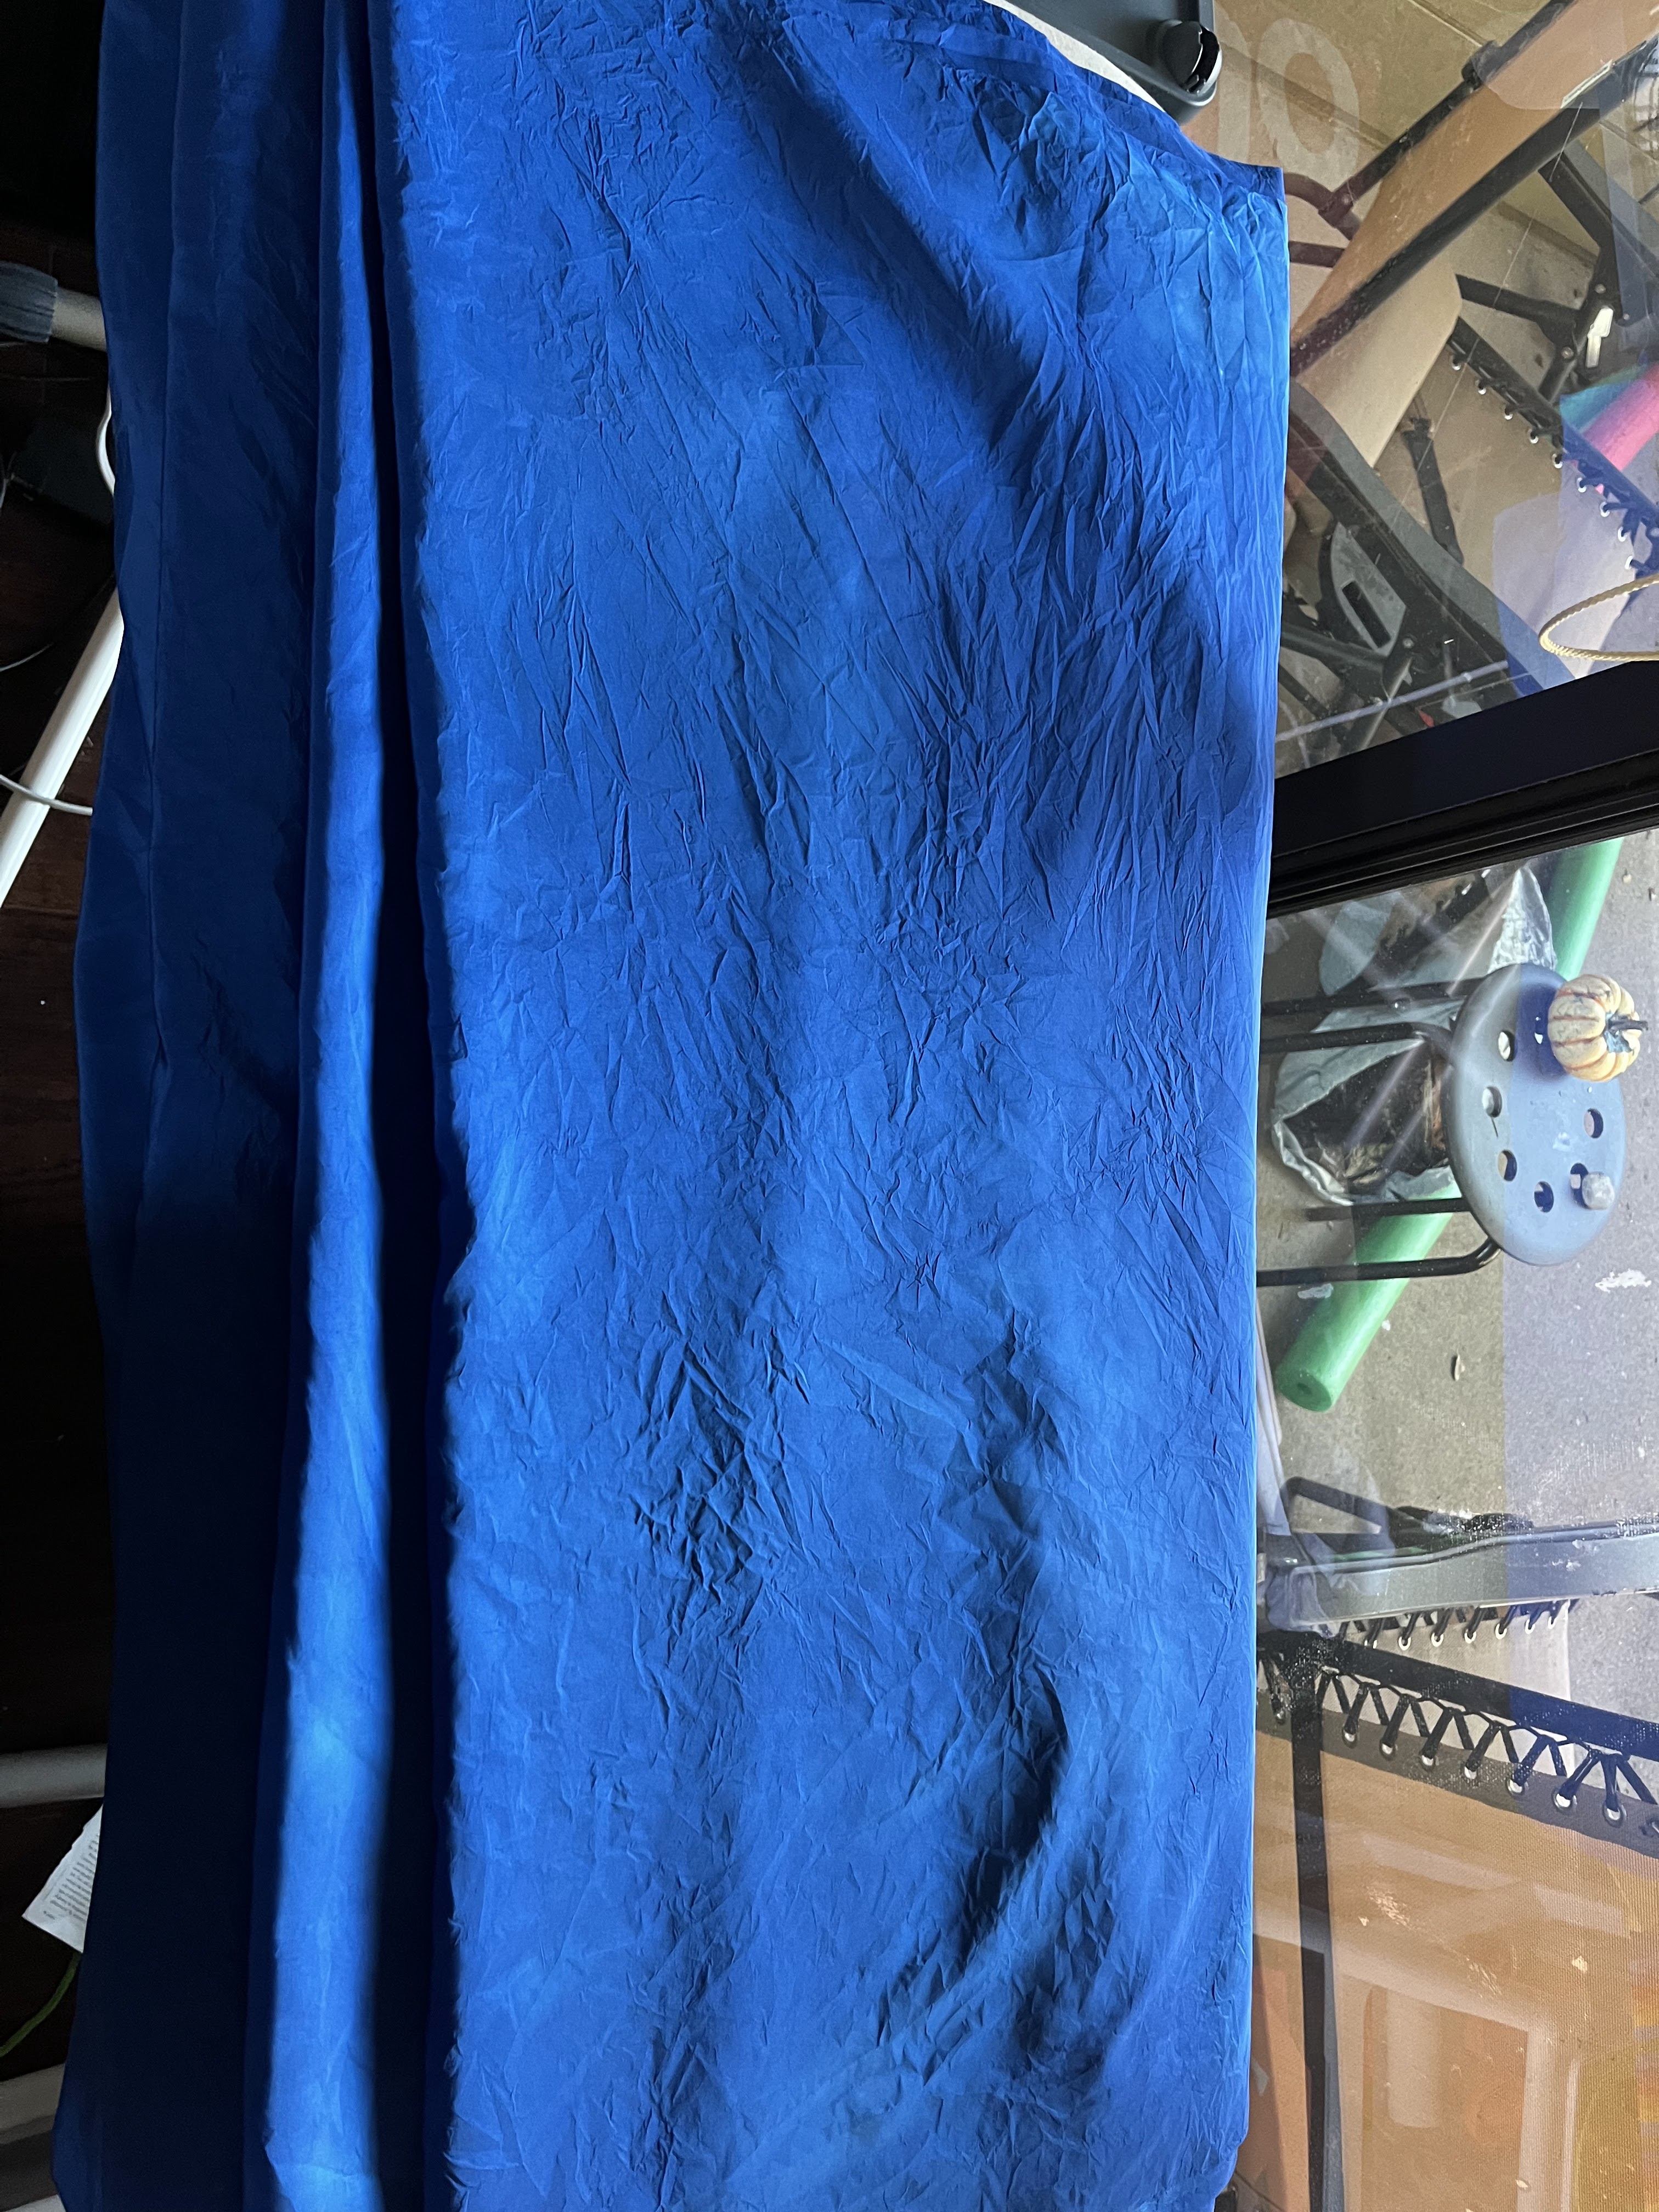
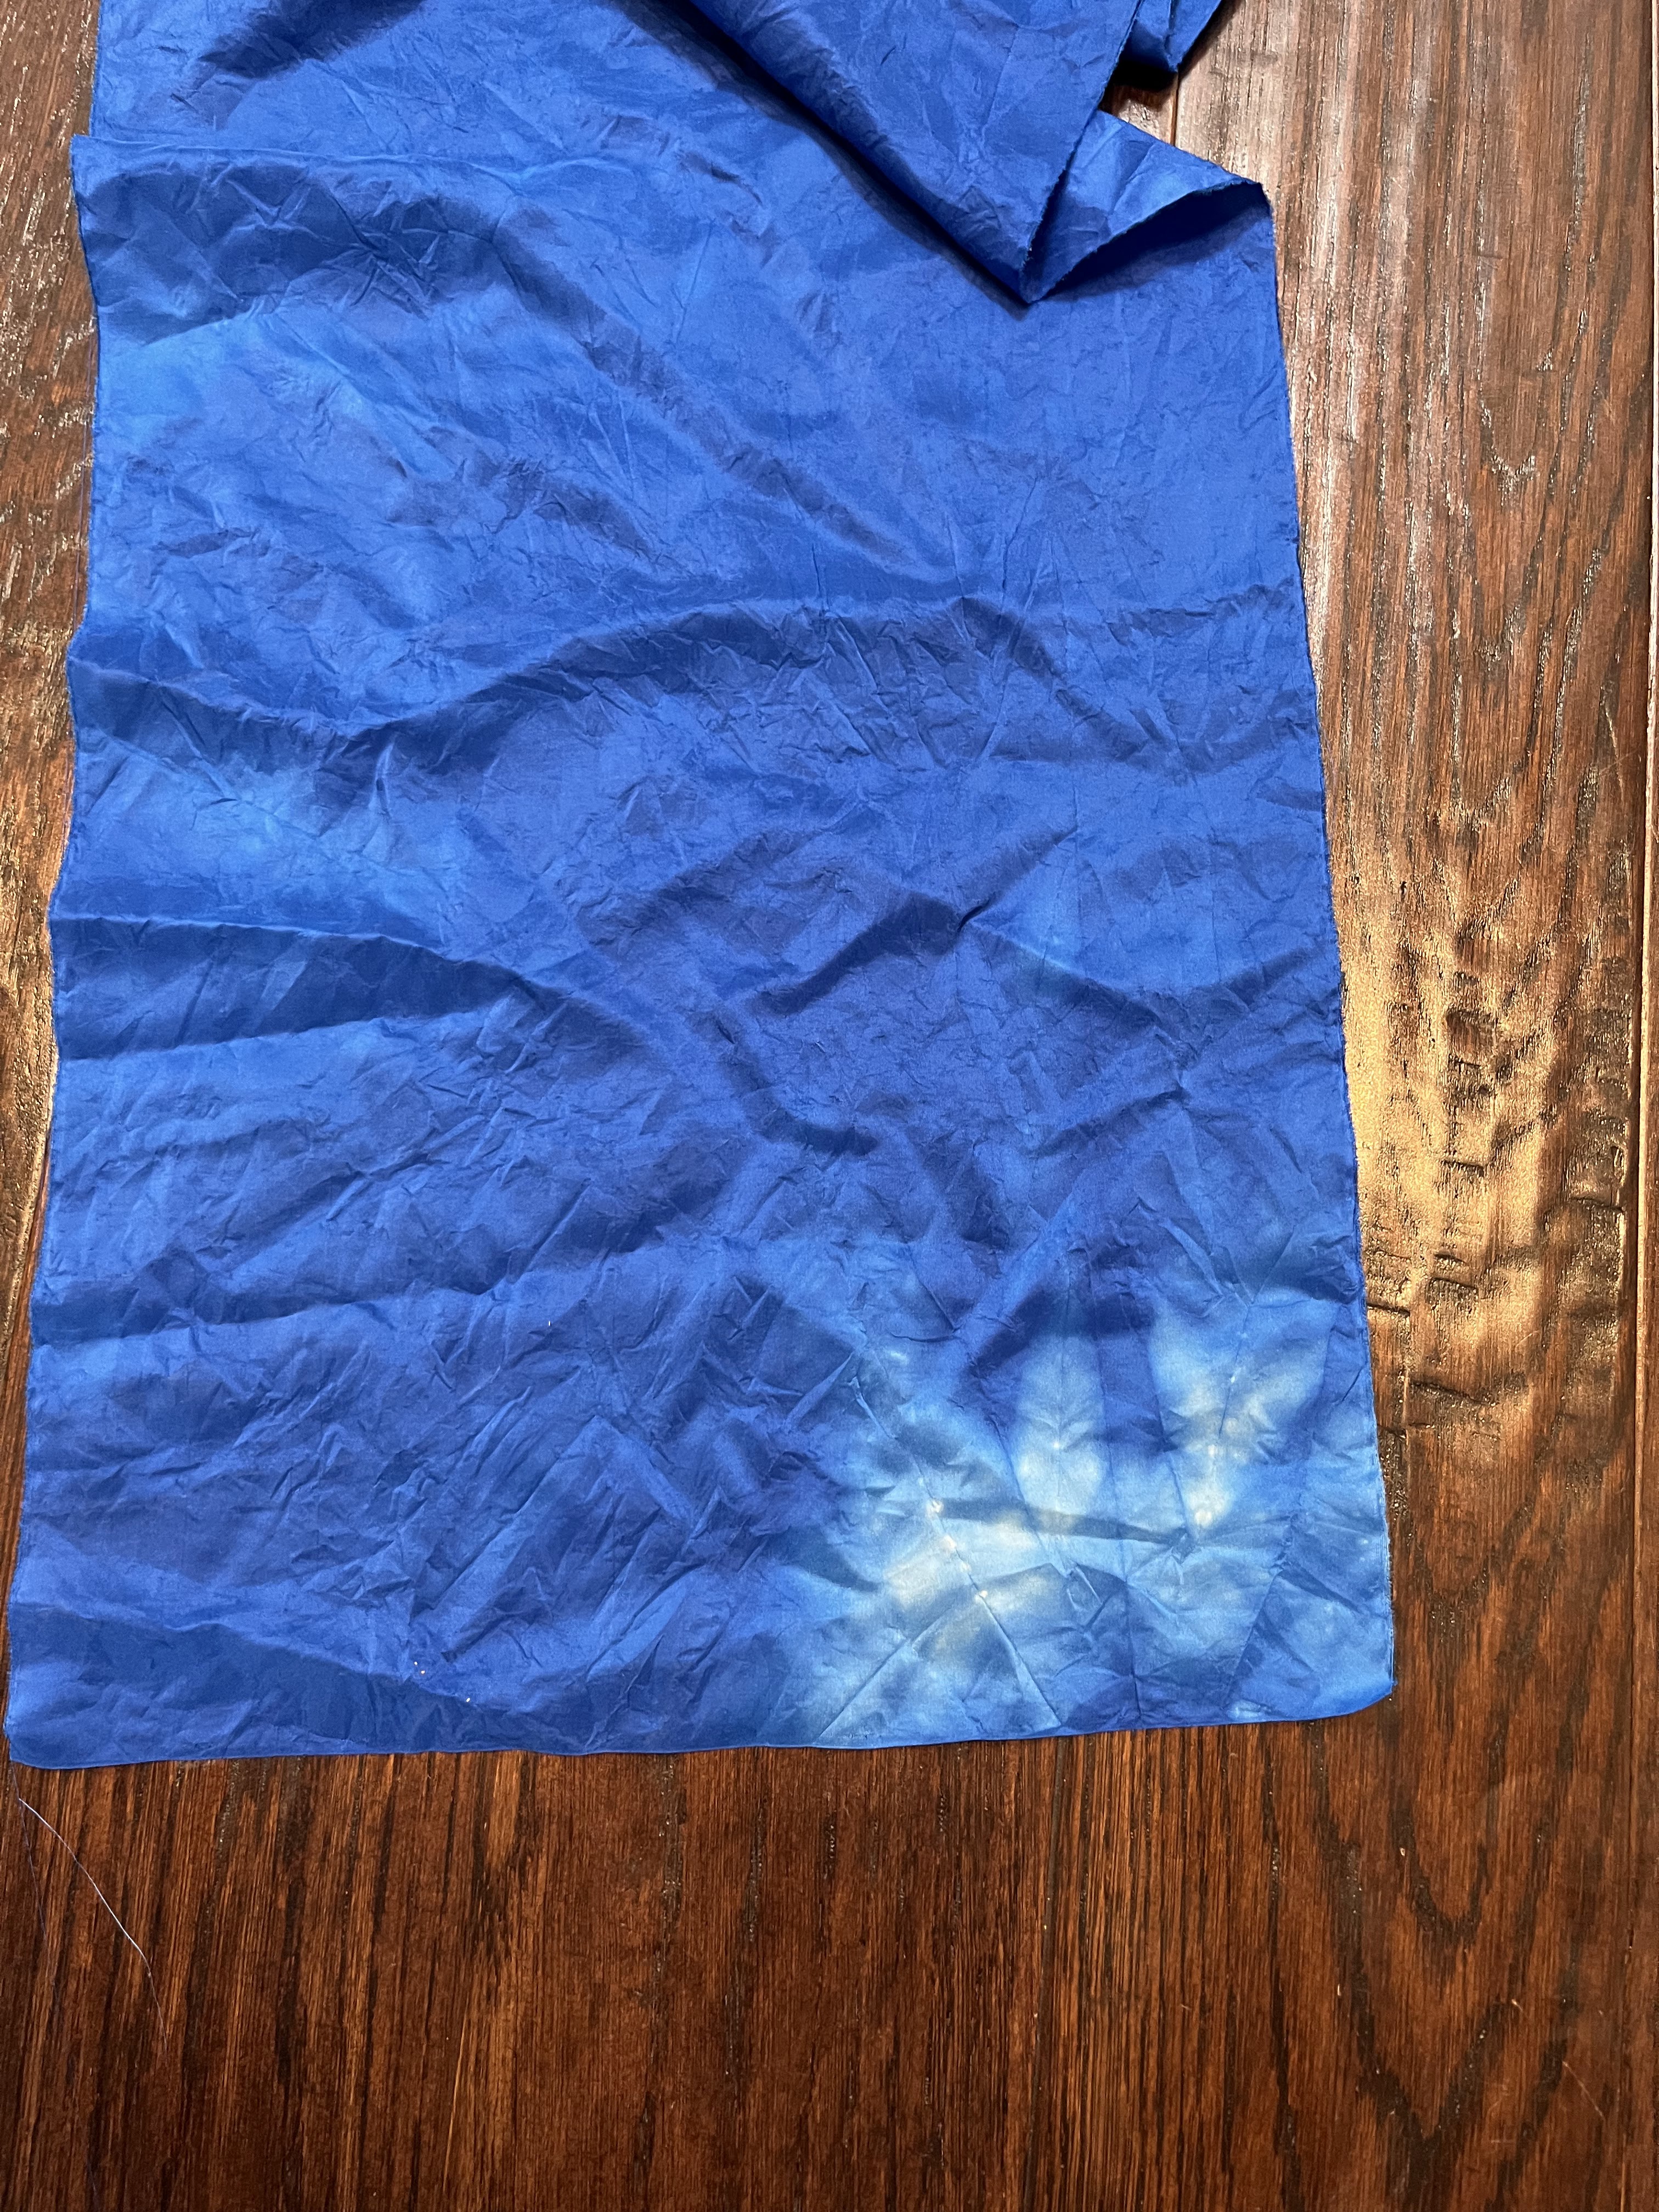
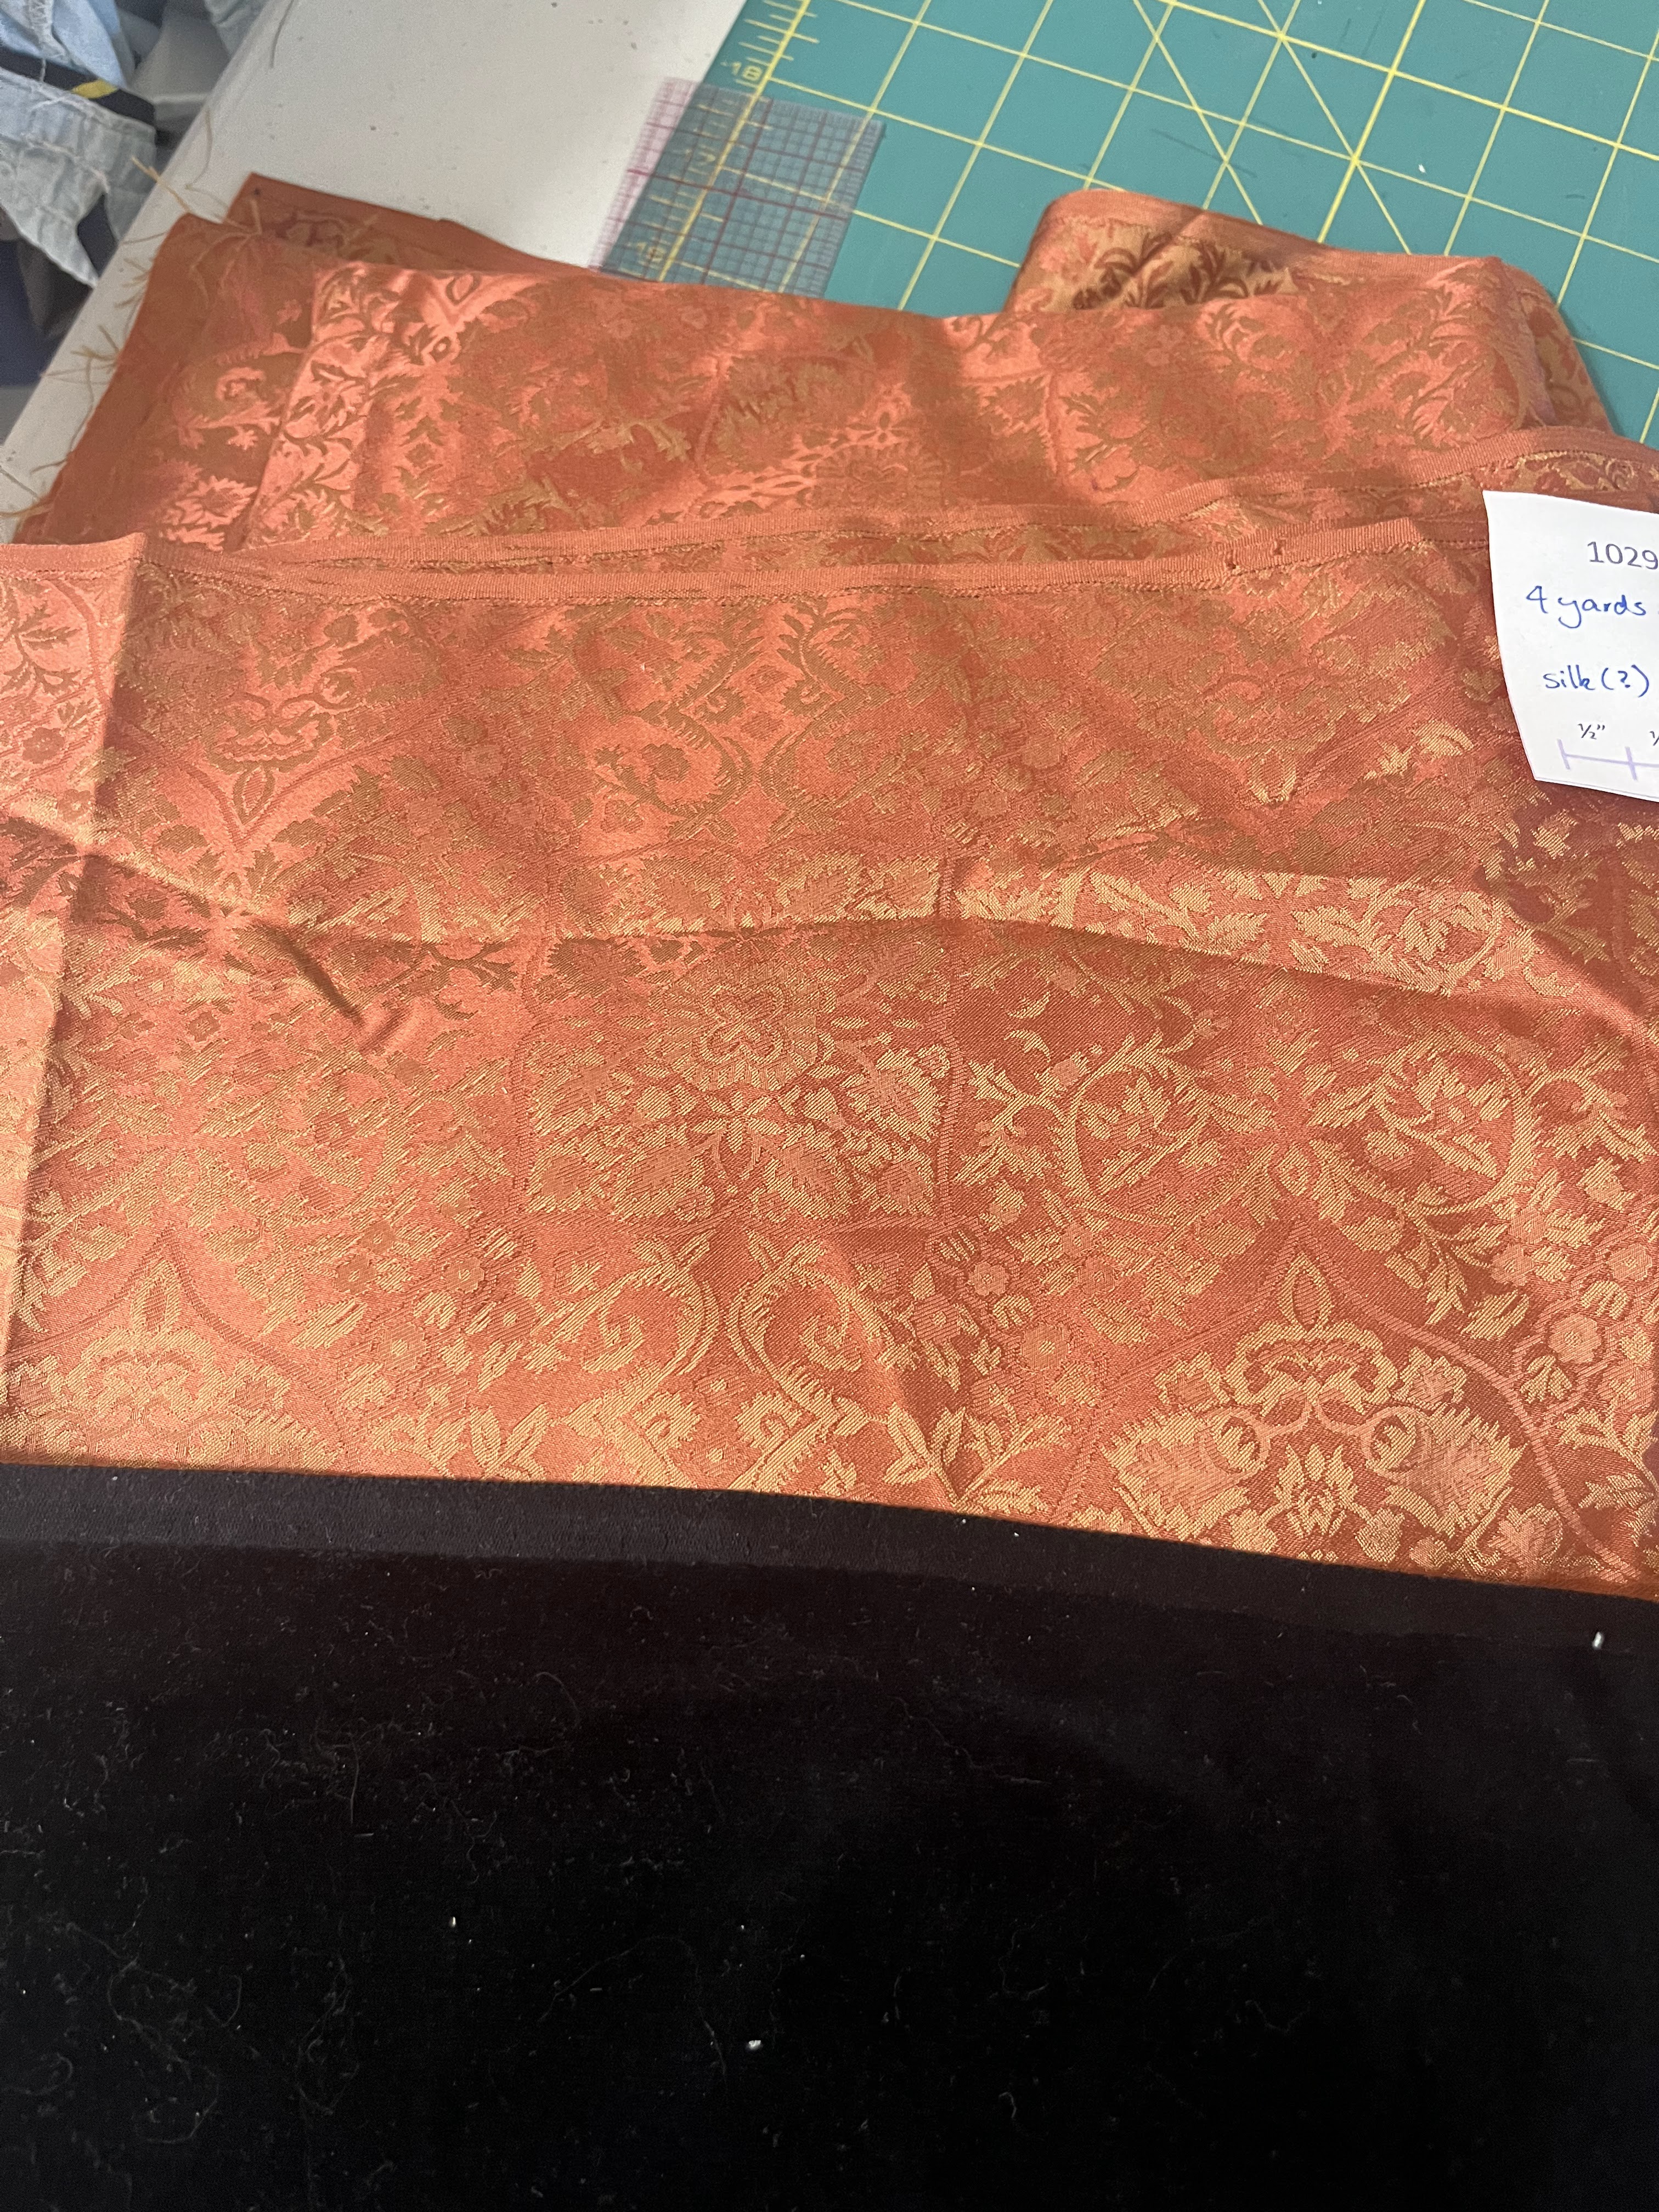
The fabric was my luckiest find ever; an orange-on-orange toned silk damask that I got for $6/yard. No I’m not joking. There is a wonderful nonprofit called Fabmo near me which collects fabric from industry and local donations and sells it super cheap to keep it out of landfills. This fabric was listed as maybe-silk, and I immediately recognized it as the Lionheart silk damask pattern that Renaissance Fabrics was selling for $30/yd (at the time of writing this post now $40), except I have no idea where it came from because they’ve never had this colorway.

To quote The Tudor Tailor, tawny was a color description that covered orange/tan/light brown that we don’t use as a color category today, but was a popular gown color at the time (black was the most popular in the clothing warrants, this was the second-most popular if you exclude the quantity of red gowns for Queen Katherine’s coronation).

I also knew I would need a head covering and luckily Fabmo had 1.5 yards of italian-made cotton velveteen for $10 when I went looking for velveteen so I nabbed that as well.

I cannot express how happy these fabrics make me

I then immersed myself in the phenomenal scholarship that is The Queen’s Servants. If you don’t have this book, you want this book. It’s several PHDs worth of research and speculative construction information of gowns at the time. It’s useful as well for understanding what became the more typical Tudor gown.

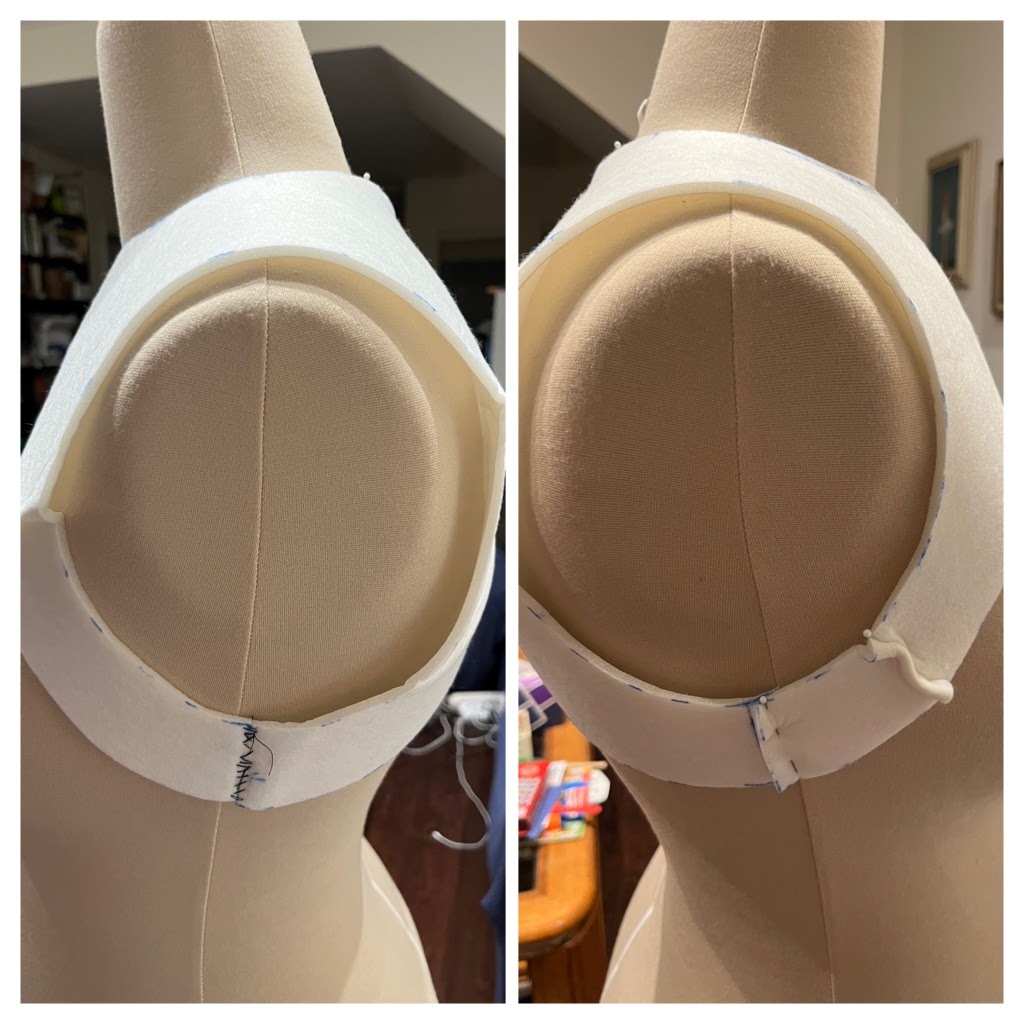
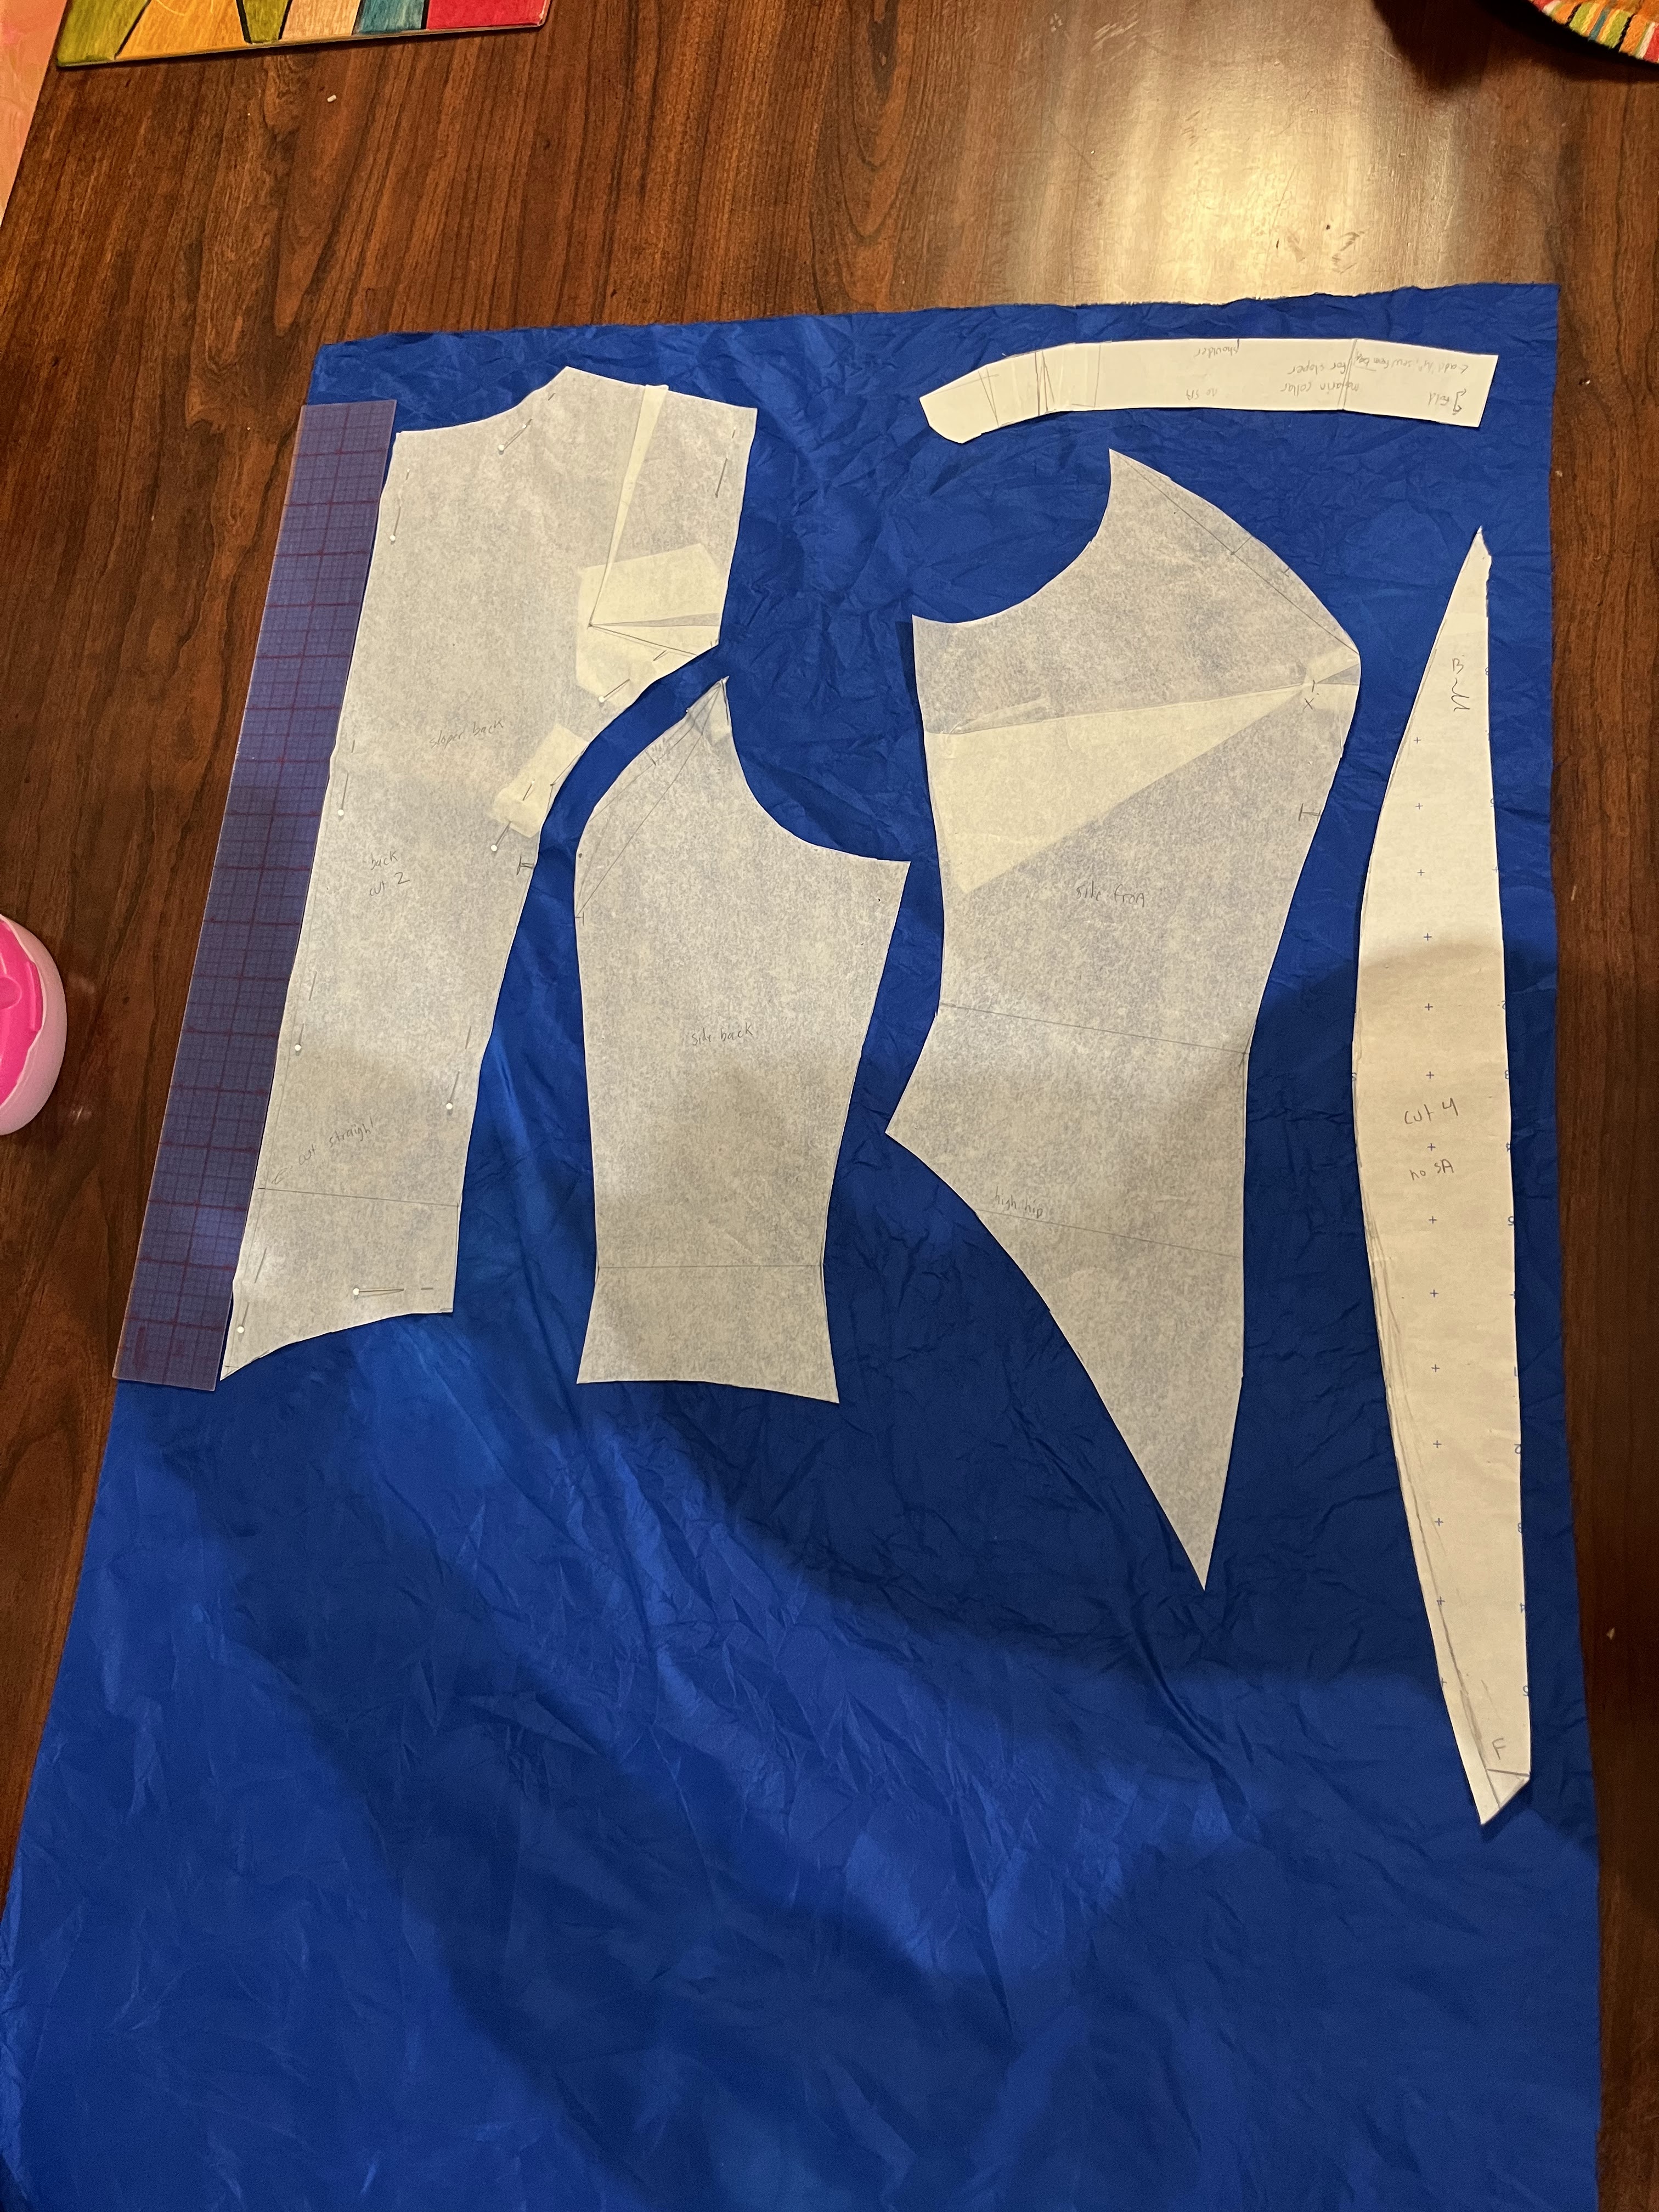
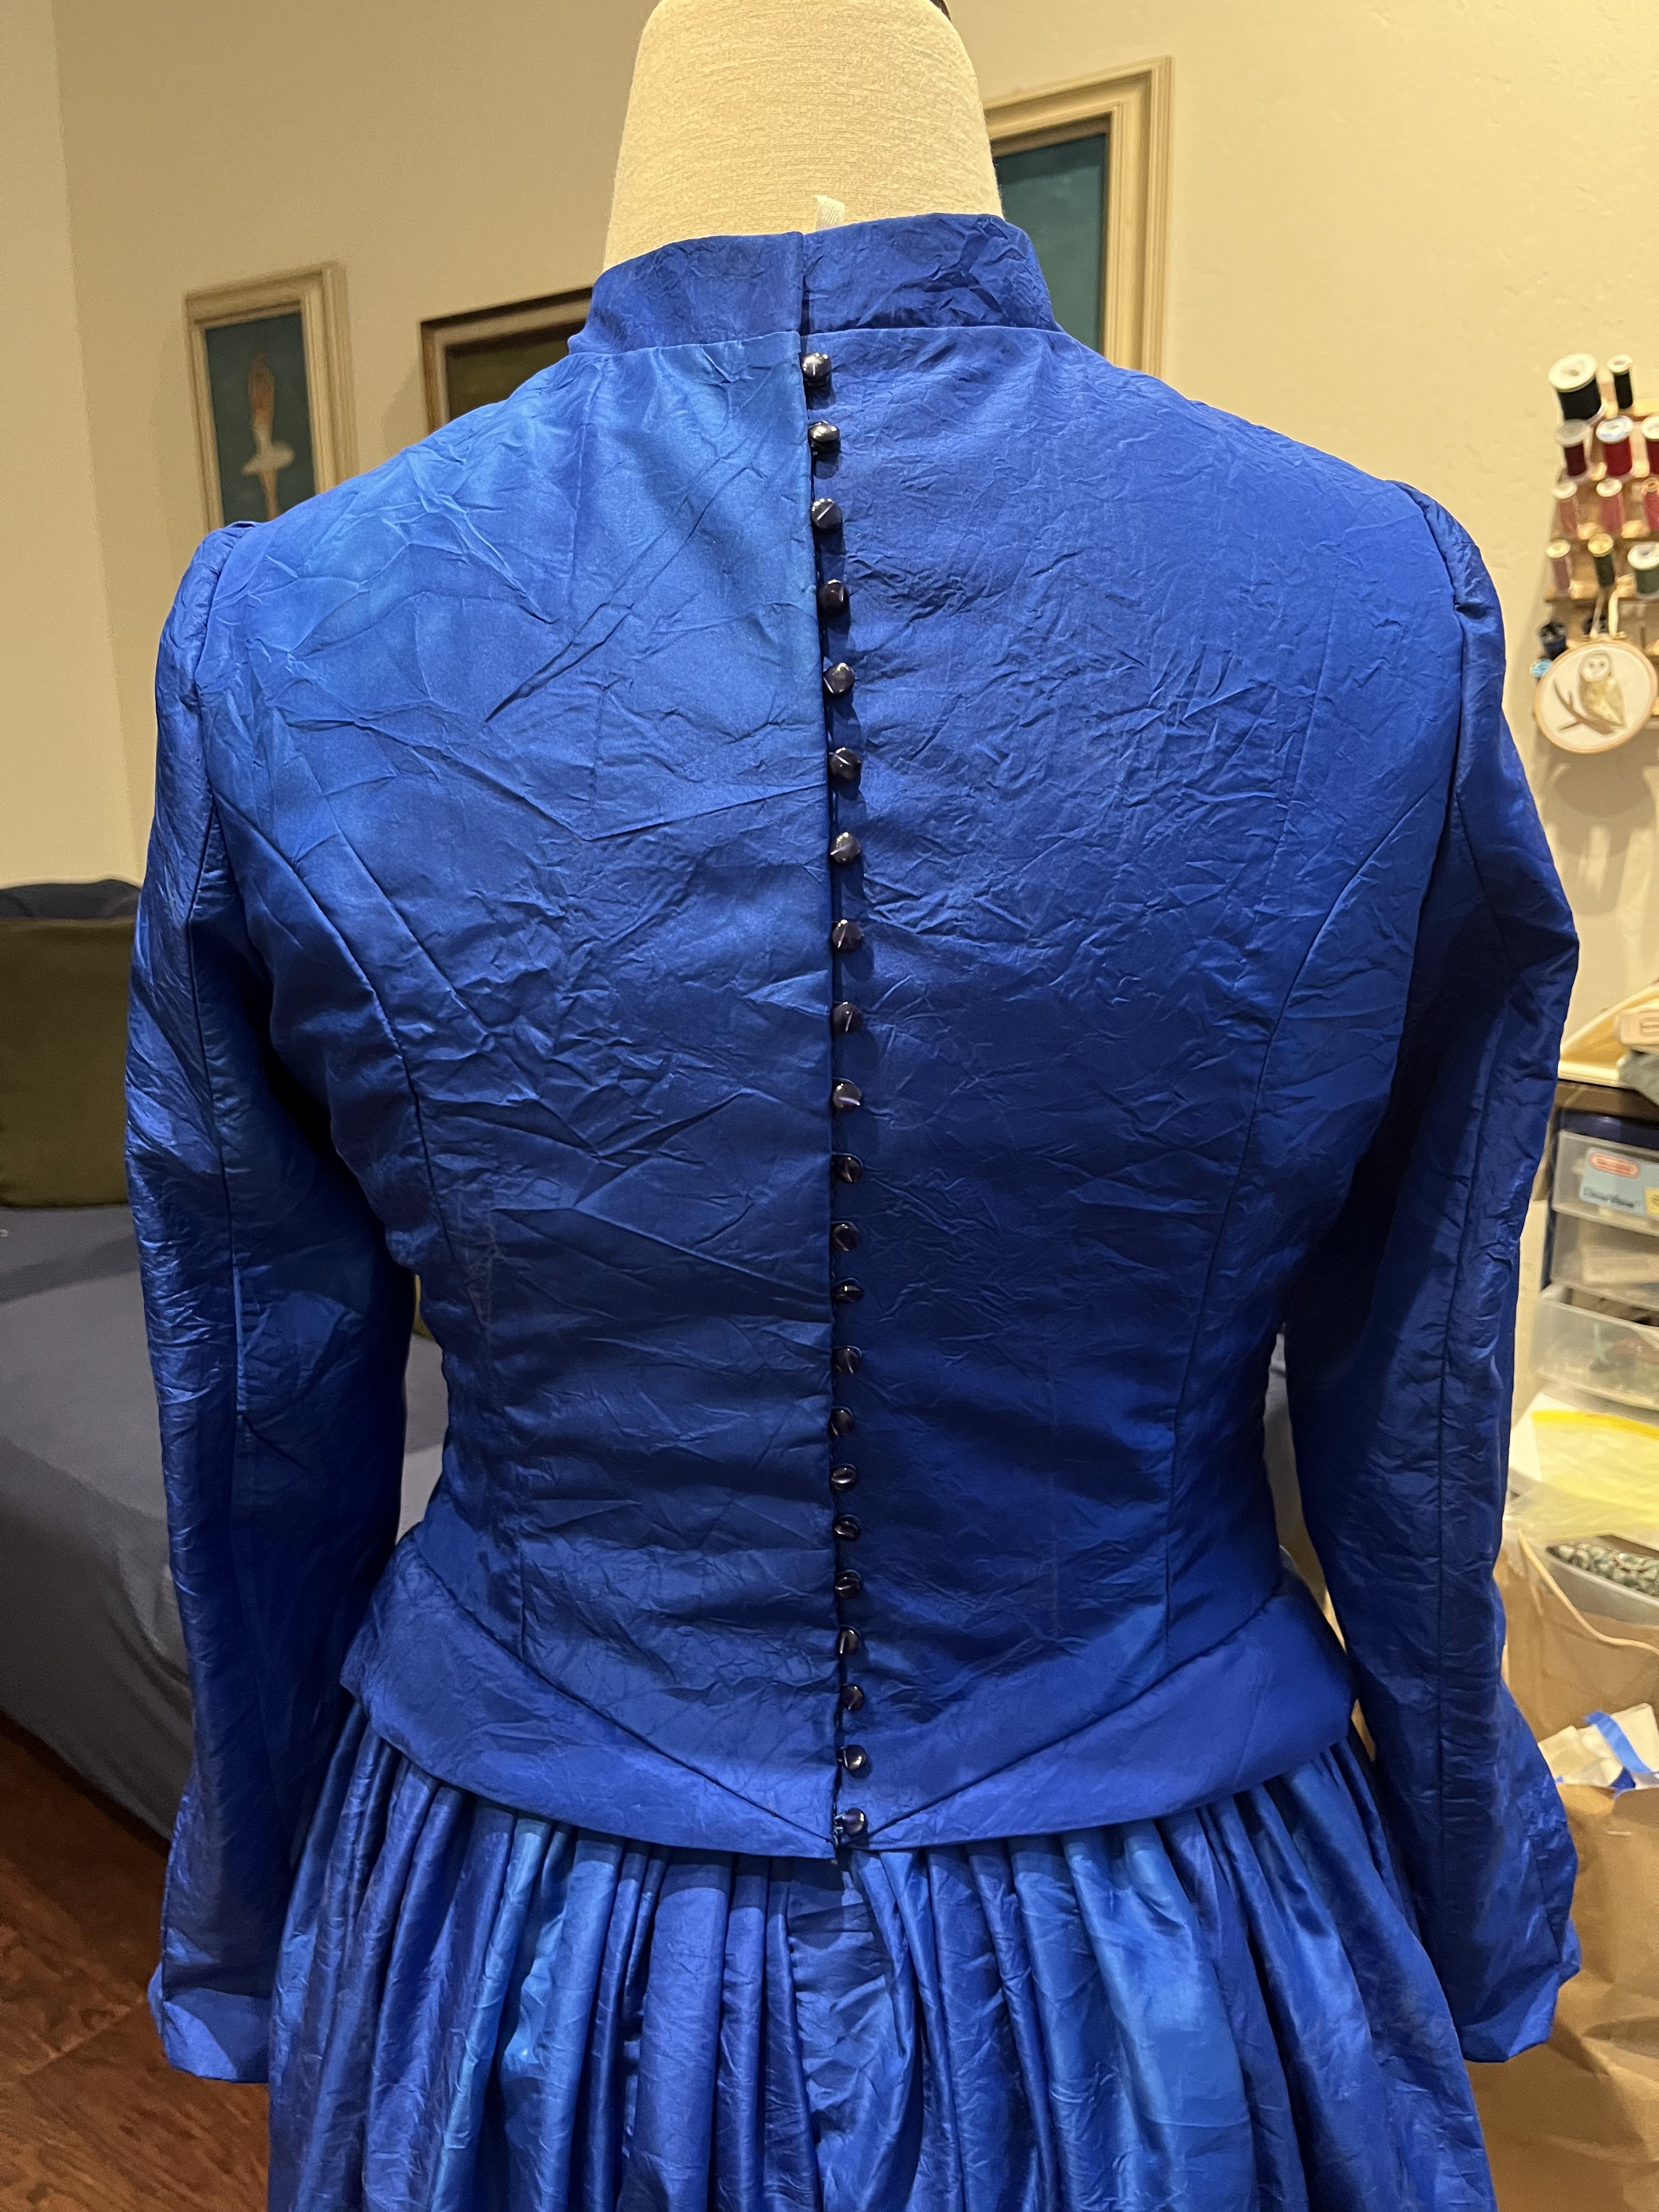
I already had a black kirtle to wear as my shaping-layer. Not much changed in about 100 years of kirtles aside from whether or not they had sleeves attached. Earlier kirtles would more likely be short sleeve, but it’s not like anyone could tell under my gown. Rather than using the Queens Servants kirtle pattern and making it fit, I traced off my old kirtle pattern and added a bit extra seam allowance to the back and sides to account for the fact that it was going over a kirtle. Crossing my fingers that it would fit perfectly the first time because it came off a fitting pattern right?

Sigh nothing is ever that easy. Mostly because I made the kirtle a decade ago on my Uniquely You dress form which is decidedly line-backer-ish compared to my extremely narrow shoulders. So I mostly had to tweak the angle and where the shoulder straps fell.

I know it looks decent, but you can see my dotted lines that the strap needs to sit a solid half inch higher up the shoulders. I also pinned on a piece of muslin to make the ridiculous point at the center front because why not go extreme silly styles!

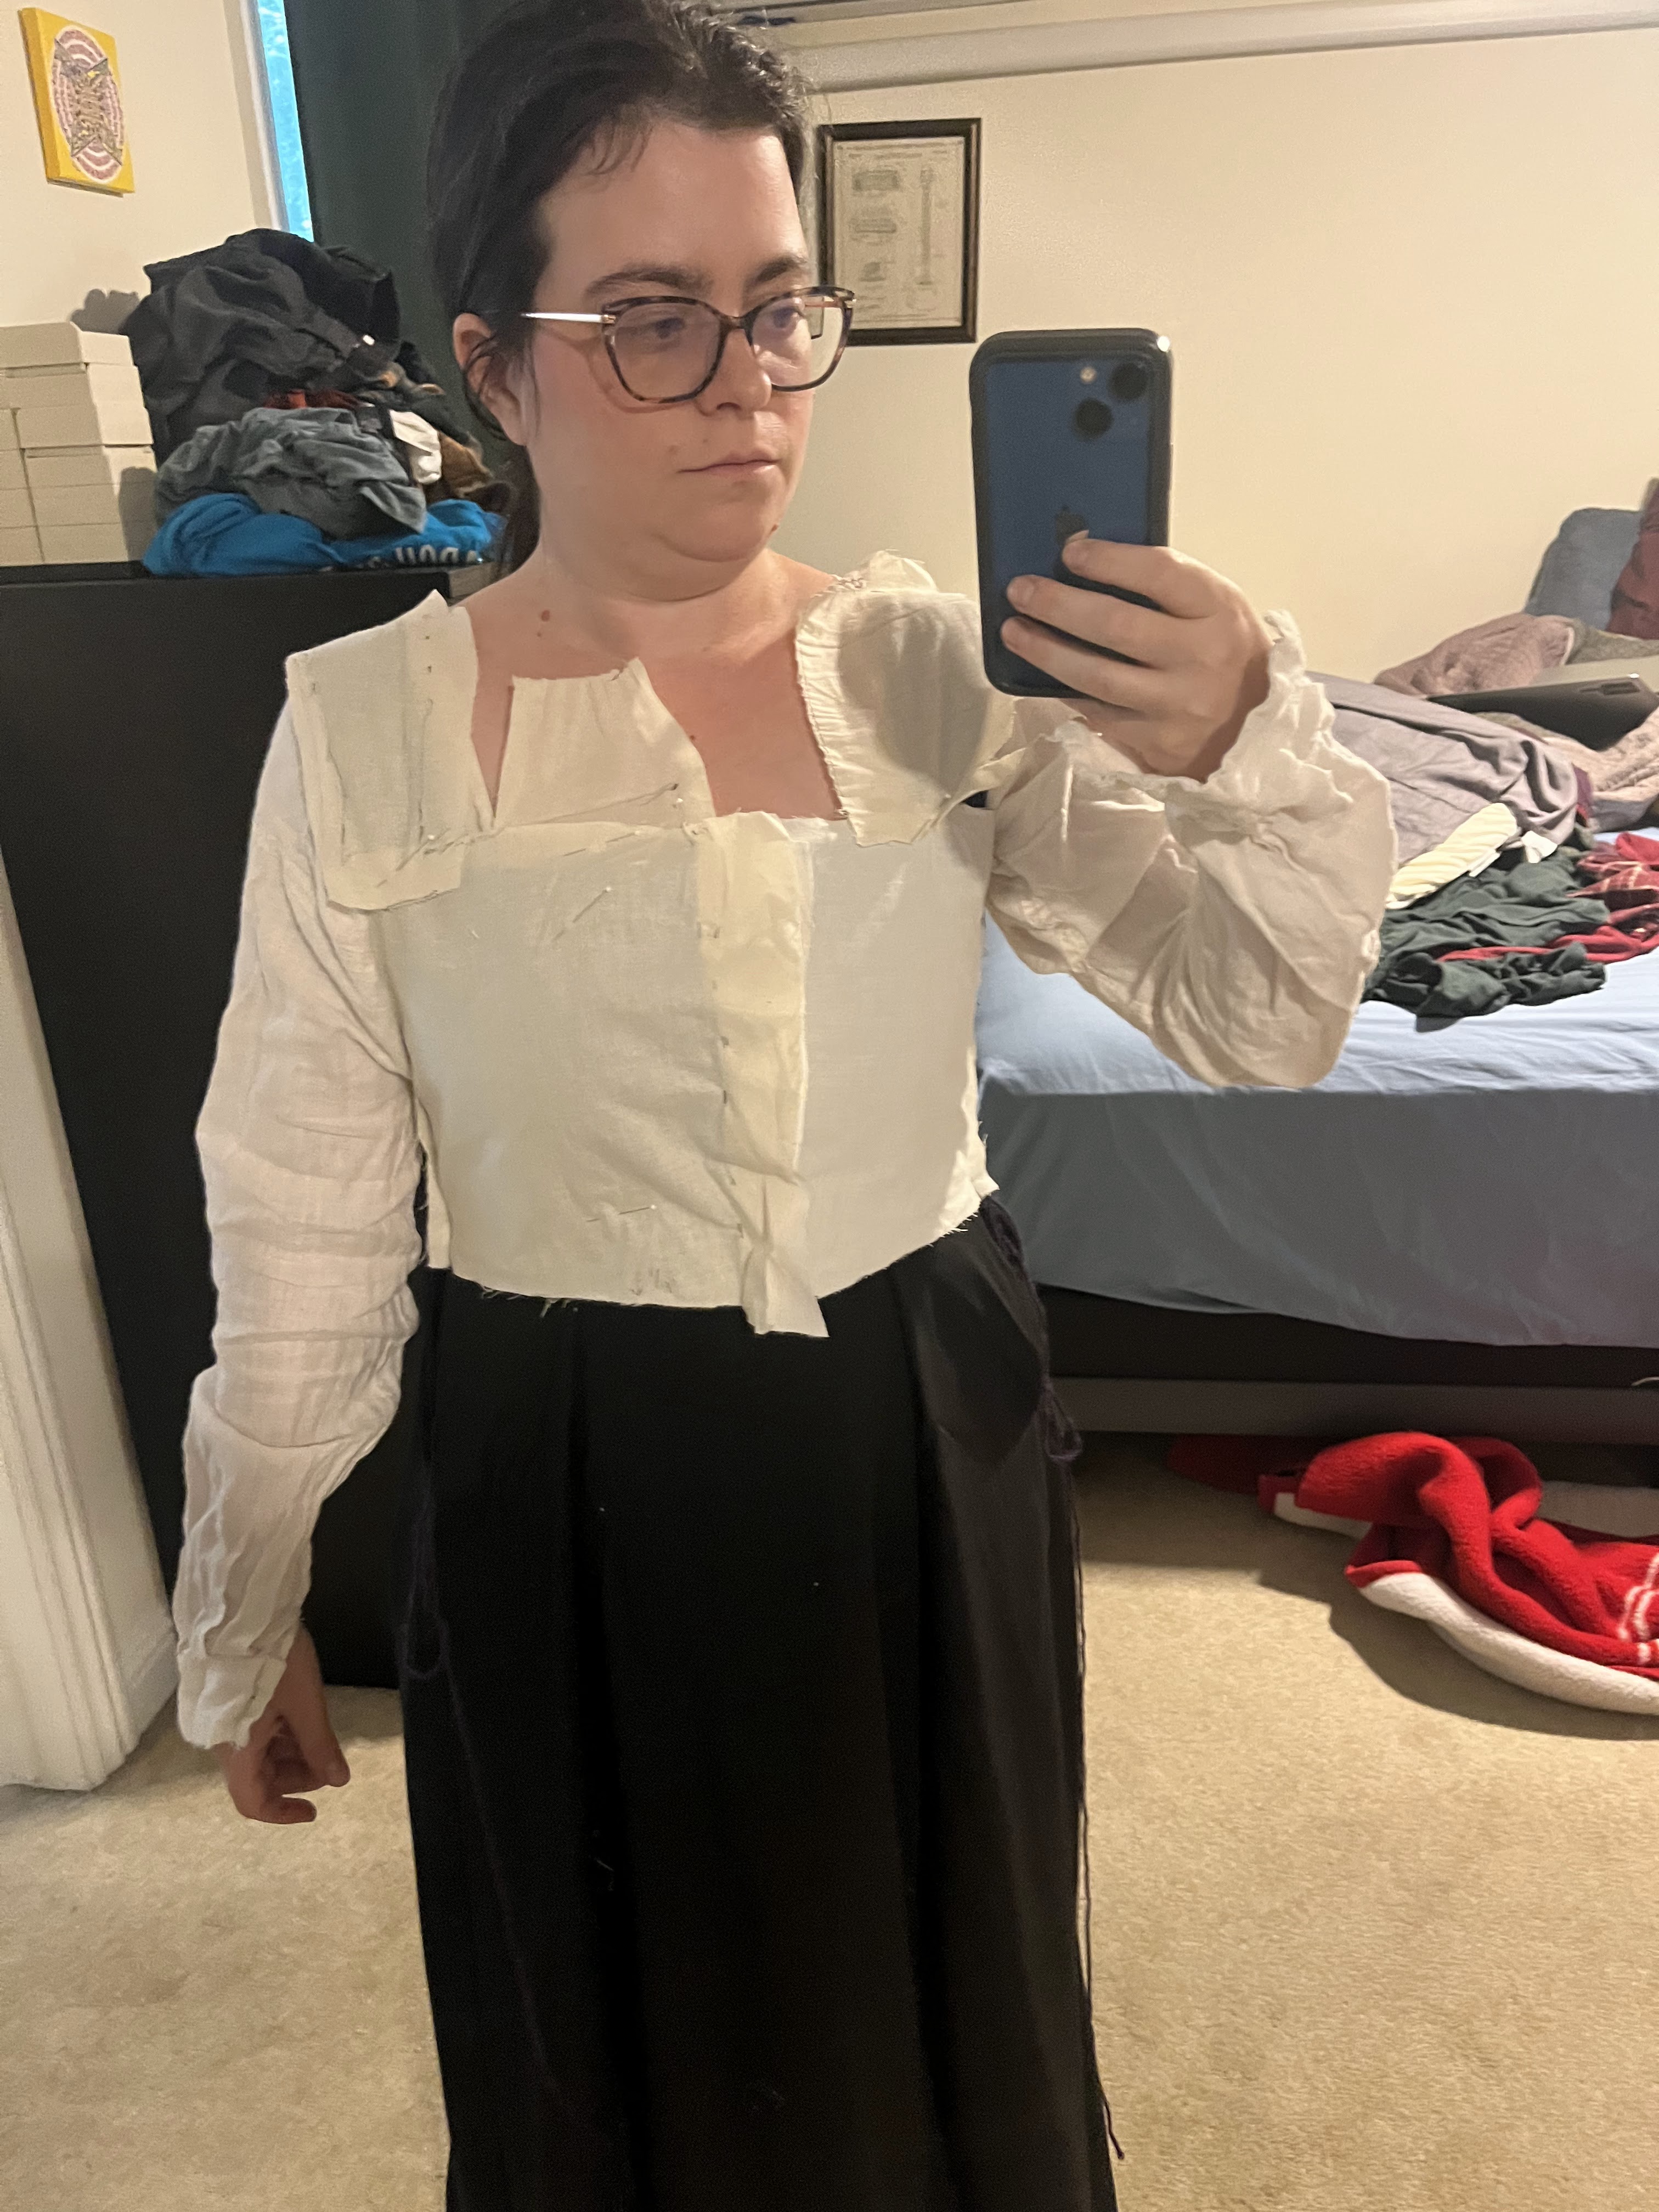
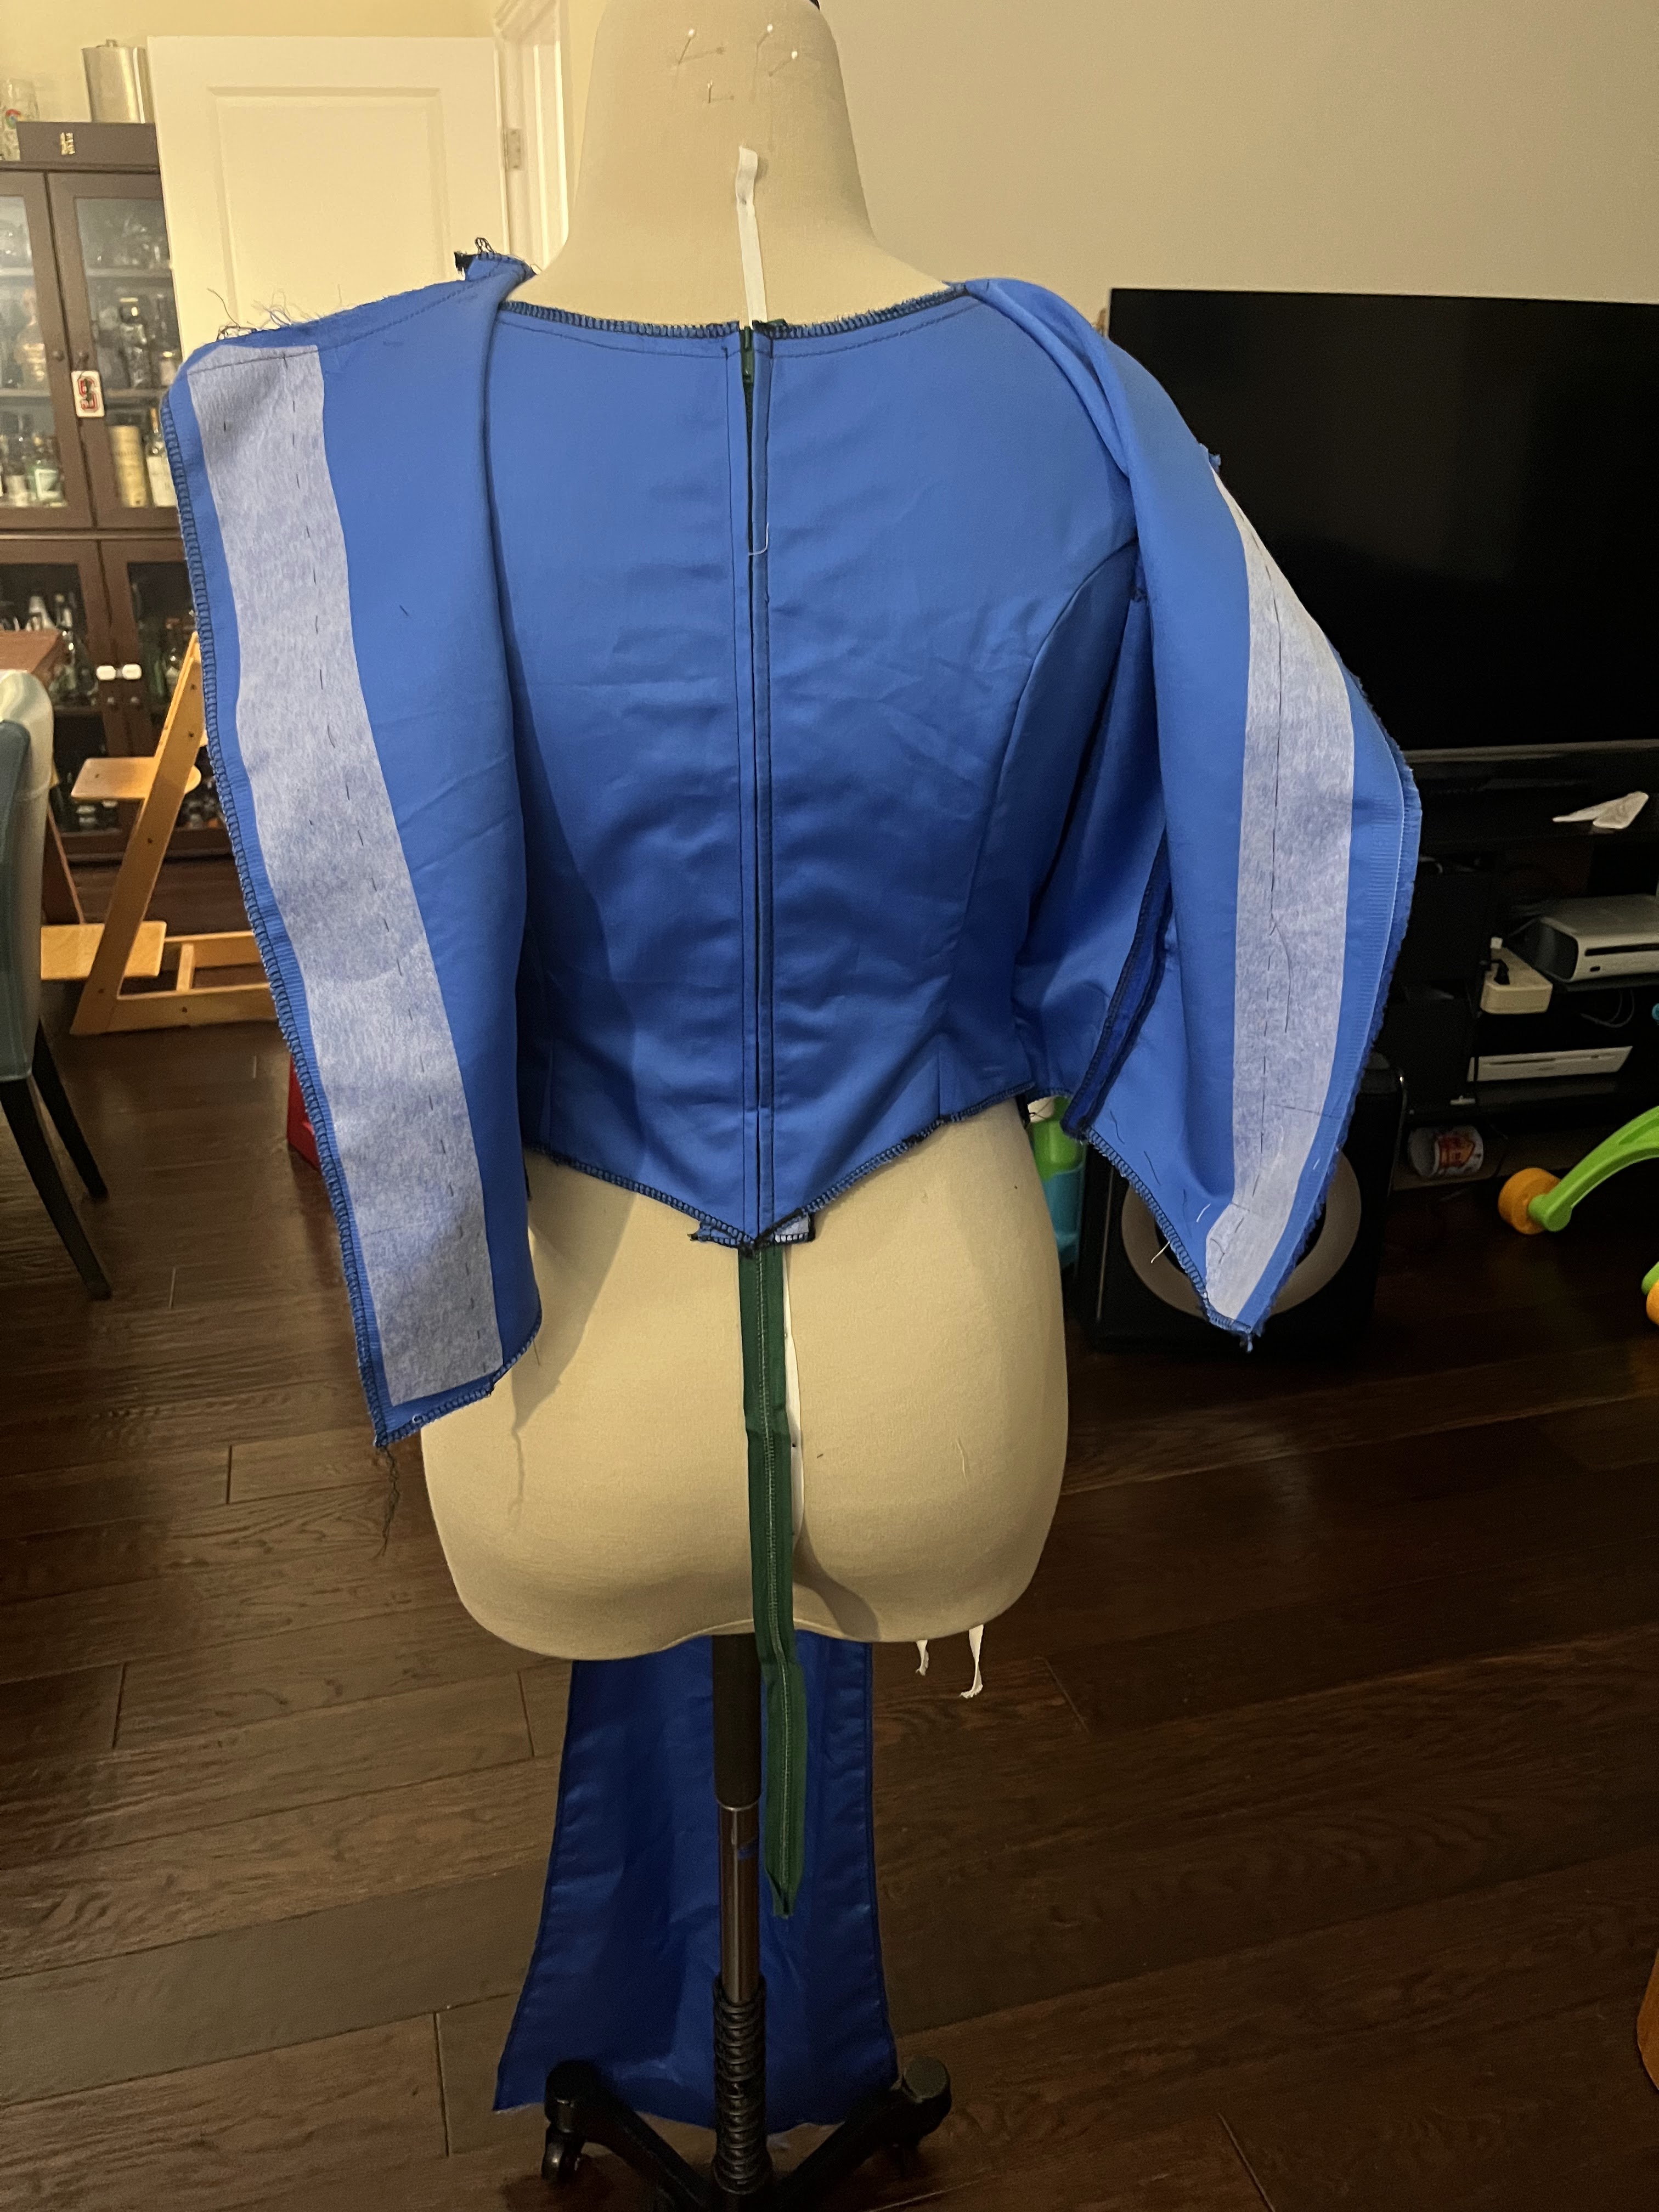
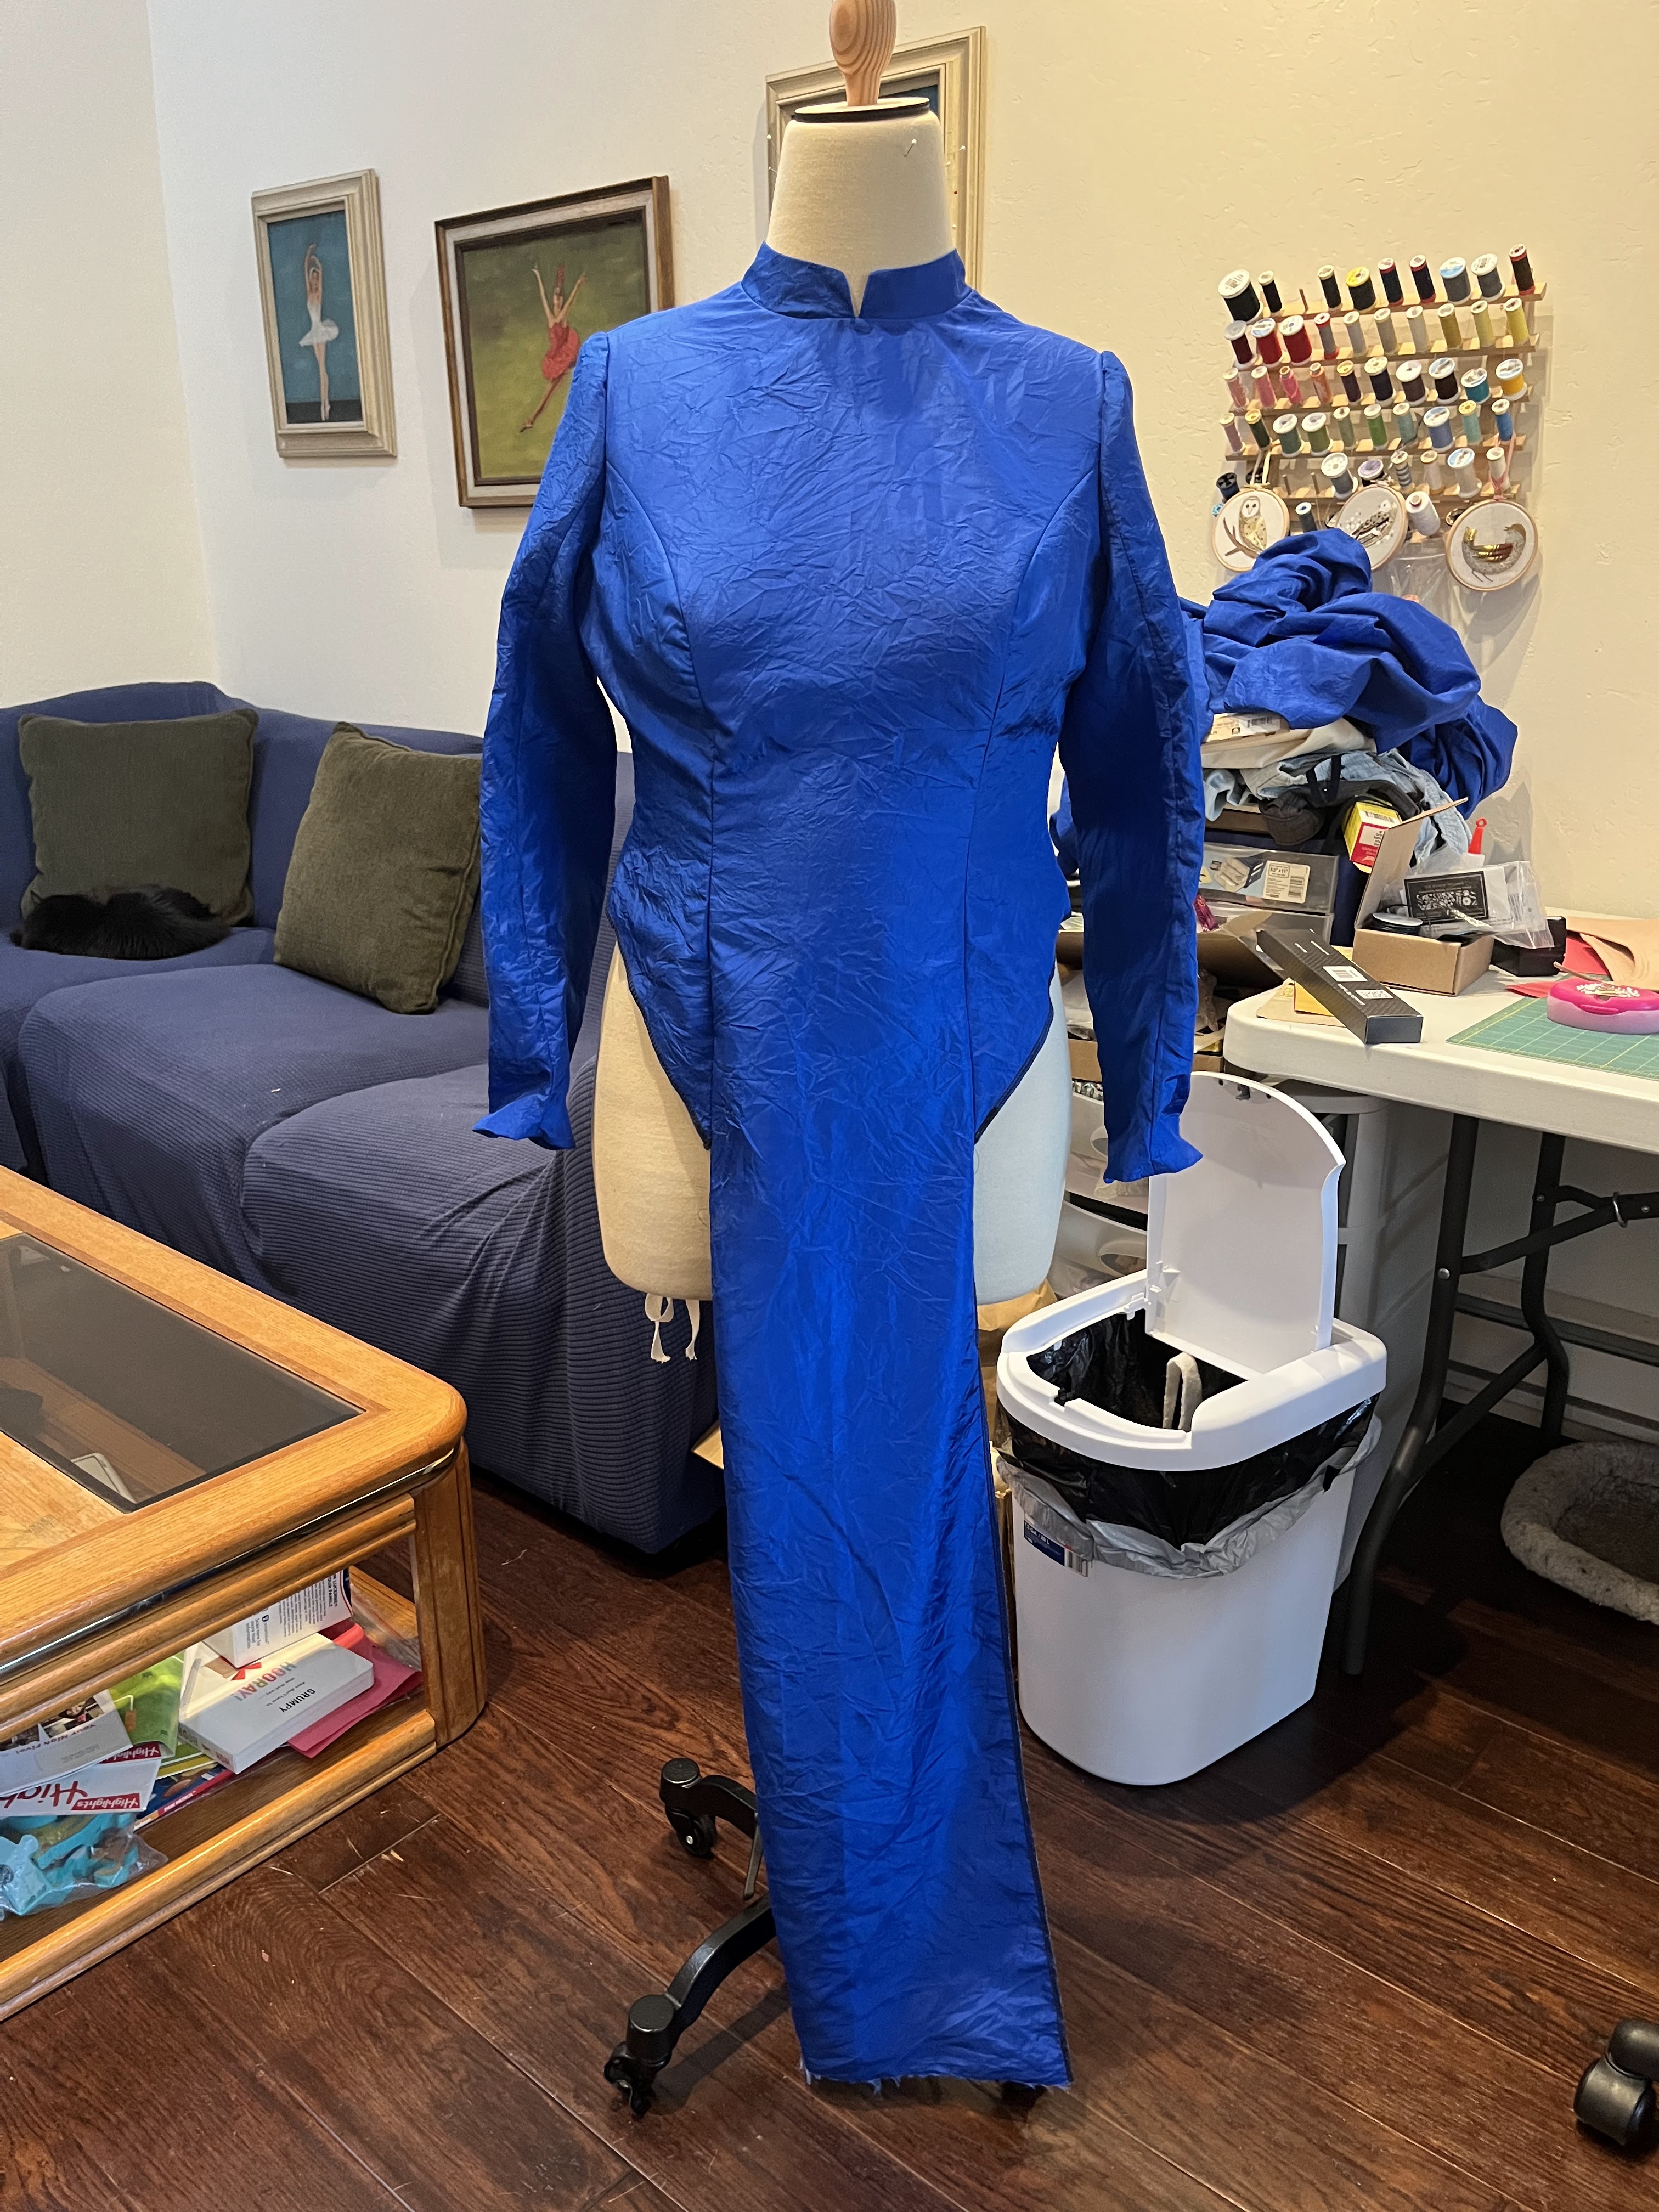
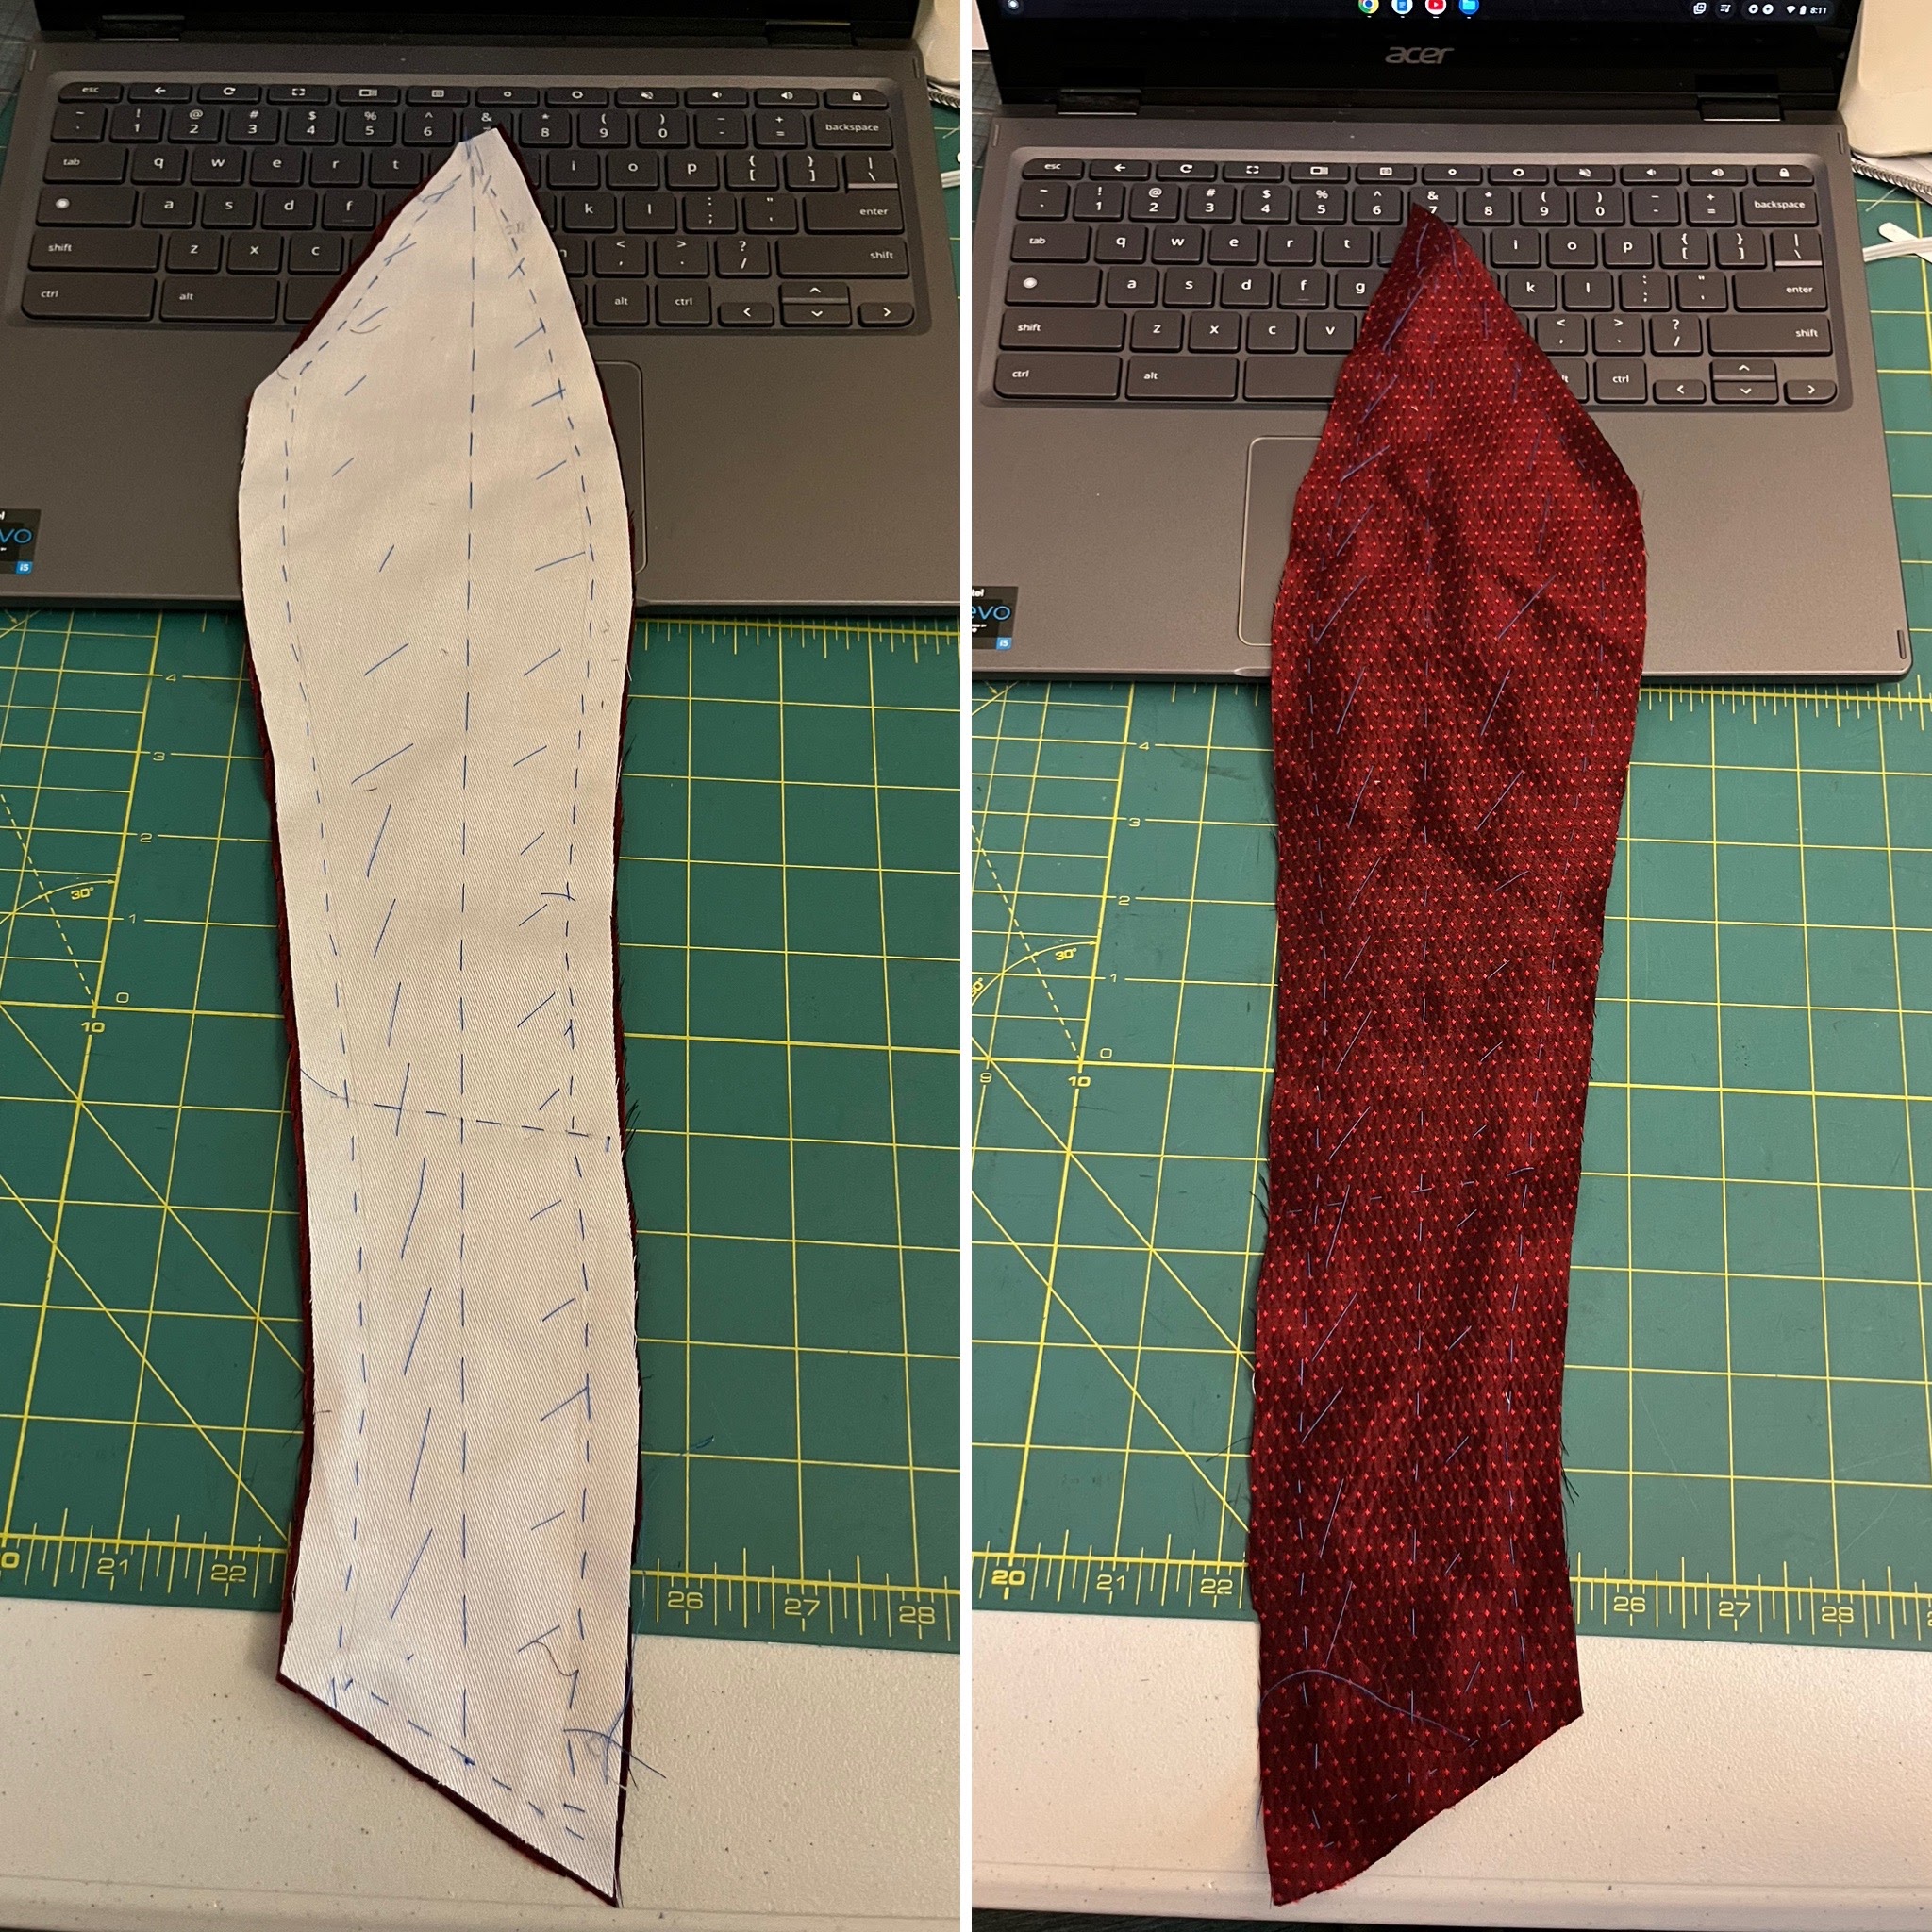
I was tempted to go straight from this alteration into my real fabric (remember, only 2 weeks to make this) but I know myself and my alteration skills too well. And to not test a sleeve mockup is absolutely to mock the gods.

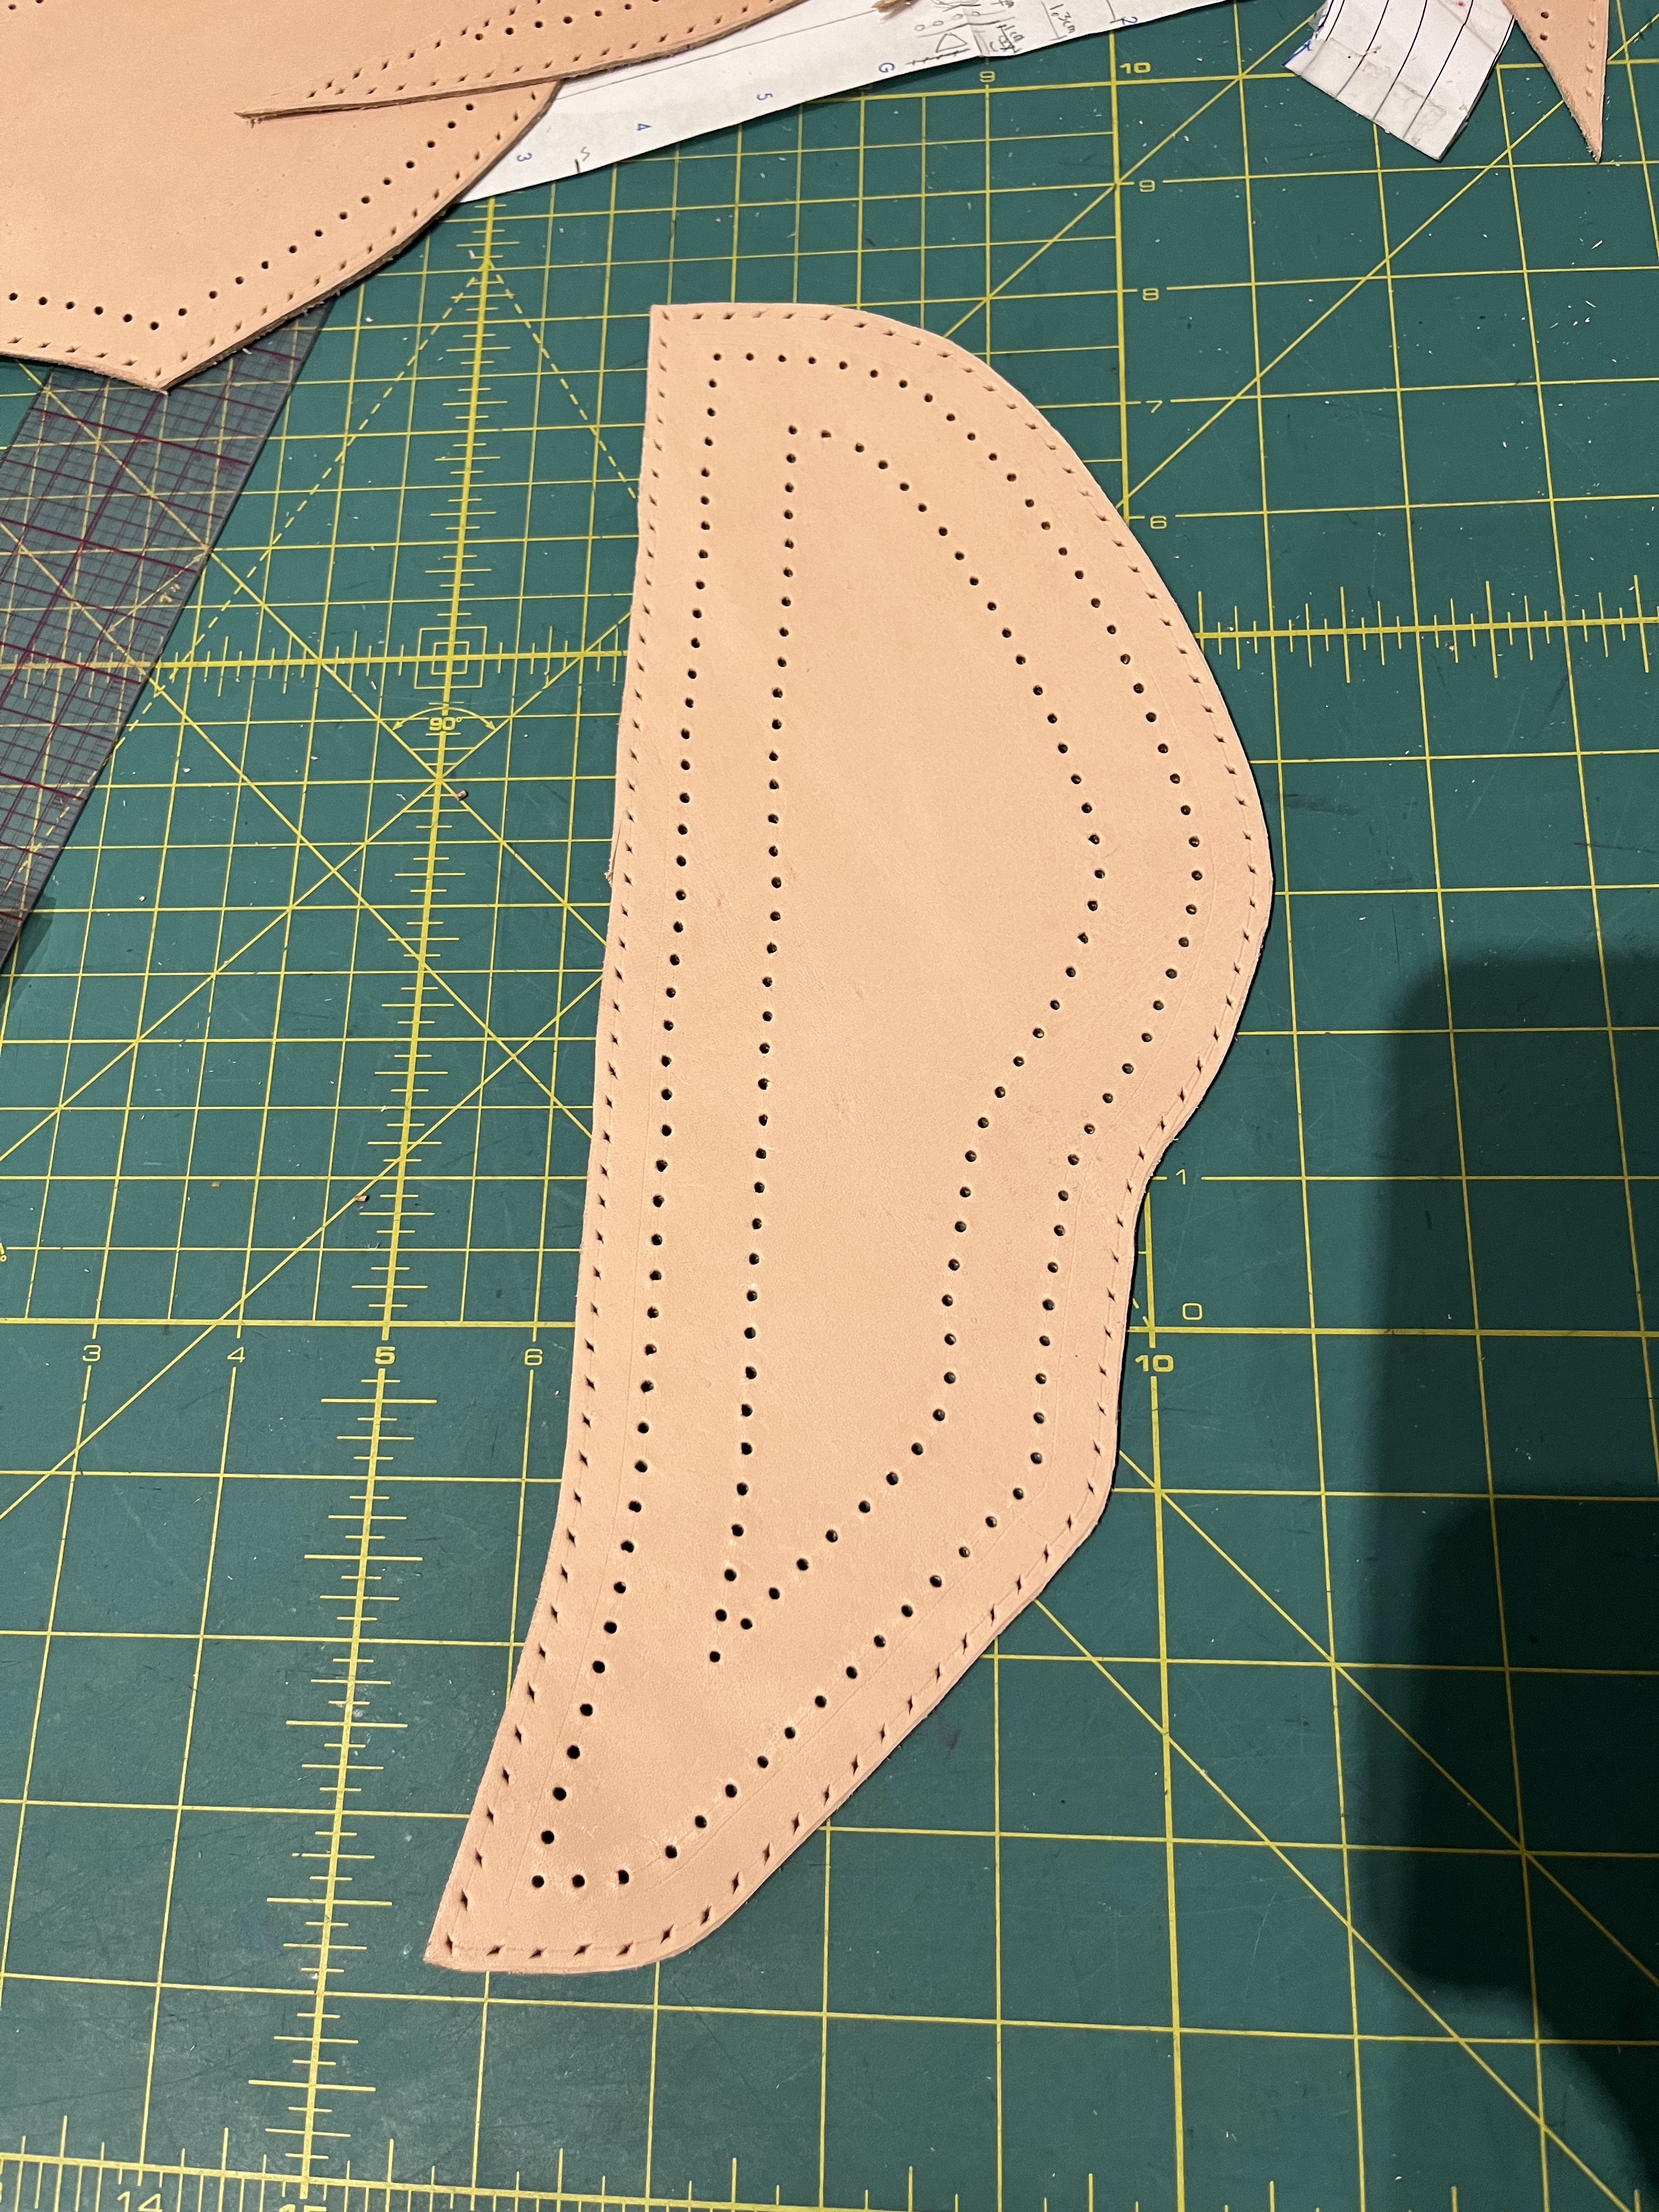
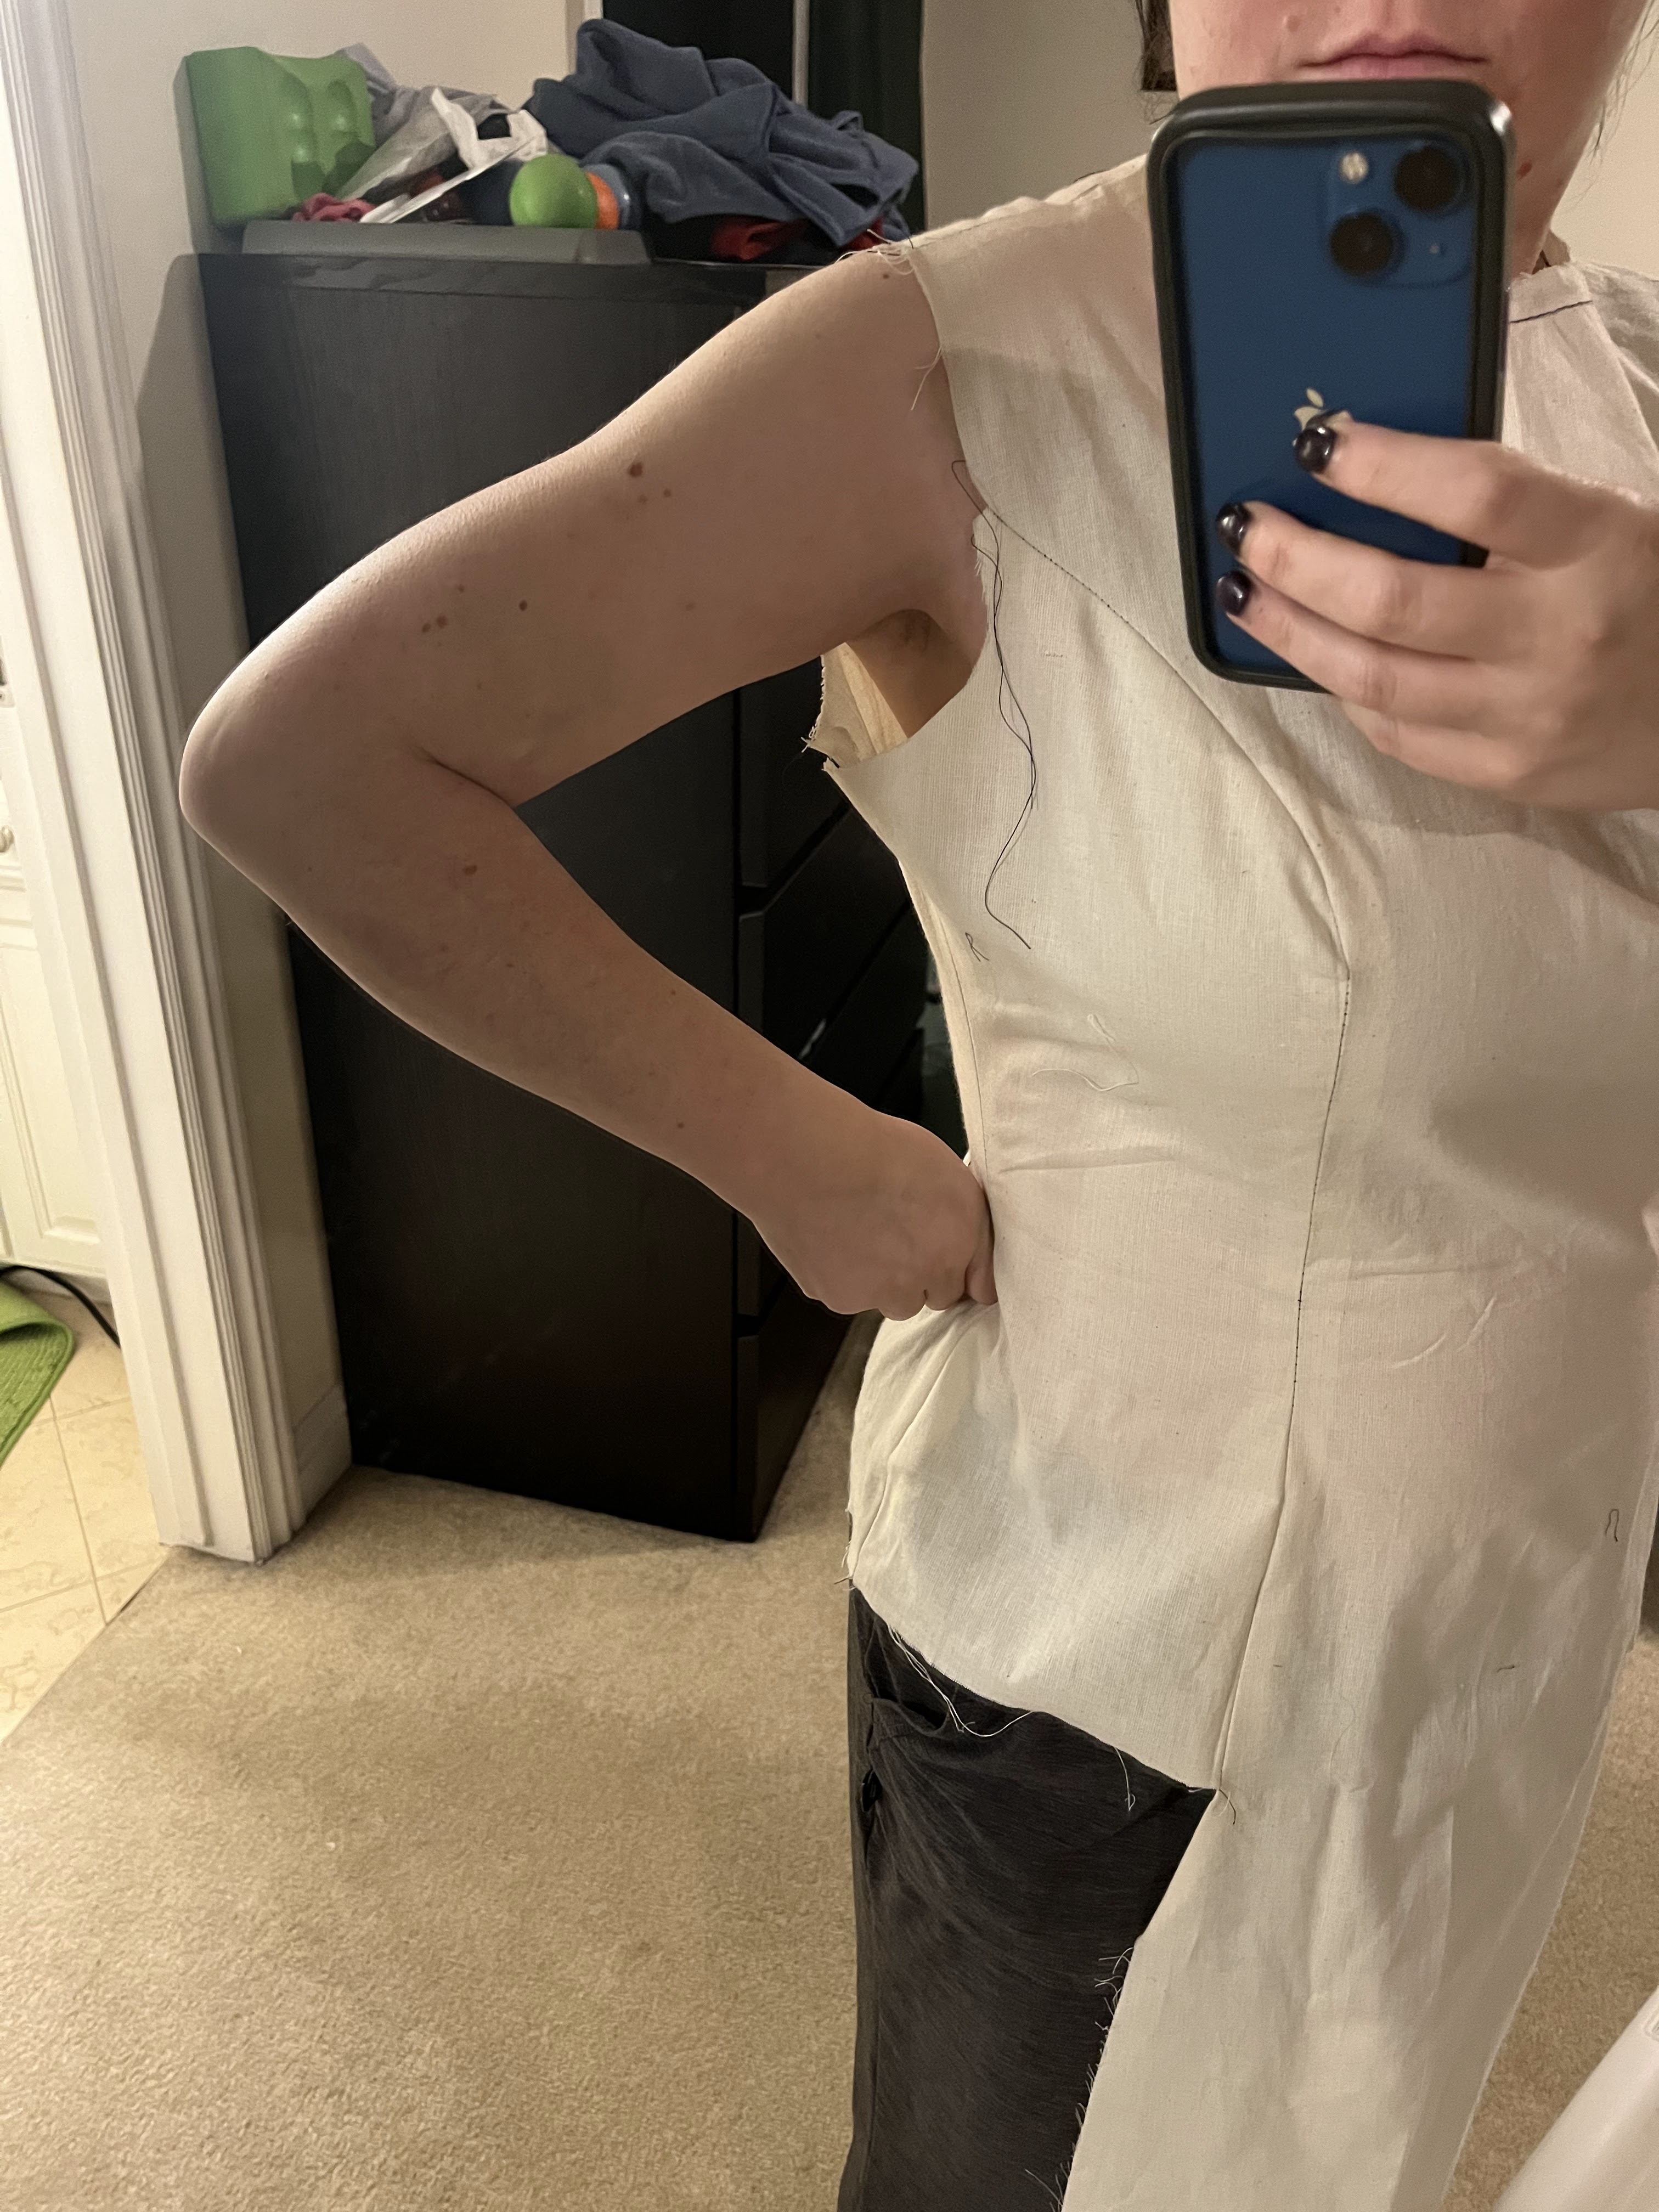
Next mockup using an absolute hodgepodge of stash fabric beause I managed to lose my bolt of muslin (I finally found it 3 months later. Literally next to my sewing table under a pile of mending). It was pretty close, but I found a few important fixes!

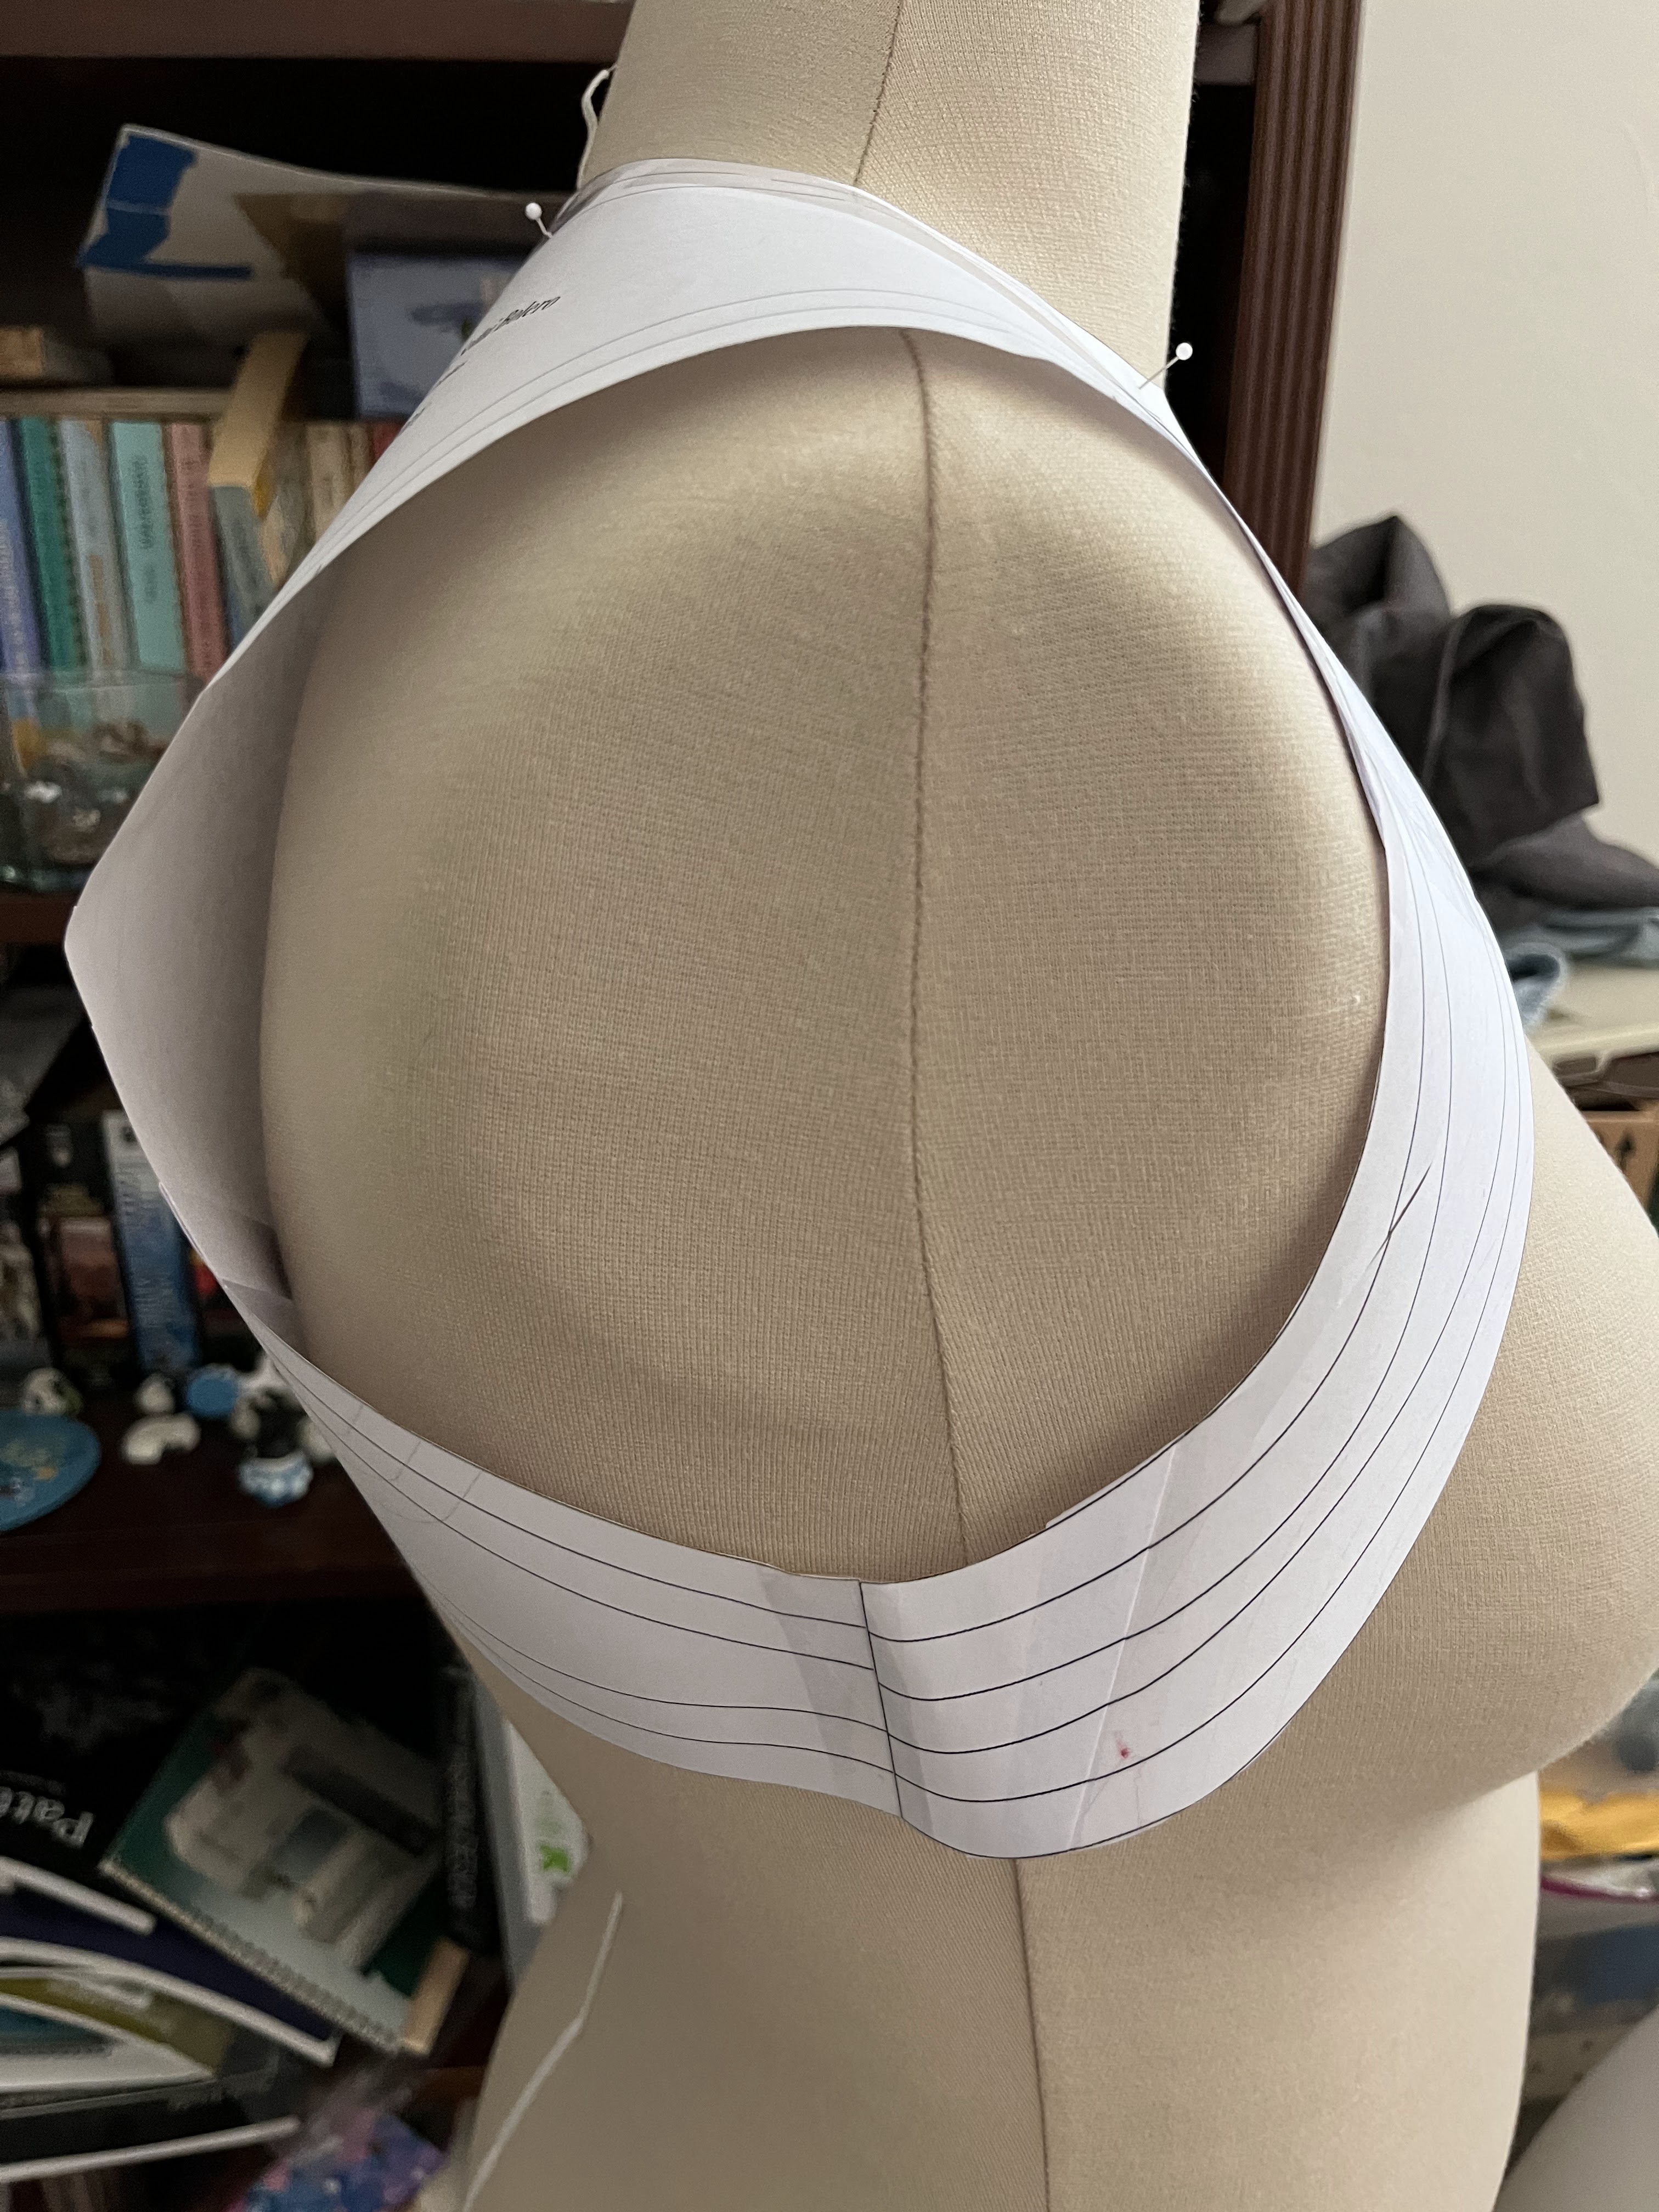
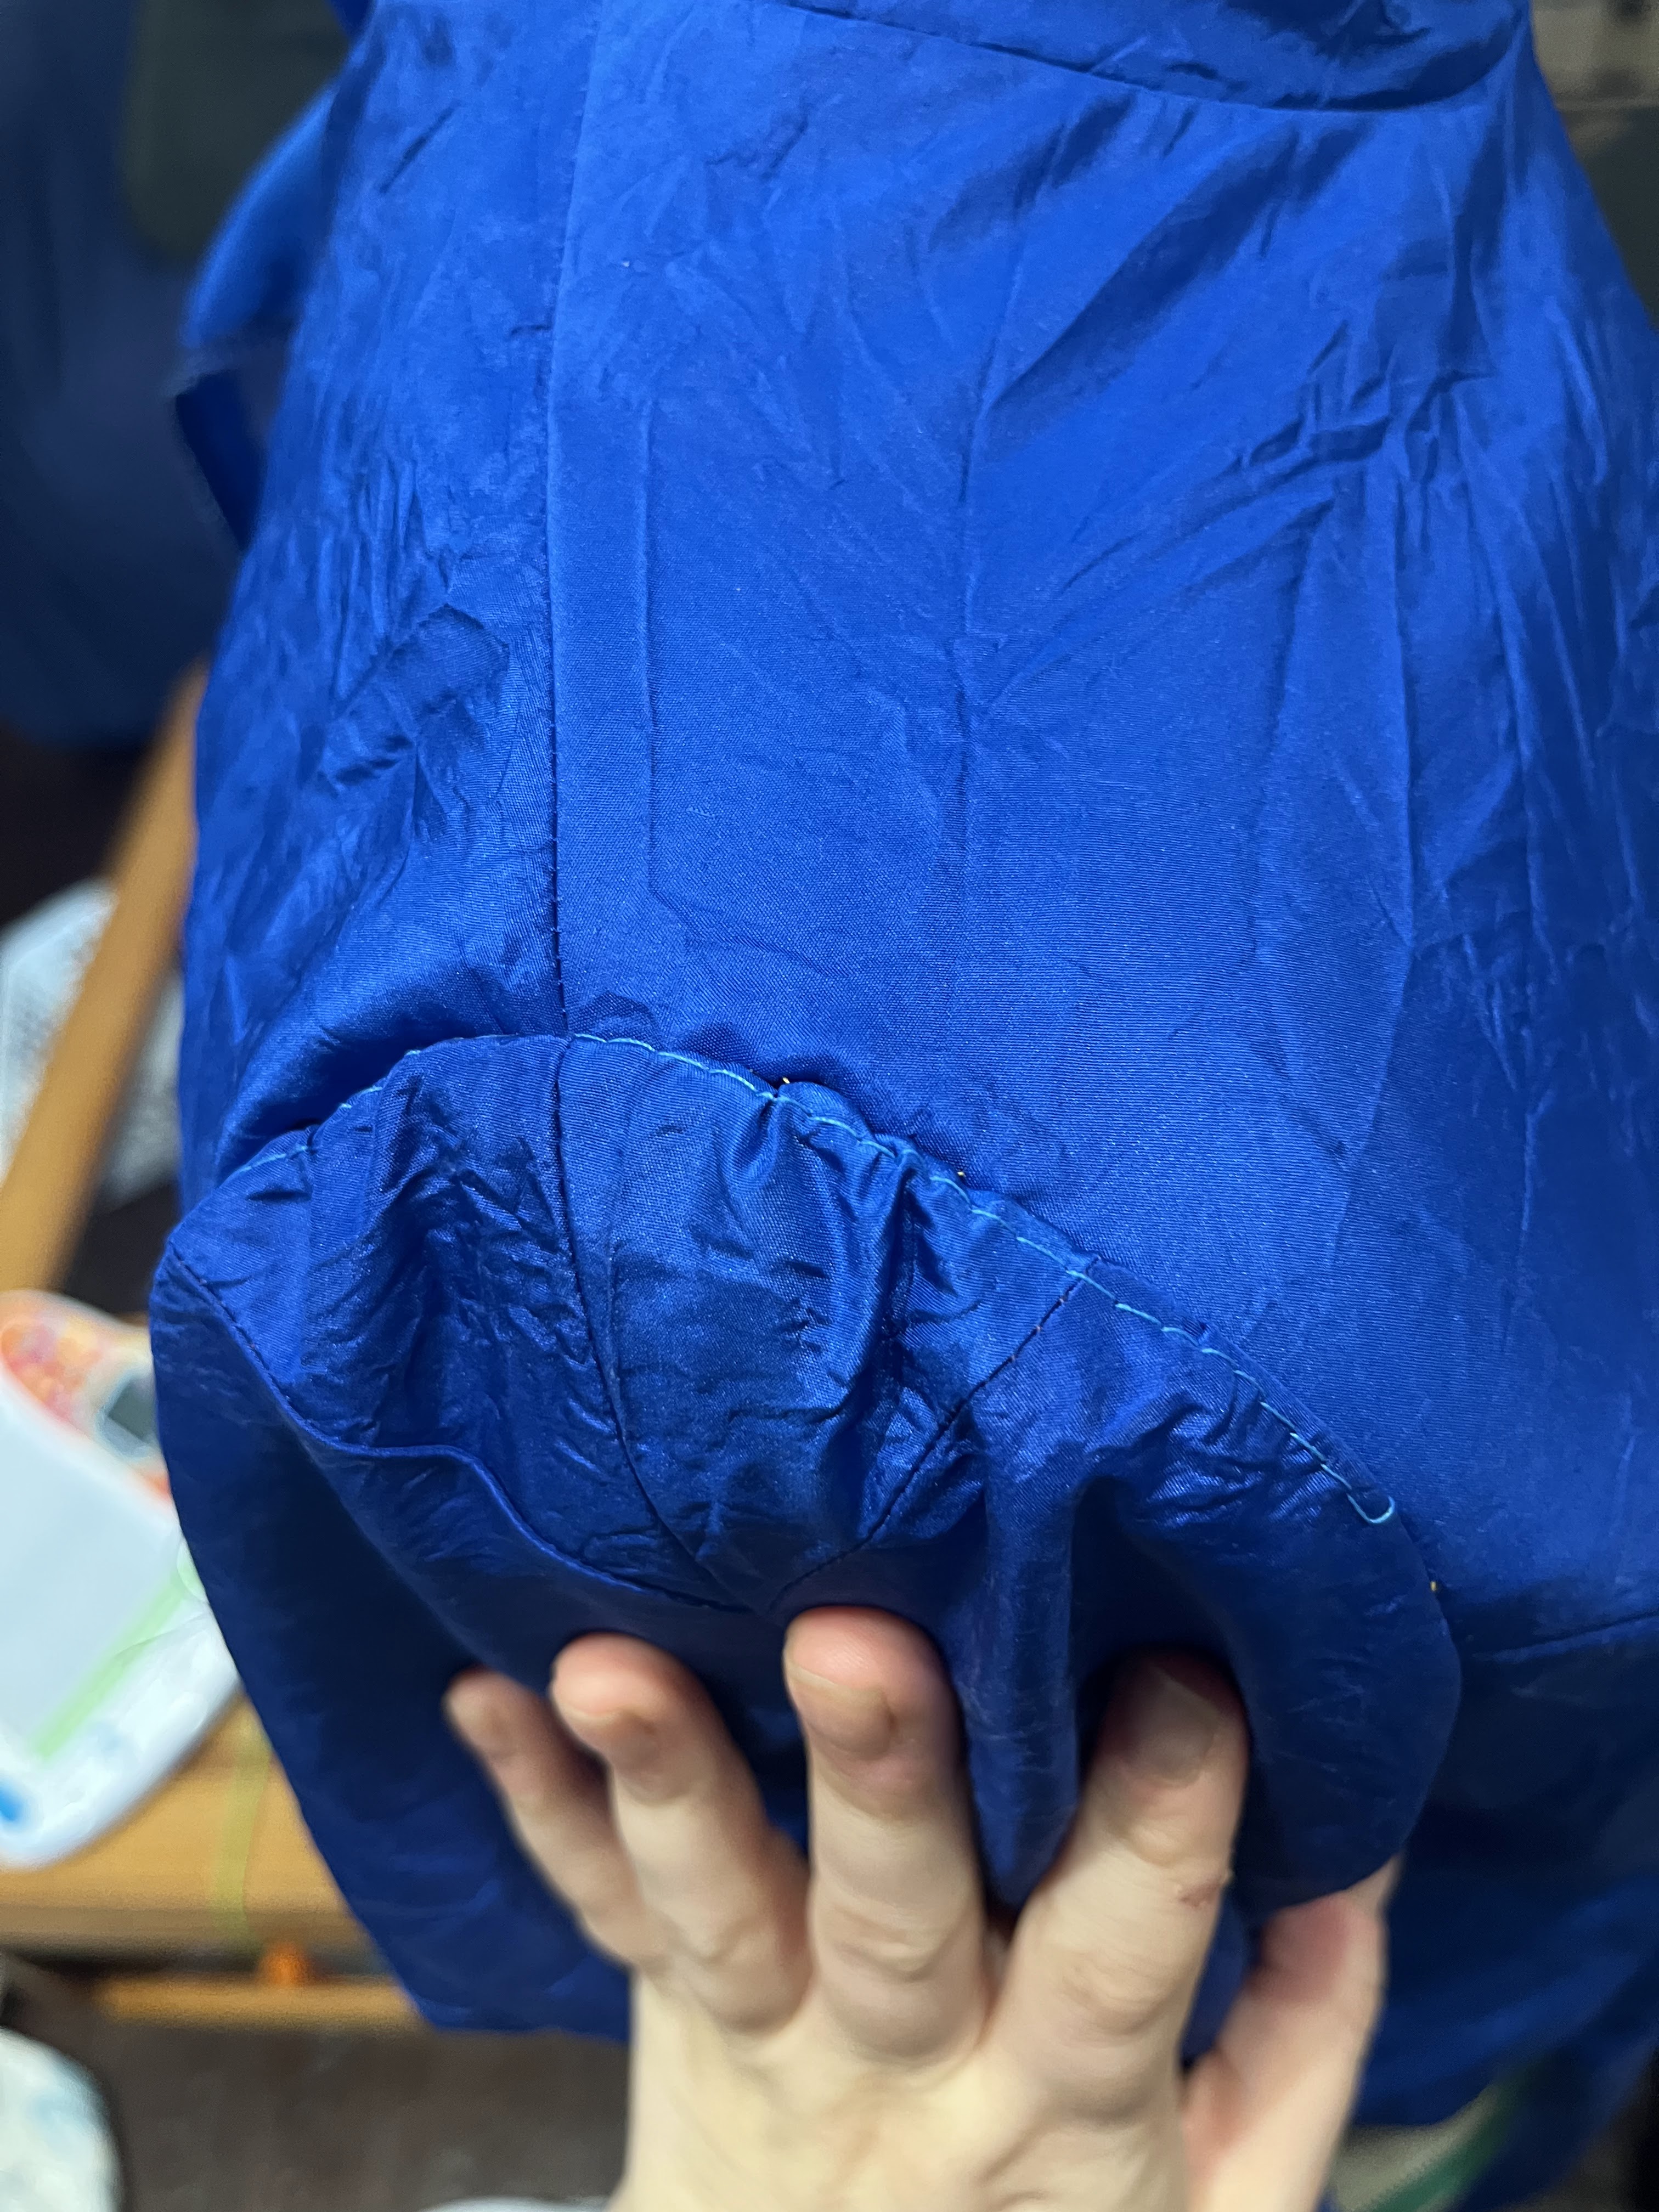
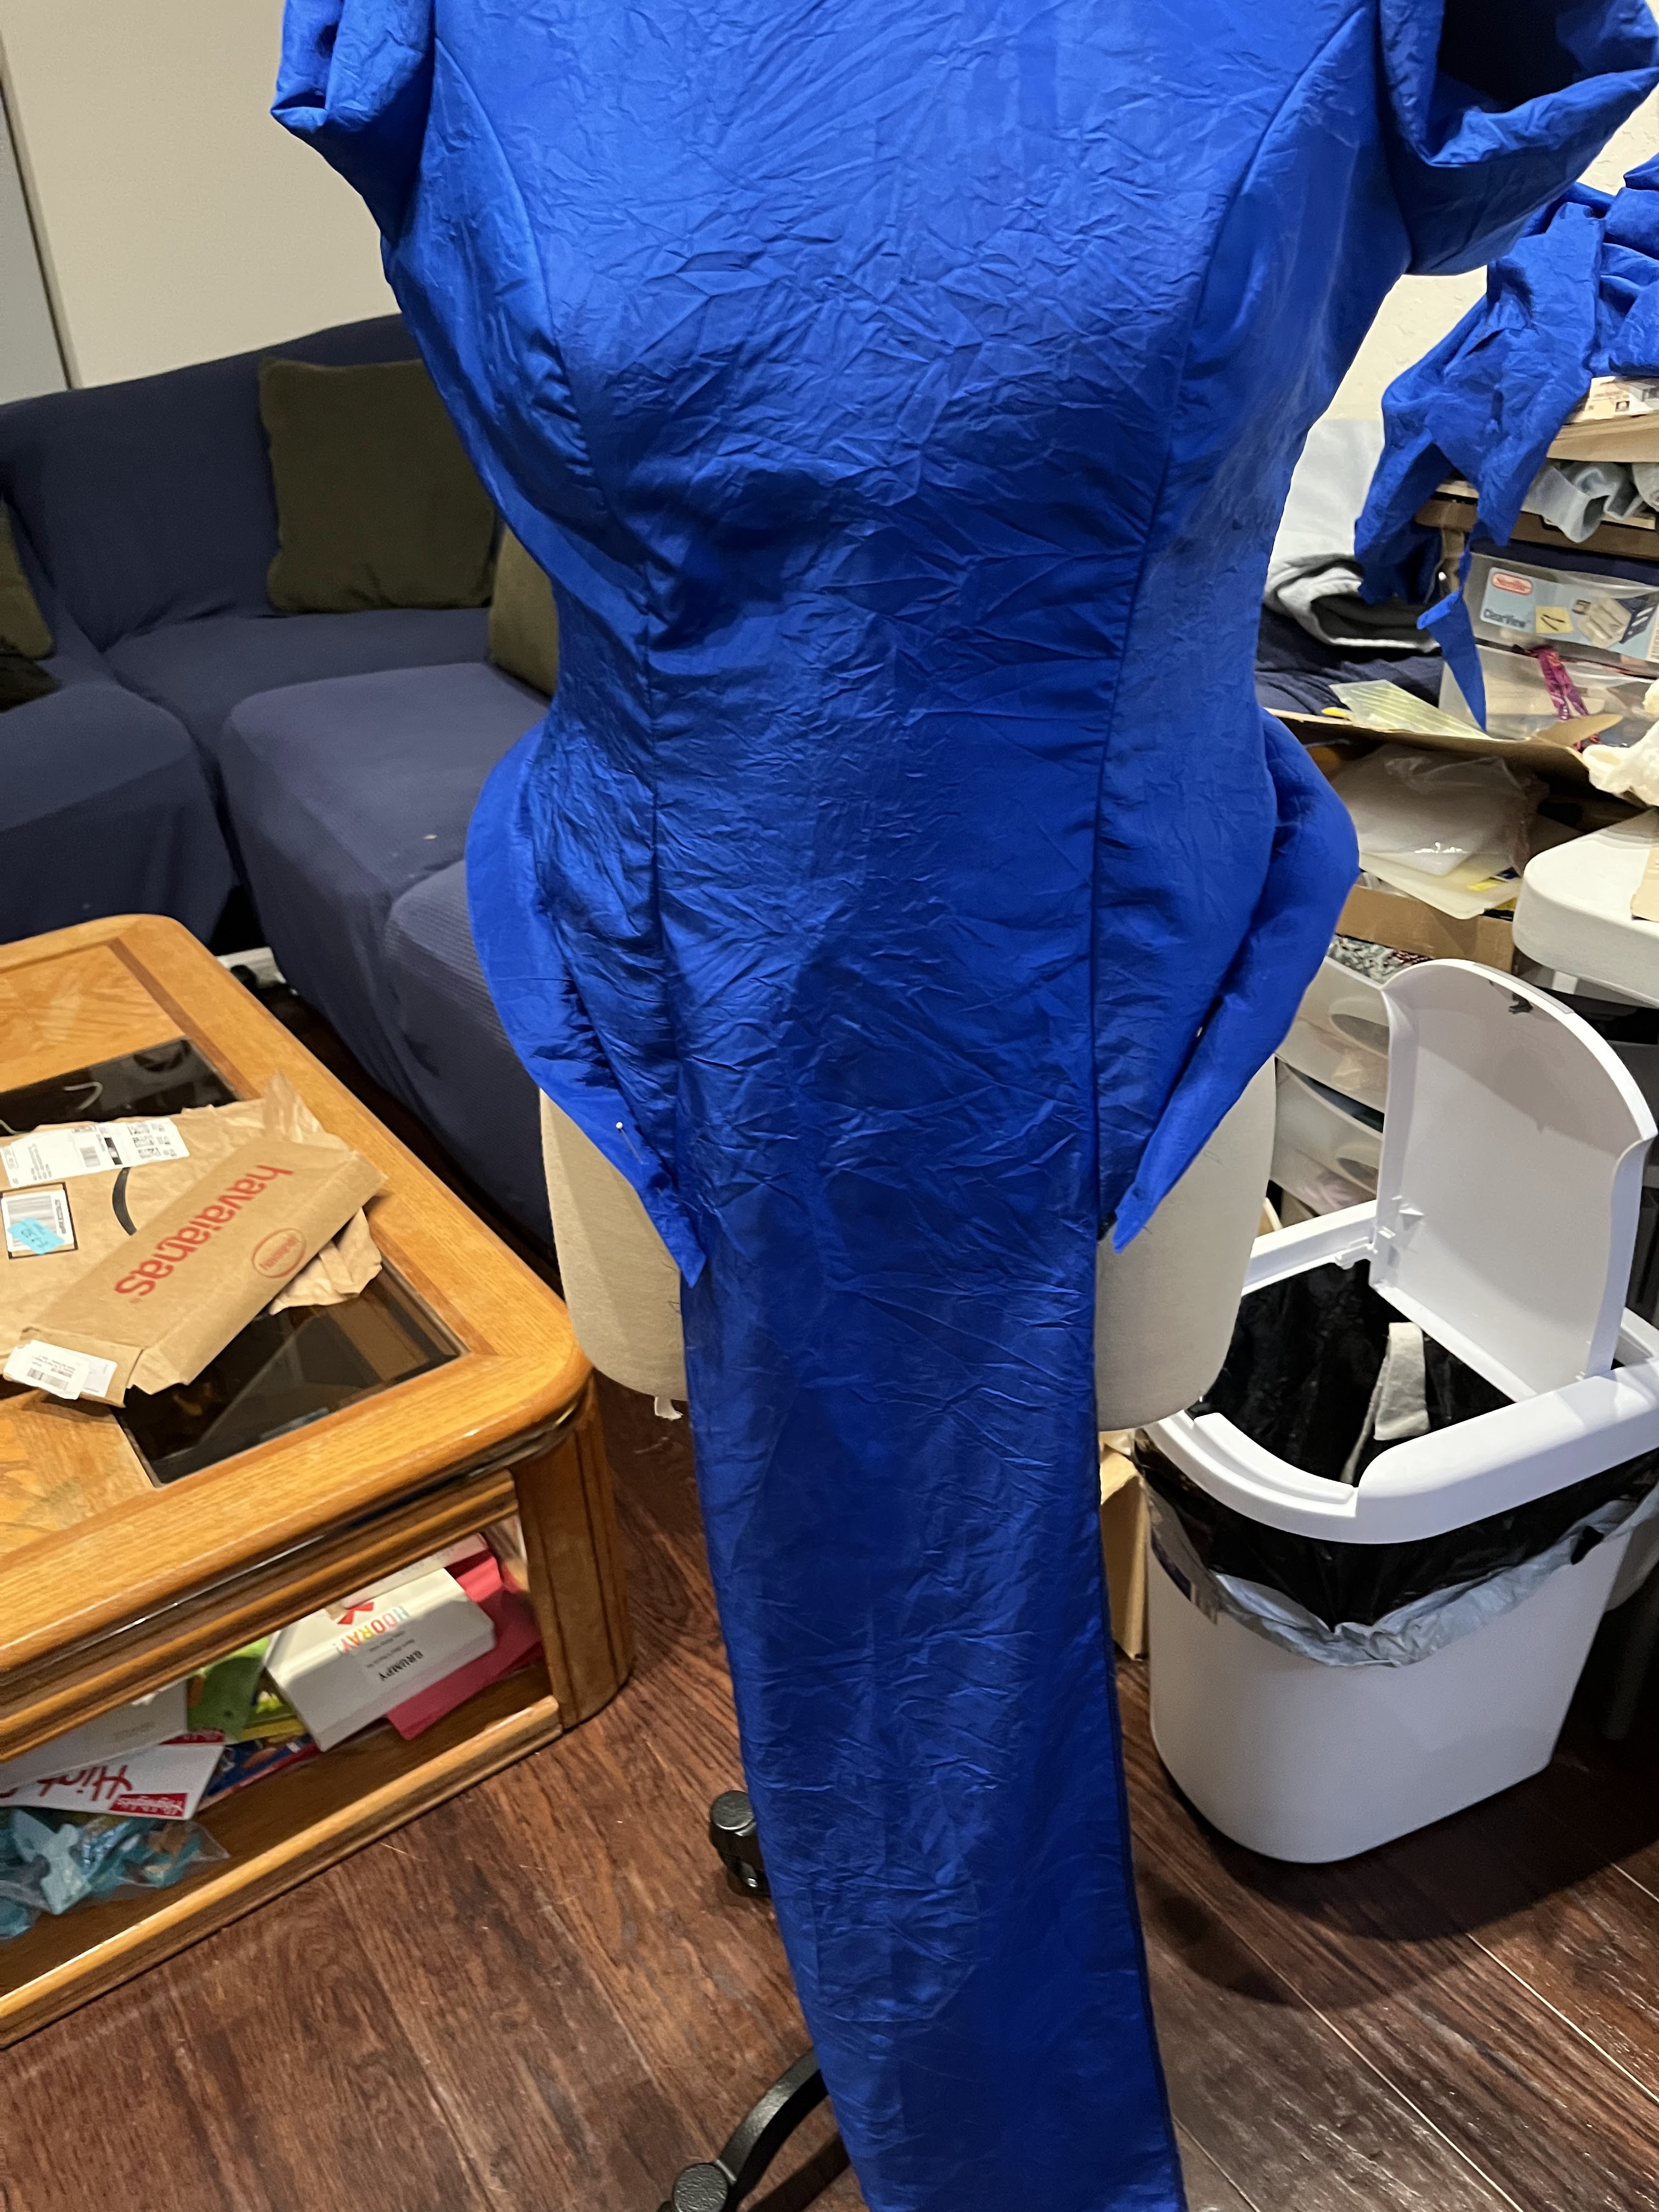
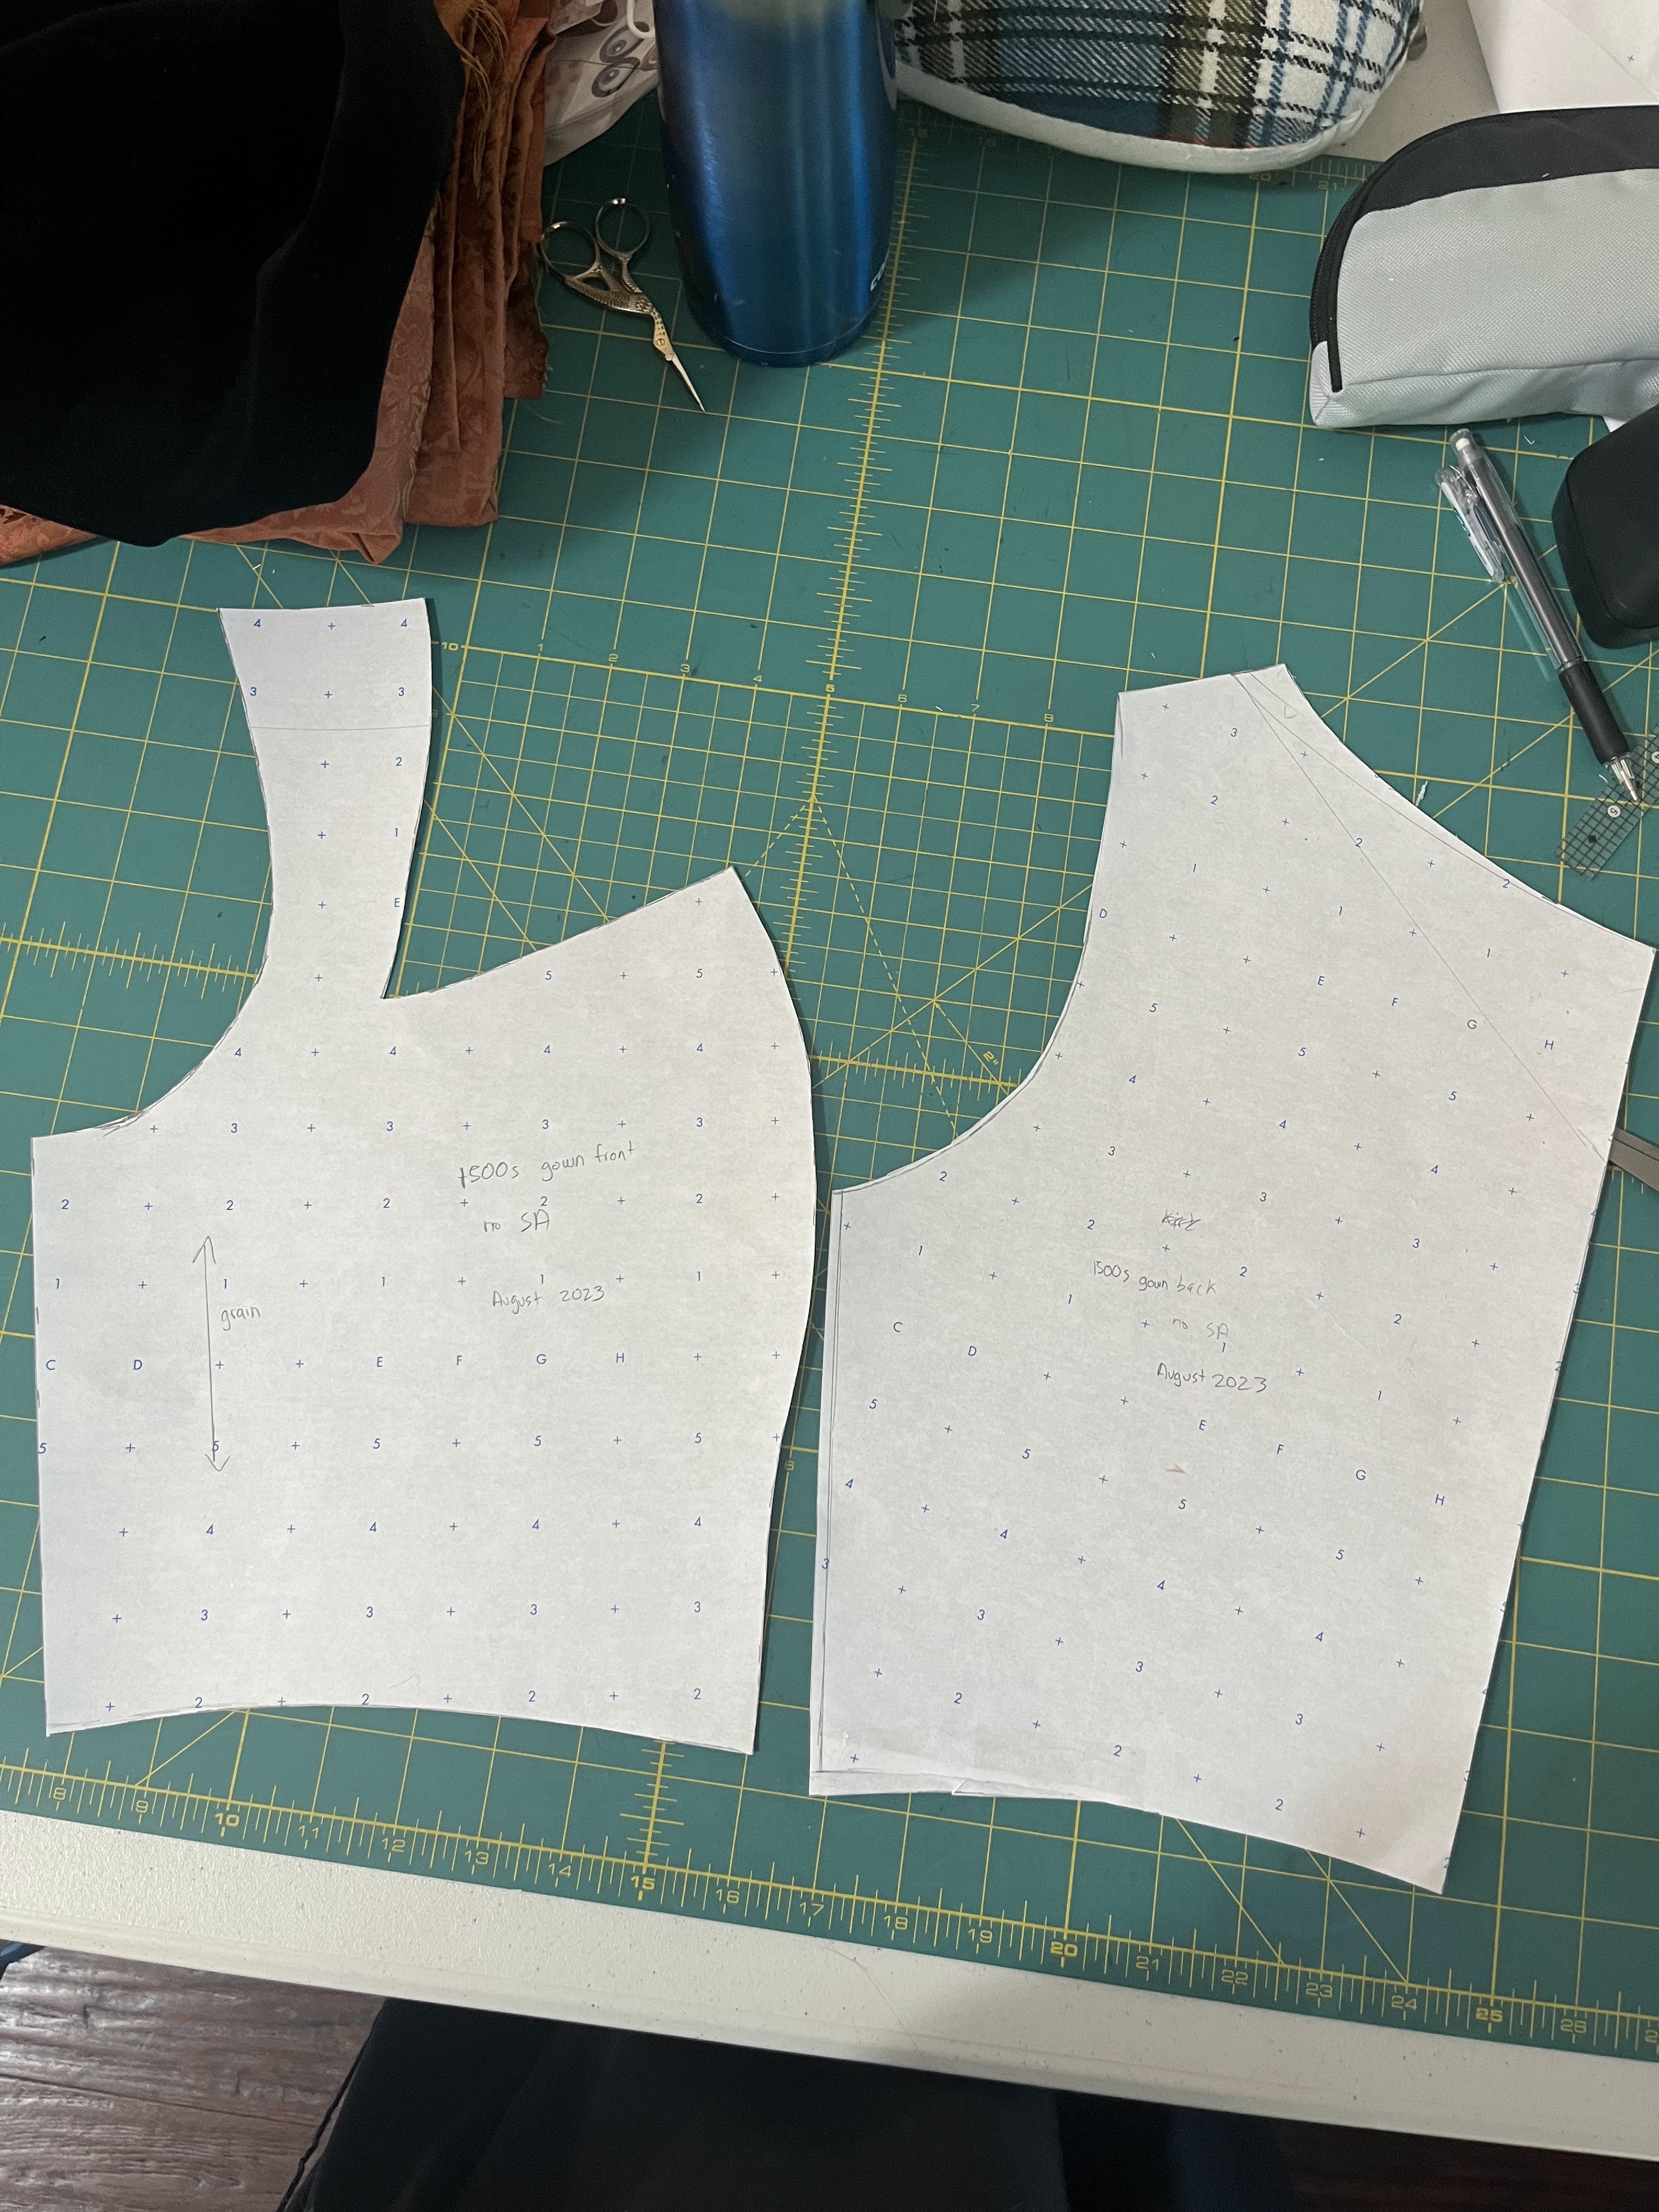
1: Bring this corner in a bit more to cover the kirtle strap. (If I ever make a later tudor gown it will need a new kirtle that also goes out further because those are wiiiiide at the neckline). Also I planned to bring up the center point higher to make it more pronounced like my inspiration images.

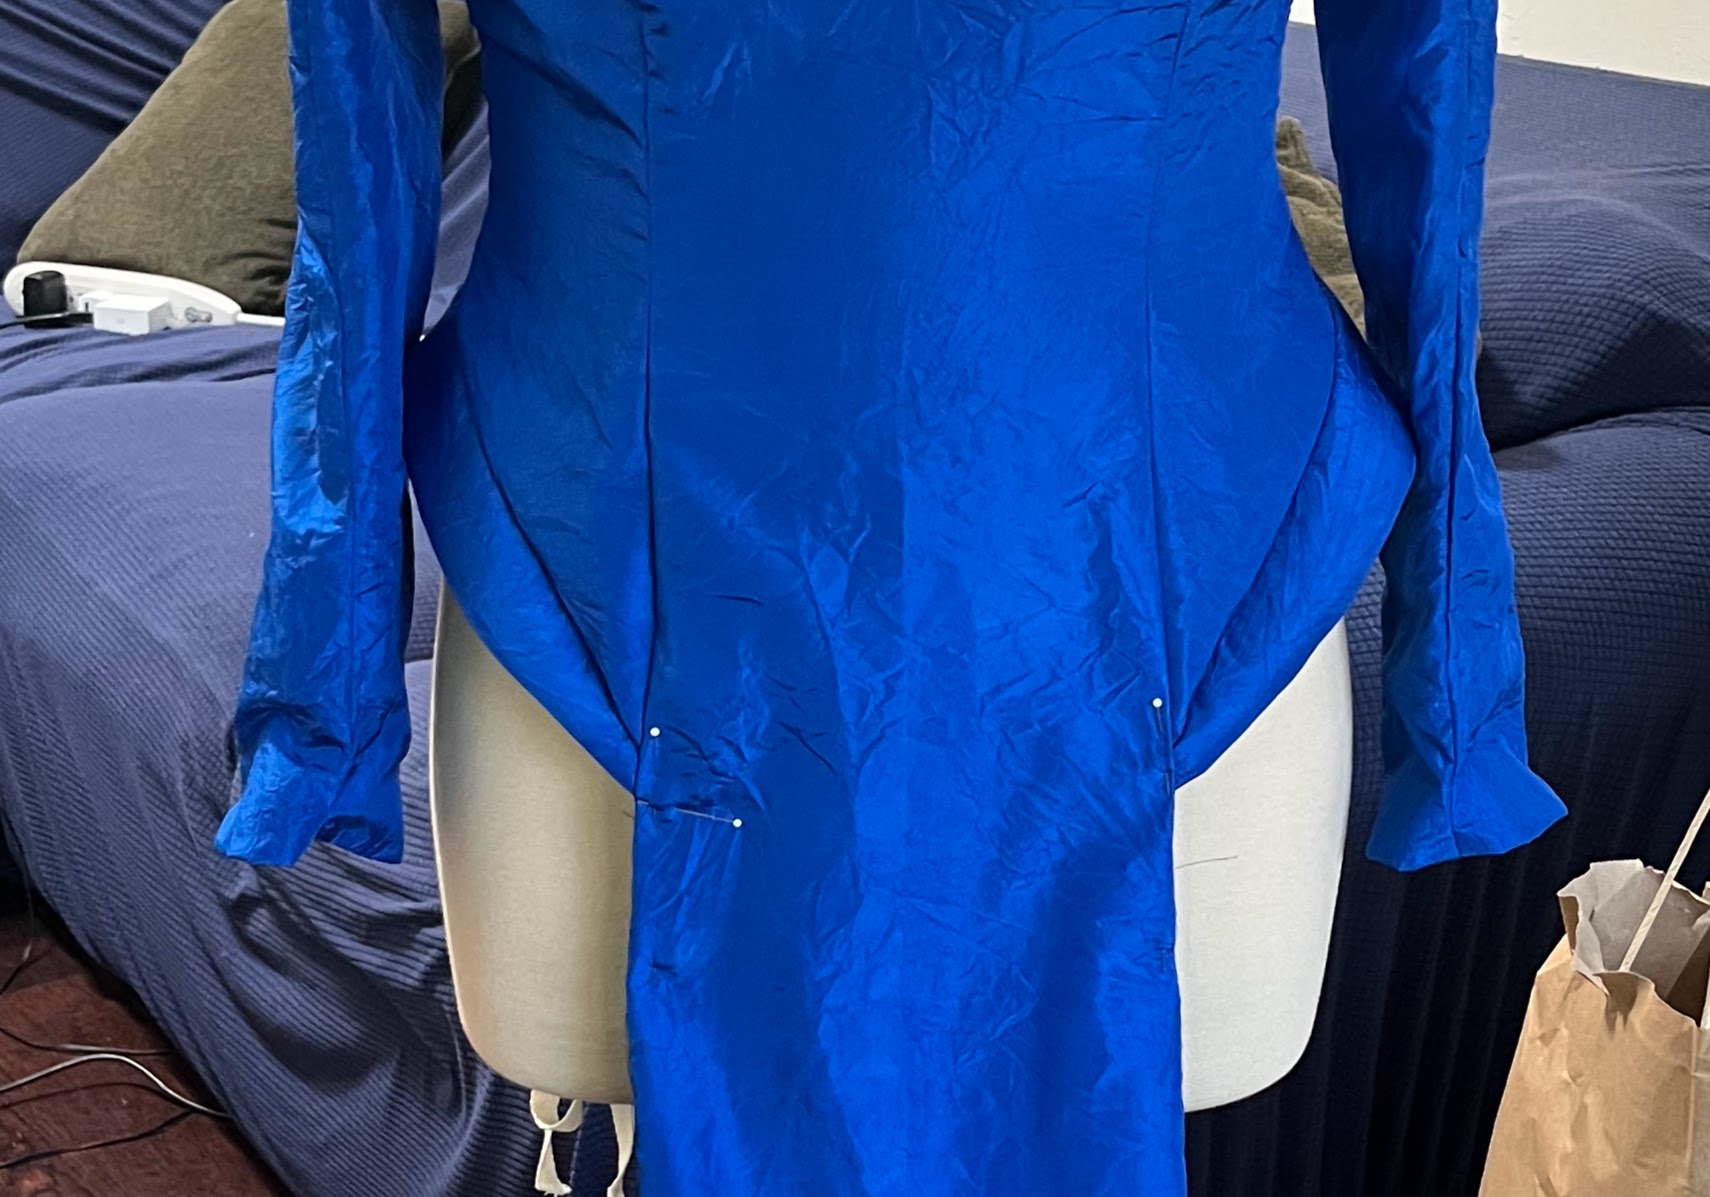
2. I pinched a *whole inch* out of the back necline to tighten it up and keep the shoulder strap on. How this was necessary I have no idea but hey do what the fabric tells you.

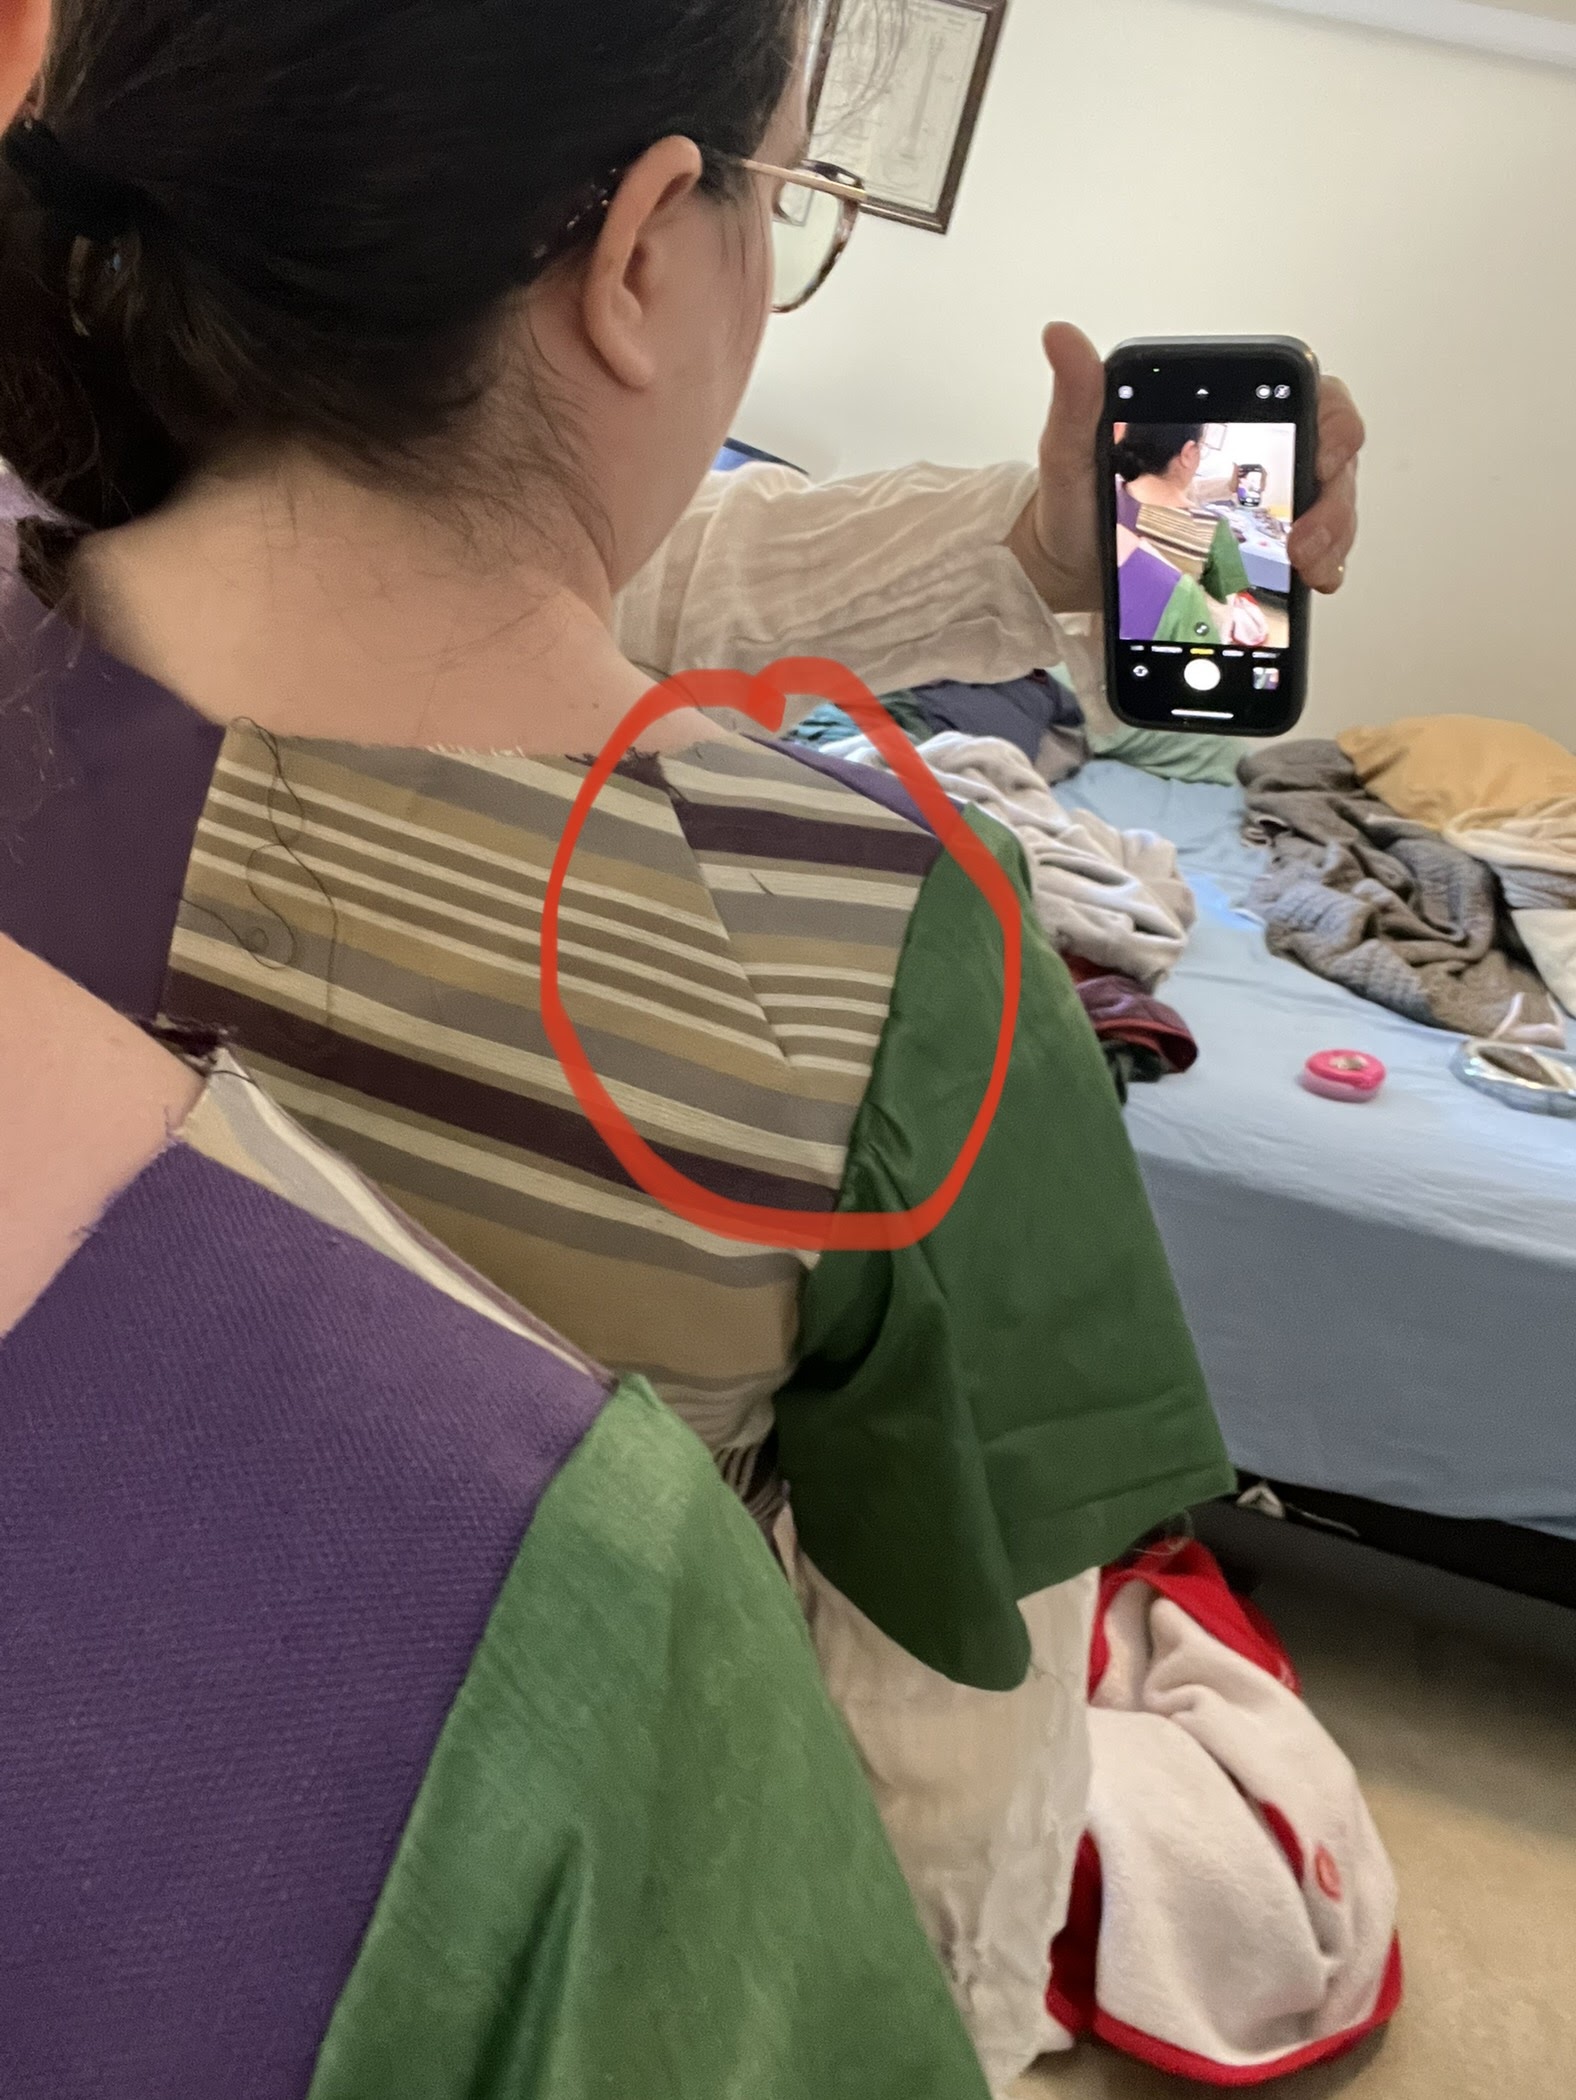
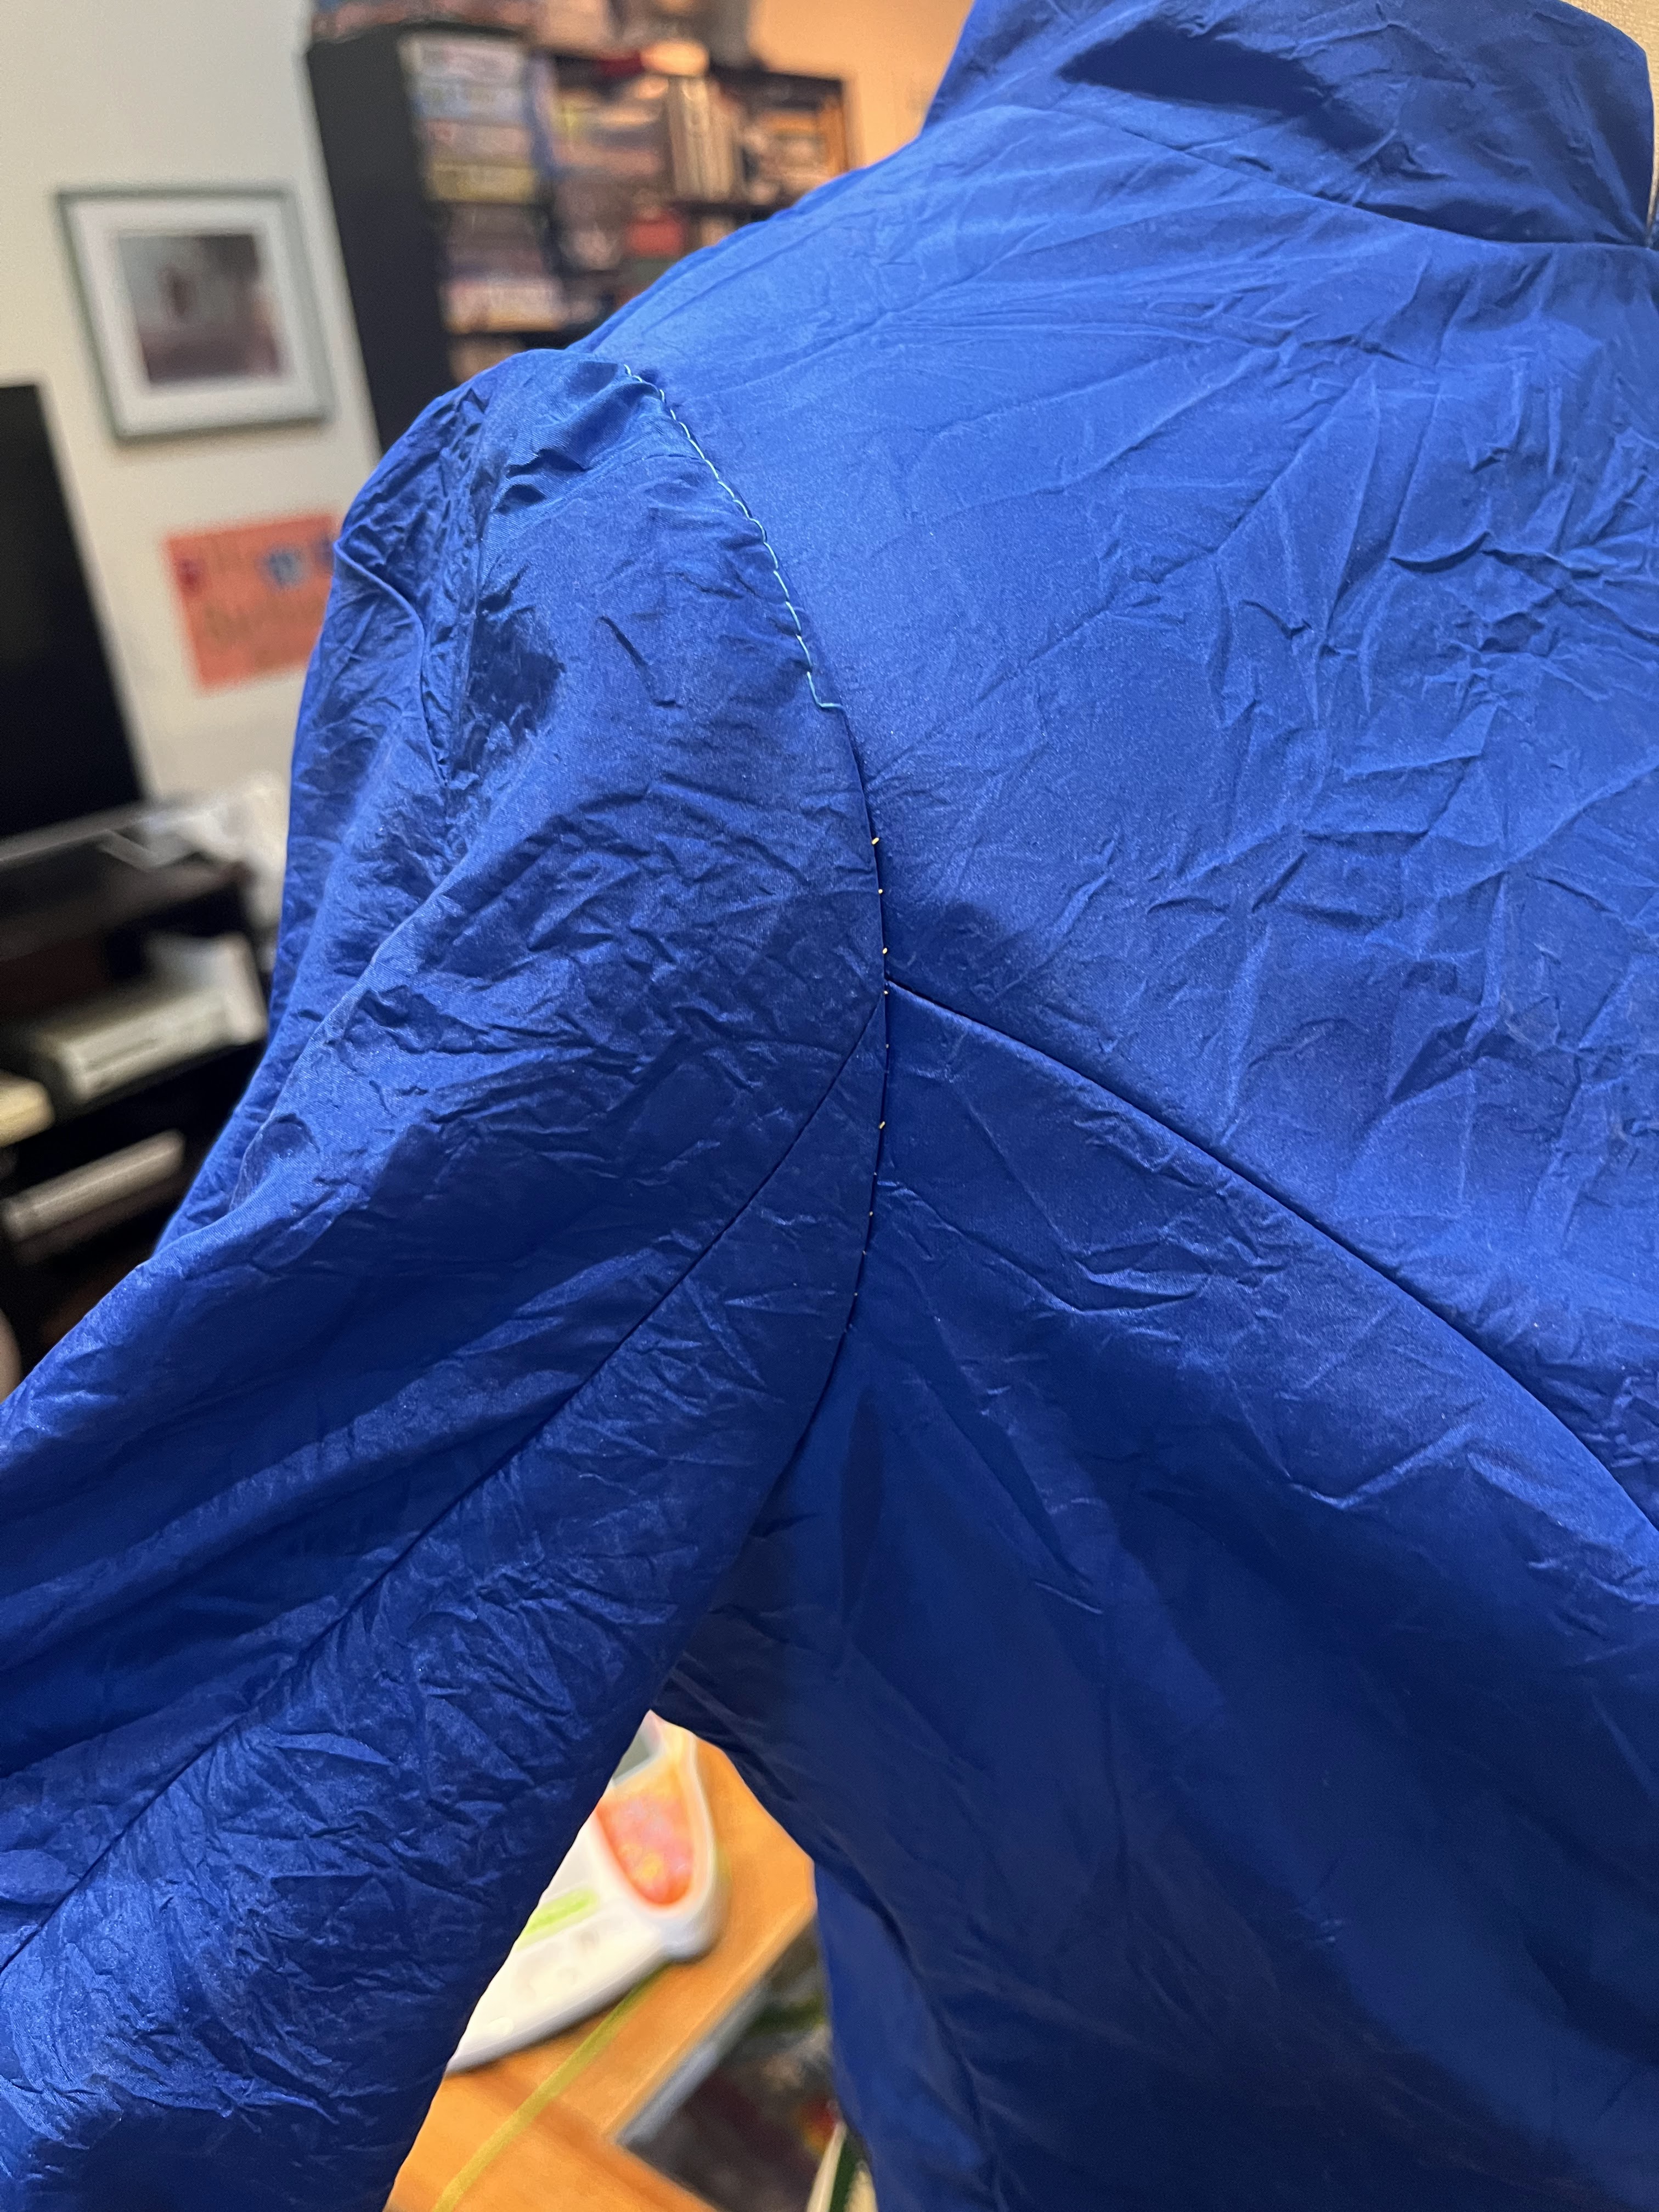
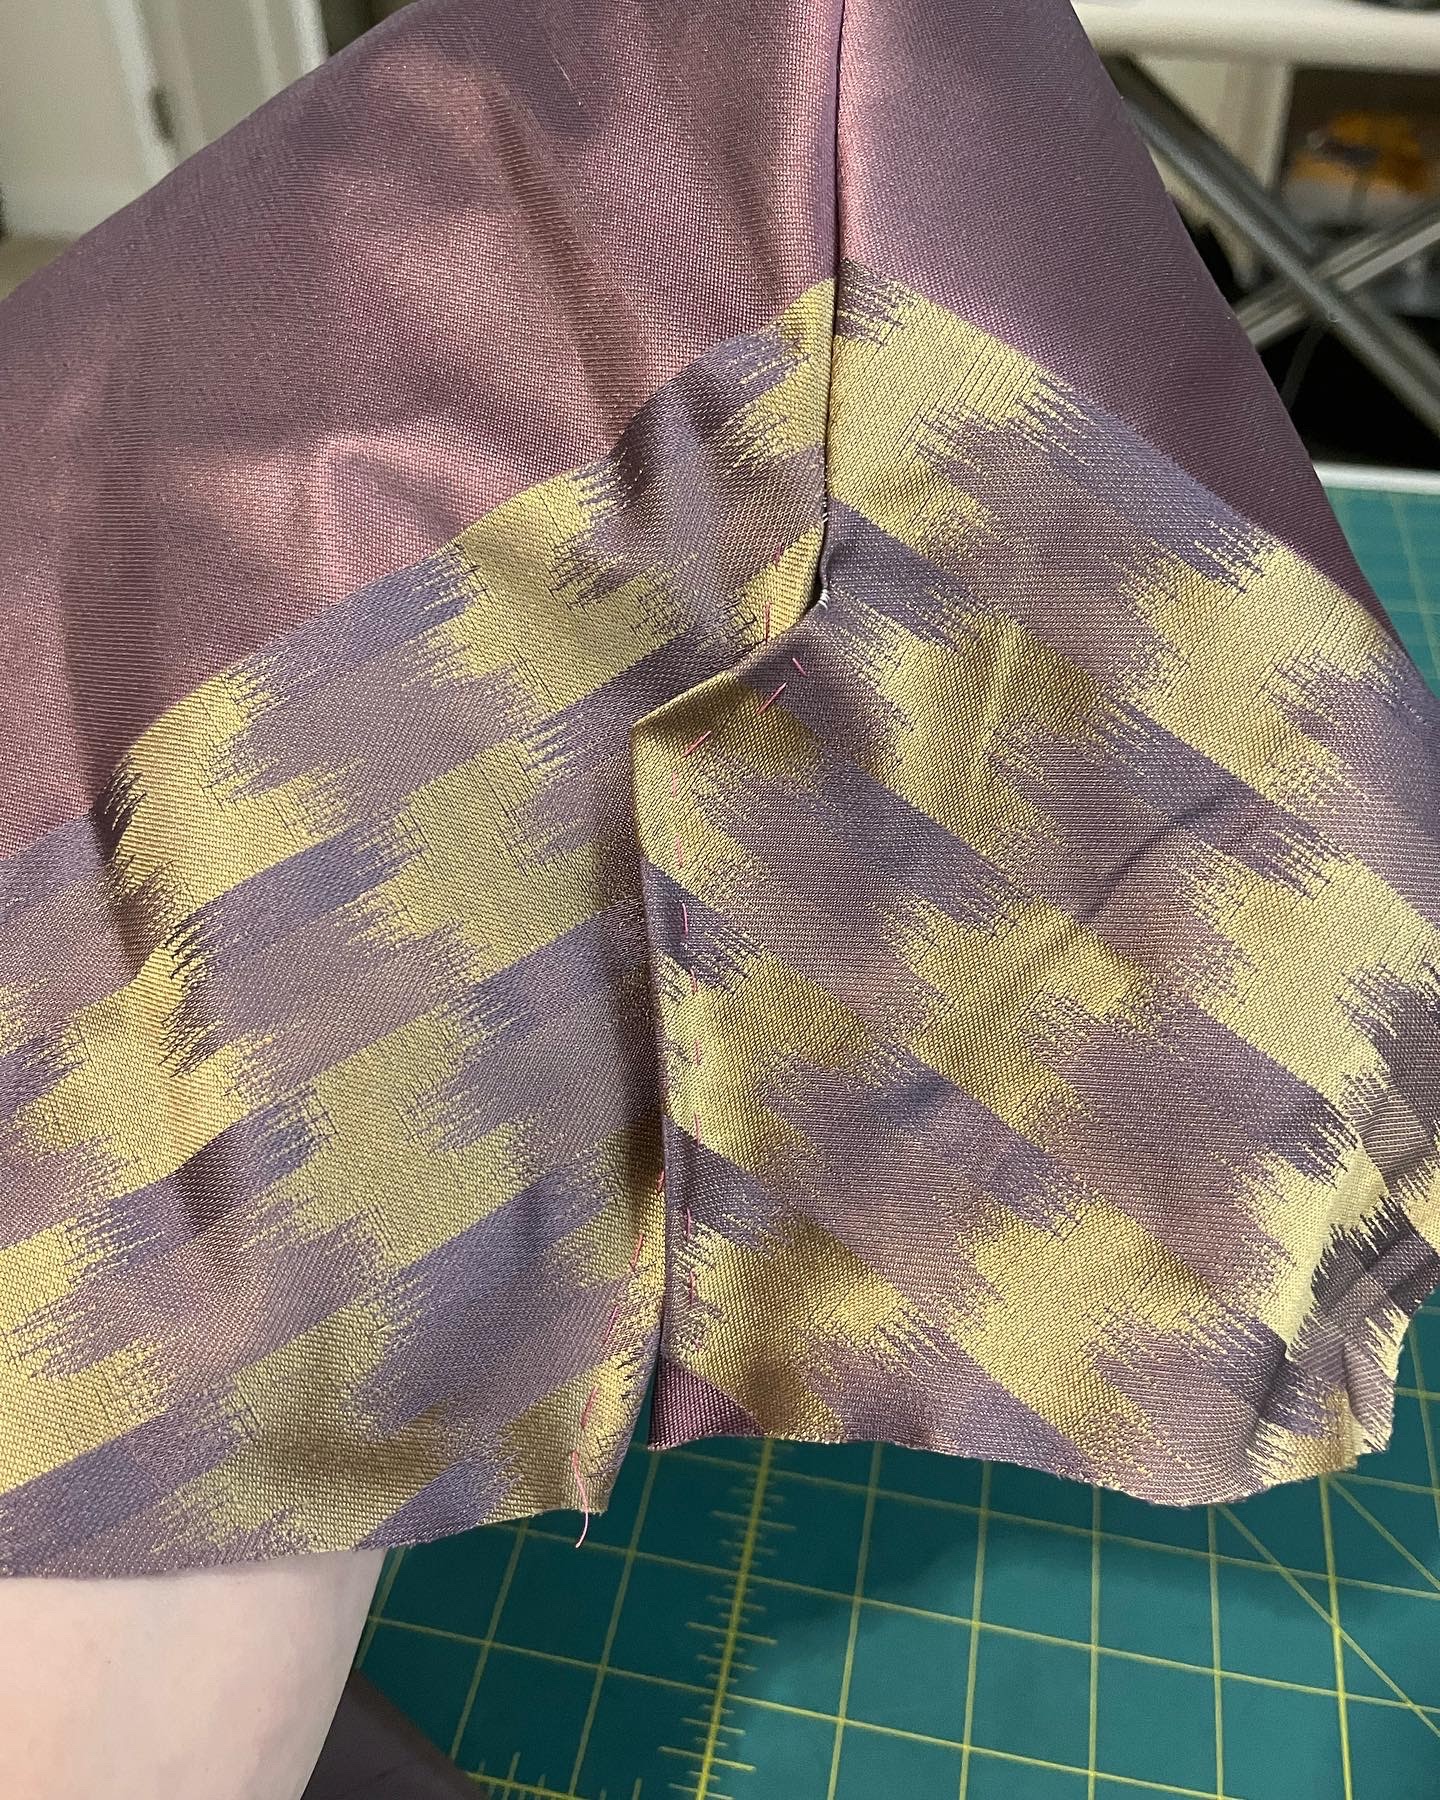
3. I have a lot of draglines at this armscye, probably because the Queens Servants sleeve draft has a super shallow sleeve head. But I decided to leave it in order to have more mobility in the final gown.

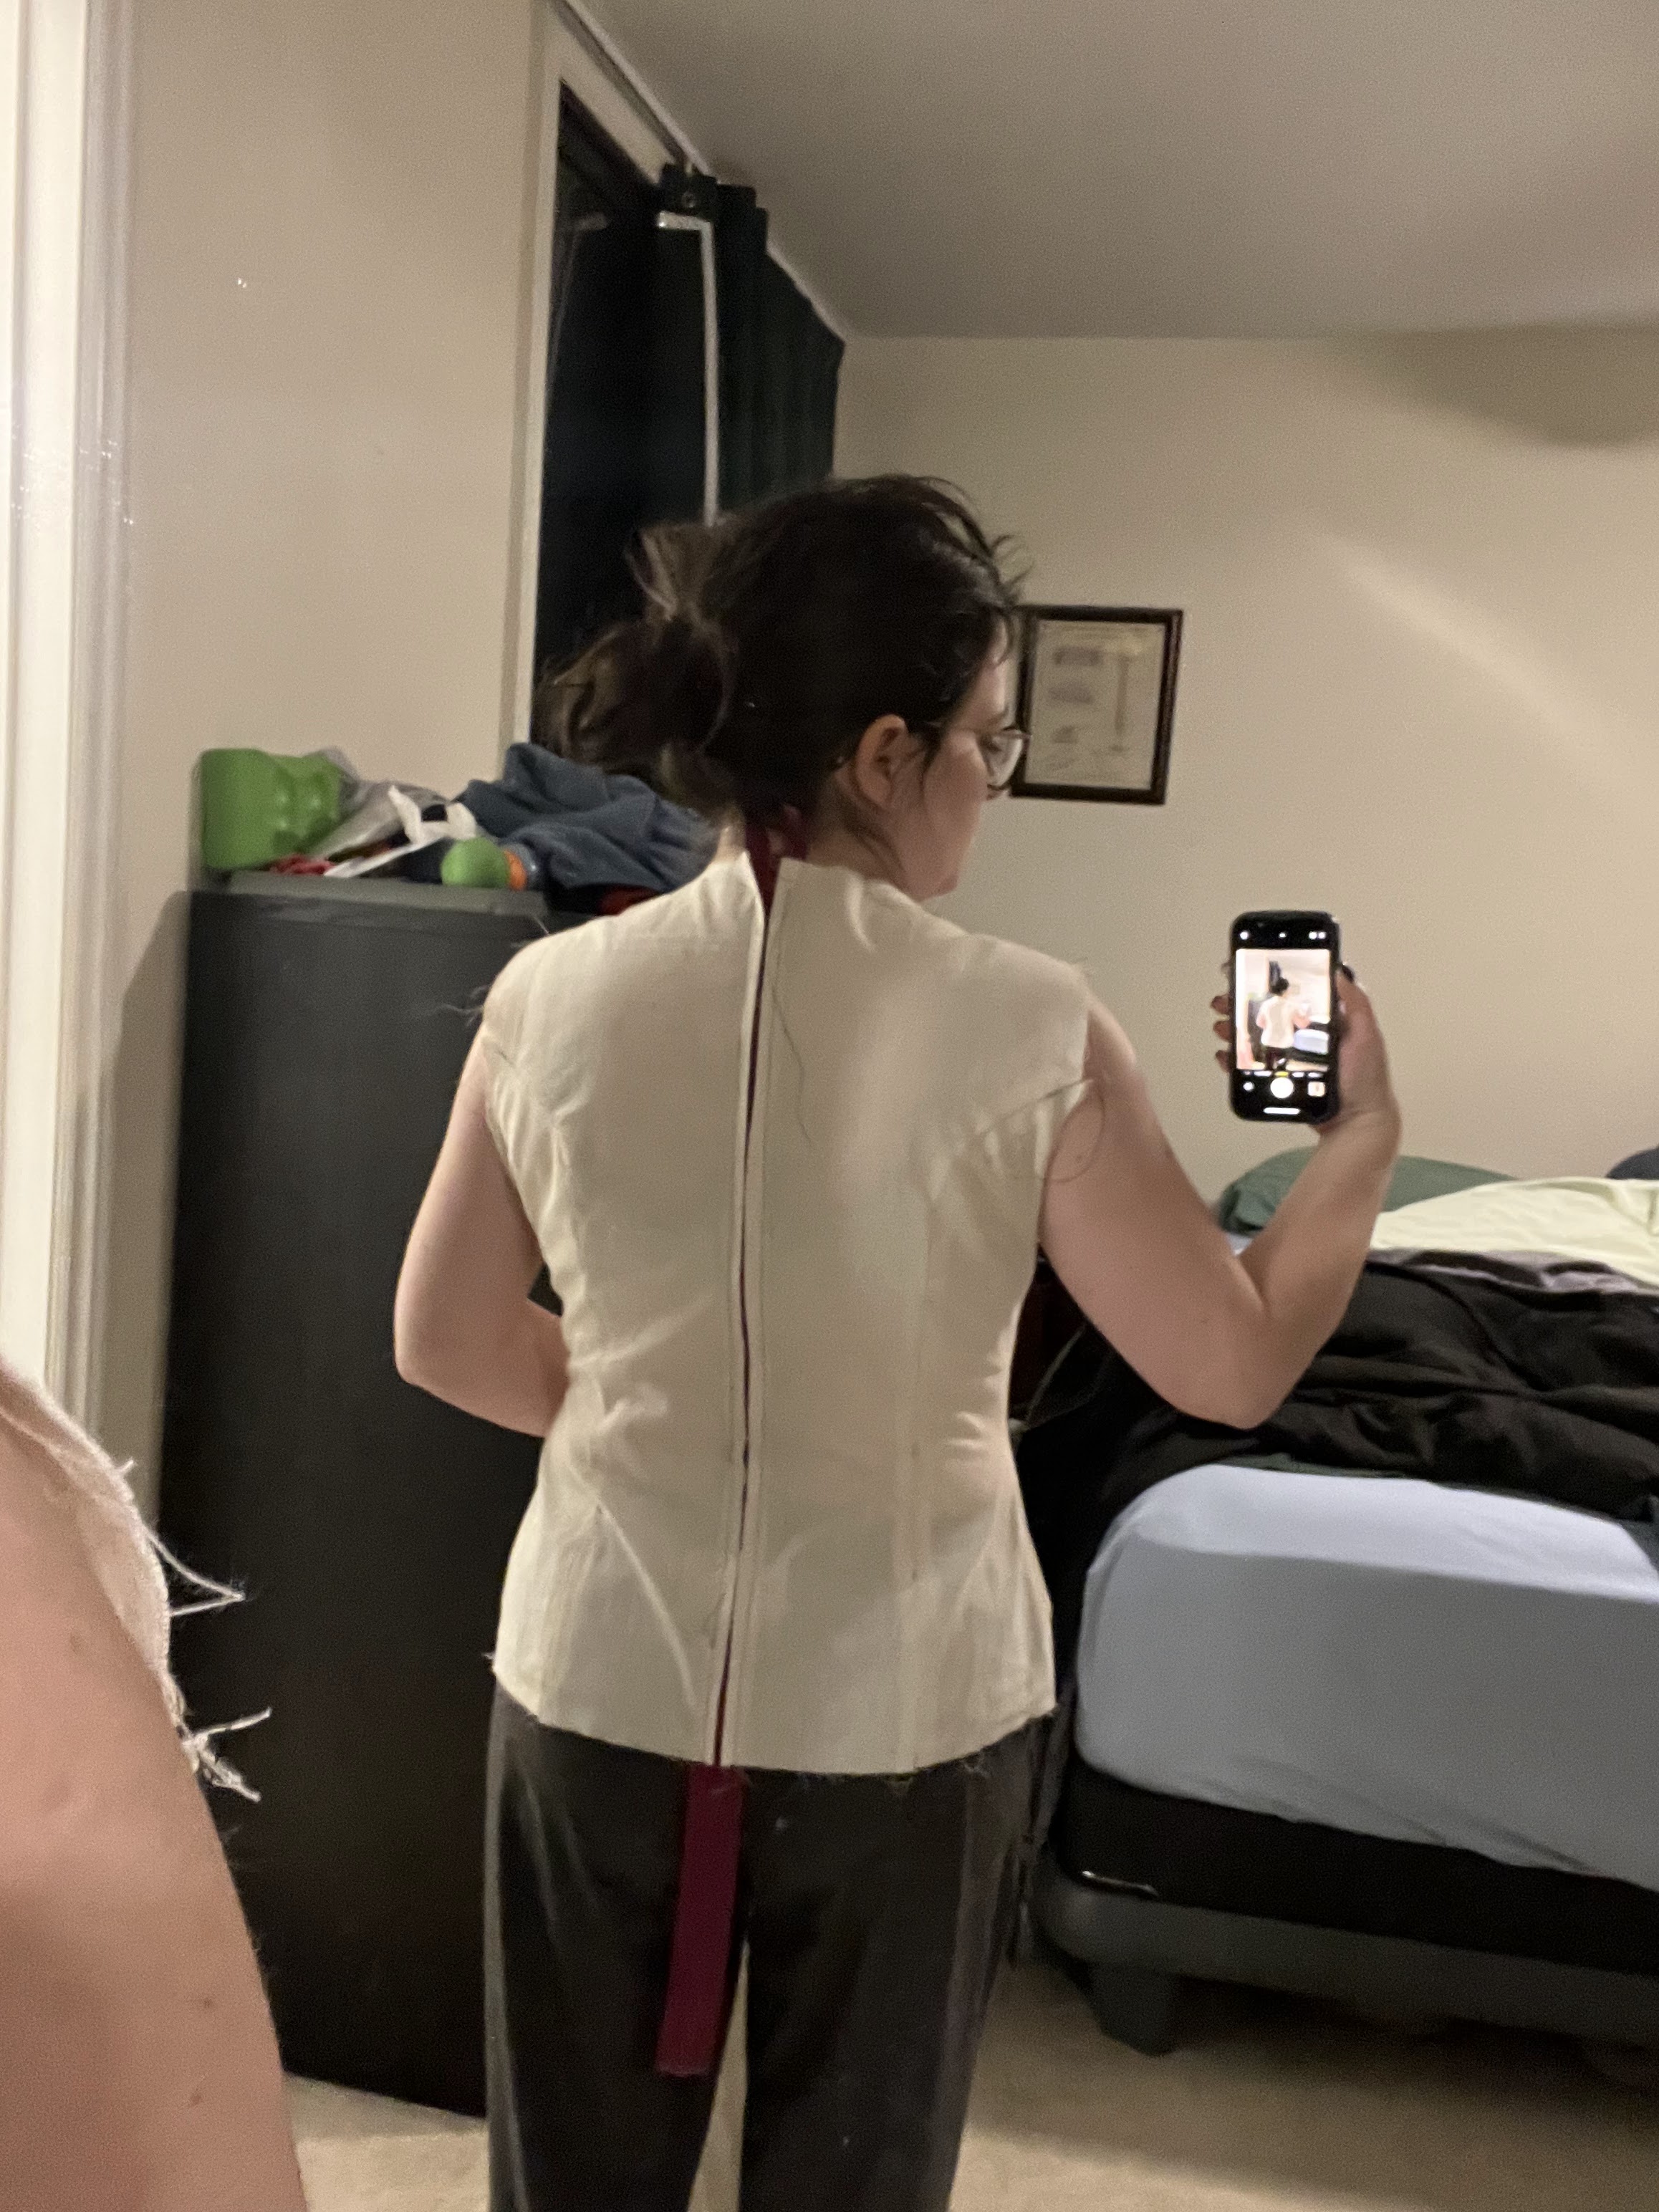
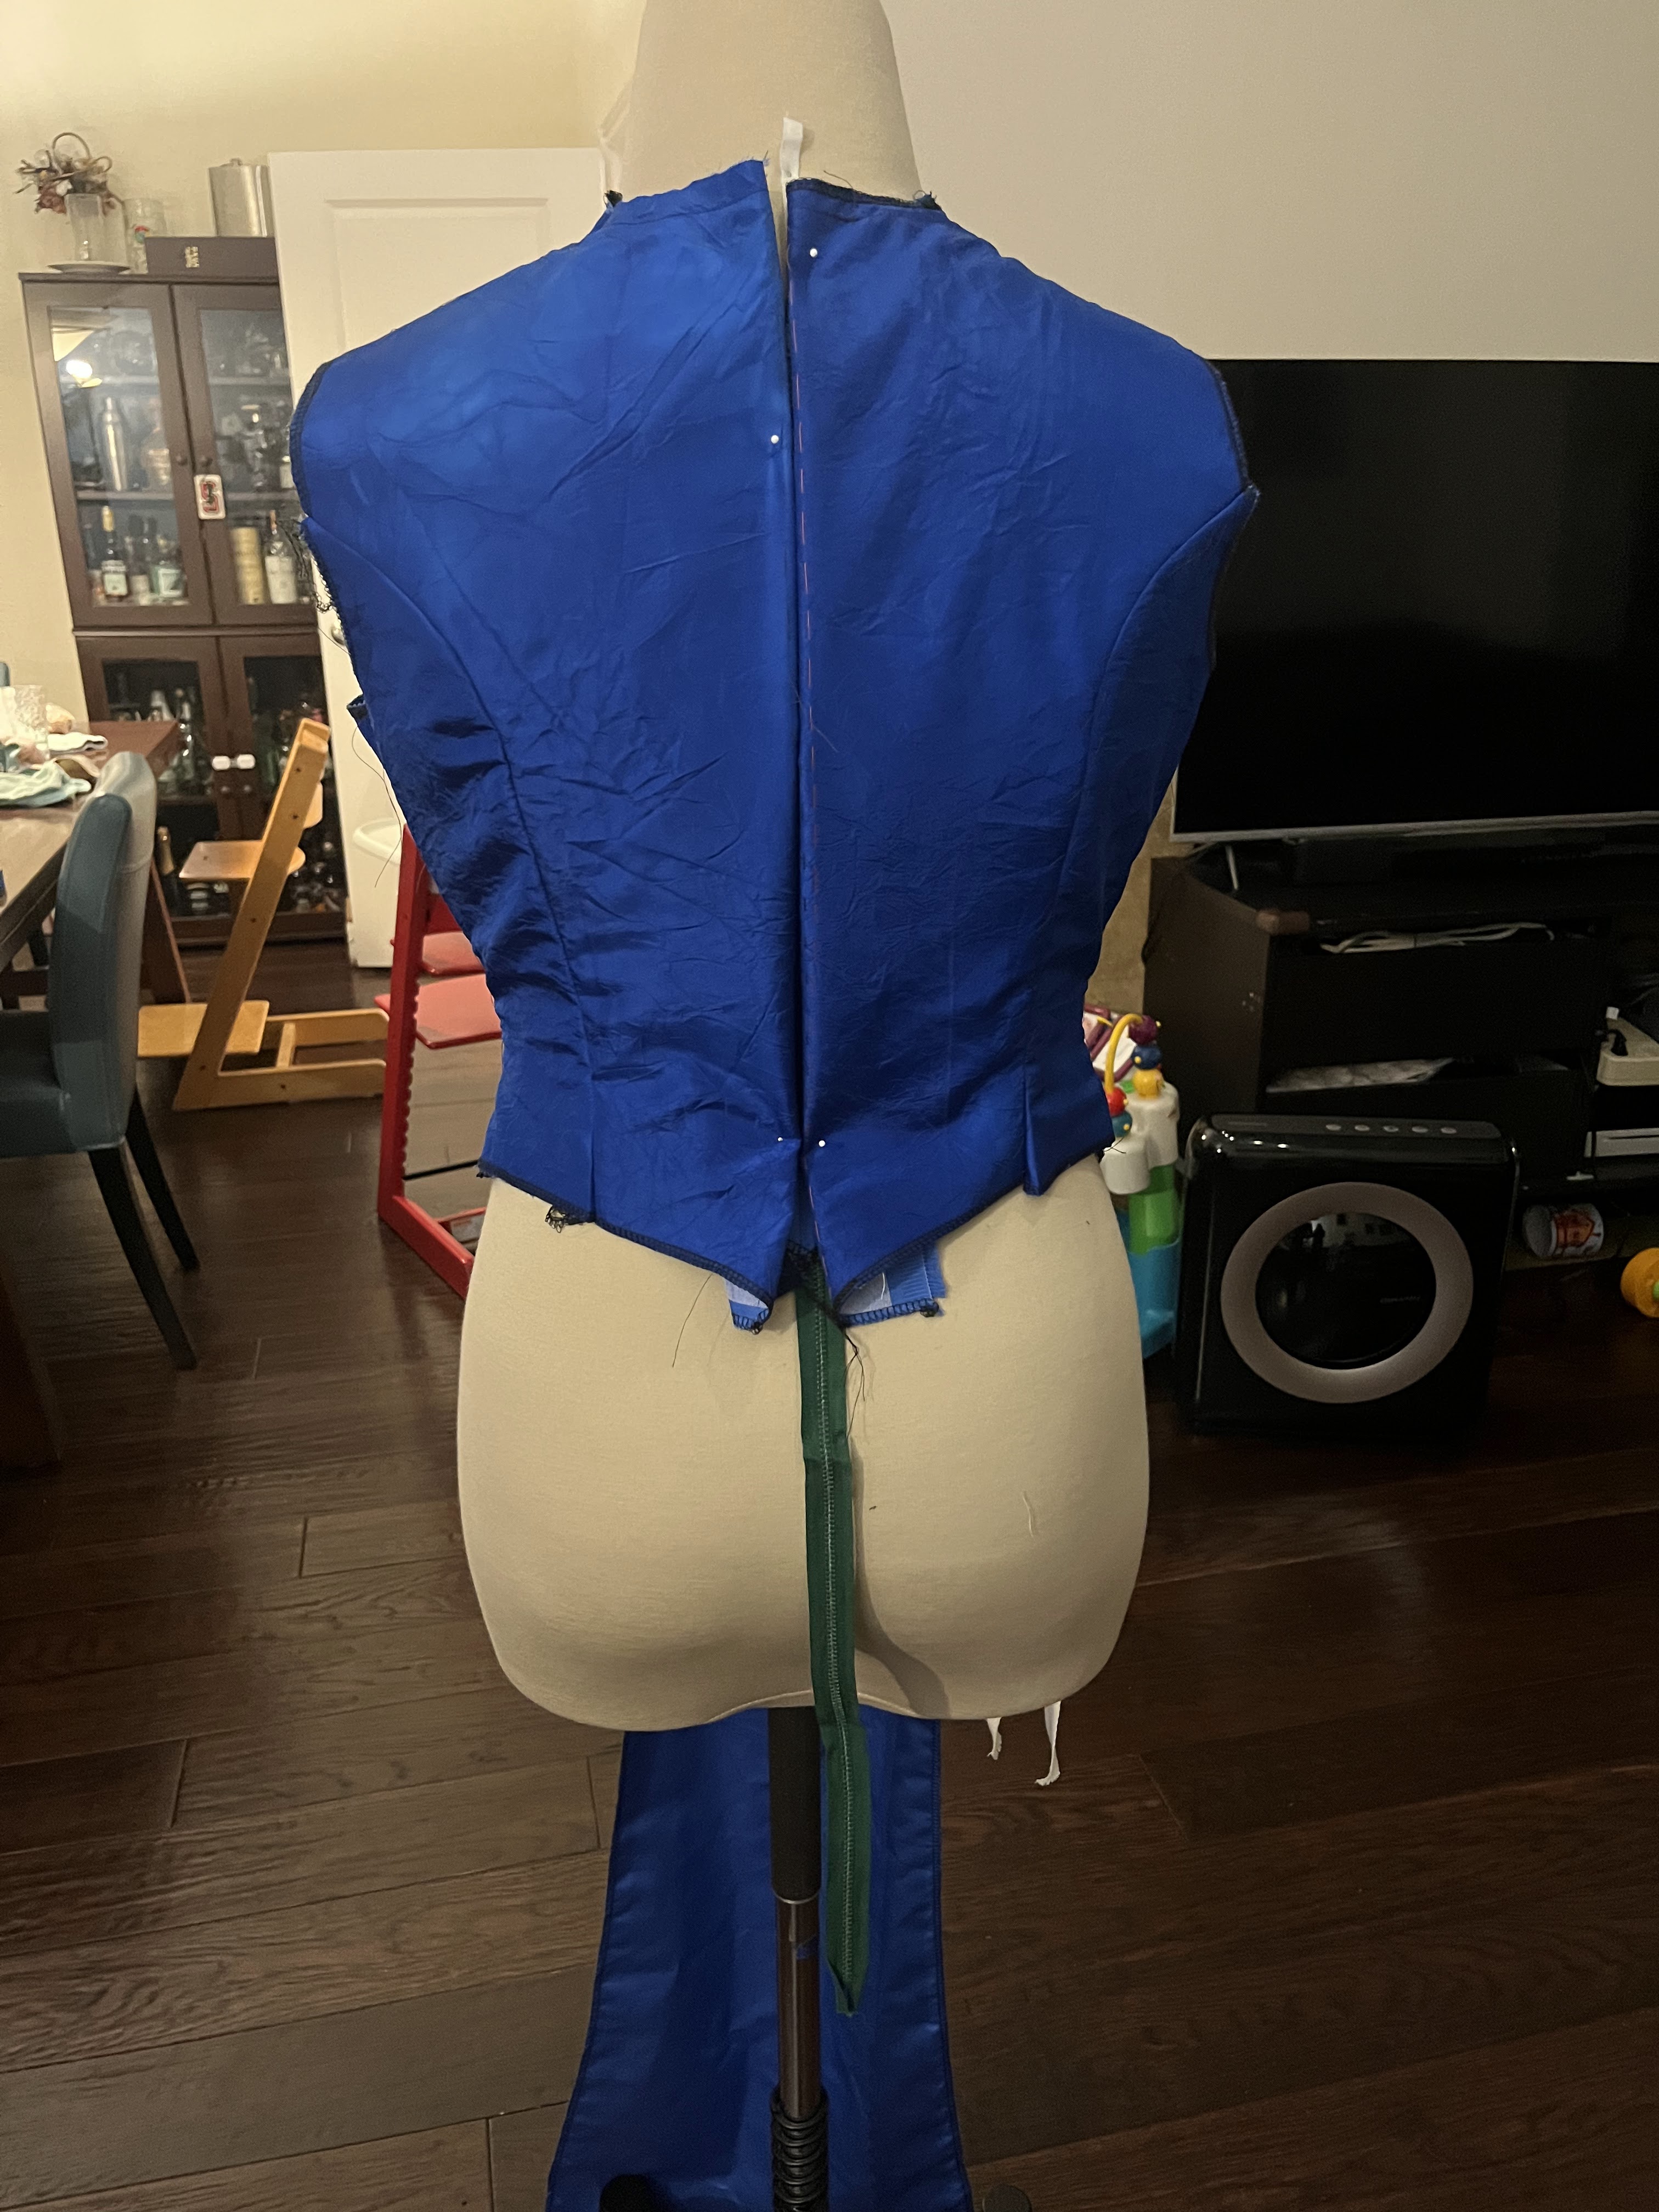
Pretty pleased with the end shape of the pattern. The acute angle where the strap meets the bodice is exactly what I’ve seen other patterns look like.

yes you could try to make your own pattern draft off of this instead of The Queen’s Servants, but it won’t work for you unless you are 4’11” and shaped like a cylinder

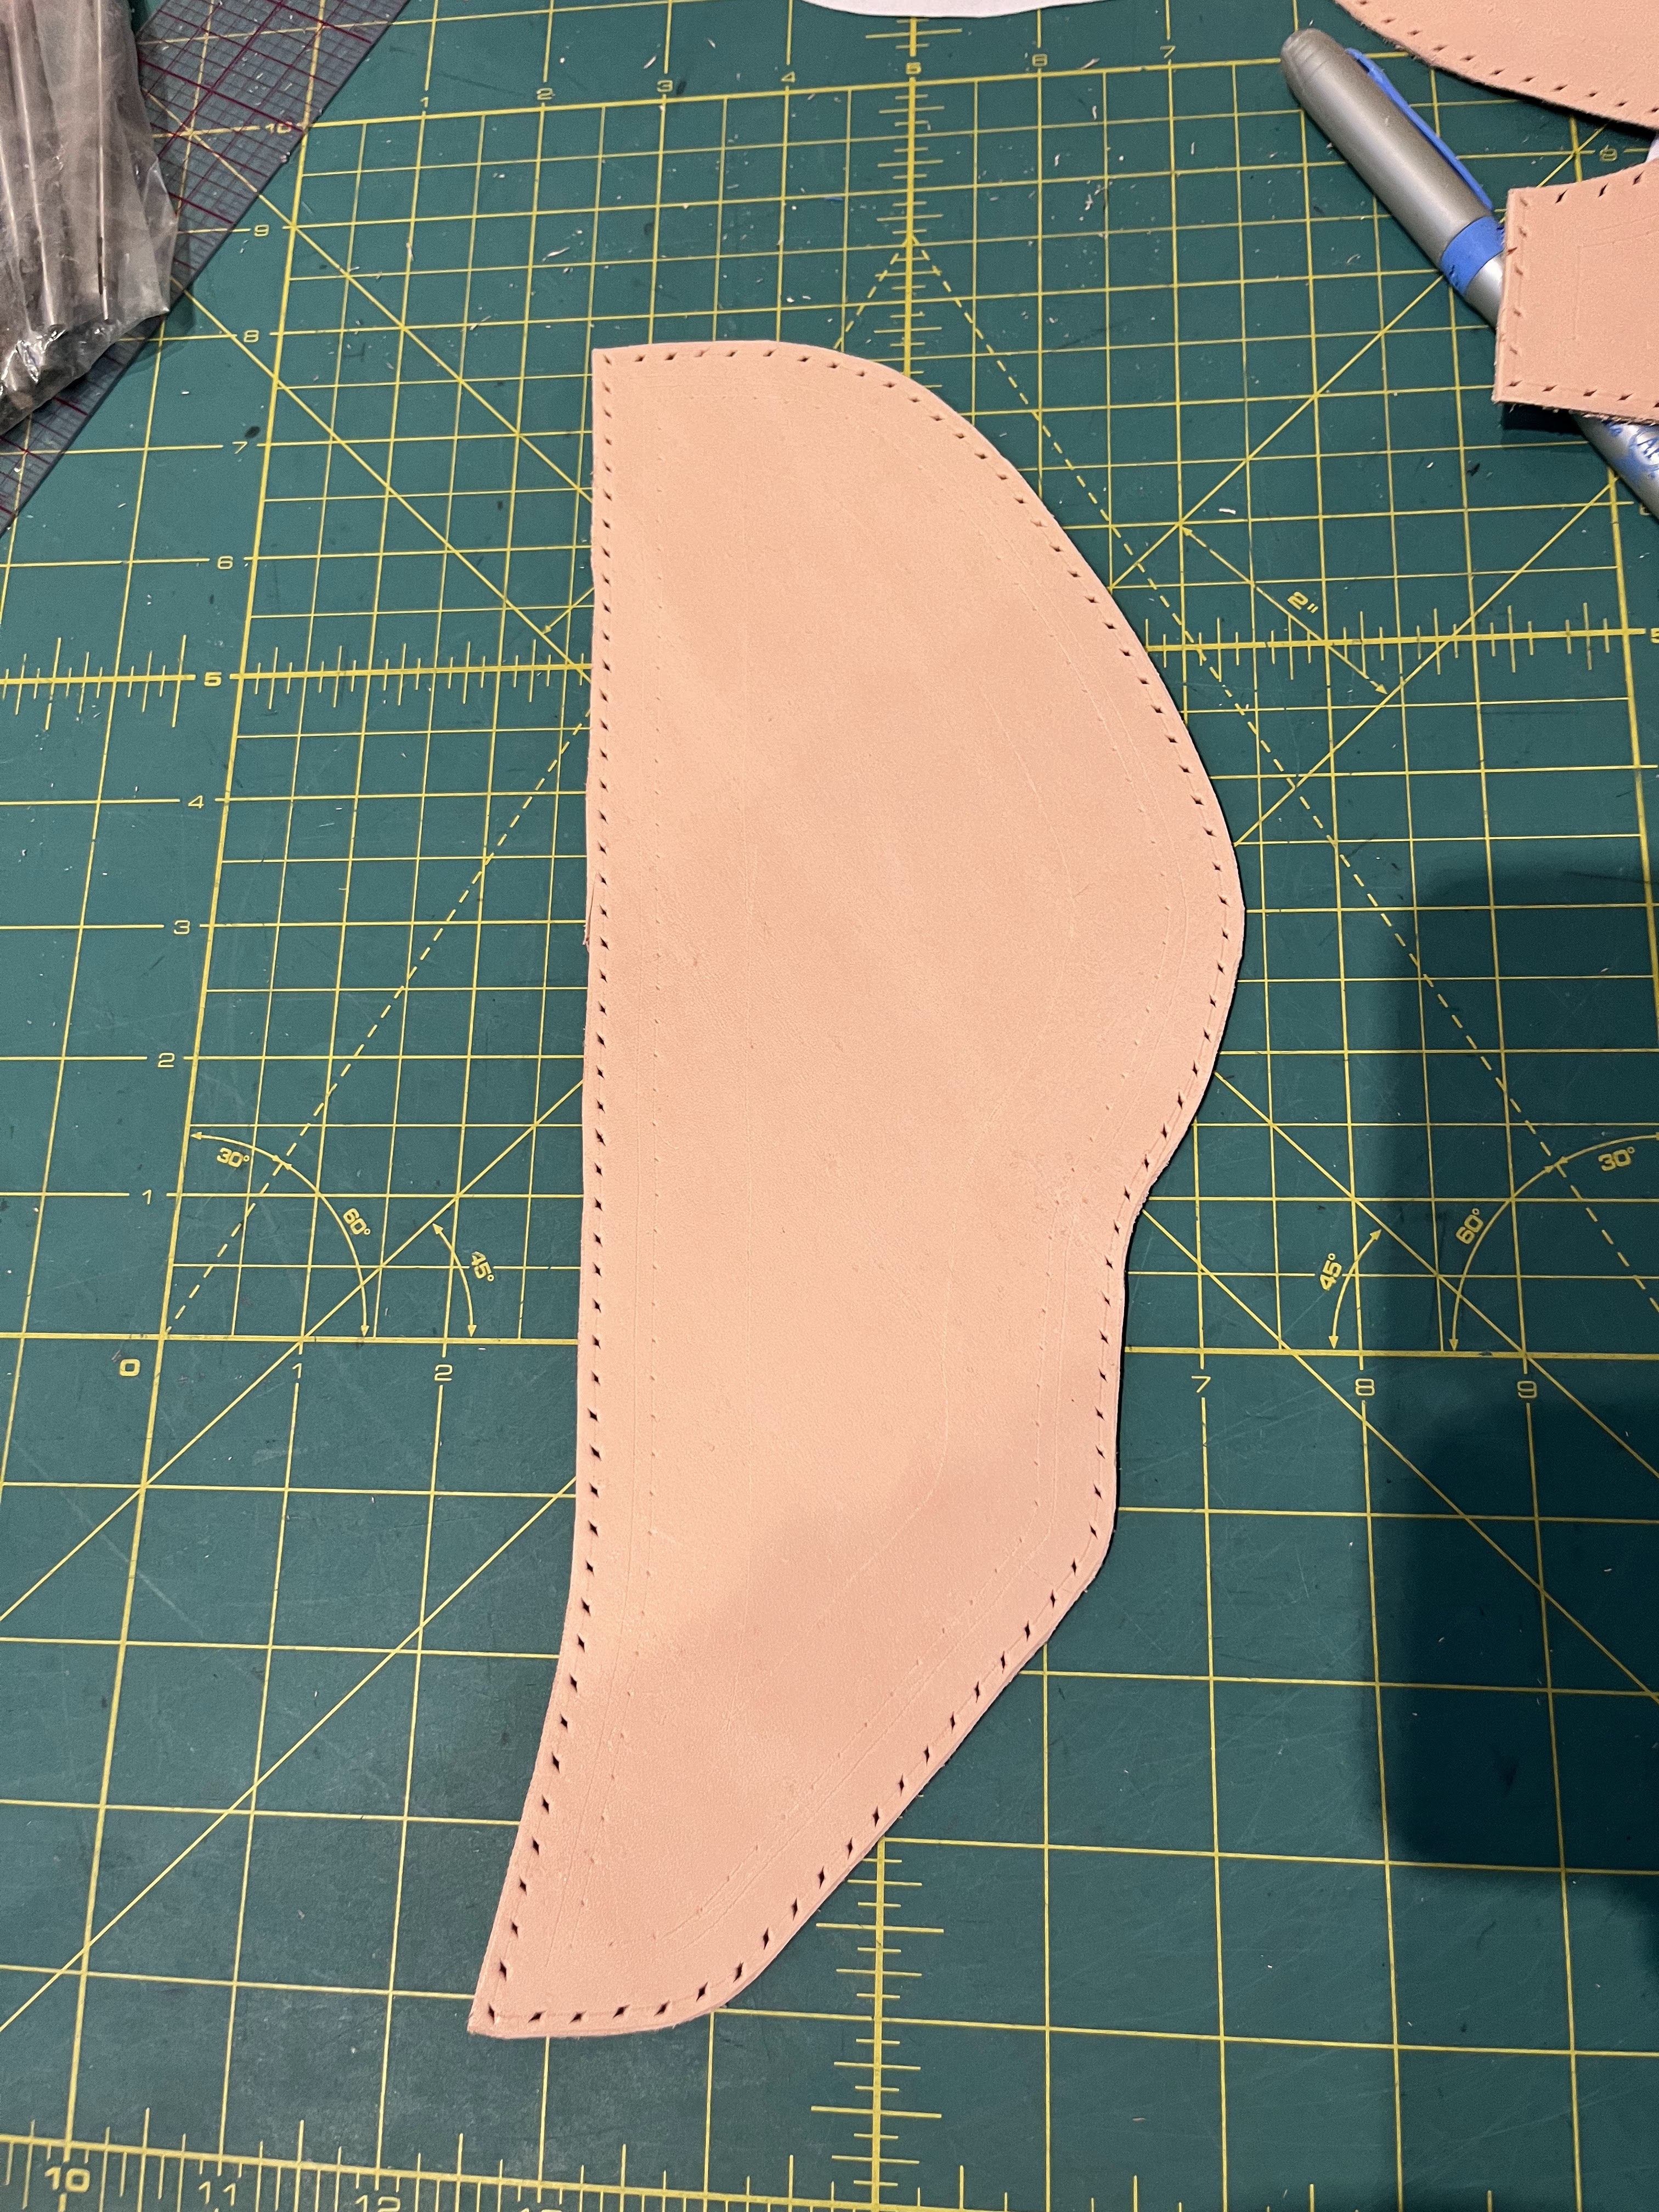
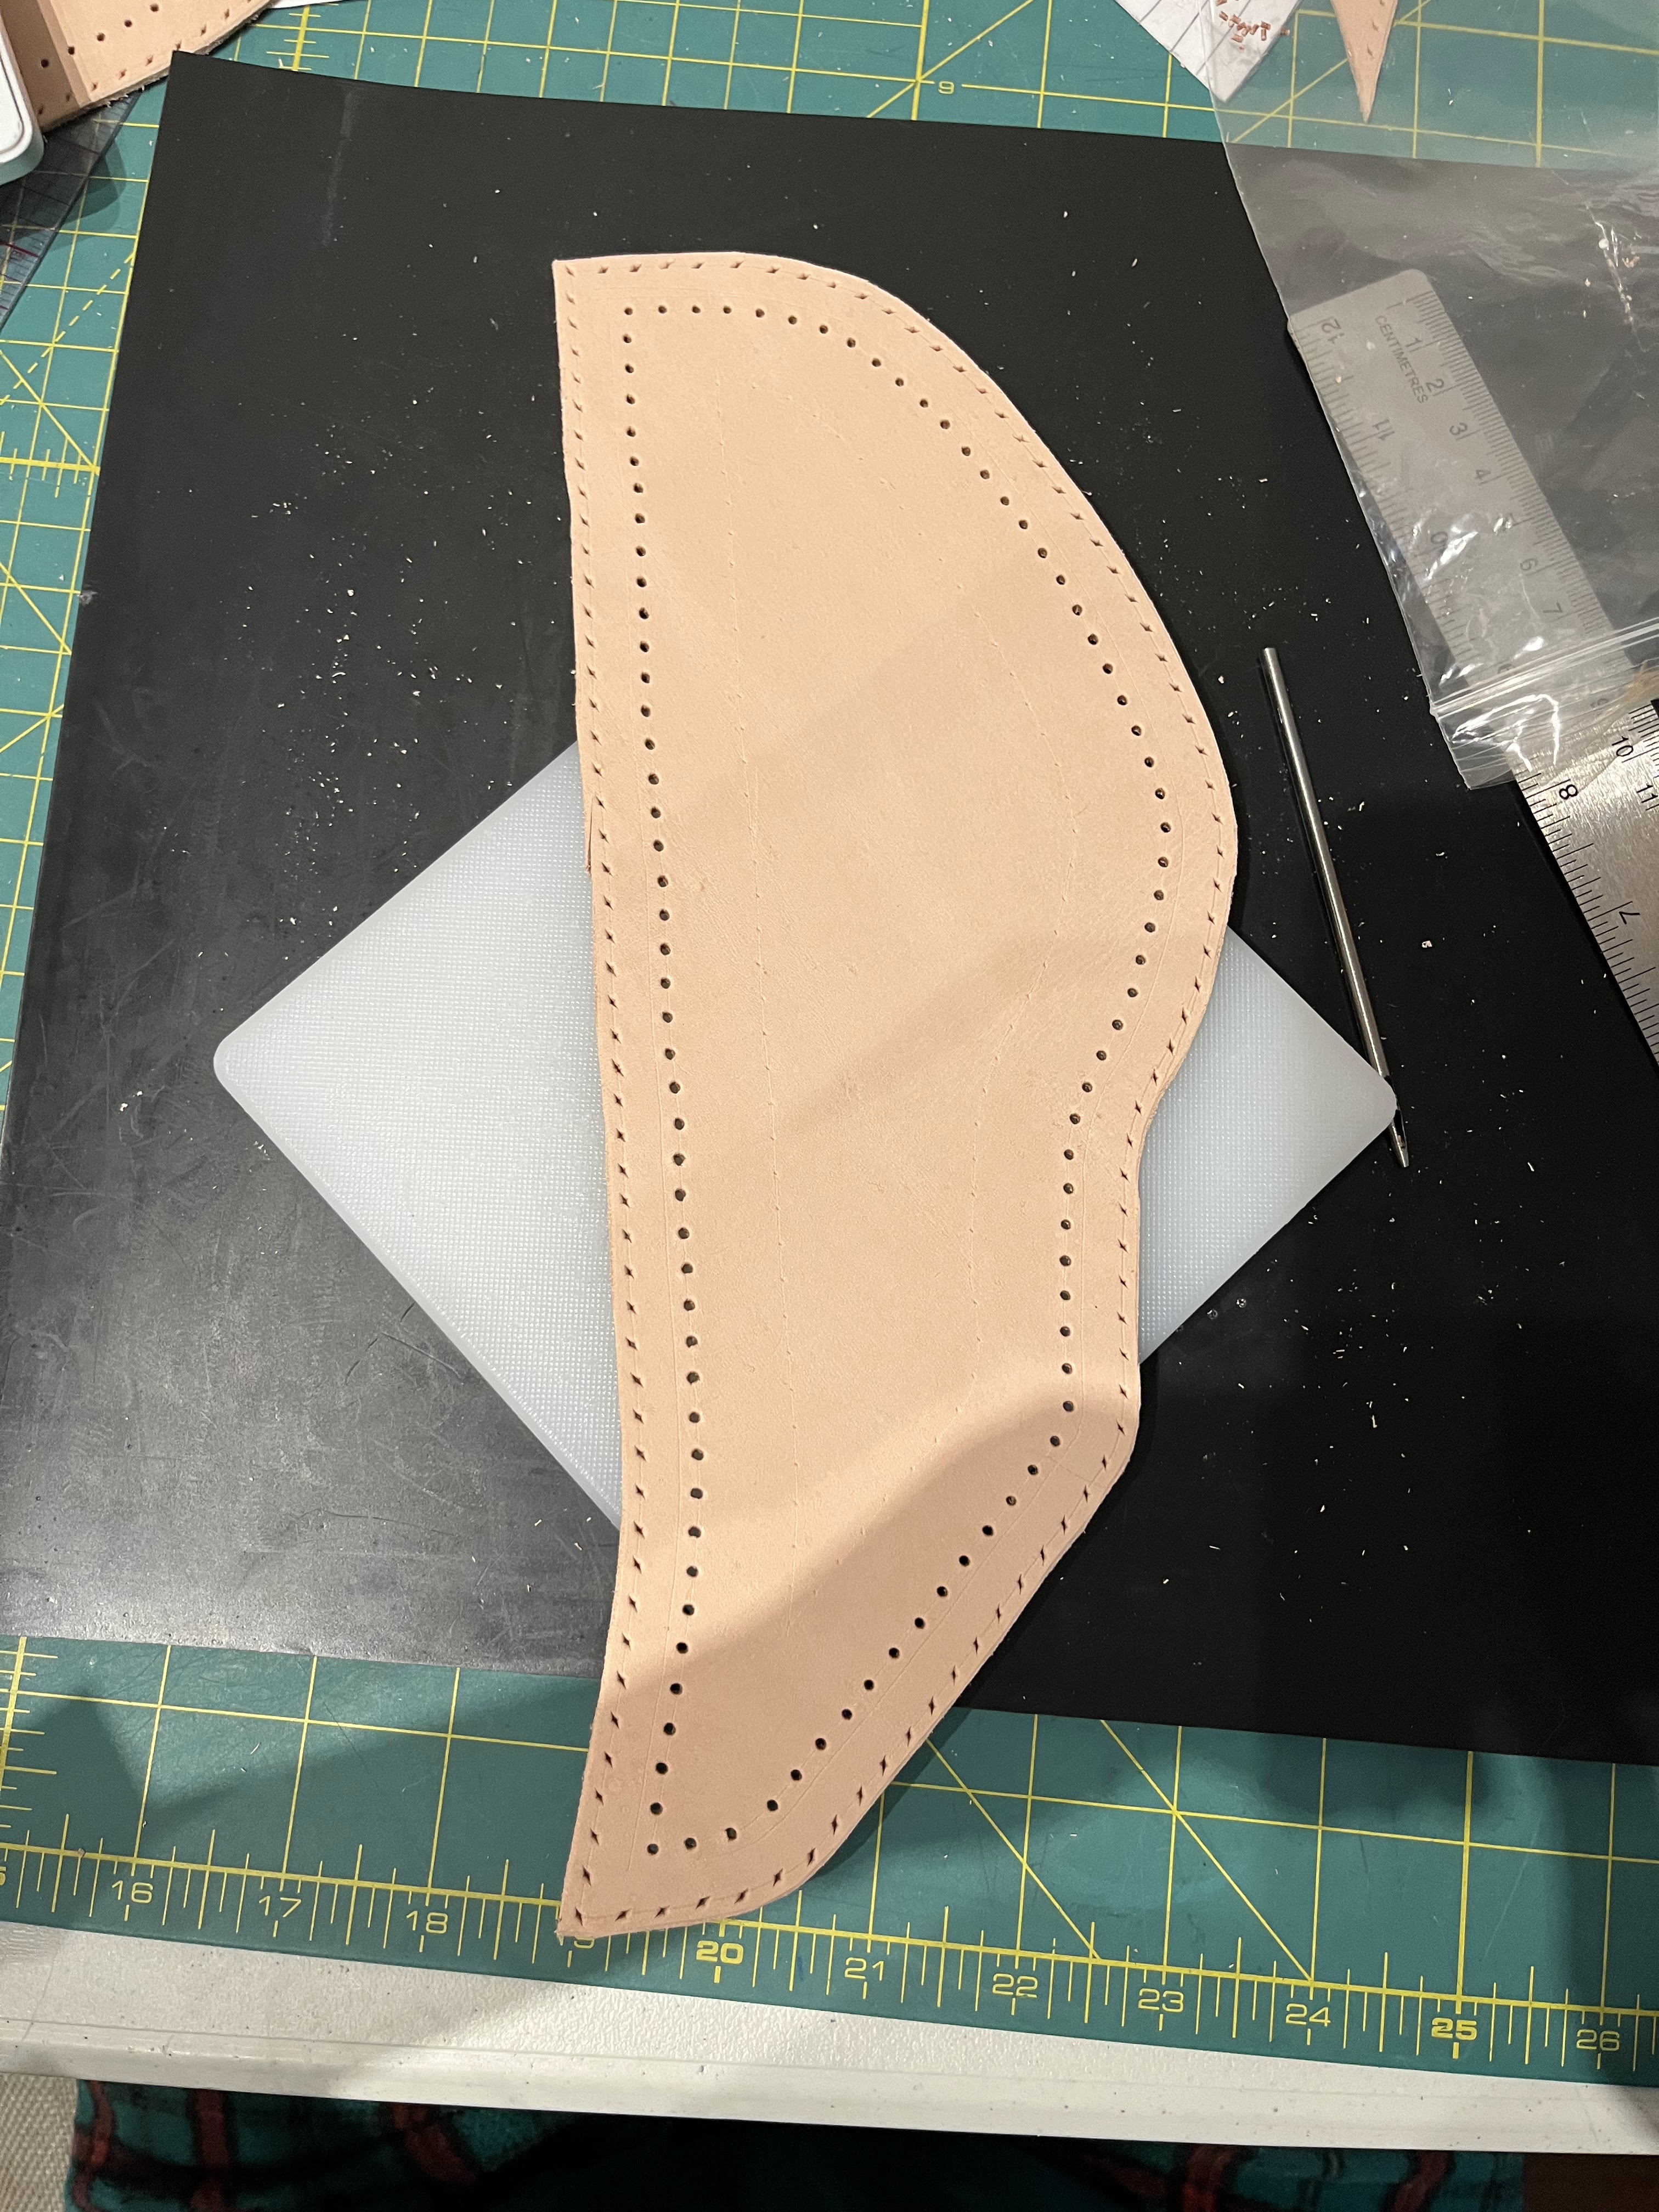
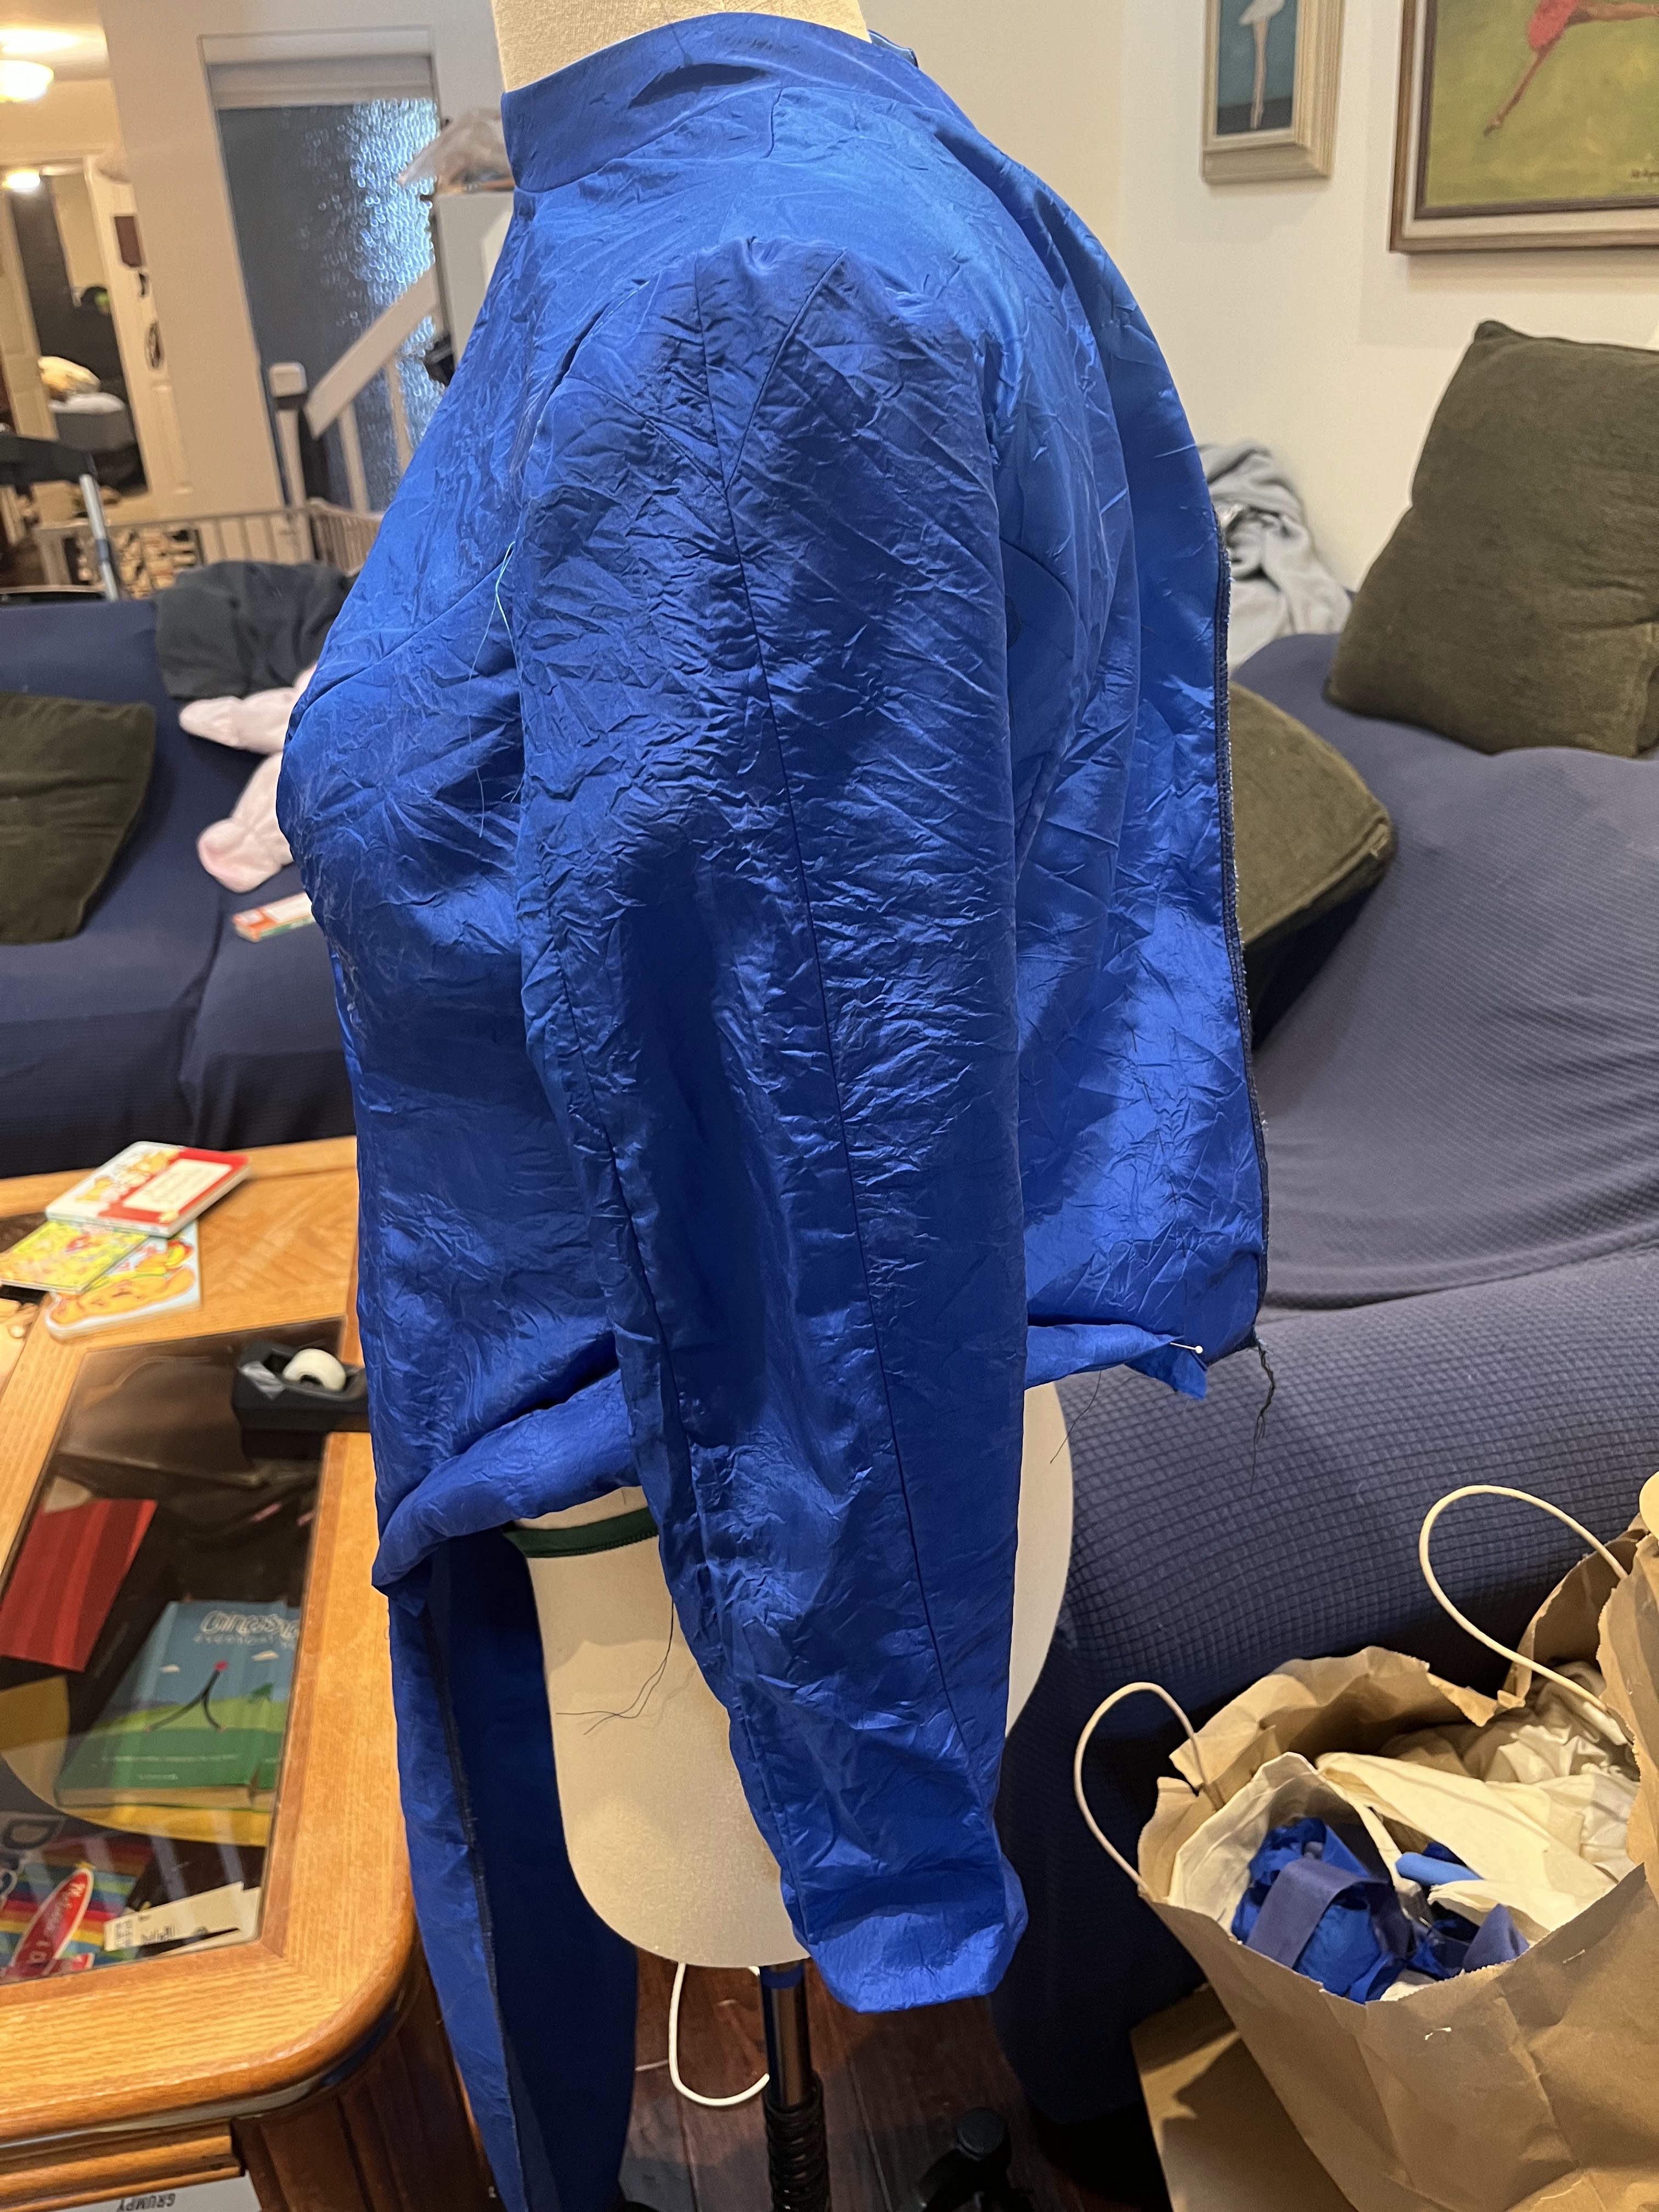
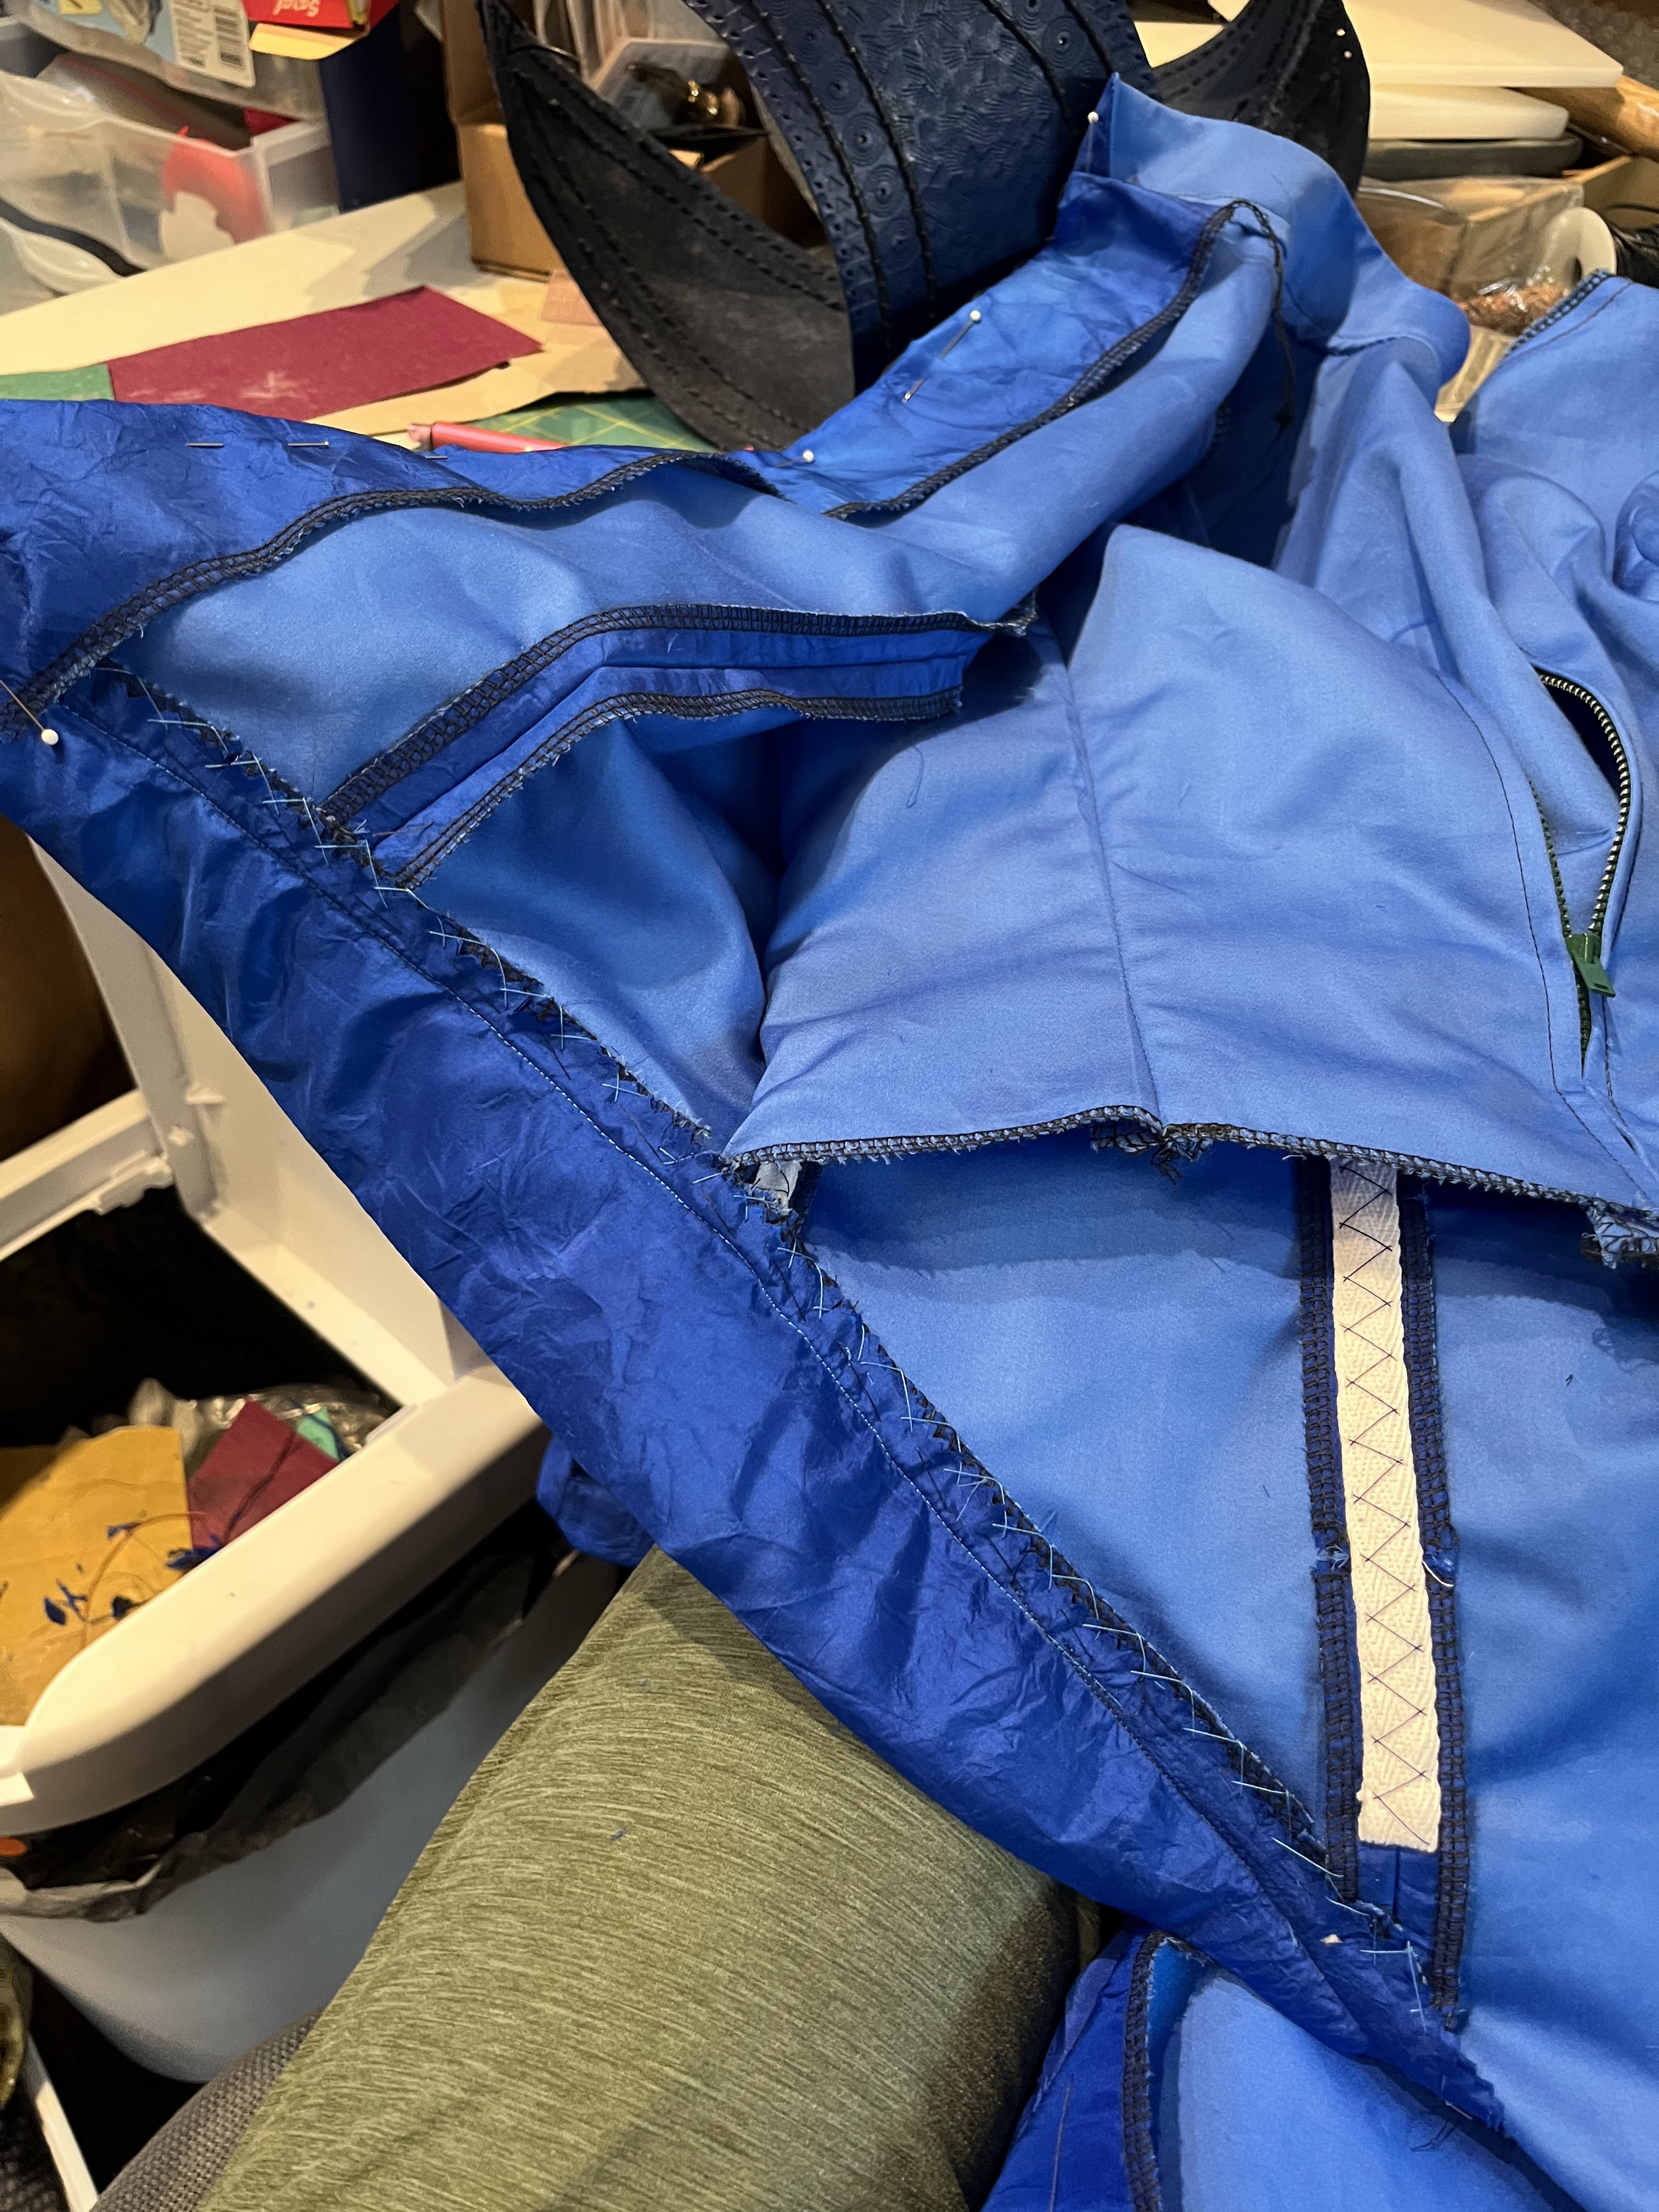
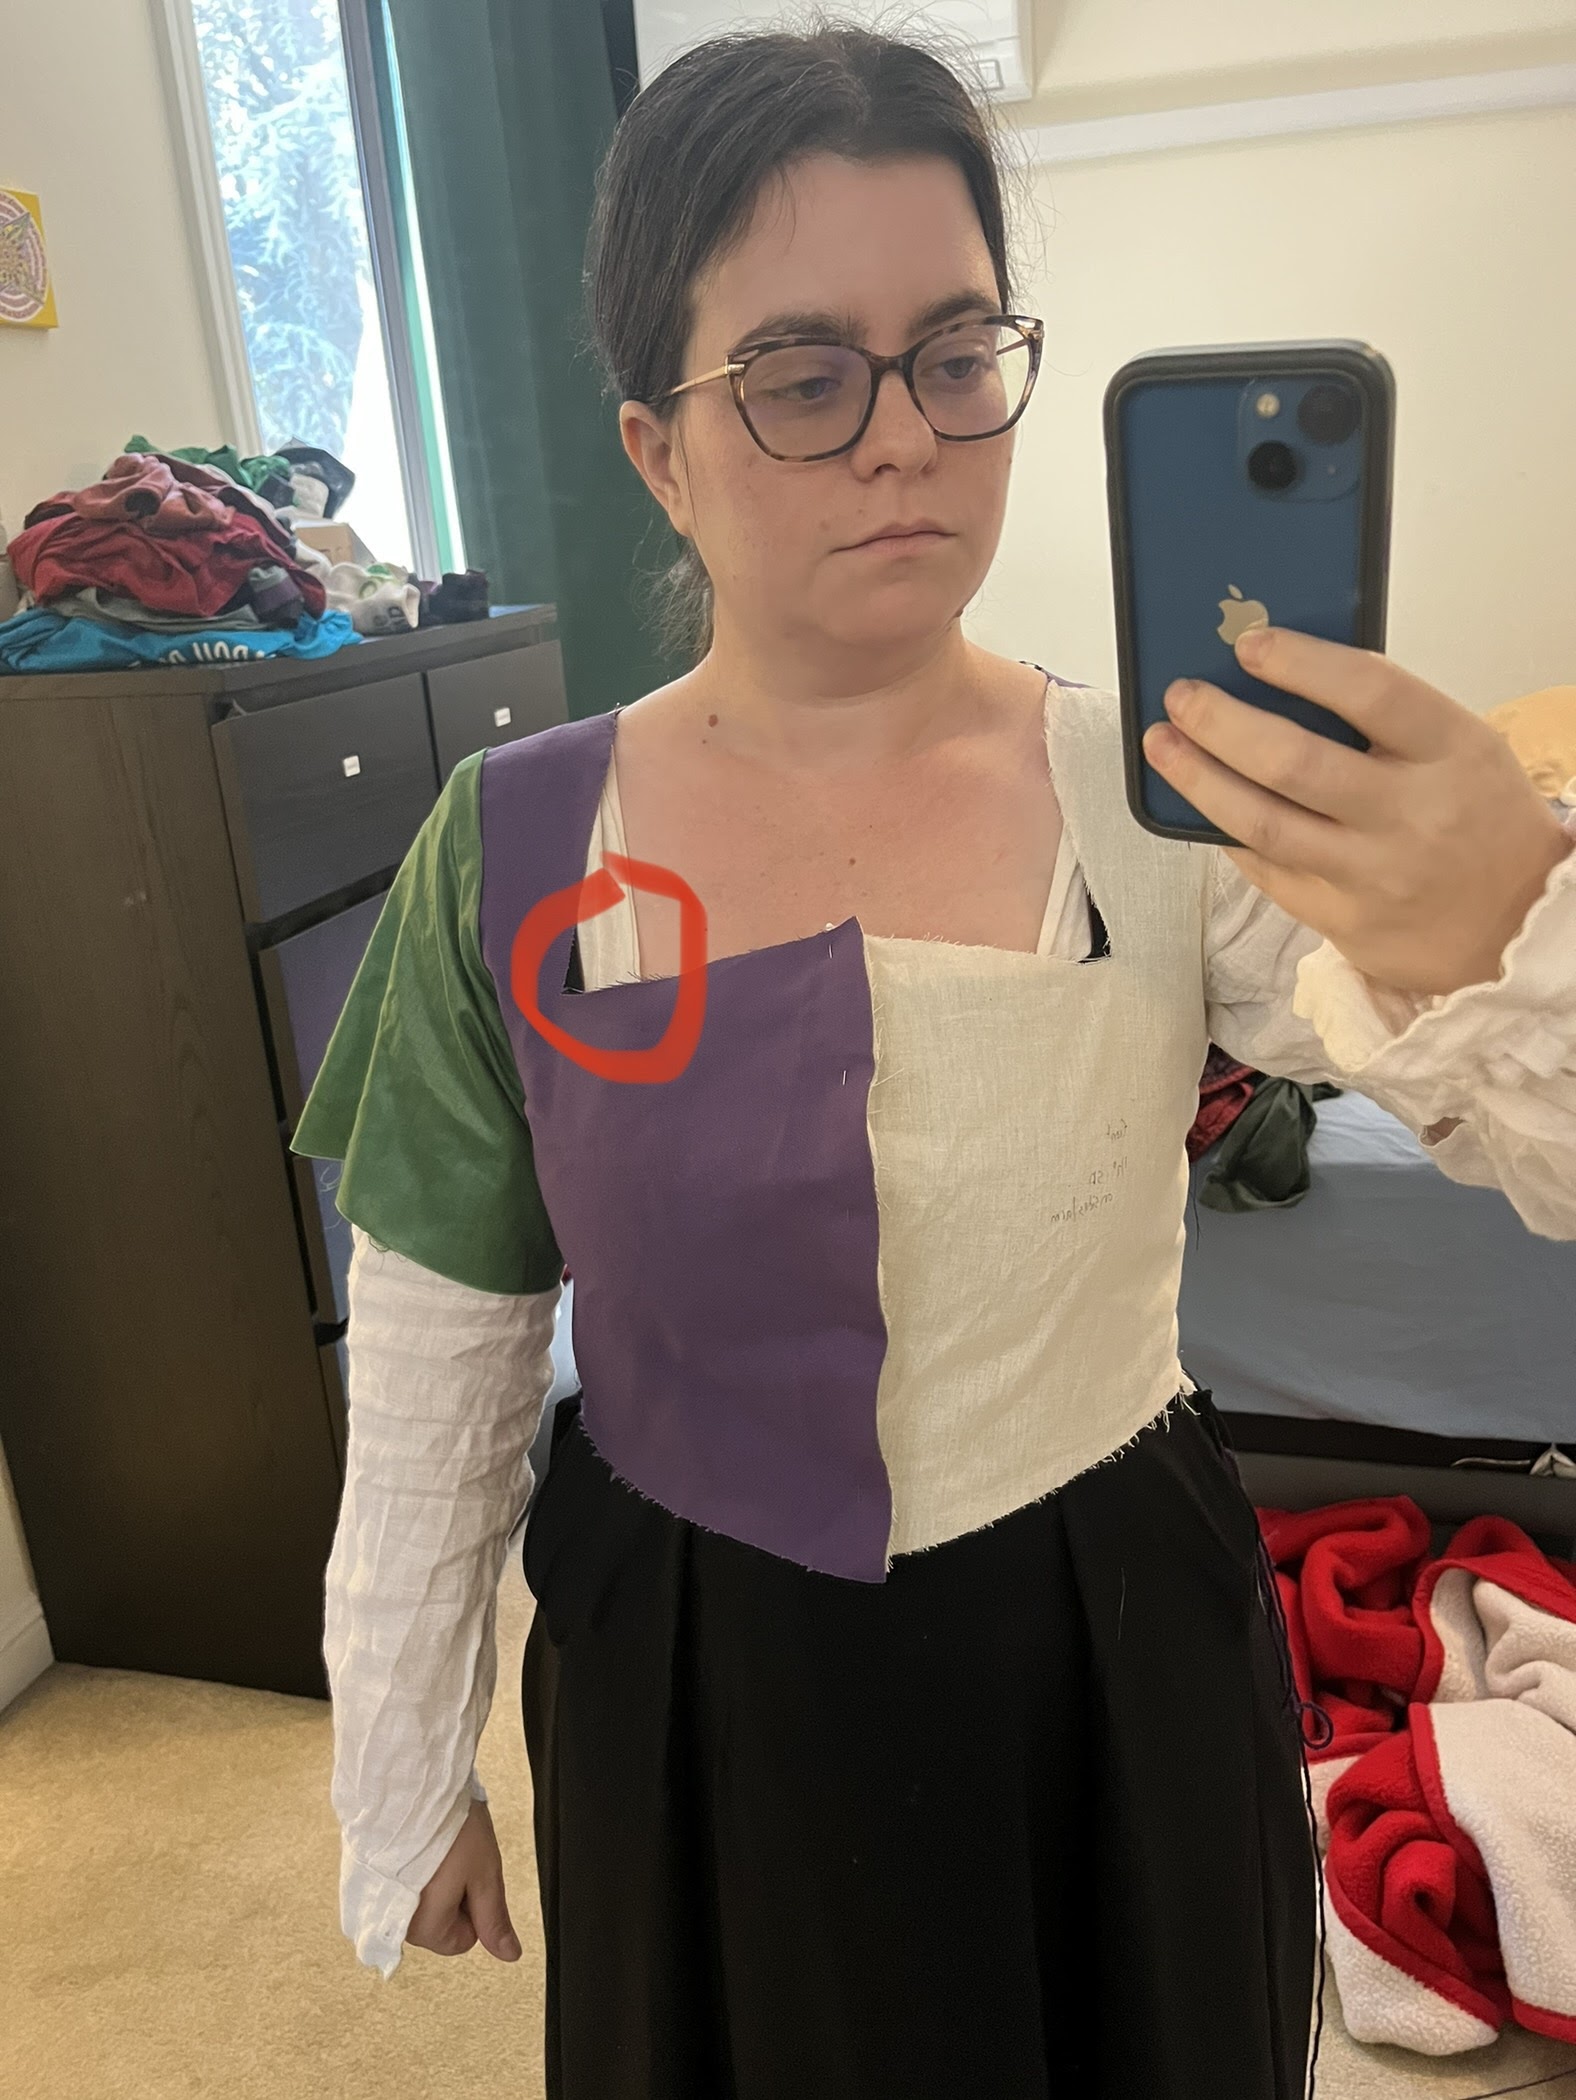
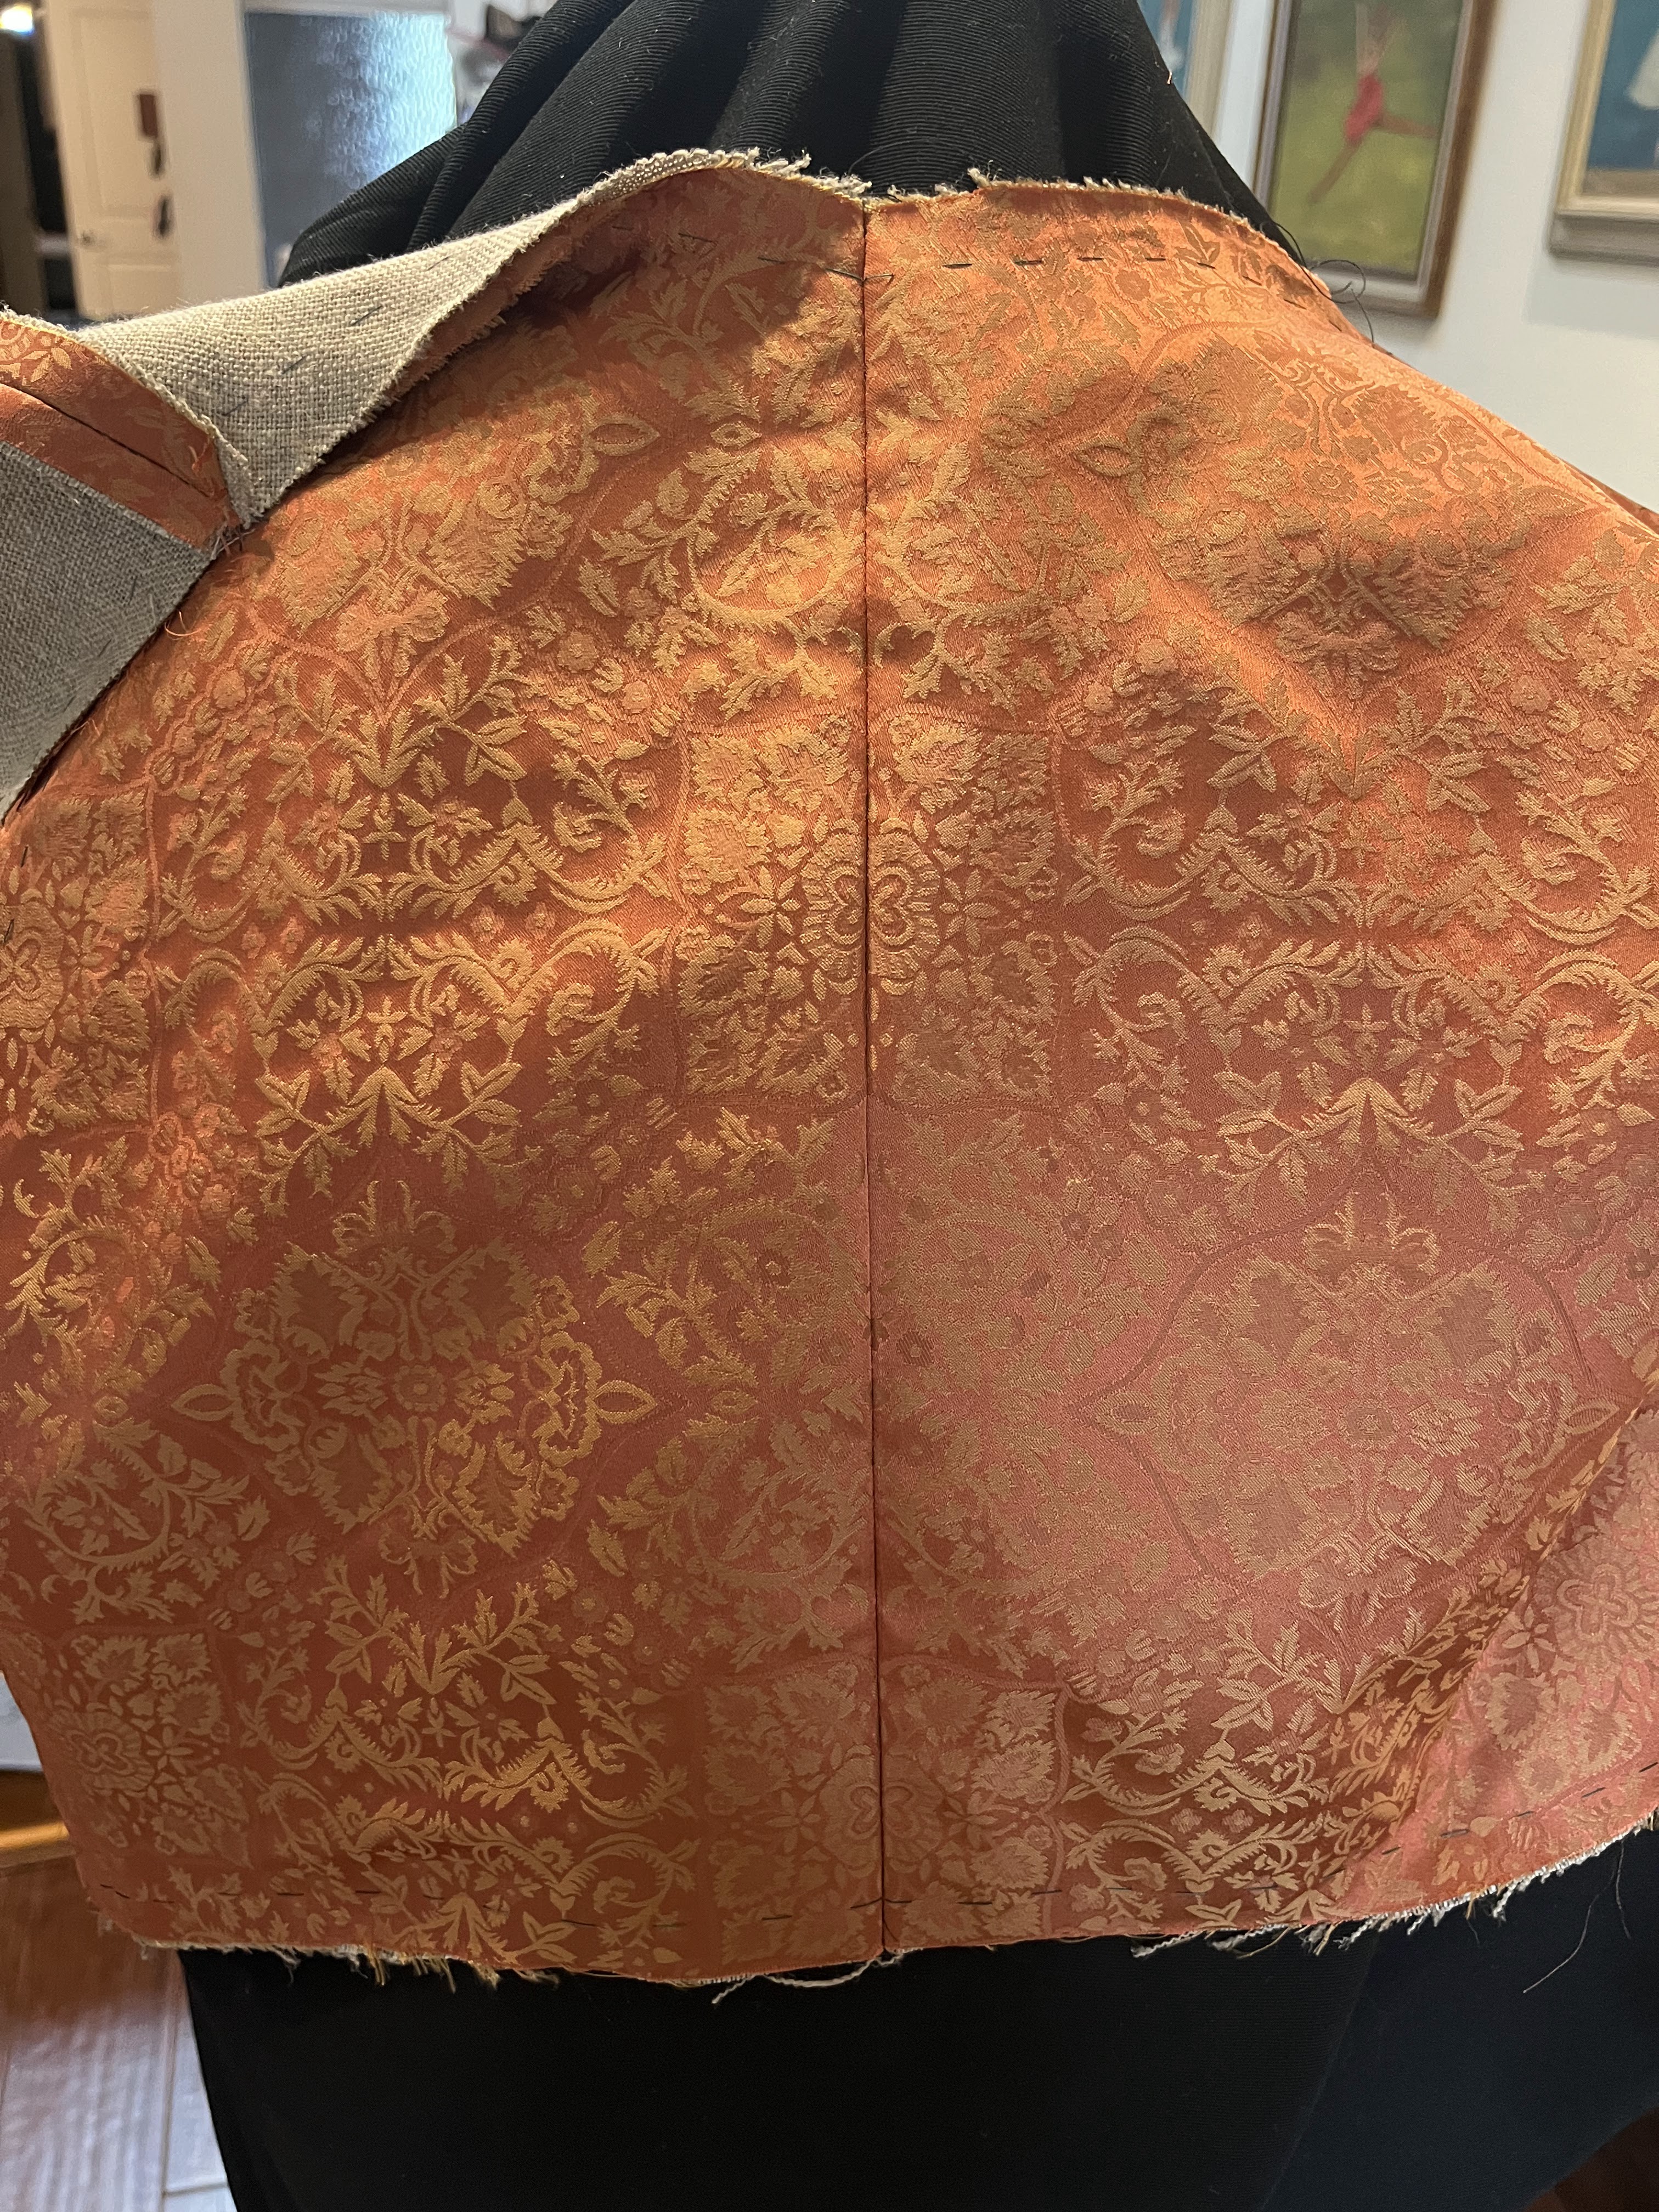
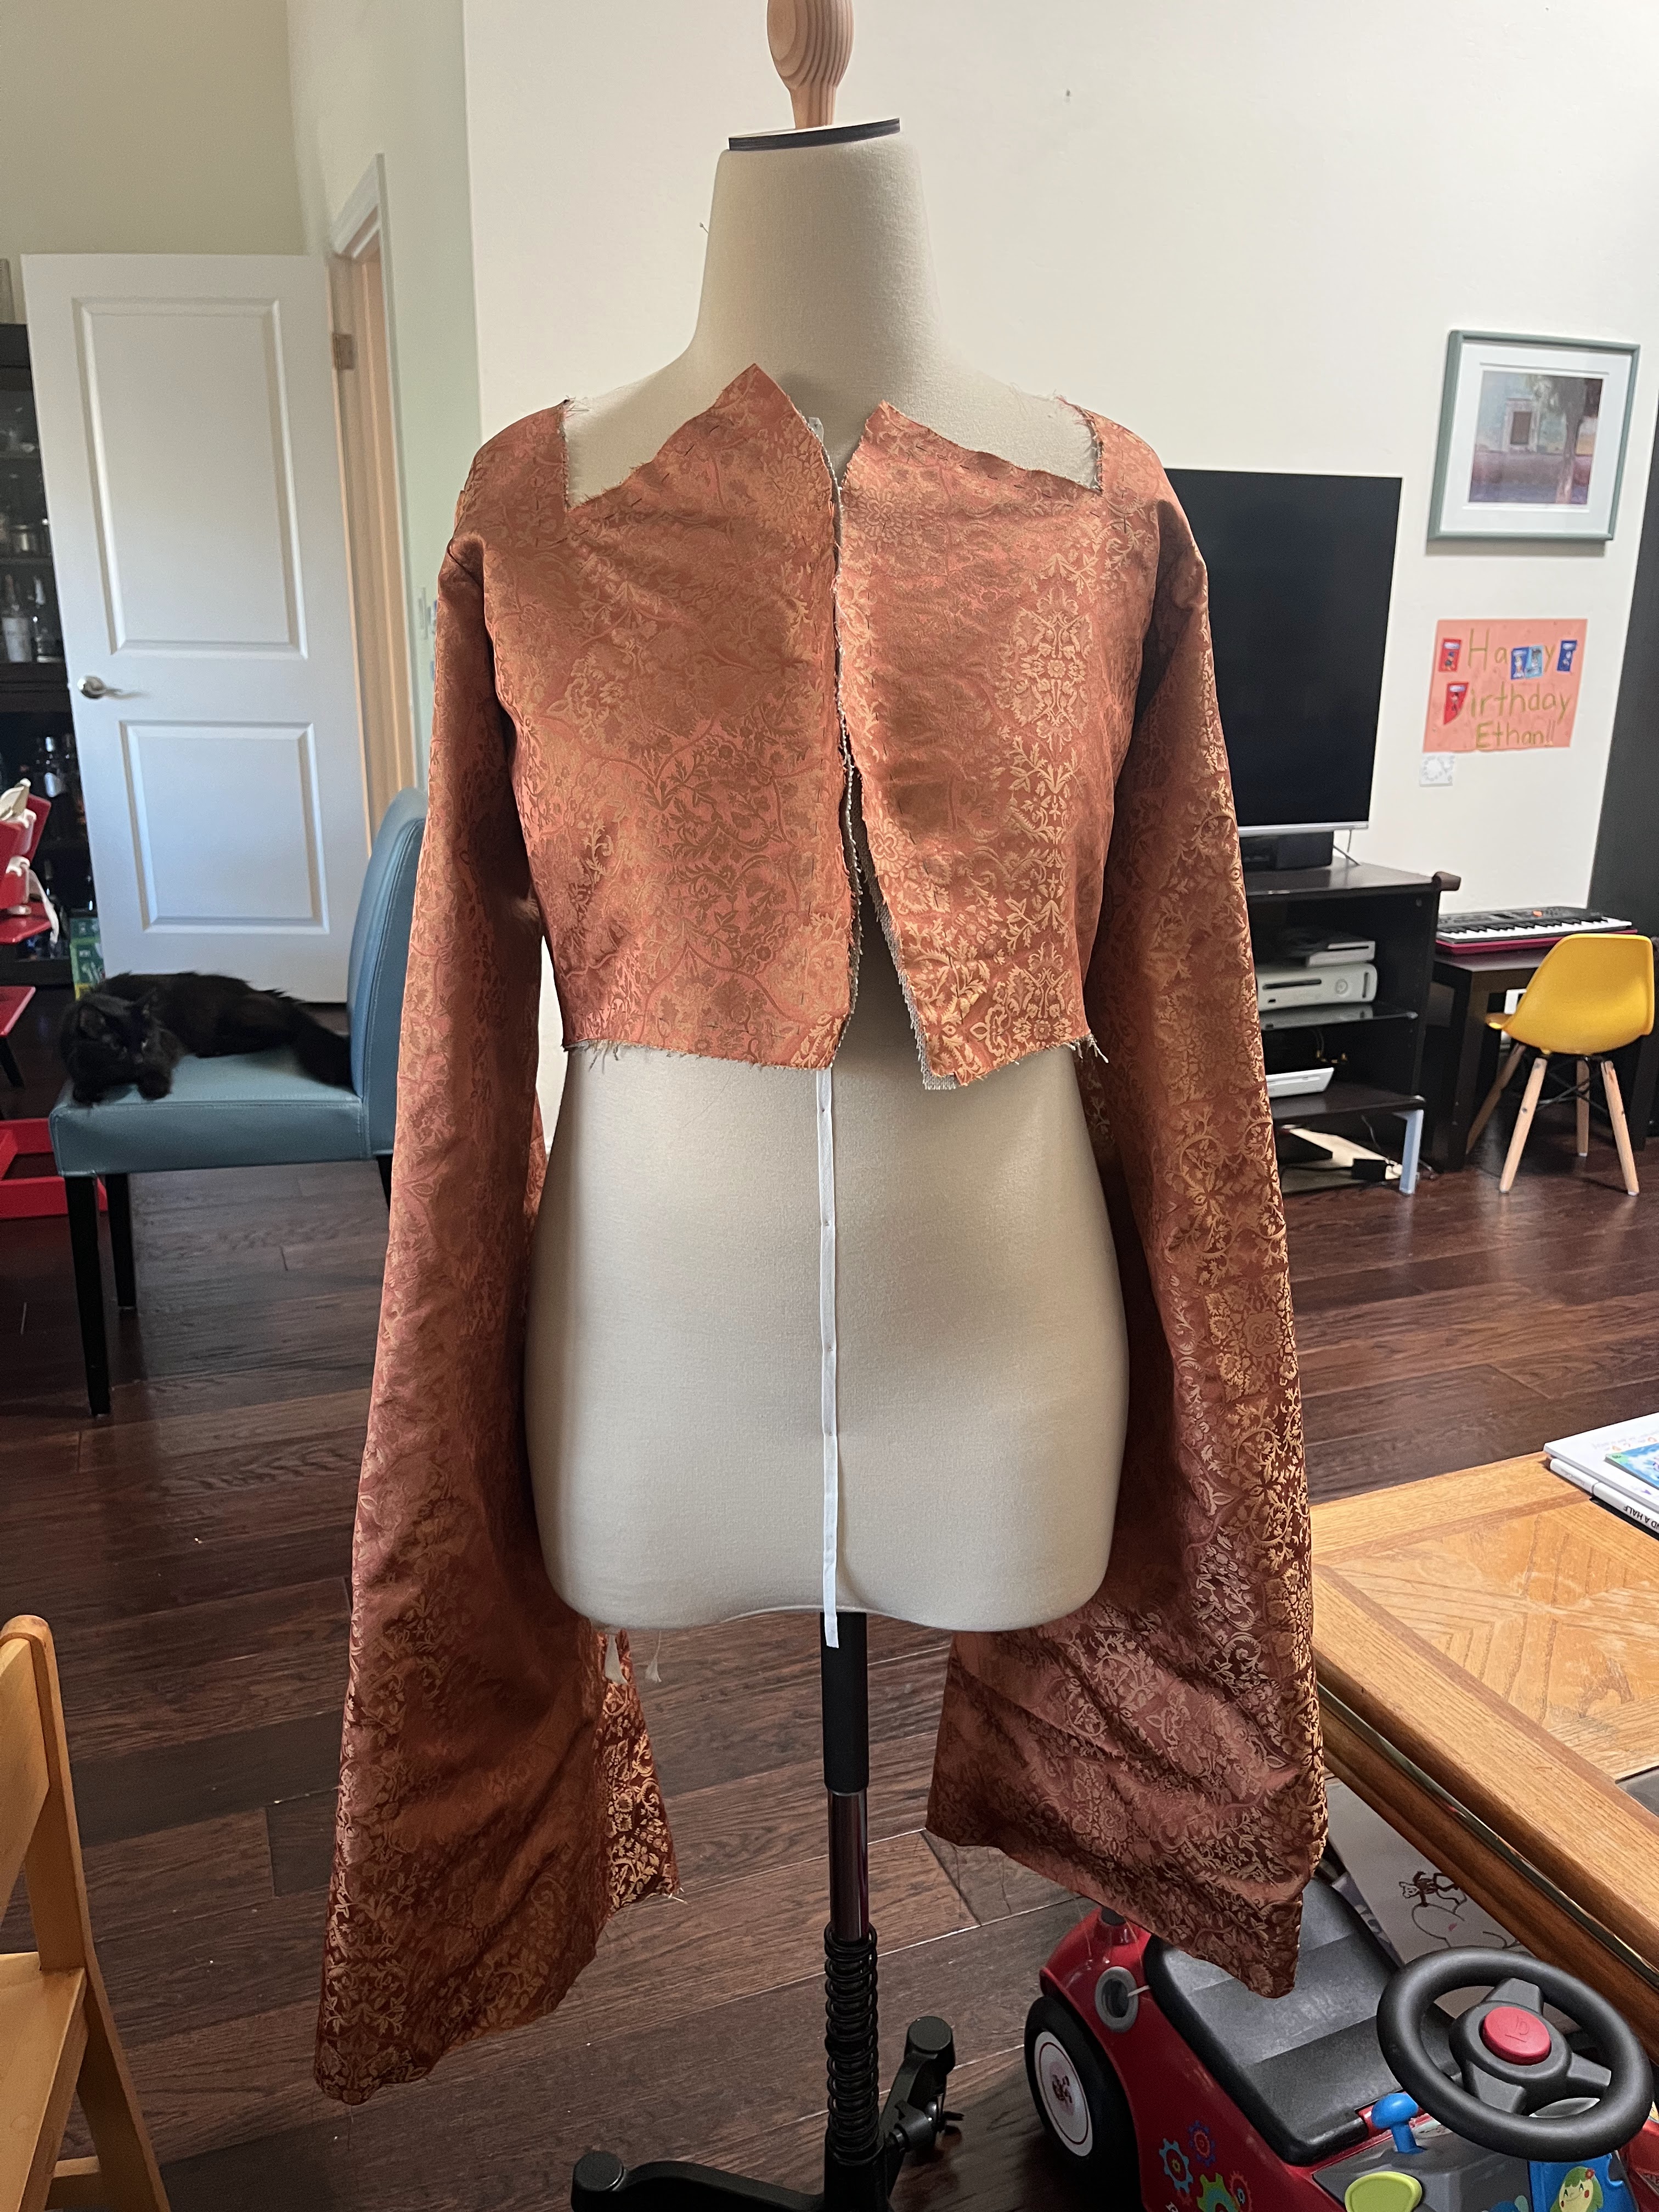
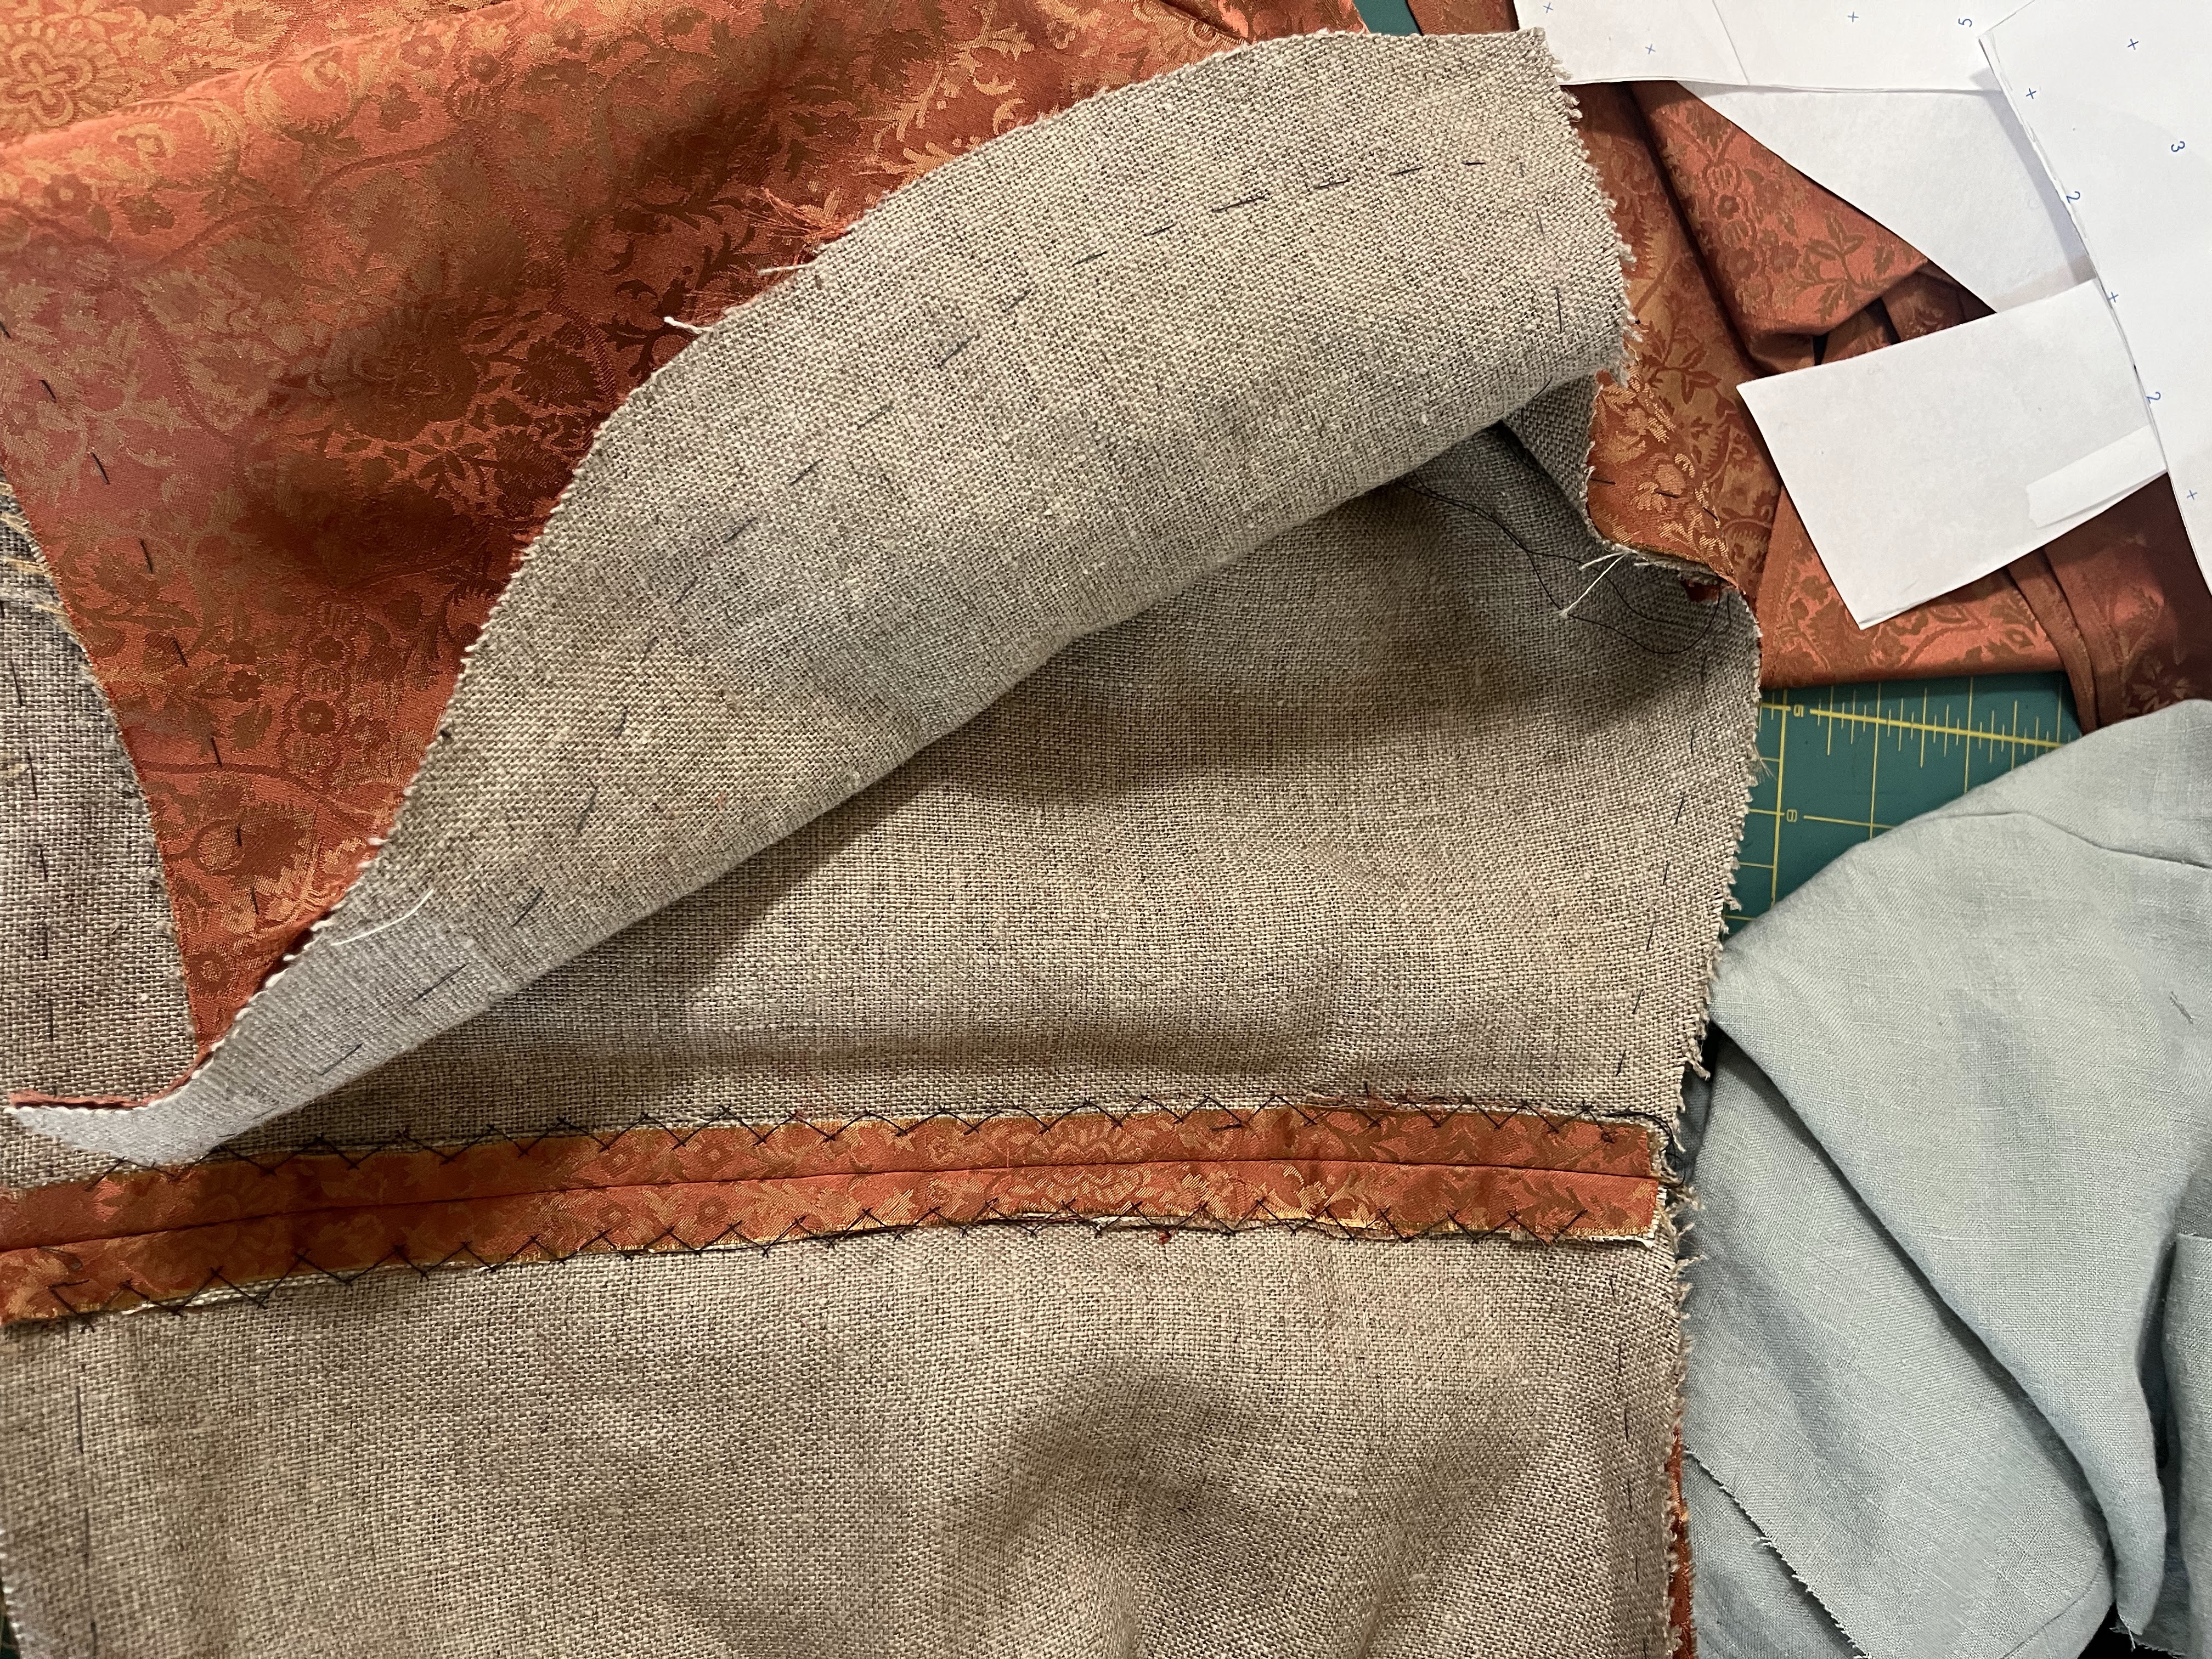
Finally time for fashion fabric! The bodice has an interlining of linen canvas (leftover from these stays) and a thin linen lining (a curtain, also from Fabmo. It’s not a great linen as it’s so open weave which makes it too soft and drapey, but was fine for a non-visible lining layer since the linen canvas was providing the strength).

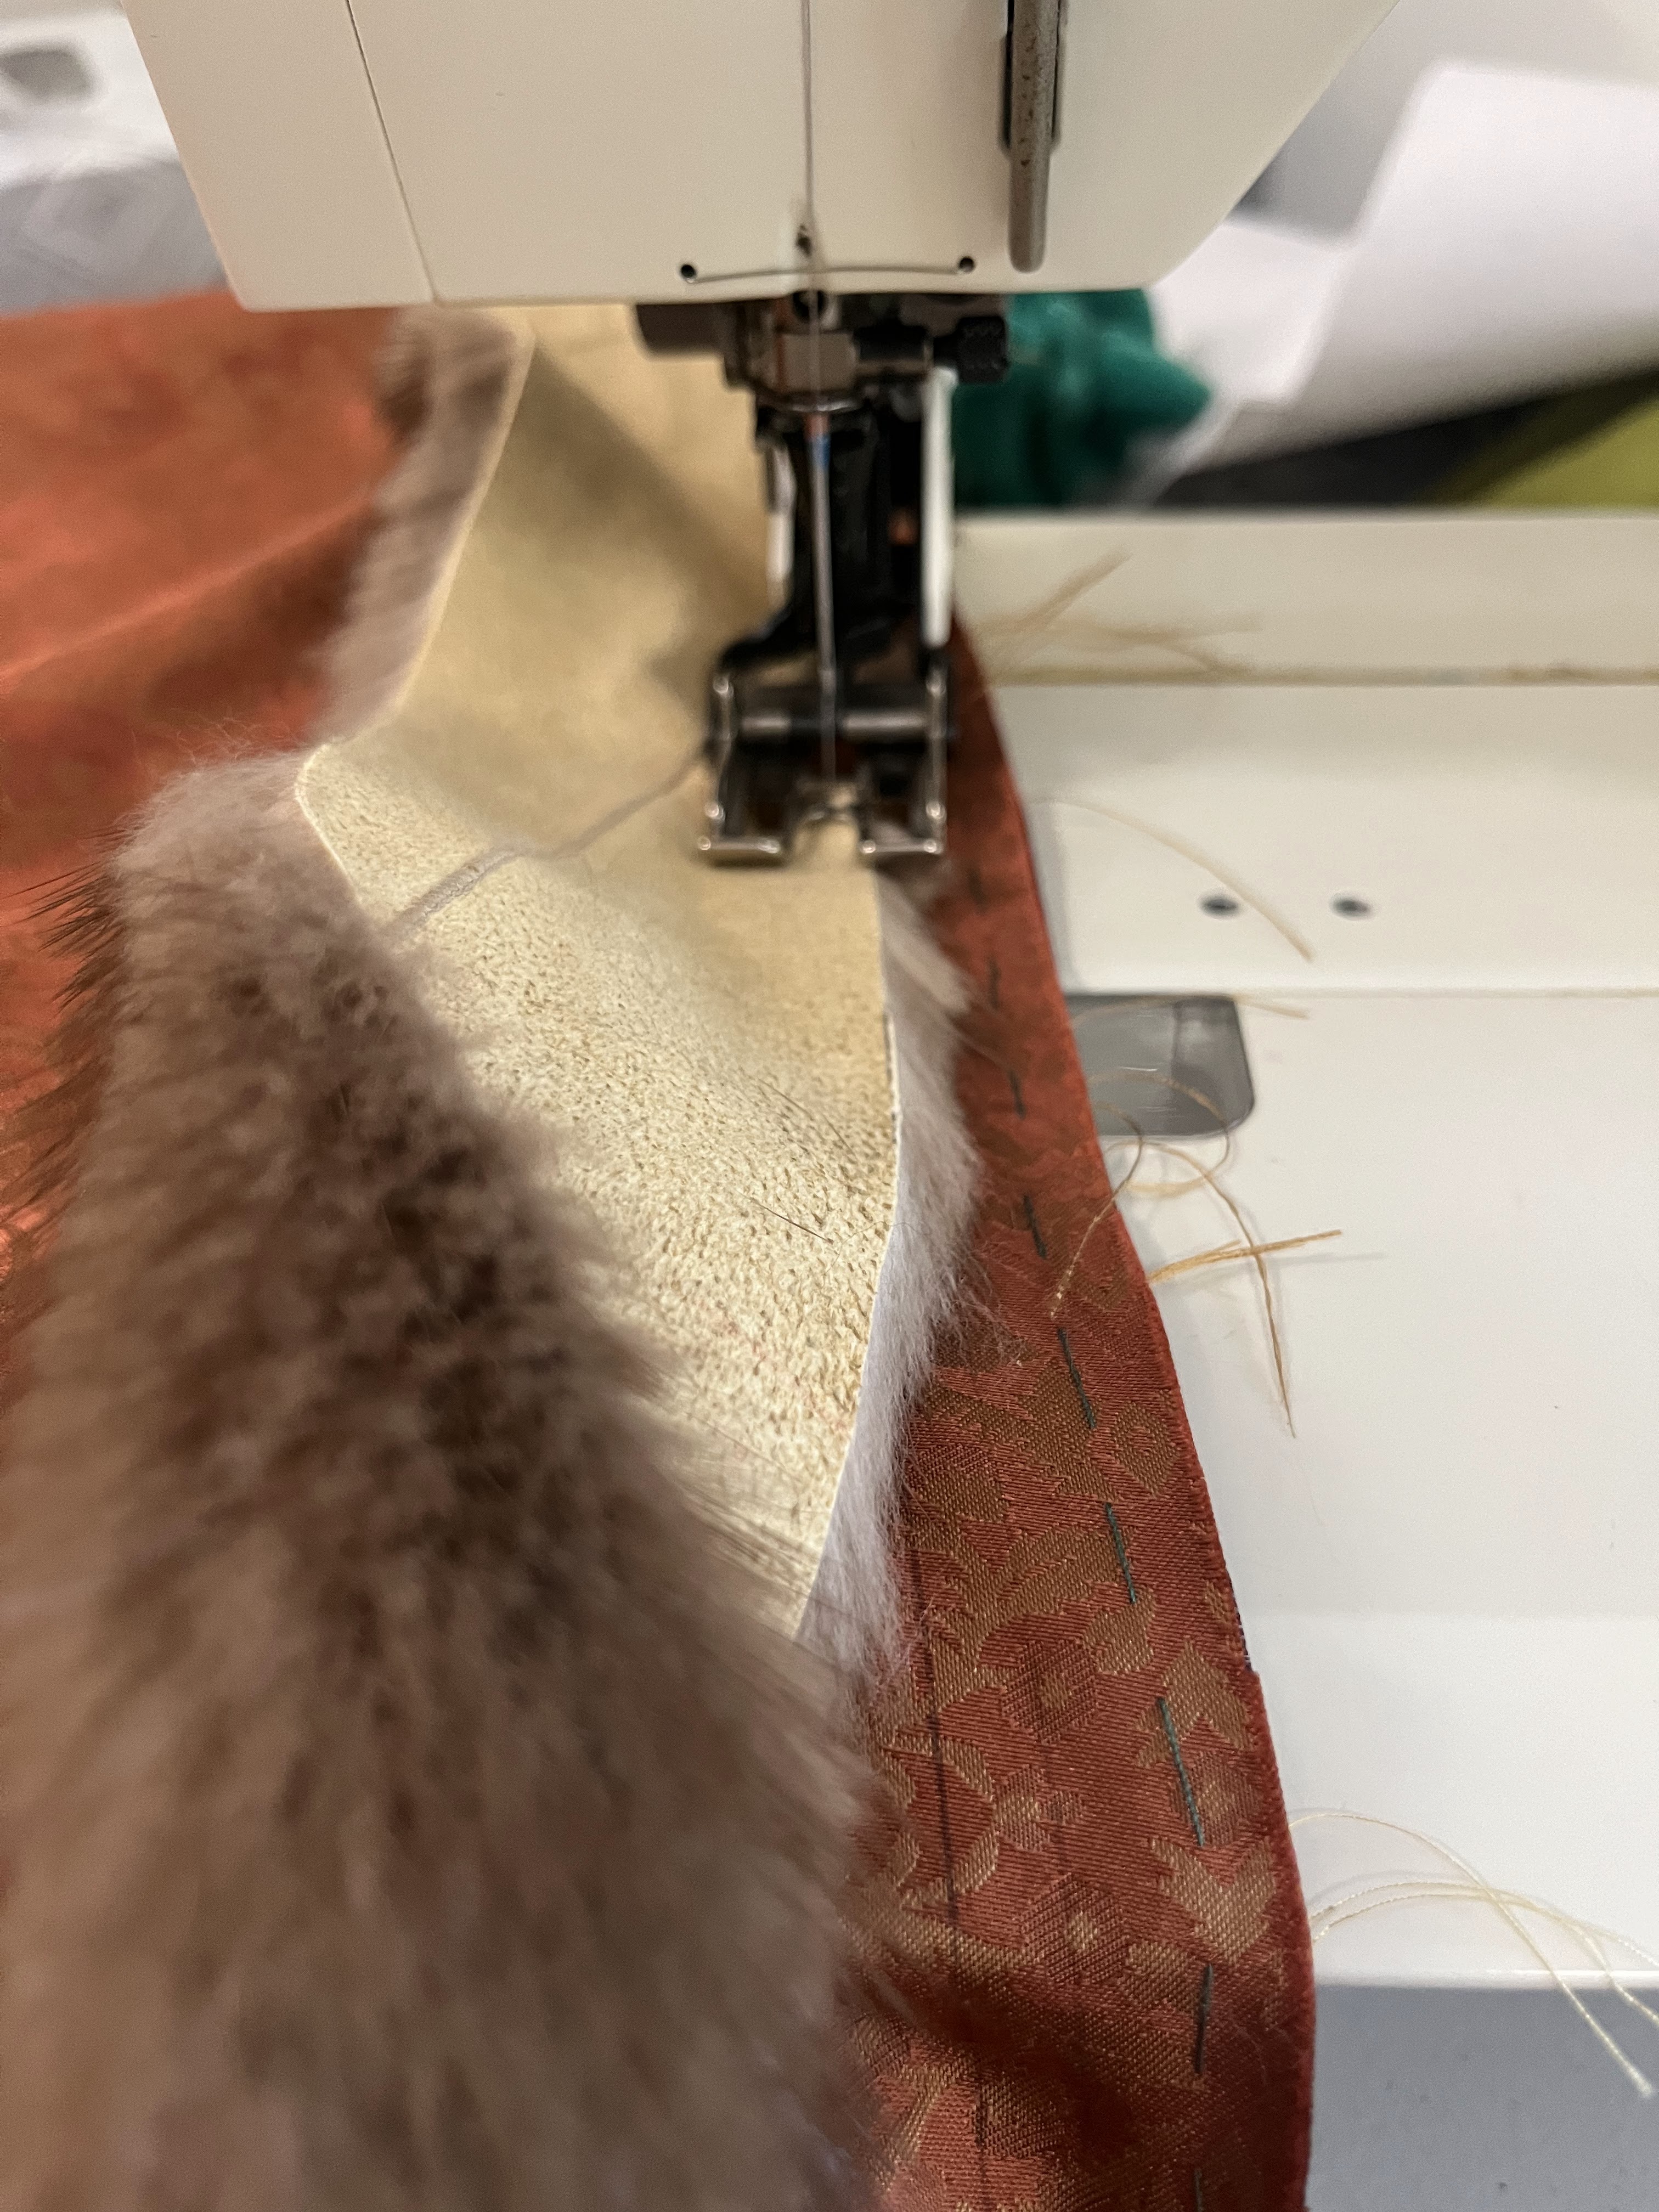
I would have liked to handsew the whole thing, but not with a 2 week deadline! So yeah every inside seam was machine sewn.

Sexay pattern matching on the back! Historically I believe they wouldn’t have cared in order to conserve fabric but I had enough fabric that it was a non-issue.

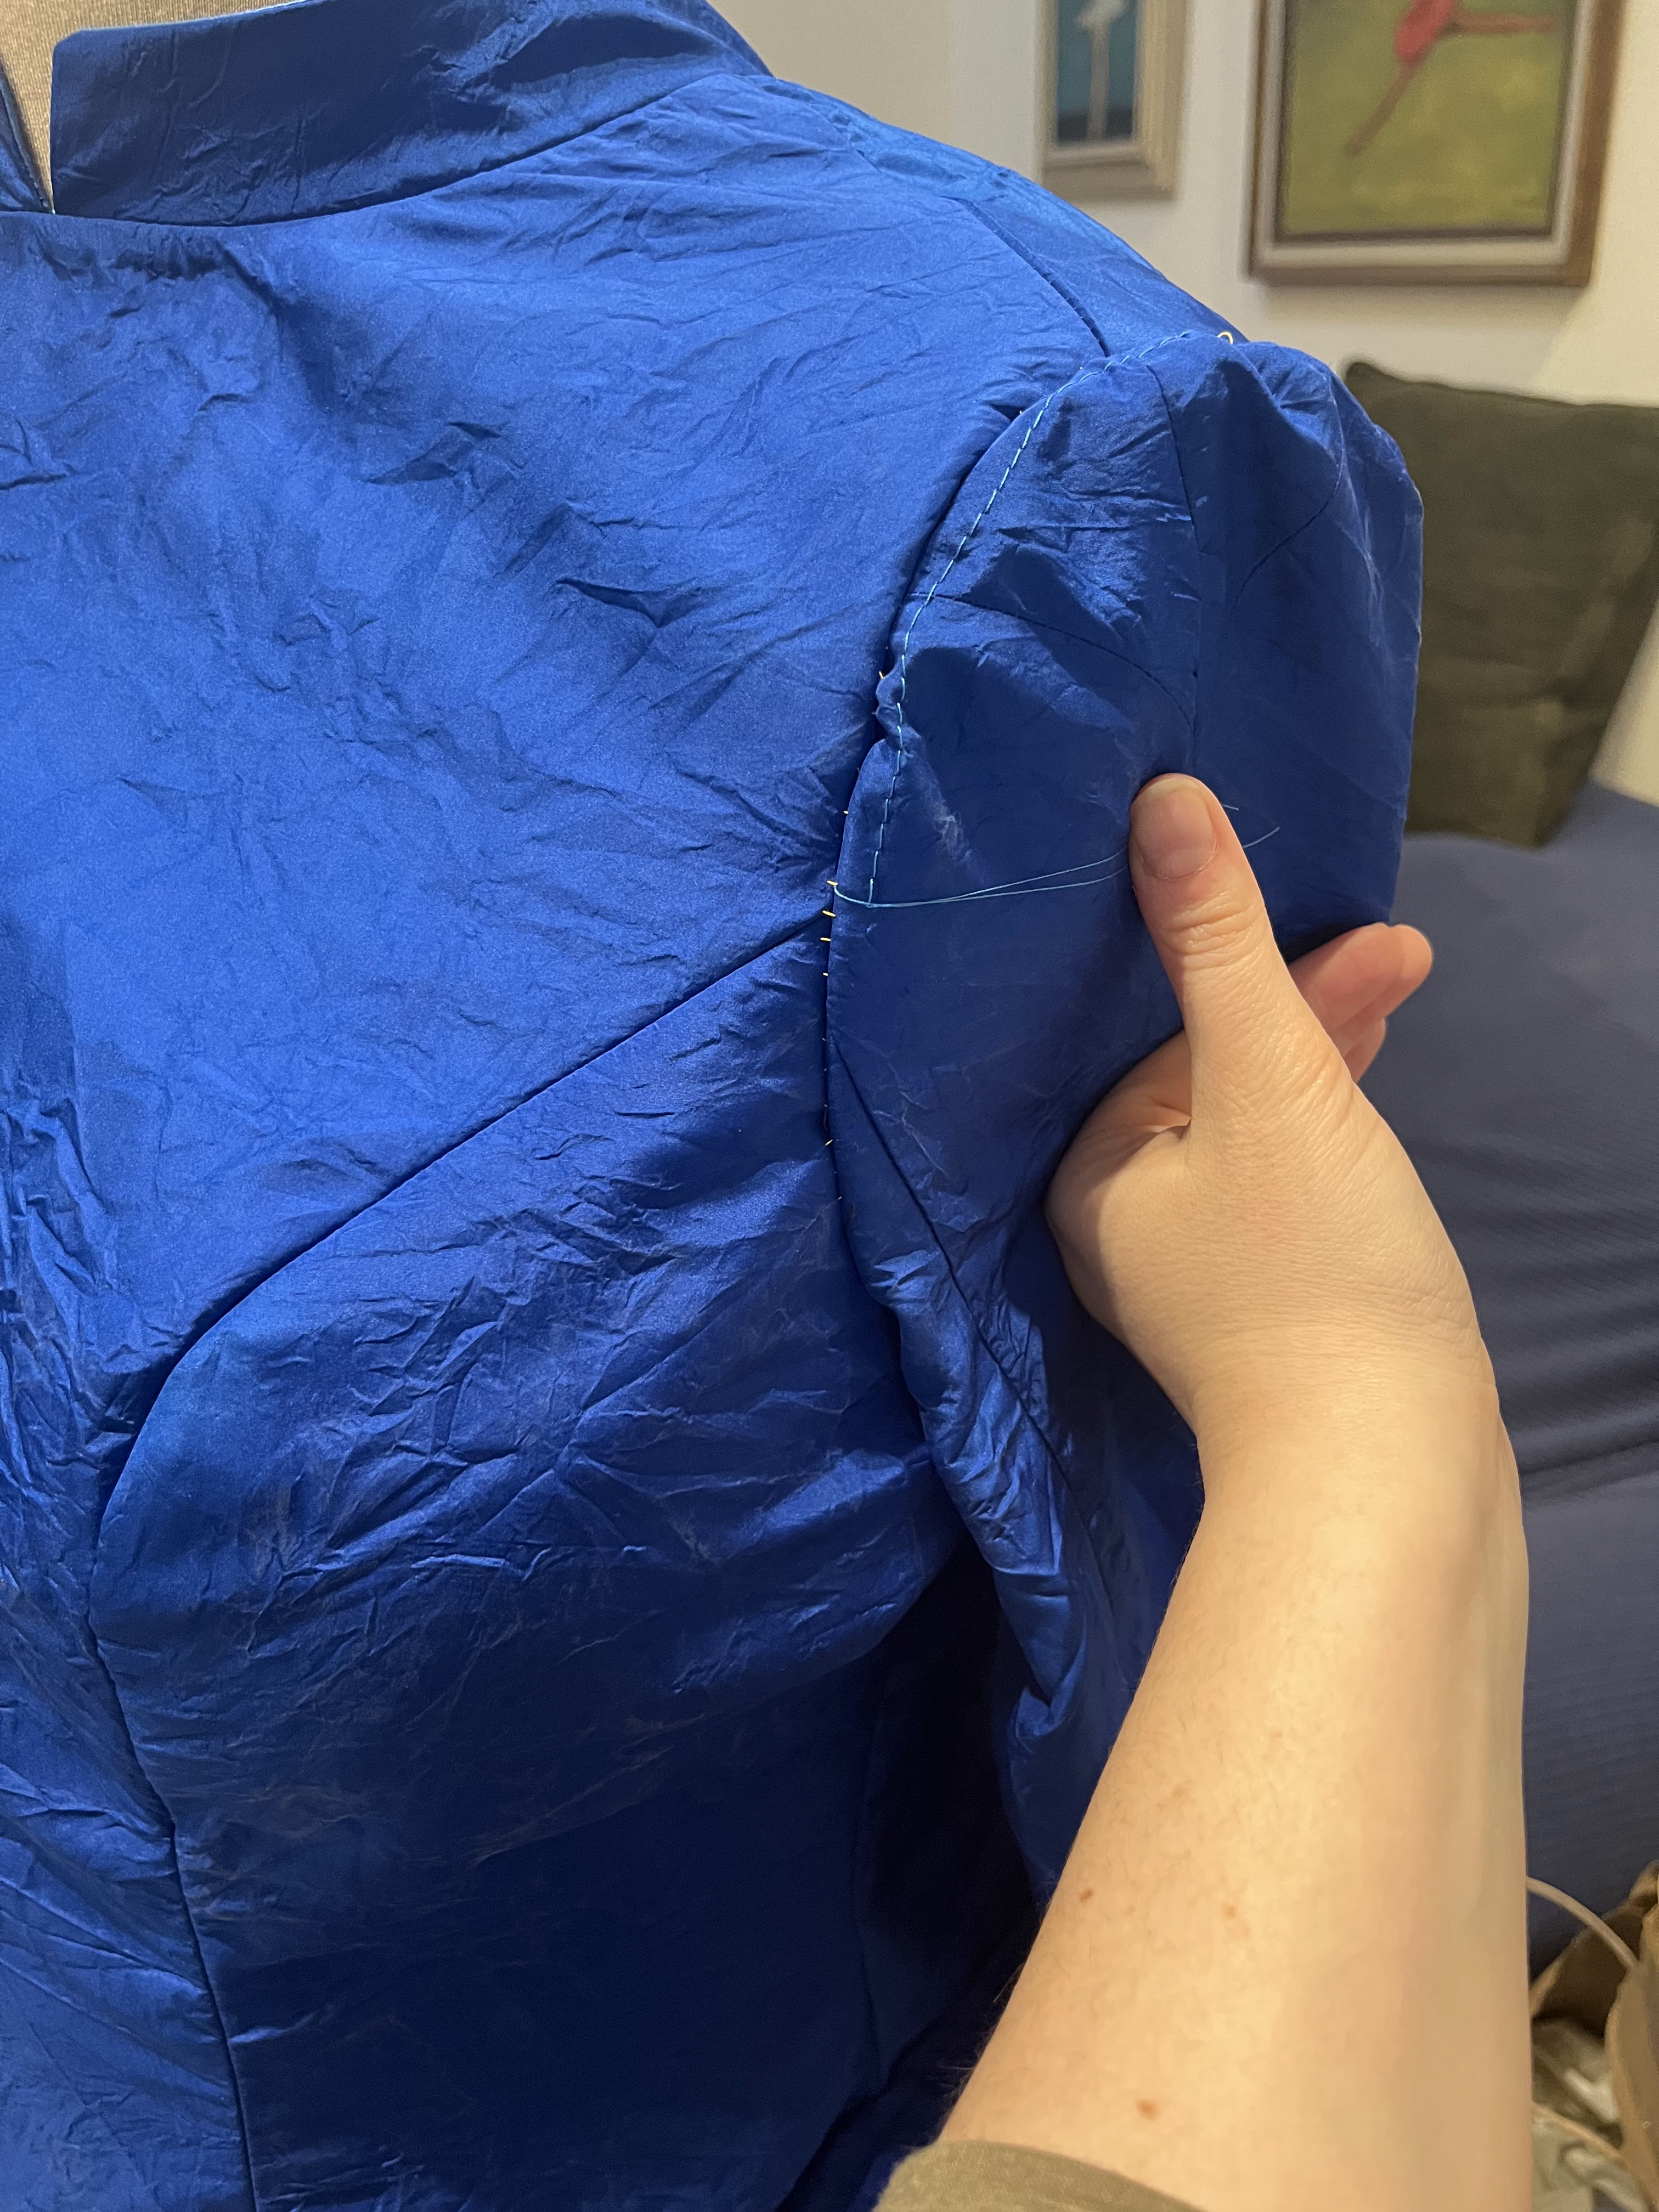
My sleeve draft was straight from the Queen’s Servants aside from shortening it just a little bit because I be short. I used the Wide Sleeve, which was only the intermediate option! (There was a Tabard Sleeve which was even bigger!). I just cut them using the full width of my fabric and not adding unnecessary piecing (which would have been required in period due to silk fabric being a much narrower width. But they also had pretty and strong selvedges which could have been whipped together whereas I would have had raw seams with piecing. tldr; it’s not possible to be 100% historically accurate because of things like this).

Long sleeves are looooooong. Also my sewing table is a corner of the living room hence things like toddler cars.
This is giving me ideas about some kind of steampunk fantasy cropped bolero with giant sleeves

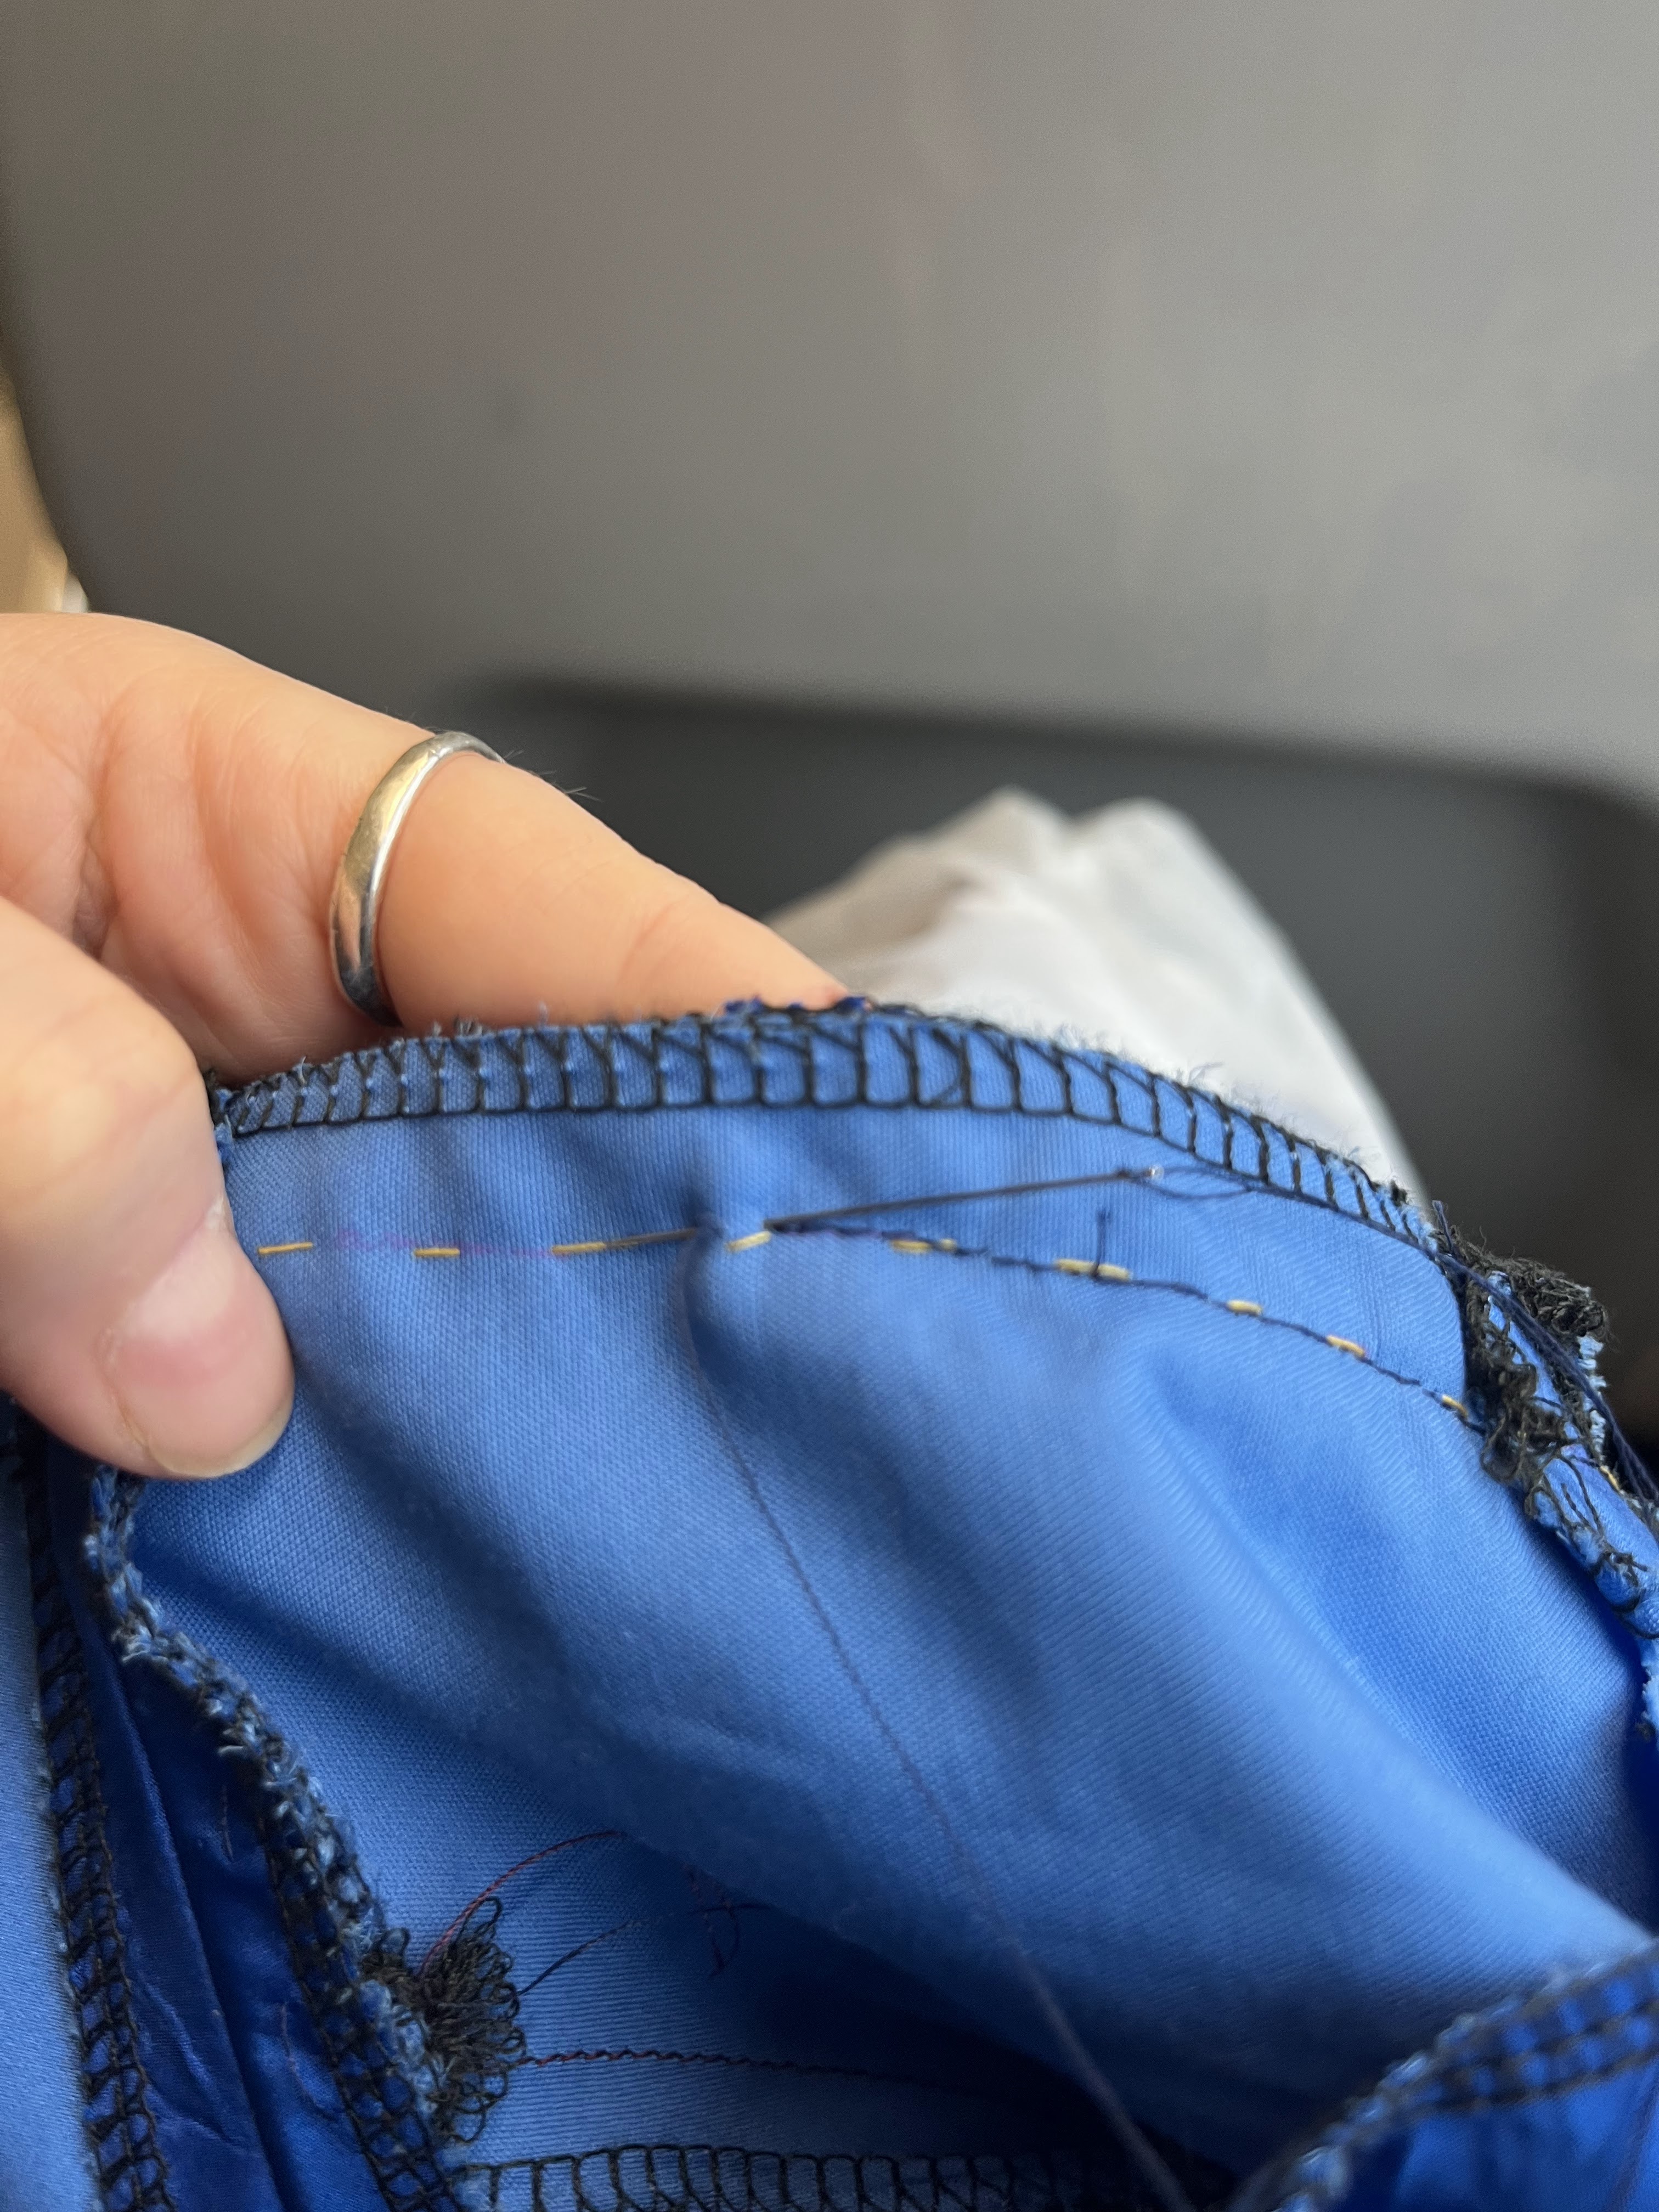
Even going for speed as much as possible the handsewing sneaks out of me – see the basting on the stitch lines (since both the damask and the linen canvas looooved to fray and I wanted to know where the stitch line was meant to be) and doing a herringbone stitch to hold the seam allowance down inside.

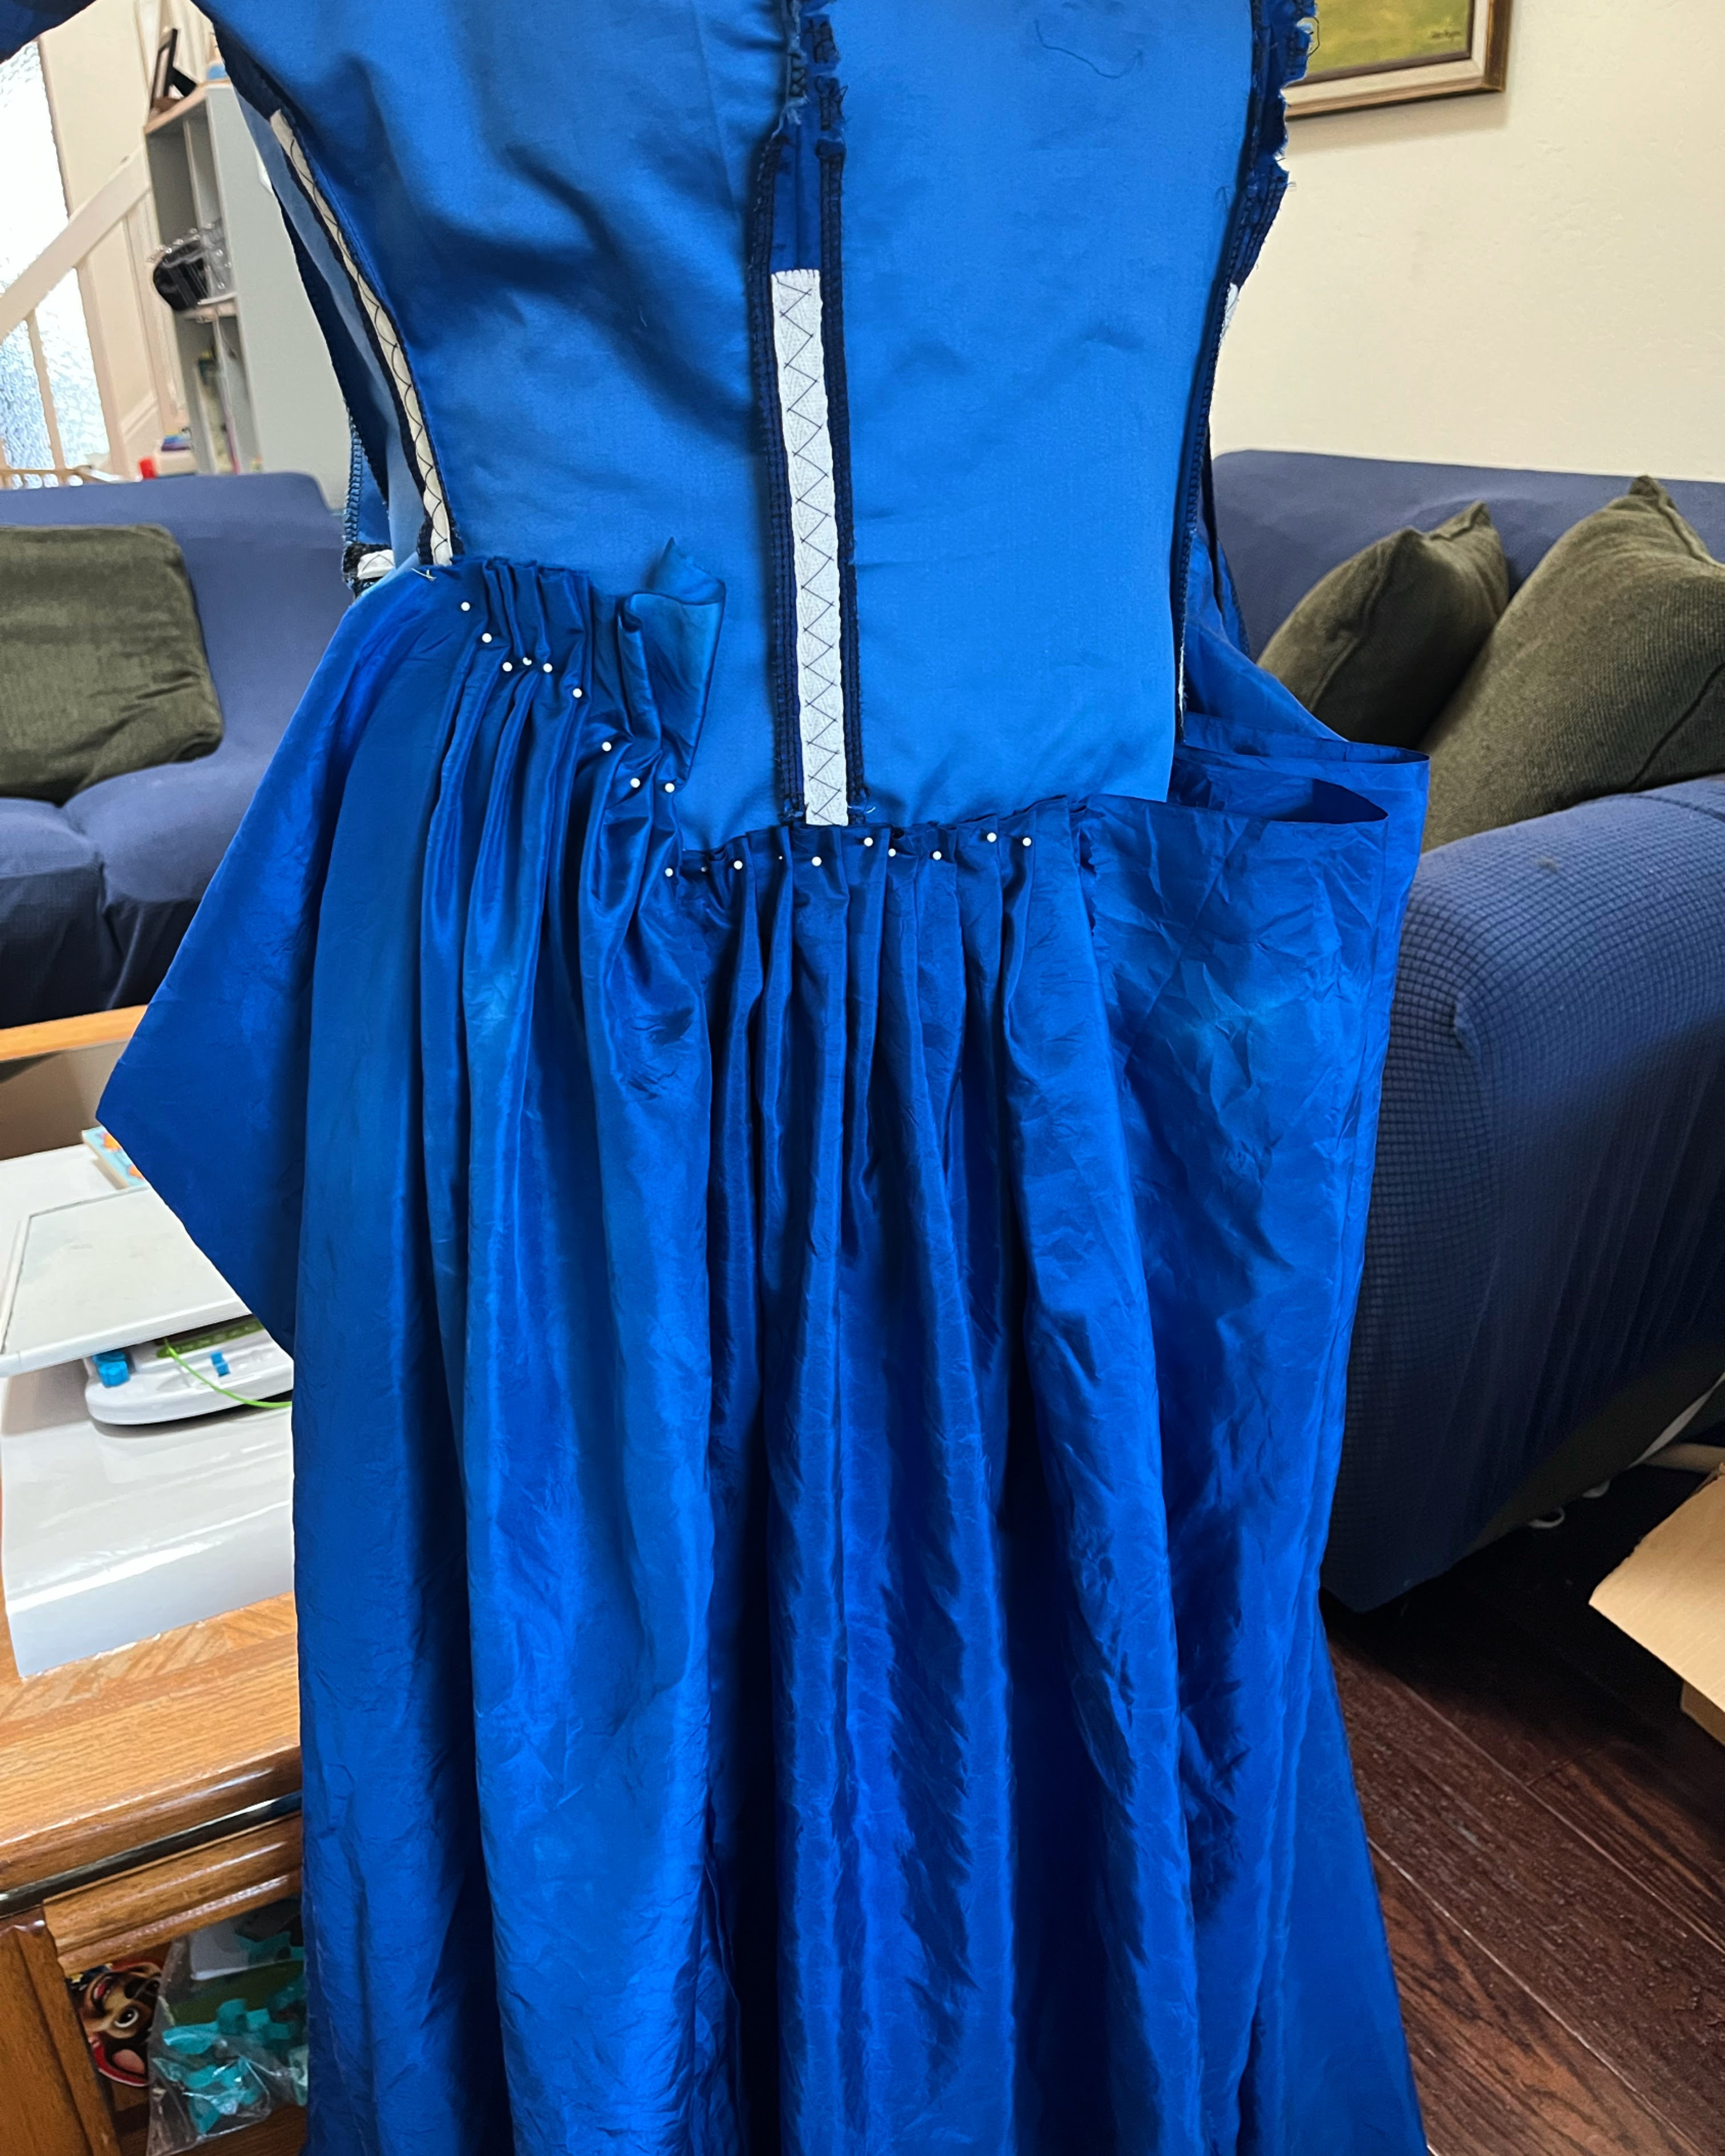
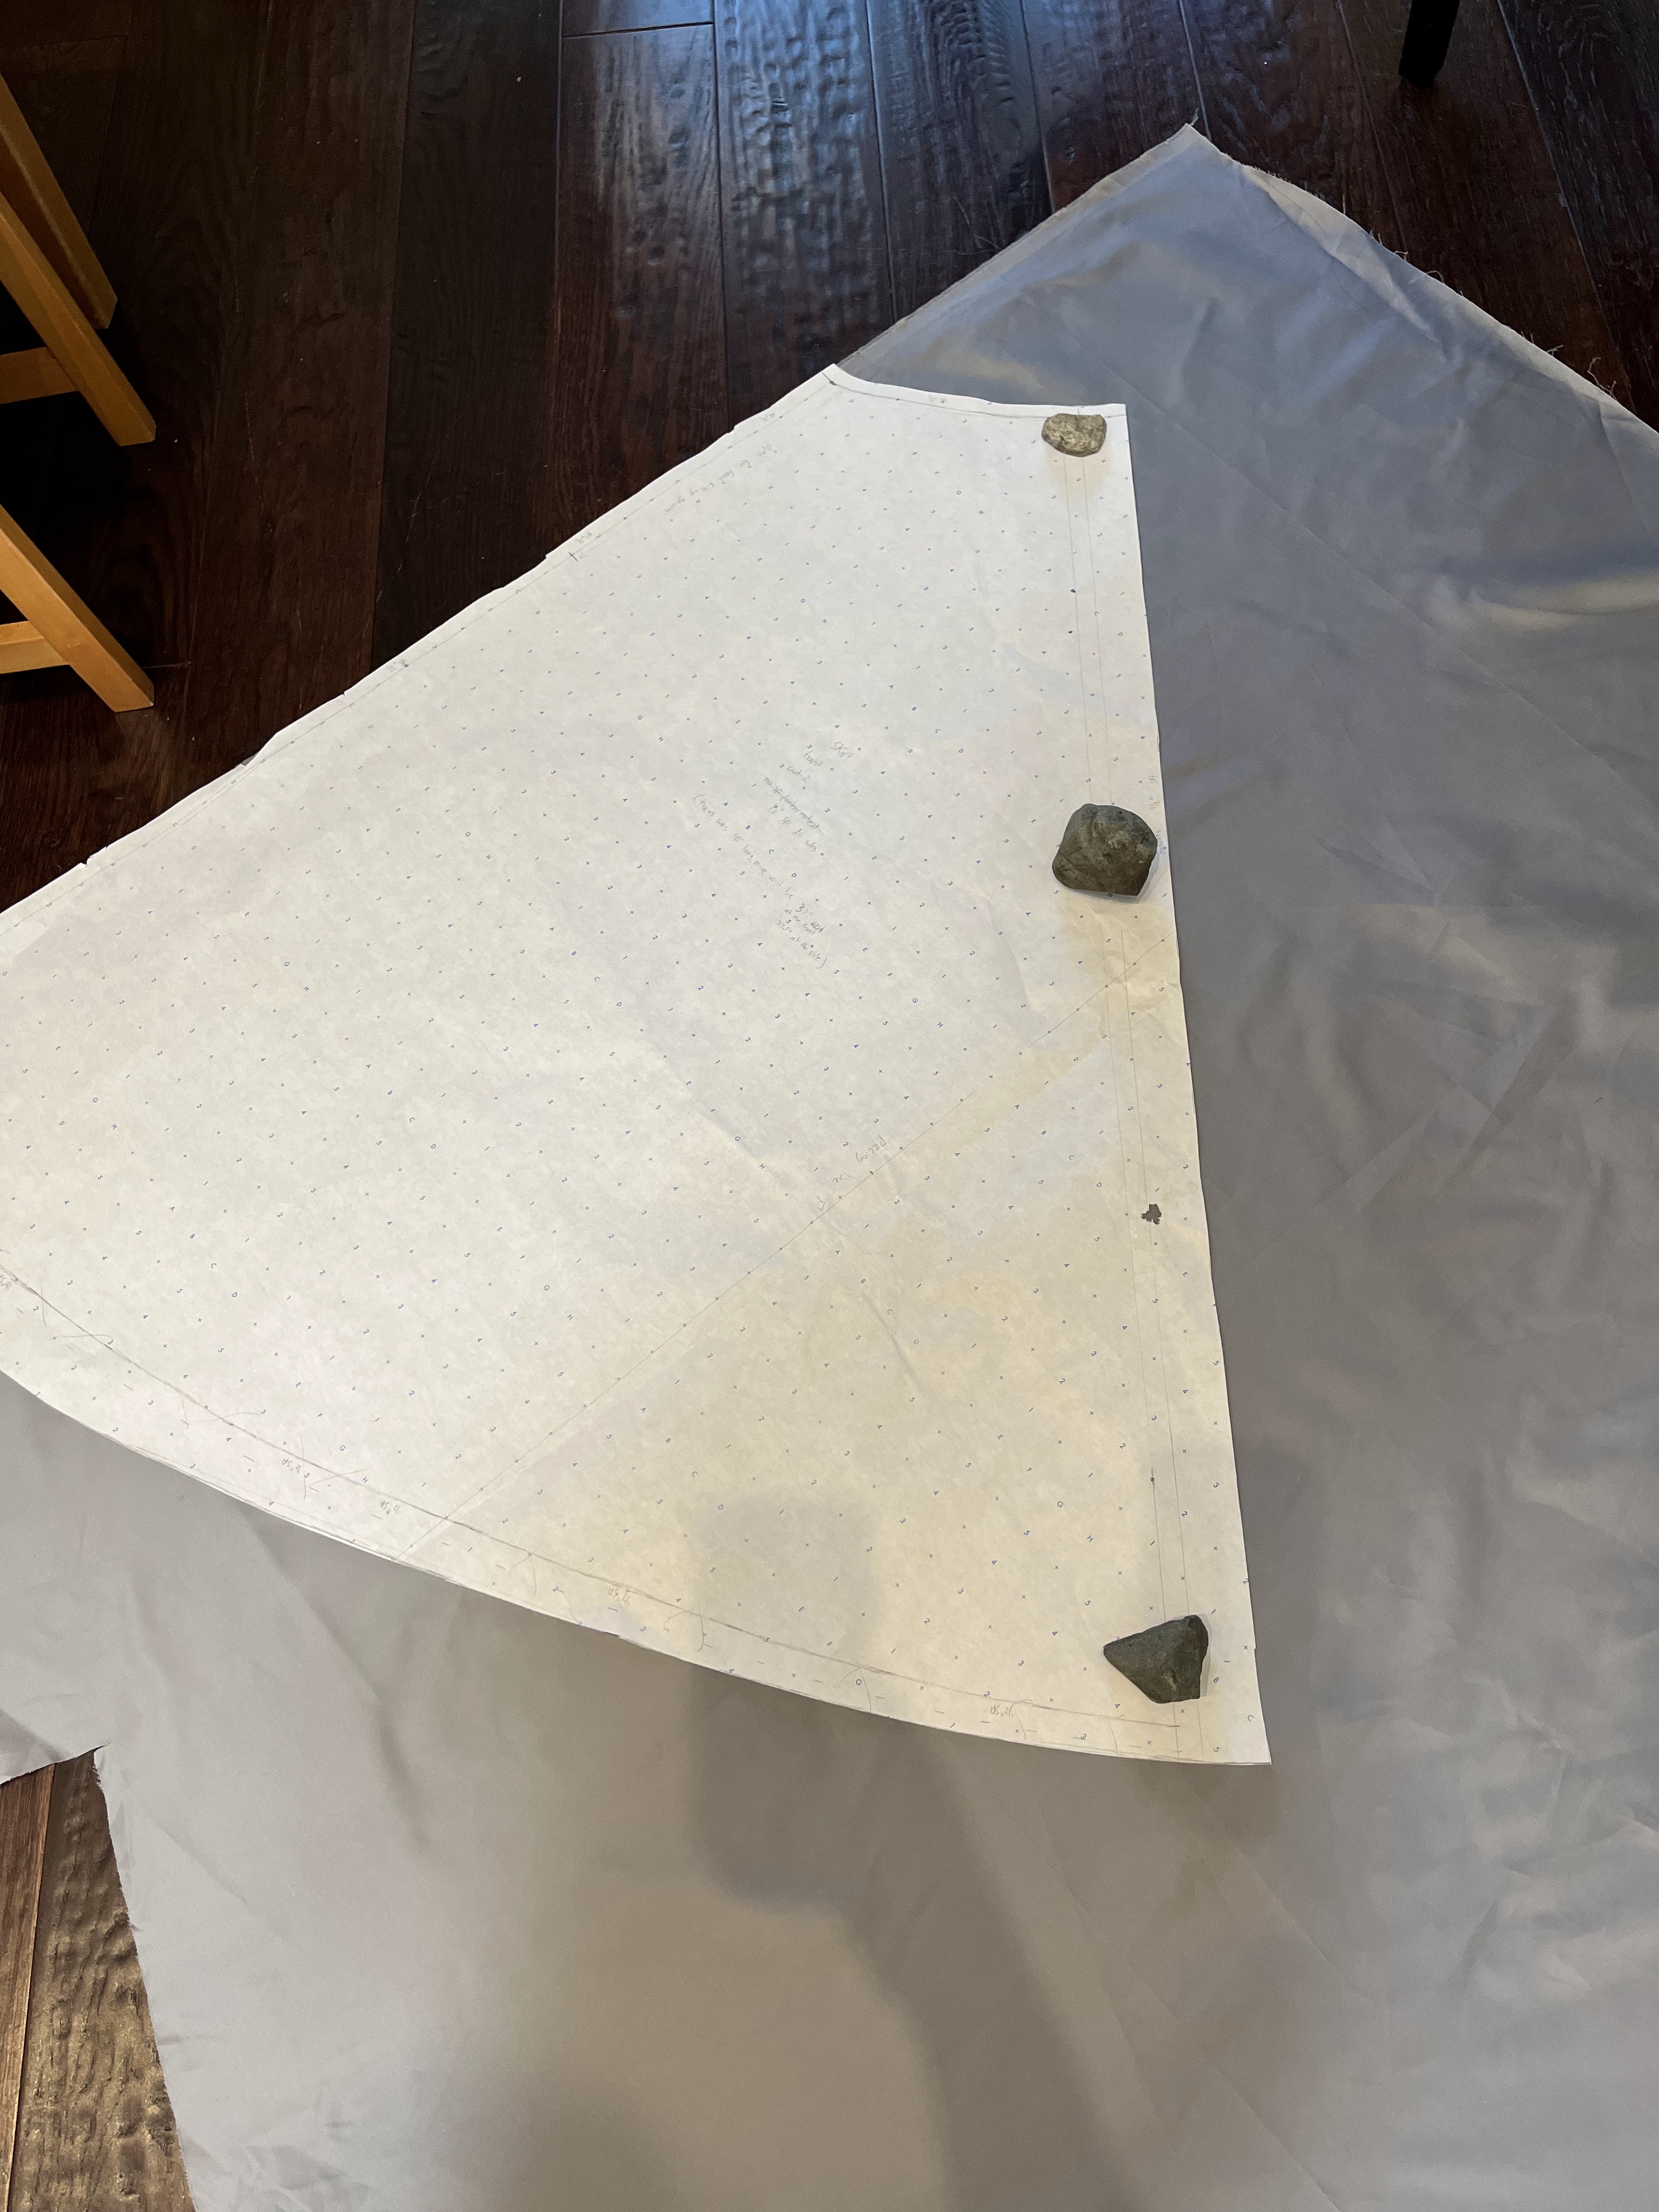
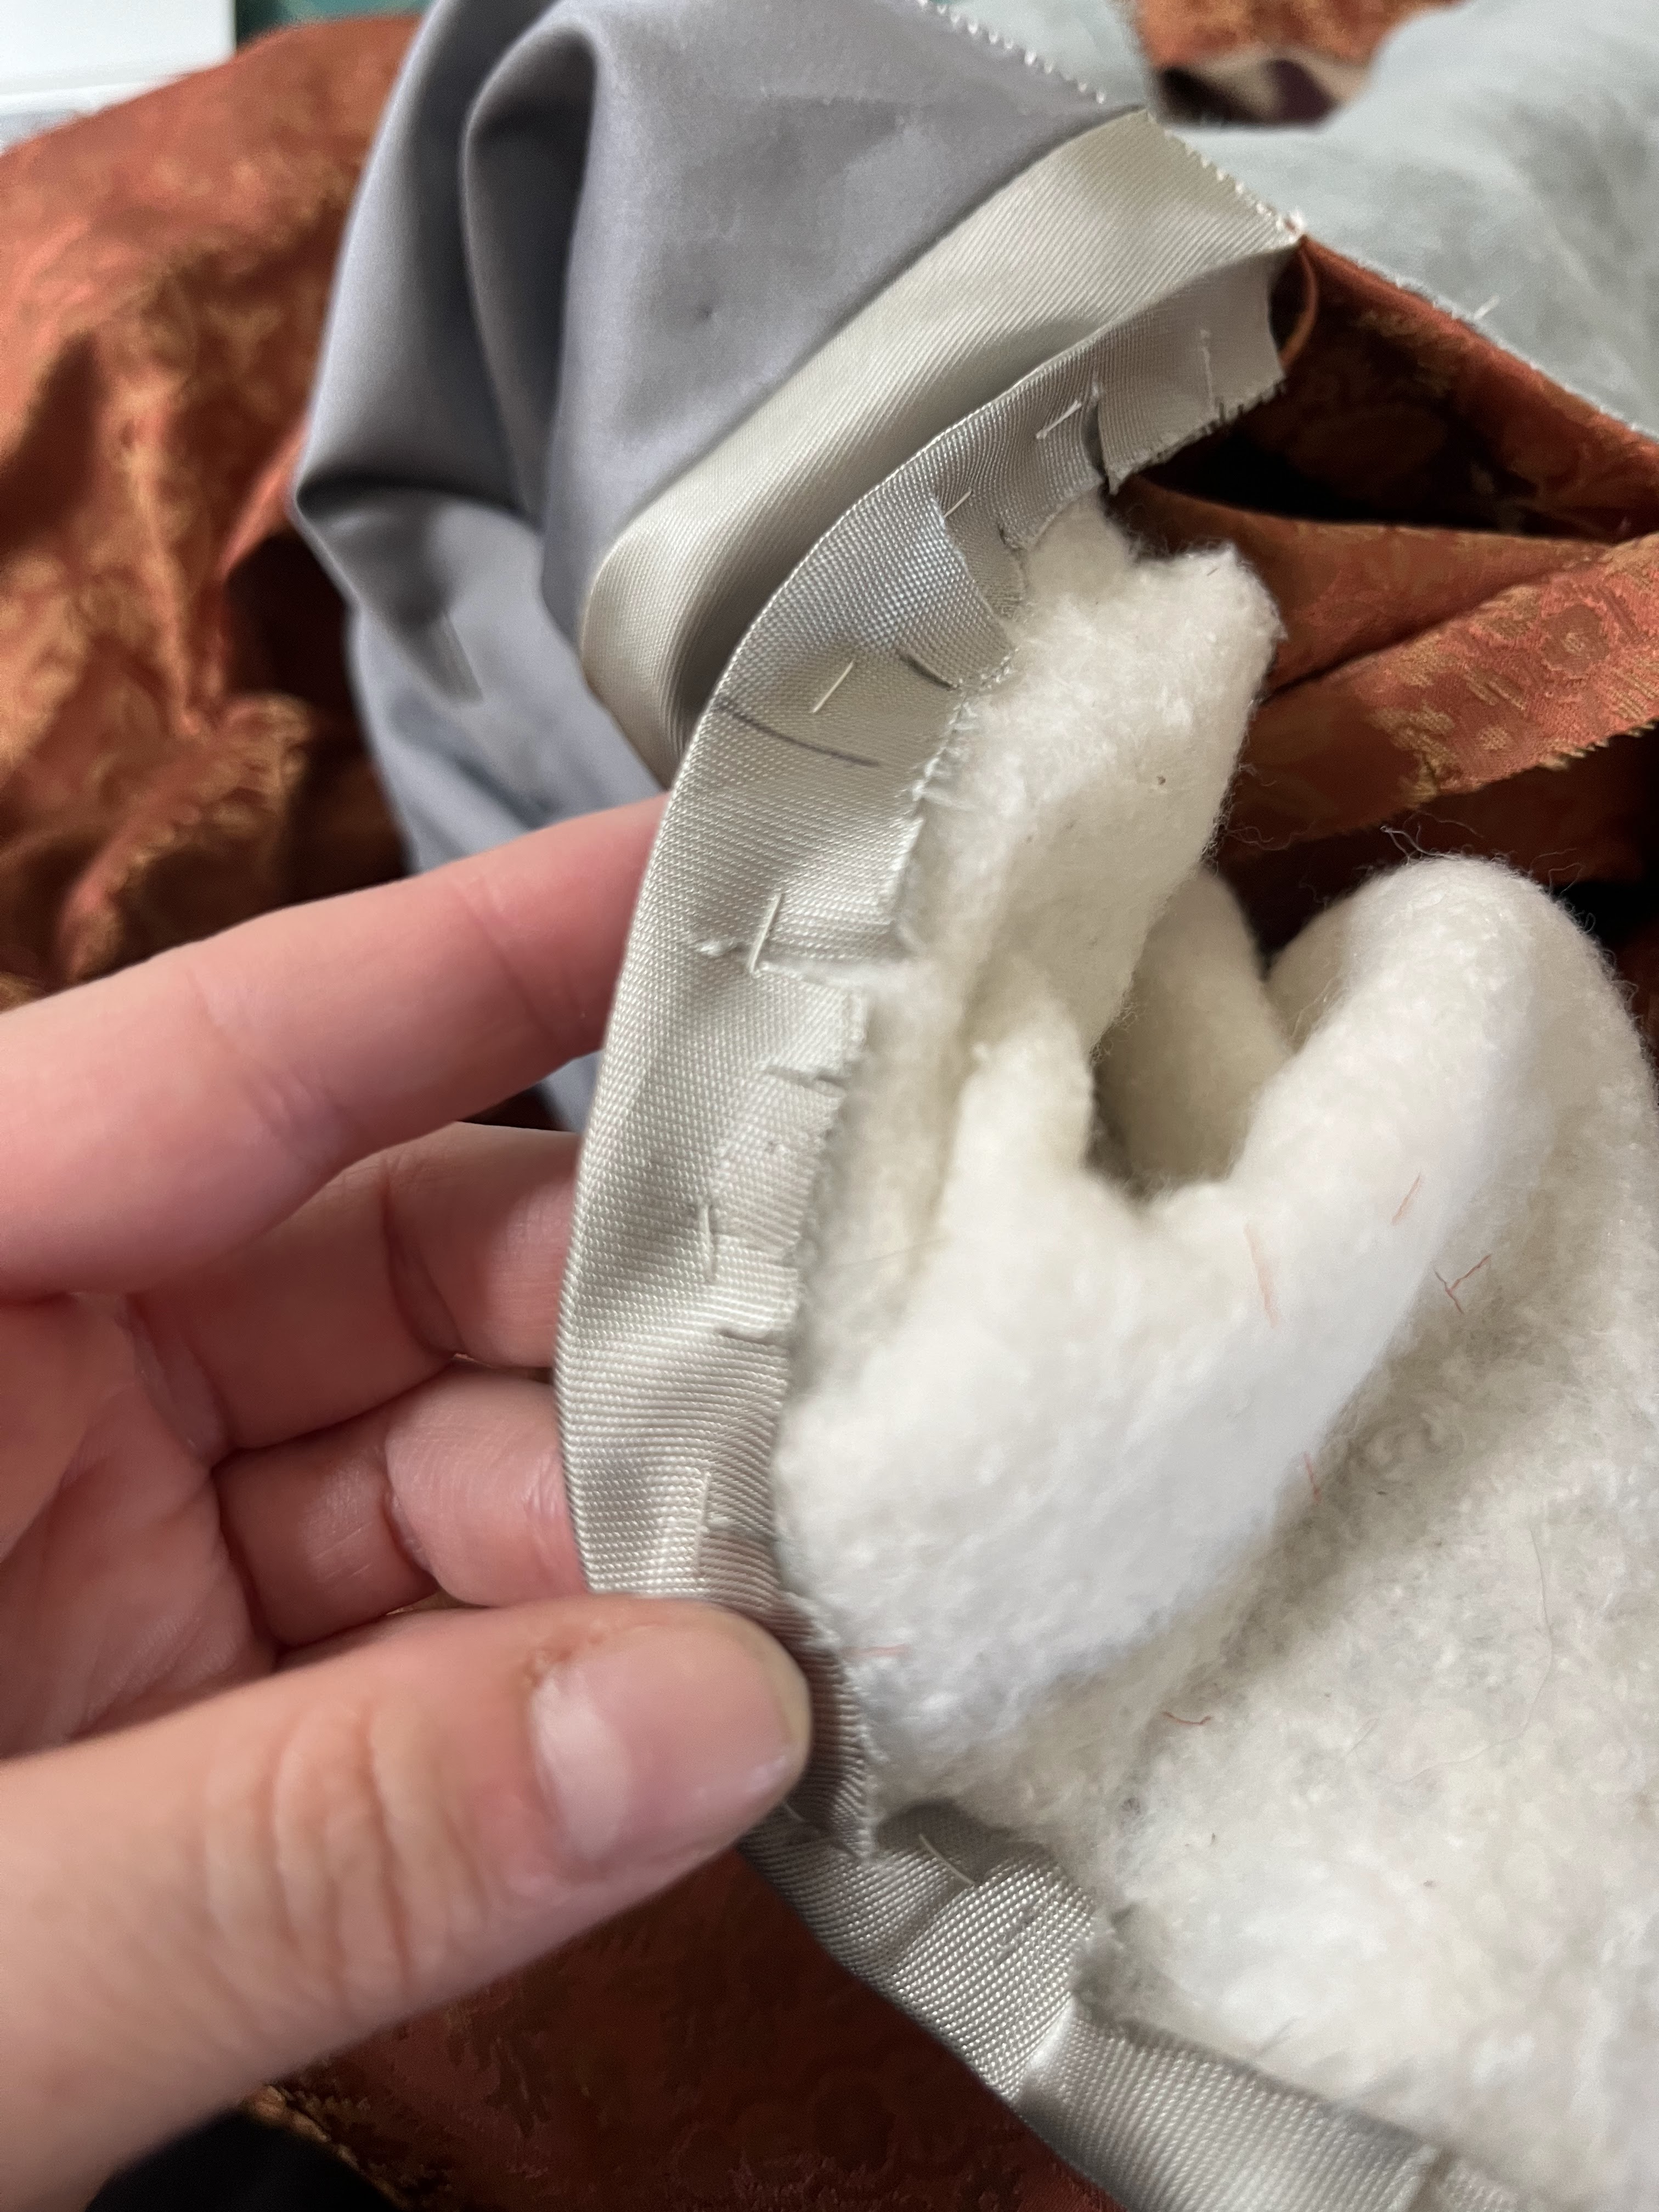
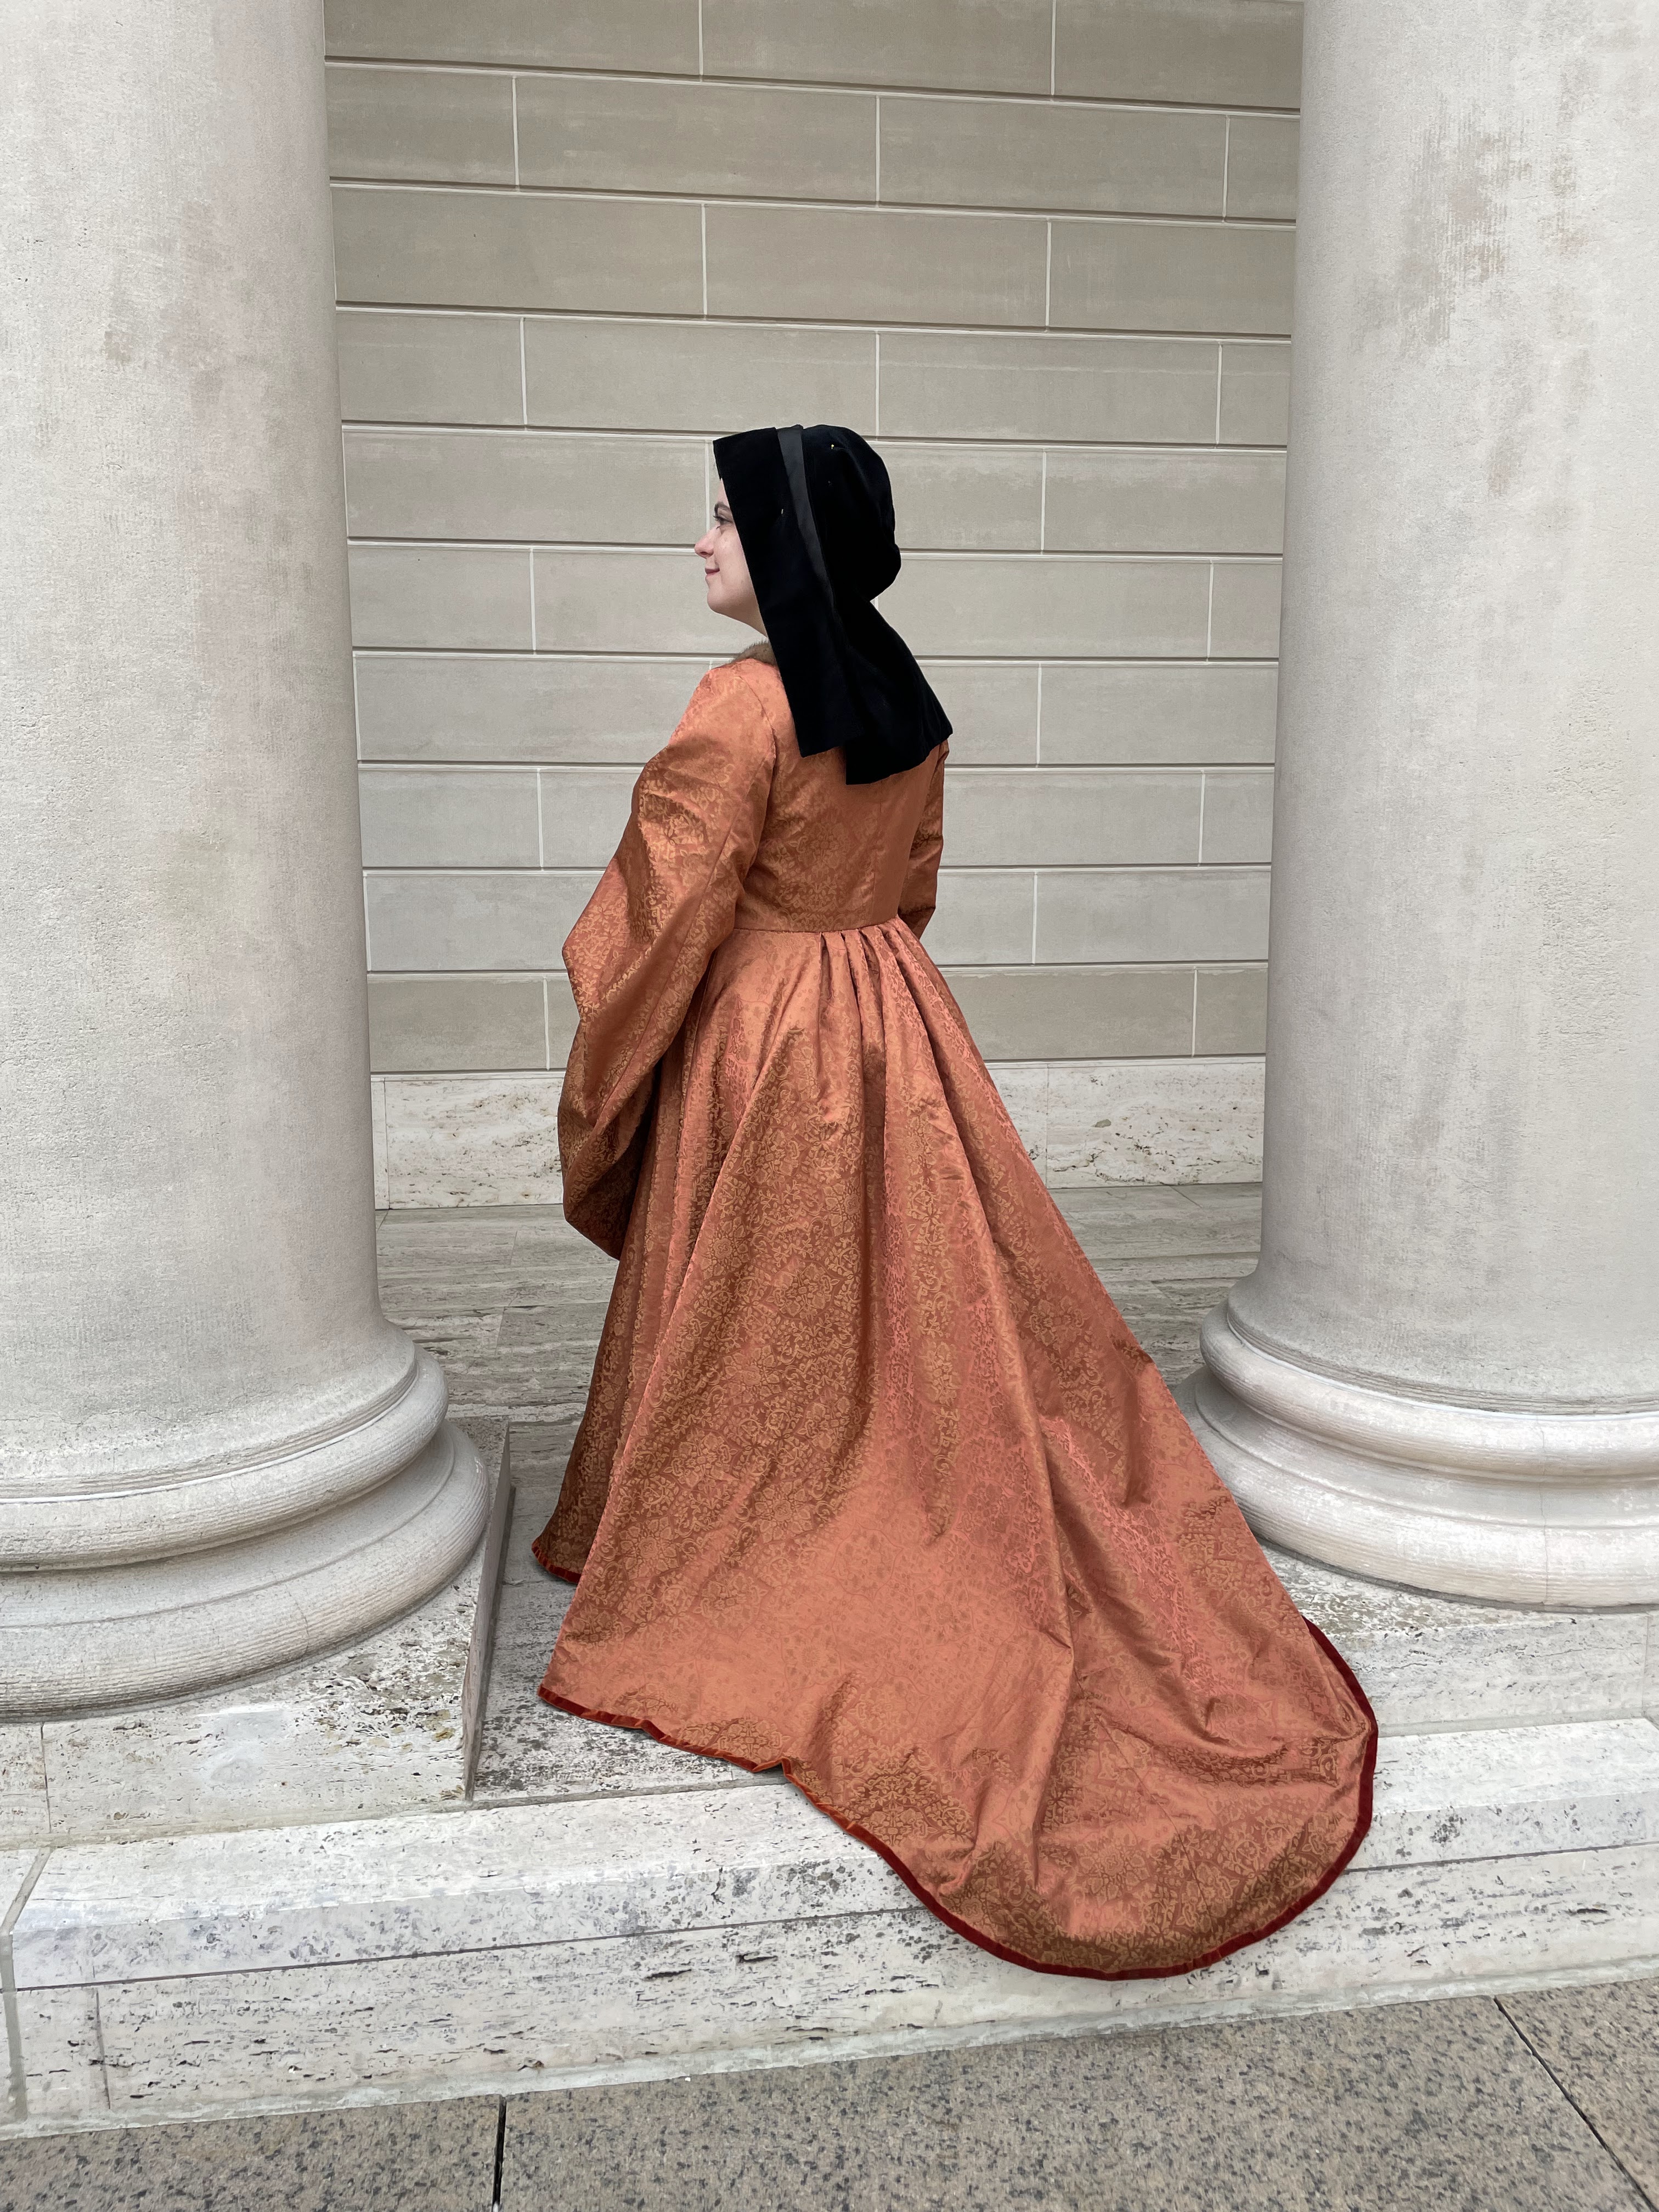
Skirts were drafted straight out of the queen’s servants choosing the narrower skirt option with a train (although about 7″ shorter since I need a 37″ skirt and not a 42″ skirt. I hate nothing more than grading up a skirt pattern which is longer than my yardstick ughhhh. The front was lined with gray cotton sateen and the back with a silver silk blend (I think that’s the content) because I didn’t have any linen of the right weight and drape in the stash.

Yes, my pattern weights are rocks that my 5yo had brought into the house at some point in time.

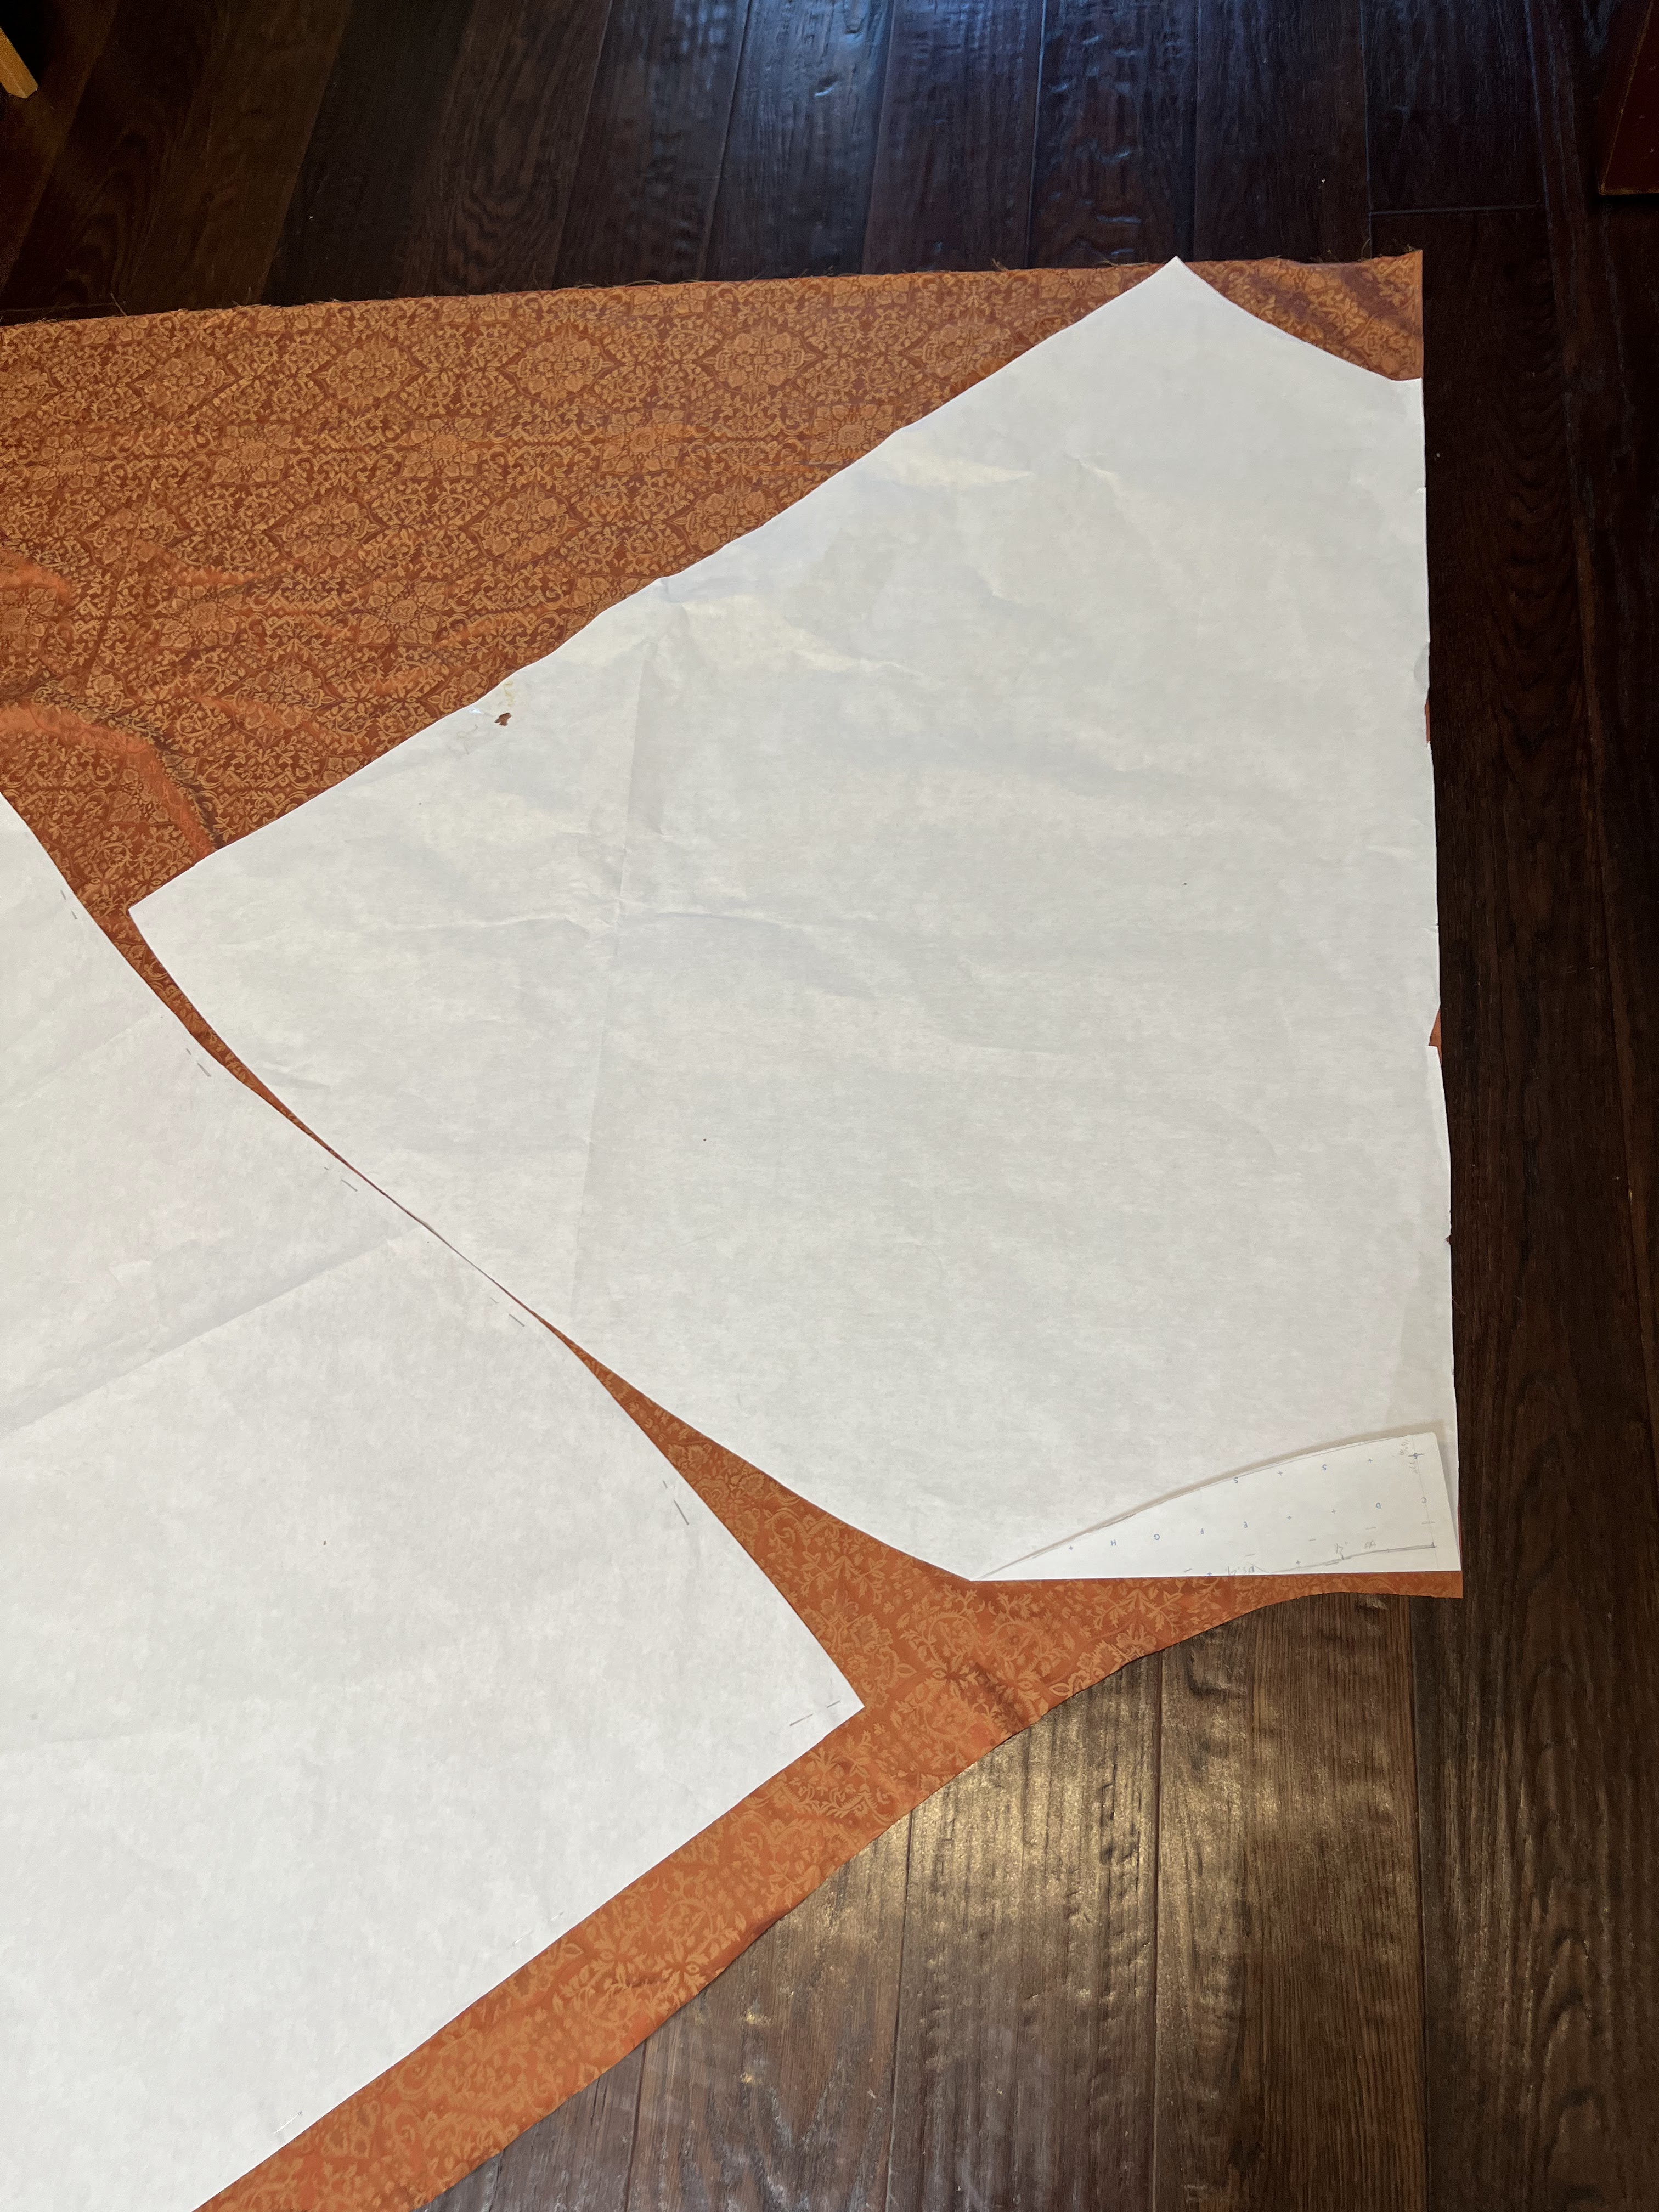
I was so close to not having to piece any of this gown, but my fabric came in 3 pieces and I wasn’tn about to cut into a new one for that tiny skirt corner. So that is the one bit I ended up piecing on (with pattern matching since I had enough extra for that).

Here is where I deviated from the Queen Servants construction information. They have a long section about making wool batting into cylinders and stuffing your pleats with them. I made the narrower skirt draft from the book and it made such tiny pleats there was no possible way to add cylinders of batting, (although the book never specified that their pleat method was only for the widest skirts so there was some initial consternation here). Instead I just added a bit of quilt batting into my back pleats to pad them out.

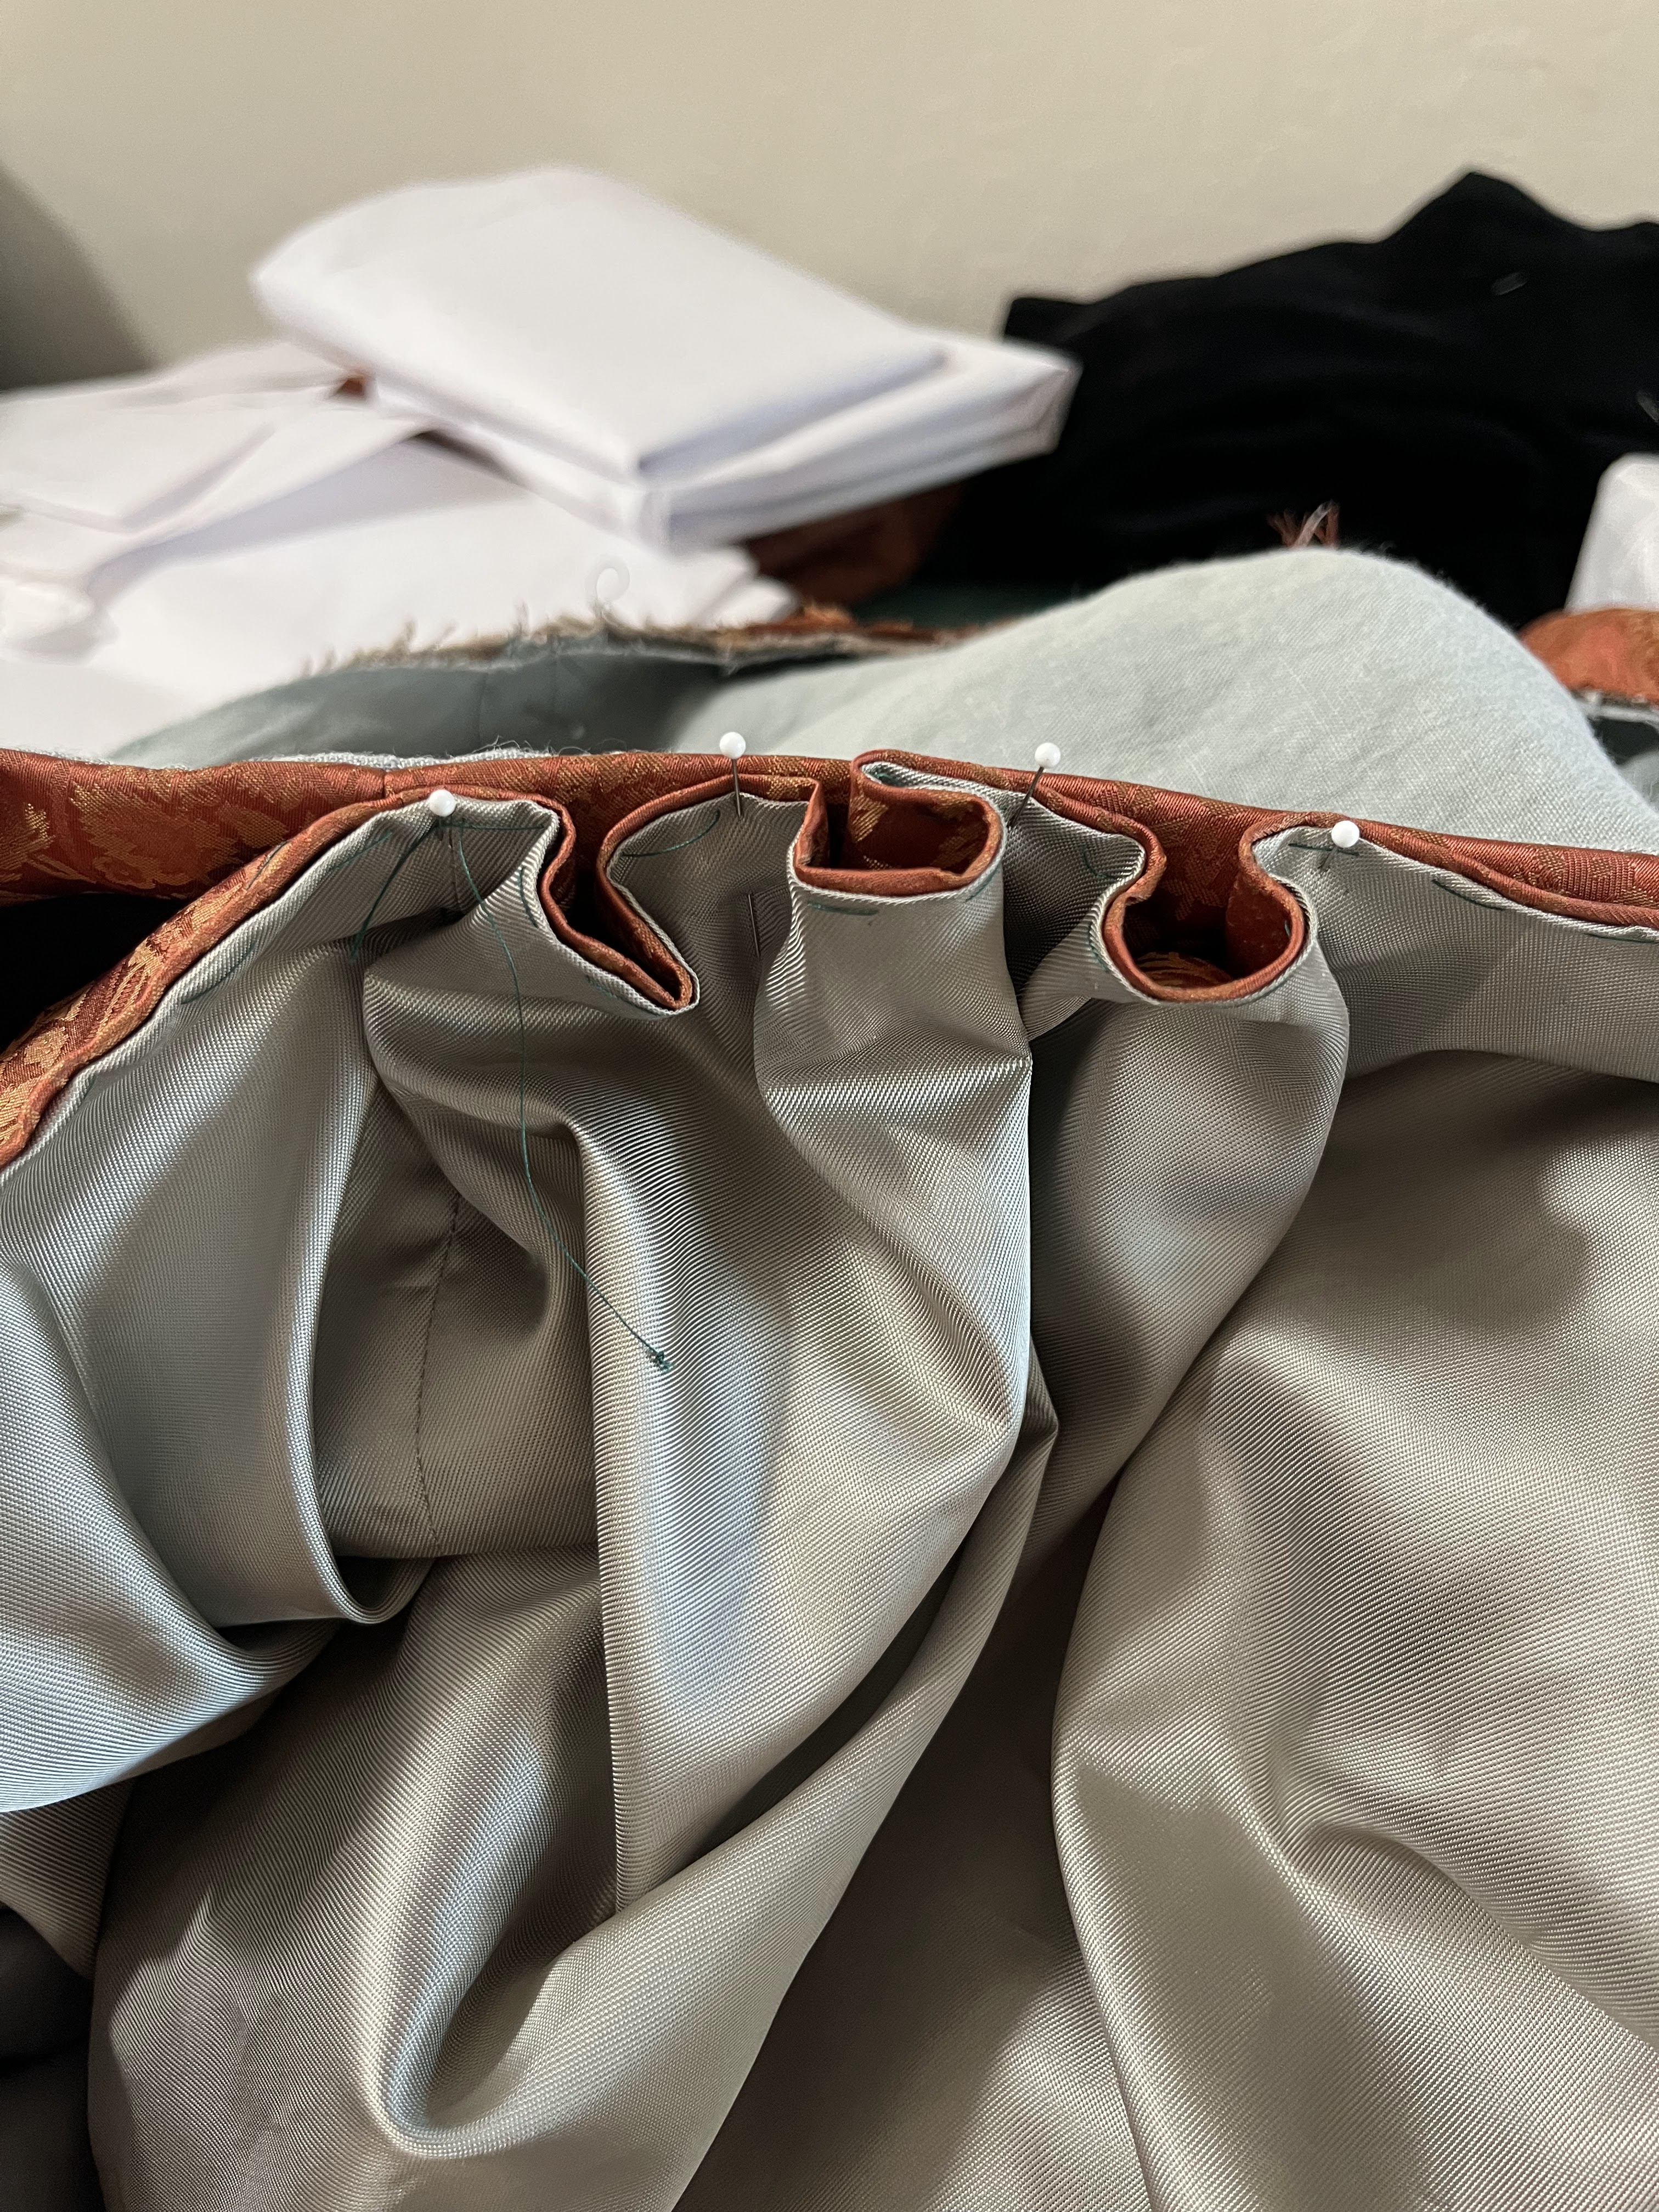
They also had incomprehensible instructions about how to attach the skirt to the bodice. I went full victorian and turned my raw edges into each other, and whipped the finished bodice bottom to the finished skirt top.

Hard to tell but those are pretty tiny pleats. And there was only enough fabric to have them be flat box pleats, definitely no room for stuffing (and I think I had 5 pleats compared to the book’s 6. Sometimes you just need to do what the fabric wants).

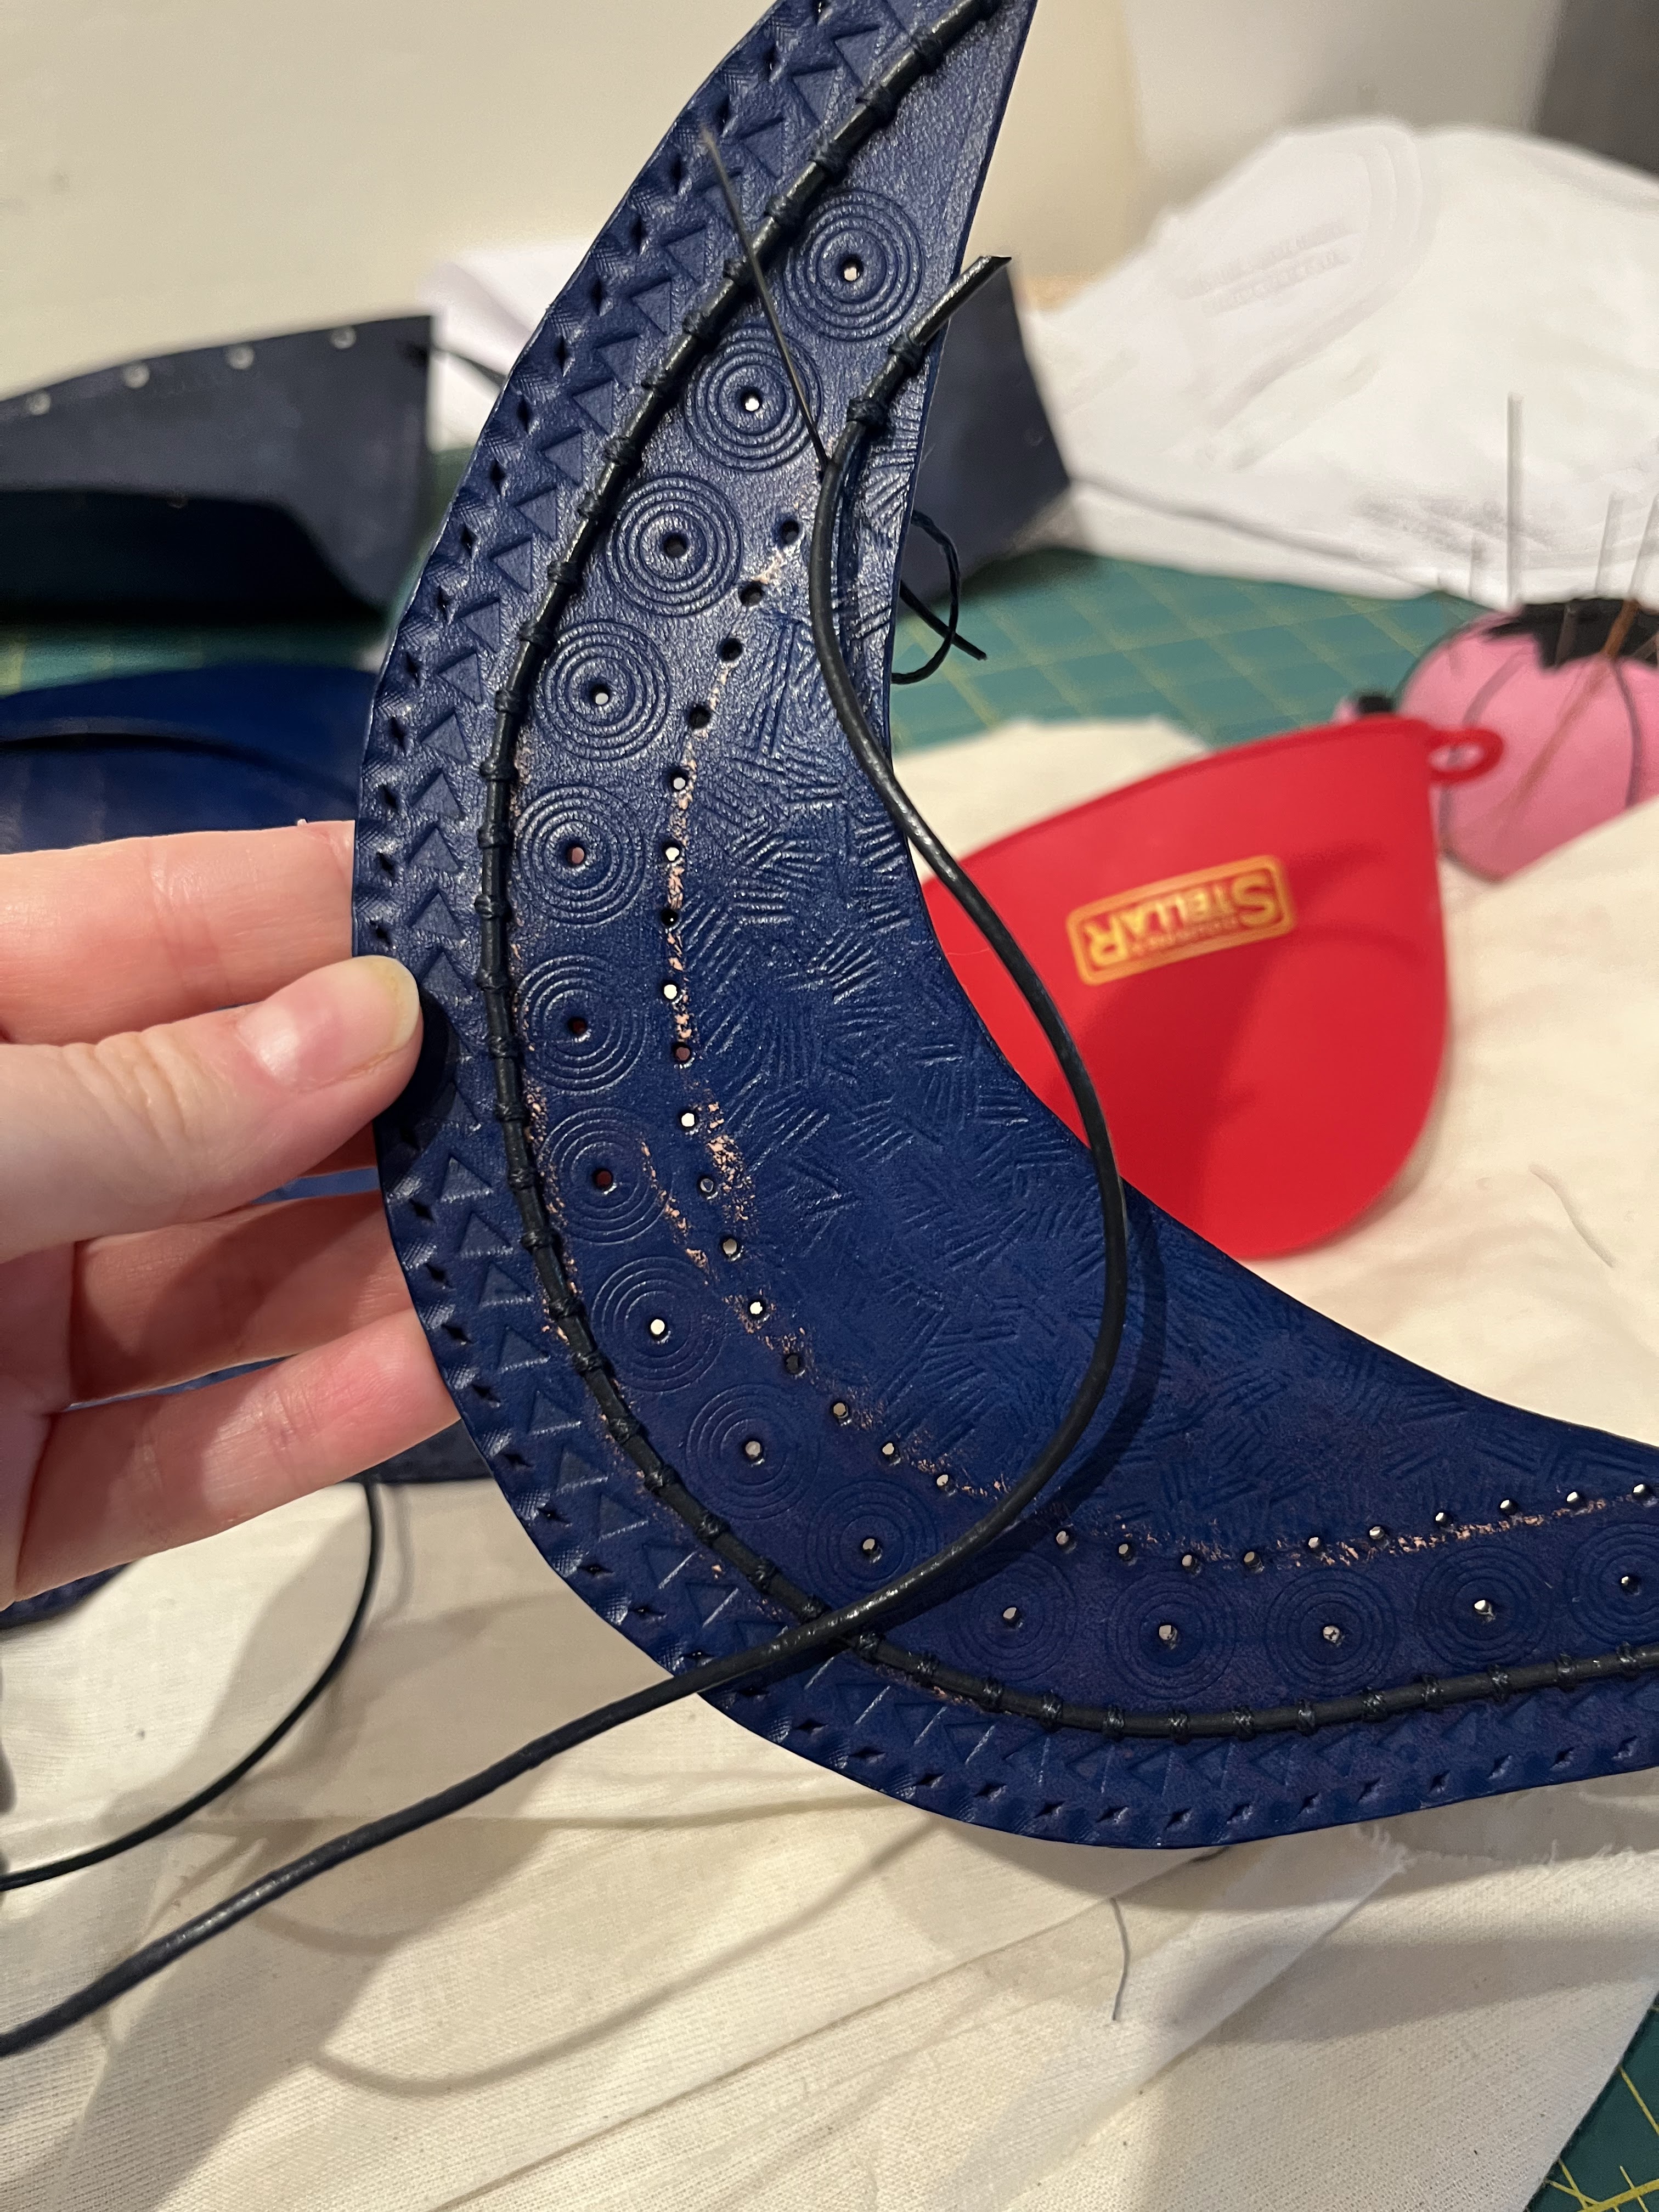
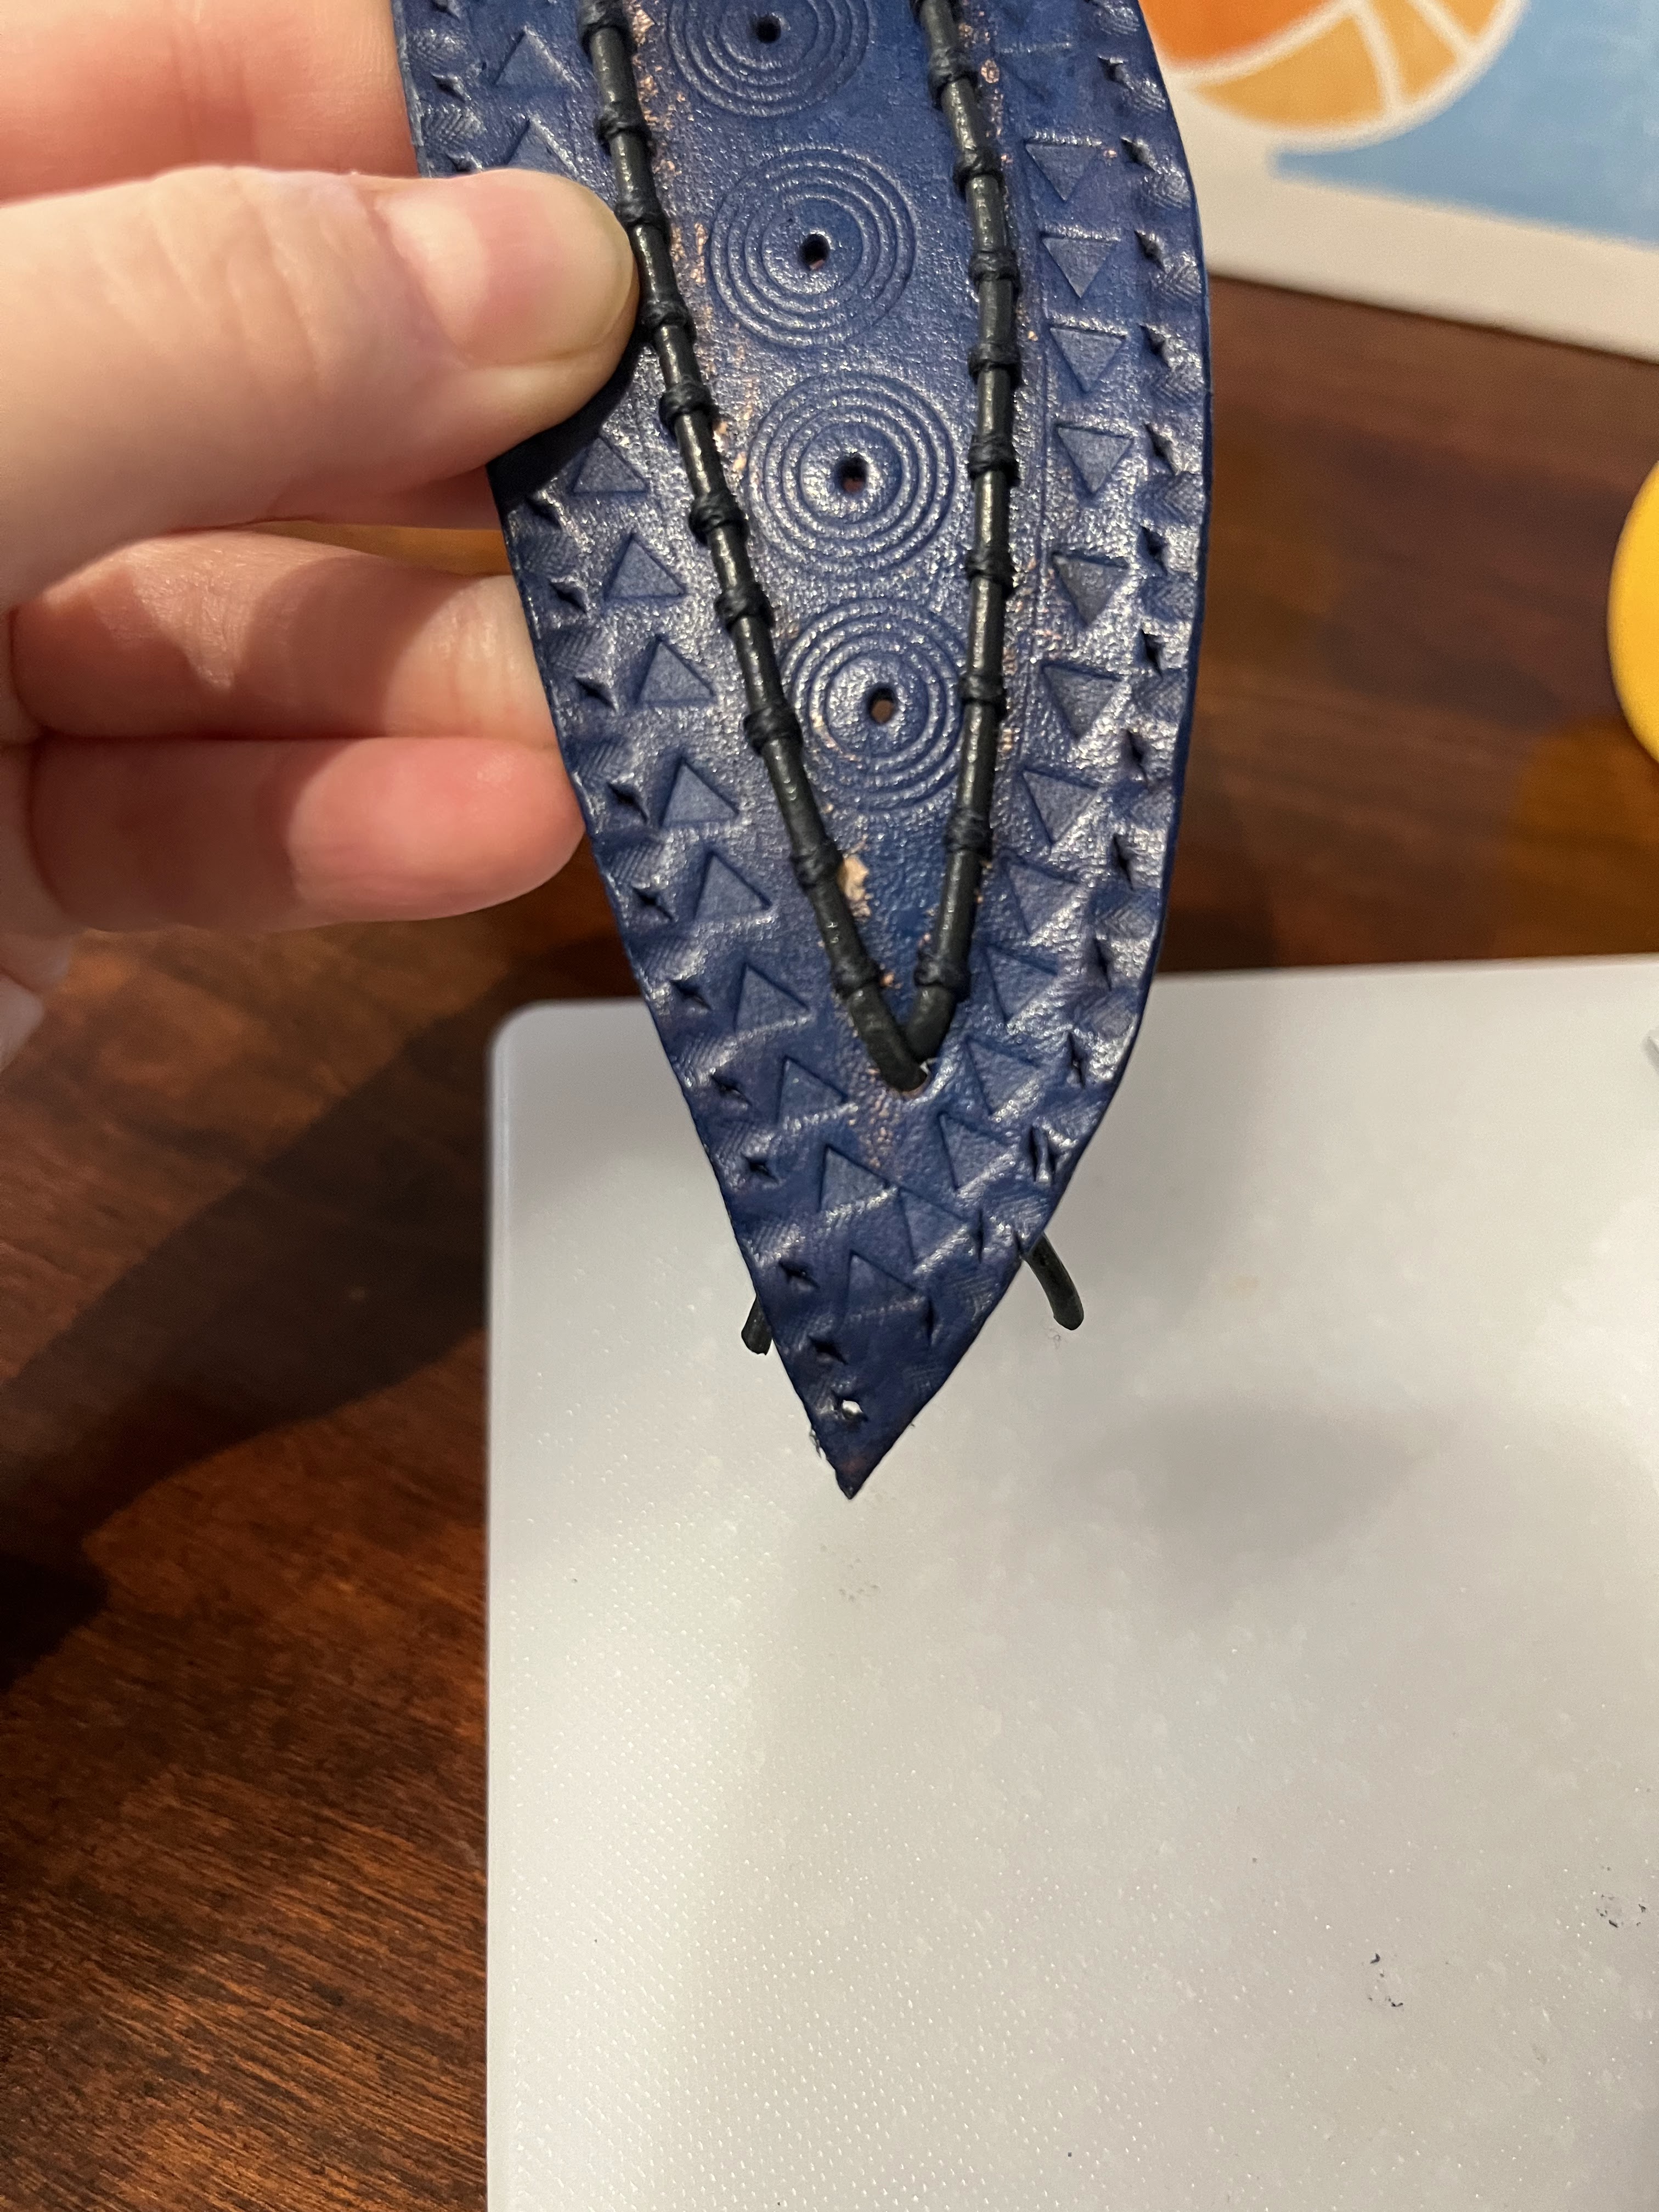
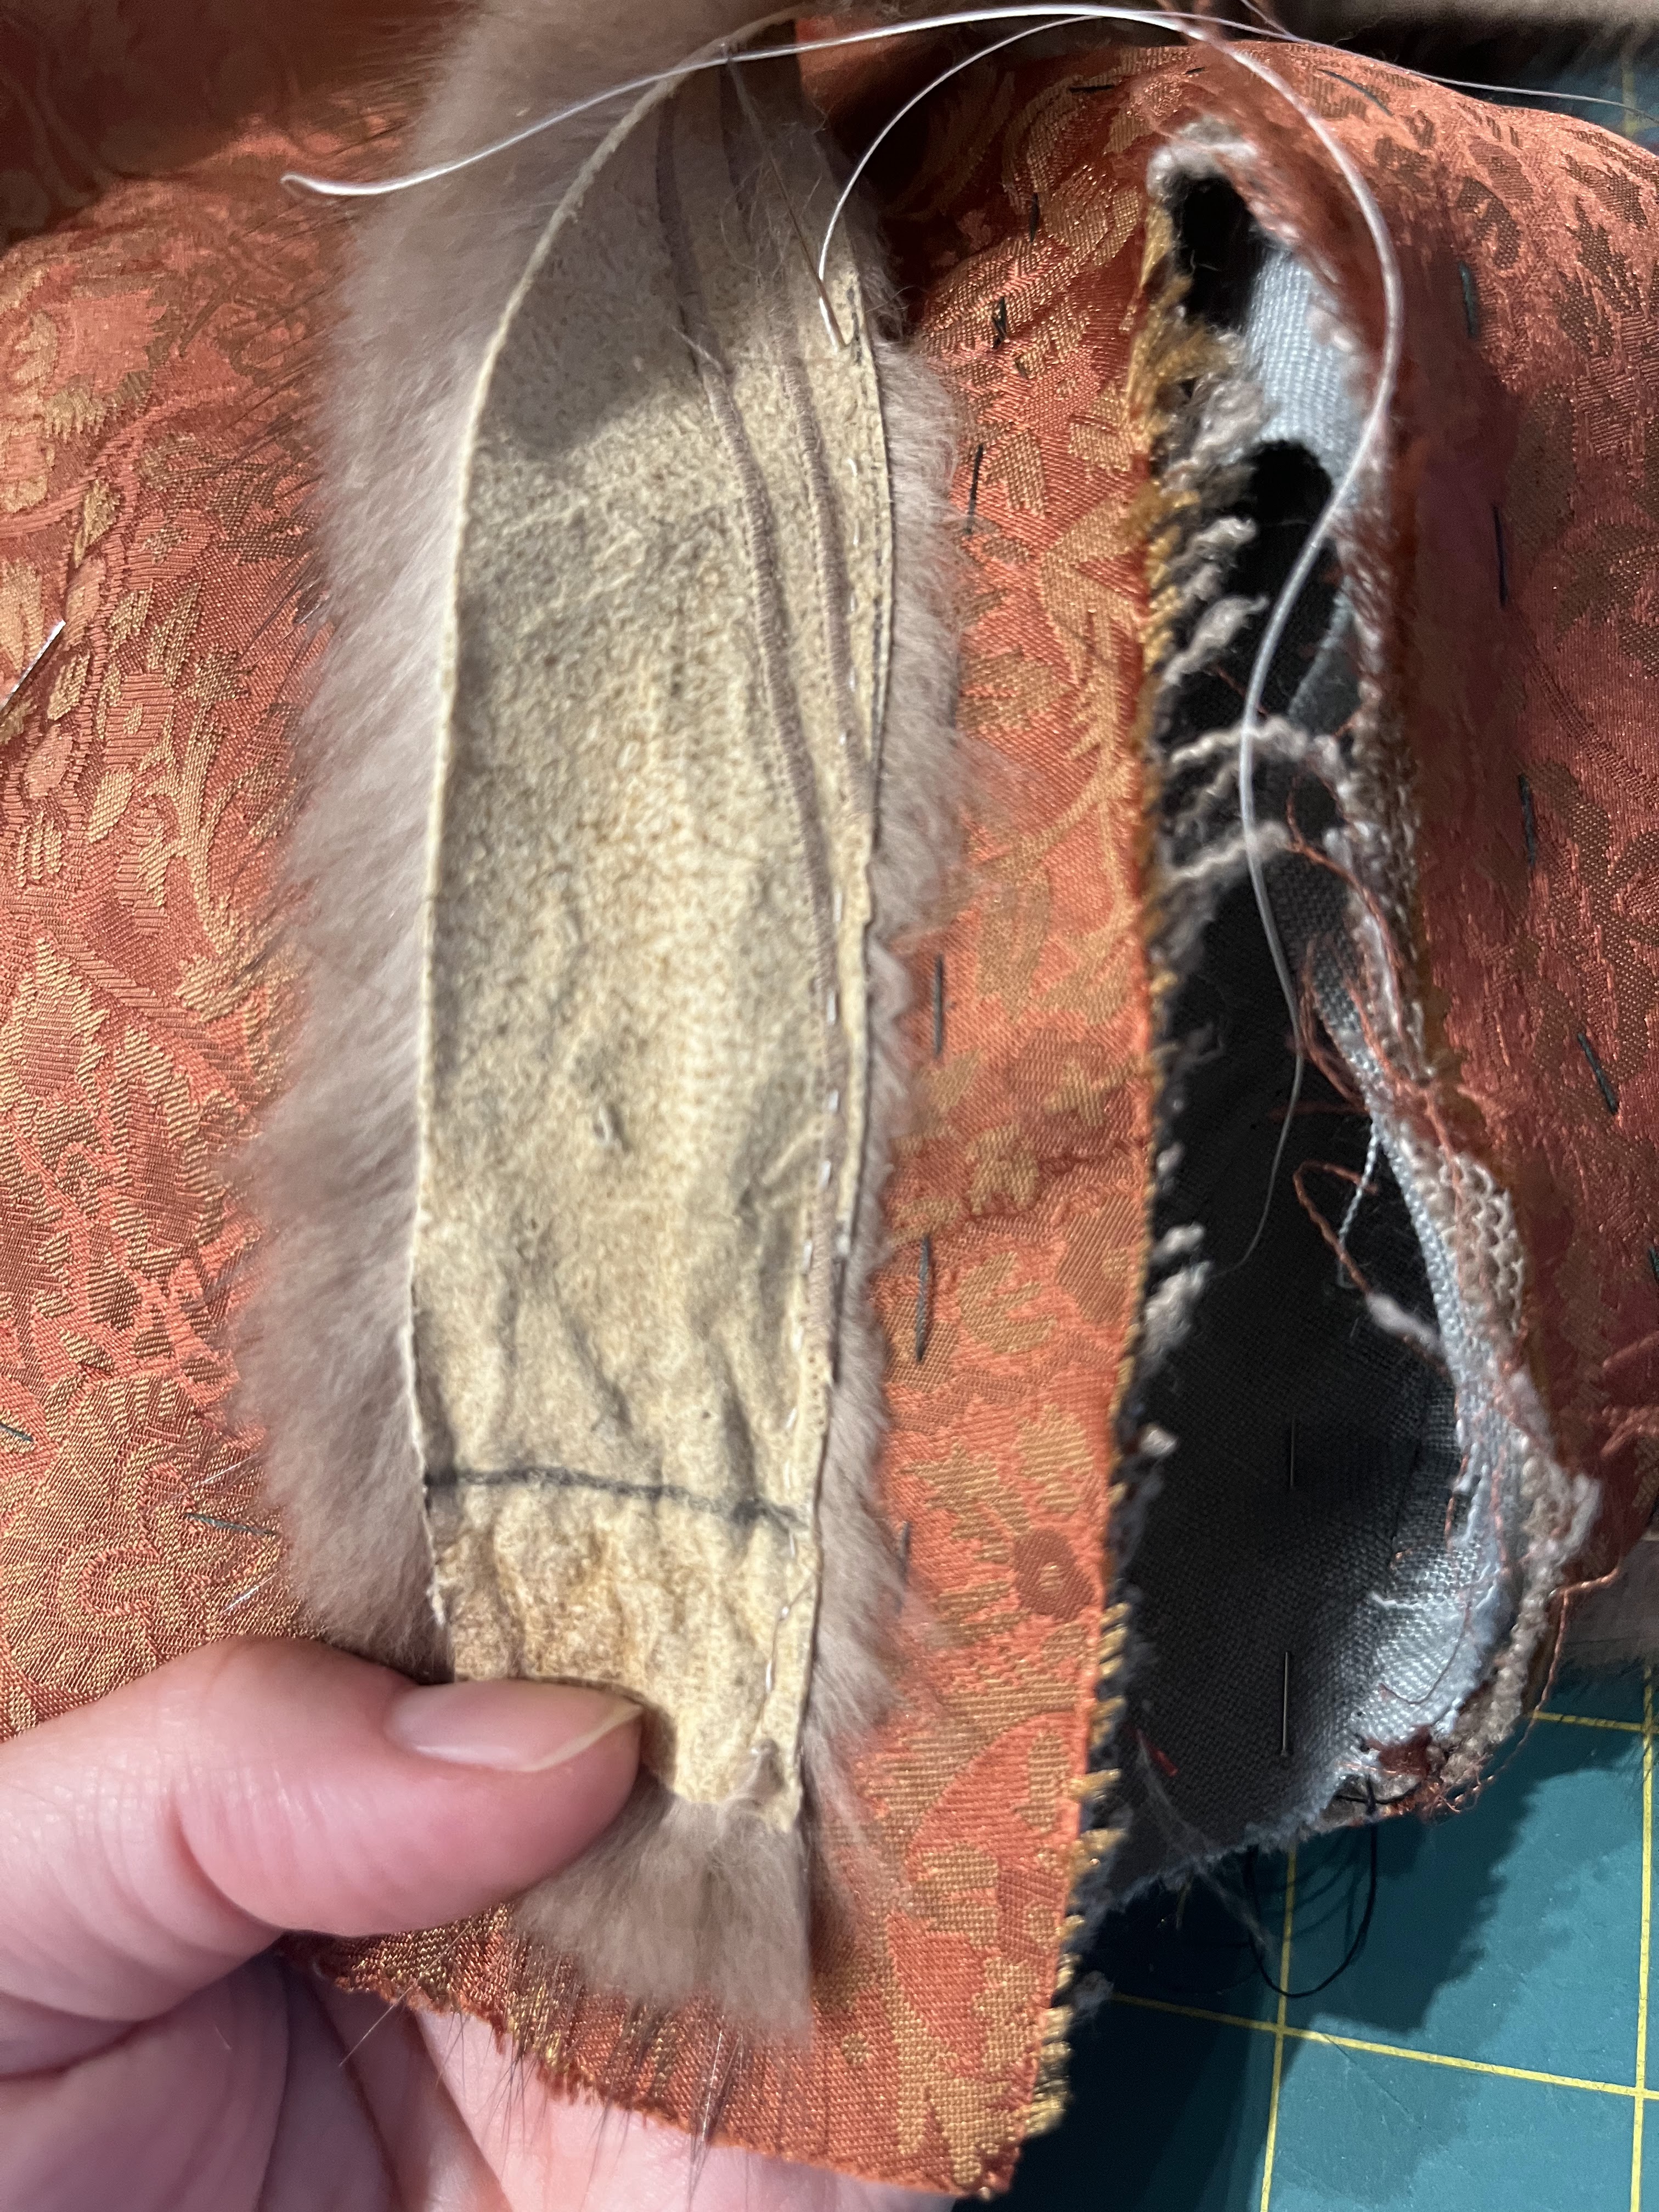
And story time about my fur! My grandmother owned a mink coat which my mom inherited. Give that we all lived in southern california, the mink coat stayed in the closet for decades. When my sister went to college in Chicago, she had the coat tailored into a vest which she would actually wear. I called dibs on the offcuts, so the sleeves then stayed in my closet for years waiting for a project. And then this one finally appeared! Mink is a documentable fancy fur for edging gowns of this type.

Can you believe how small some of those seamed sections are? That’s a quarter inch wide piece of fur they pieced in.

I pulled out my cutter and strop from leatherworking and carefully cut this into strips, trying not to push too hard (because ideally you just cut through the leather backing and not so much the fluffy side). Of course everything did end up coated in fuzz and I used a handheld vacuum on the table in between cutting each strip.

I tried to figure out the “correct” way of handsewing fur onto a gown, and whaddya know there really are no resources out there for doing this. So for the front opening I did a running stitch right sides together, flipped the fur over to bind the edge, and whipped it down on the inside without folding it under (because leather doesn’t fray).

Sewing the leather strip down juts outside the seam allowance before cutting off the seam allowance and flipping the leather around the raw edge
Fur doesn’t like turning acute corners but it’s also so fluffy you can’t really tell how messy the stitching is
Same procedure for sleeves as neckline, but a sewing machine. Also I used the fur as a facing (so flipped all the way to the inside) as opposed to a binding. I wish I had enough to go higher up the sleeve!

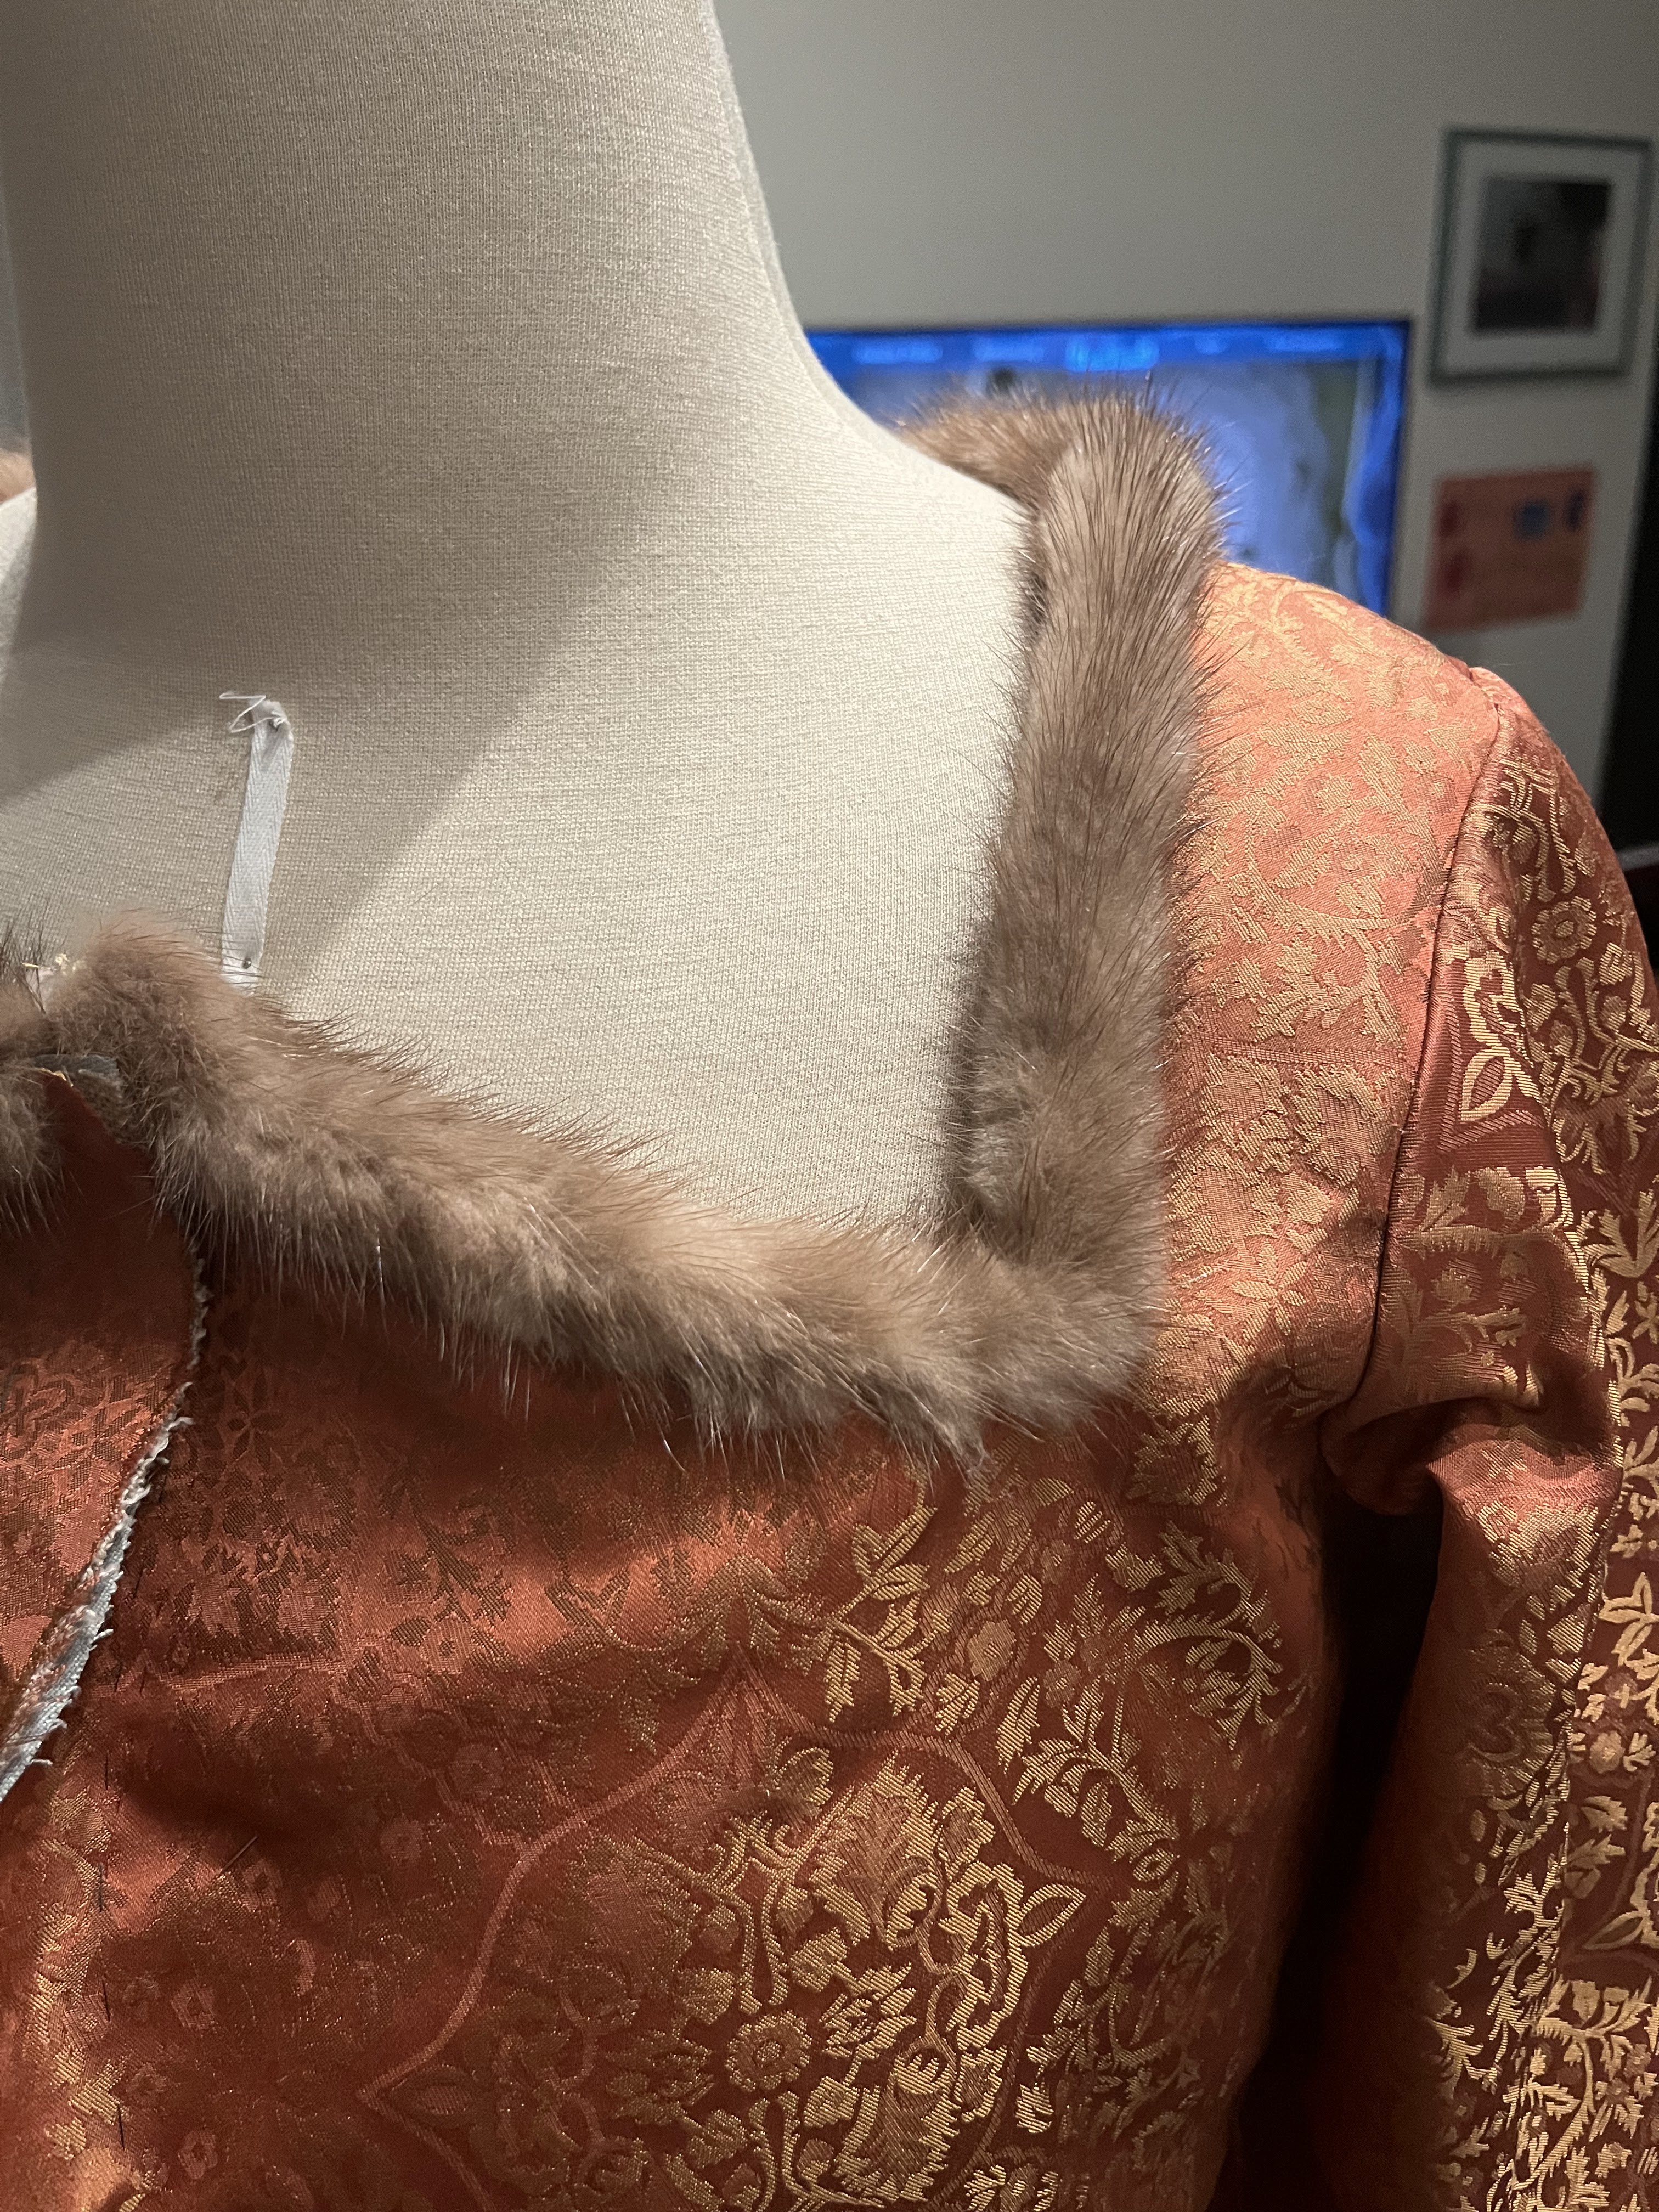
For the sleeves, I was seriously running out of time. Walking foot and leather sewing needle to the rescue! (The walking foot had been purchased to sew some knit jersey shirts and the leather needle was from long ago attaching leather trim to boots for my Rey costume. All parts of the hobby are useful and converge!). Unfortunately despite careful math to make the length of trim be correct, the fur tends to bunch up a little bit meaning I was about 2″ short on the trim and had to carefully (and begrudgingly because it was getting late at night) add on a little extension piece). I think I finished the whipstitching on the inside of the sleeve around 10pm which is past my bedtime these days.

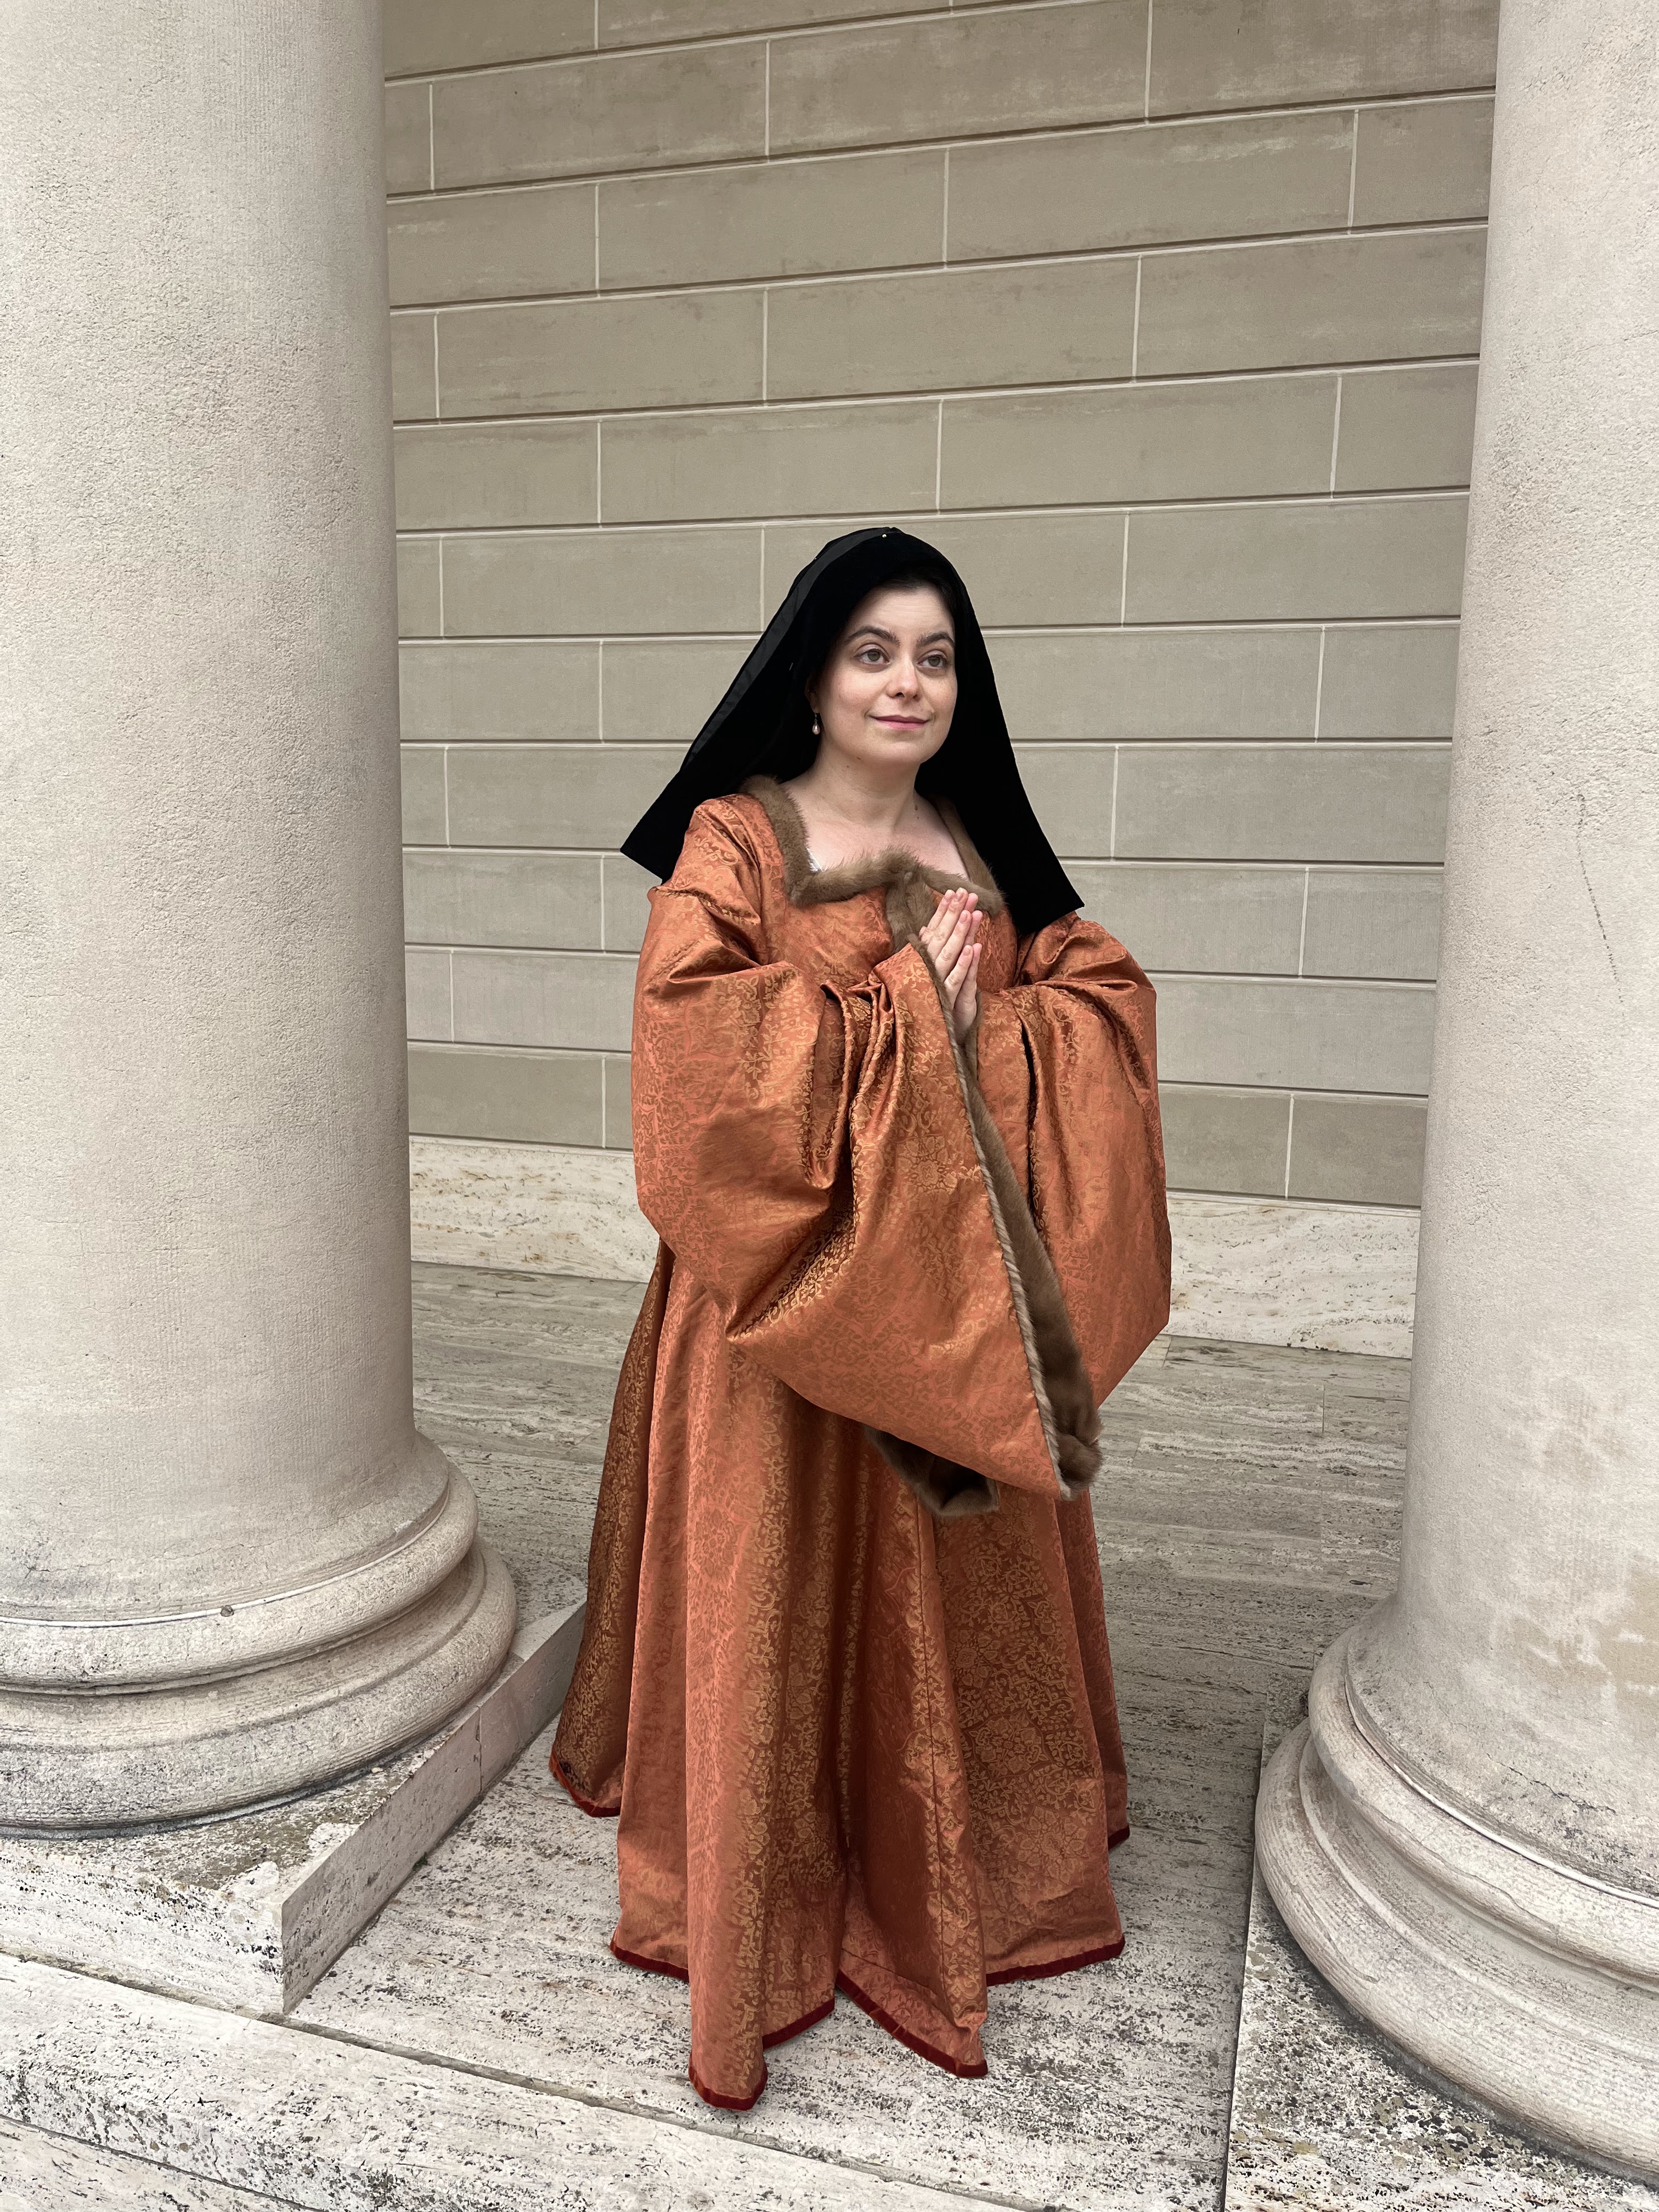
And miraculously, this dress was done within two weeks to go see the Tudor Exhibit at the Legion of Honor with the Greater Bay Area Costumer’s Guild!

whoops all my photos in front of the exhibit name have my eyes closed

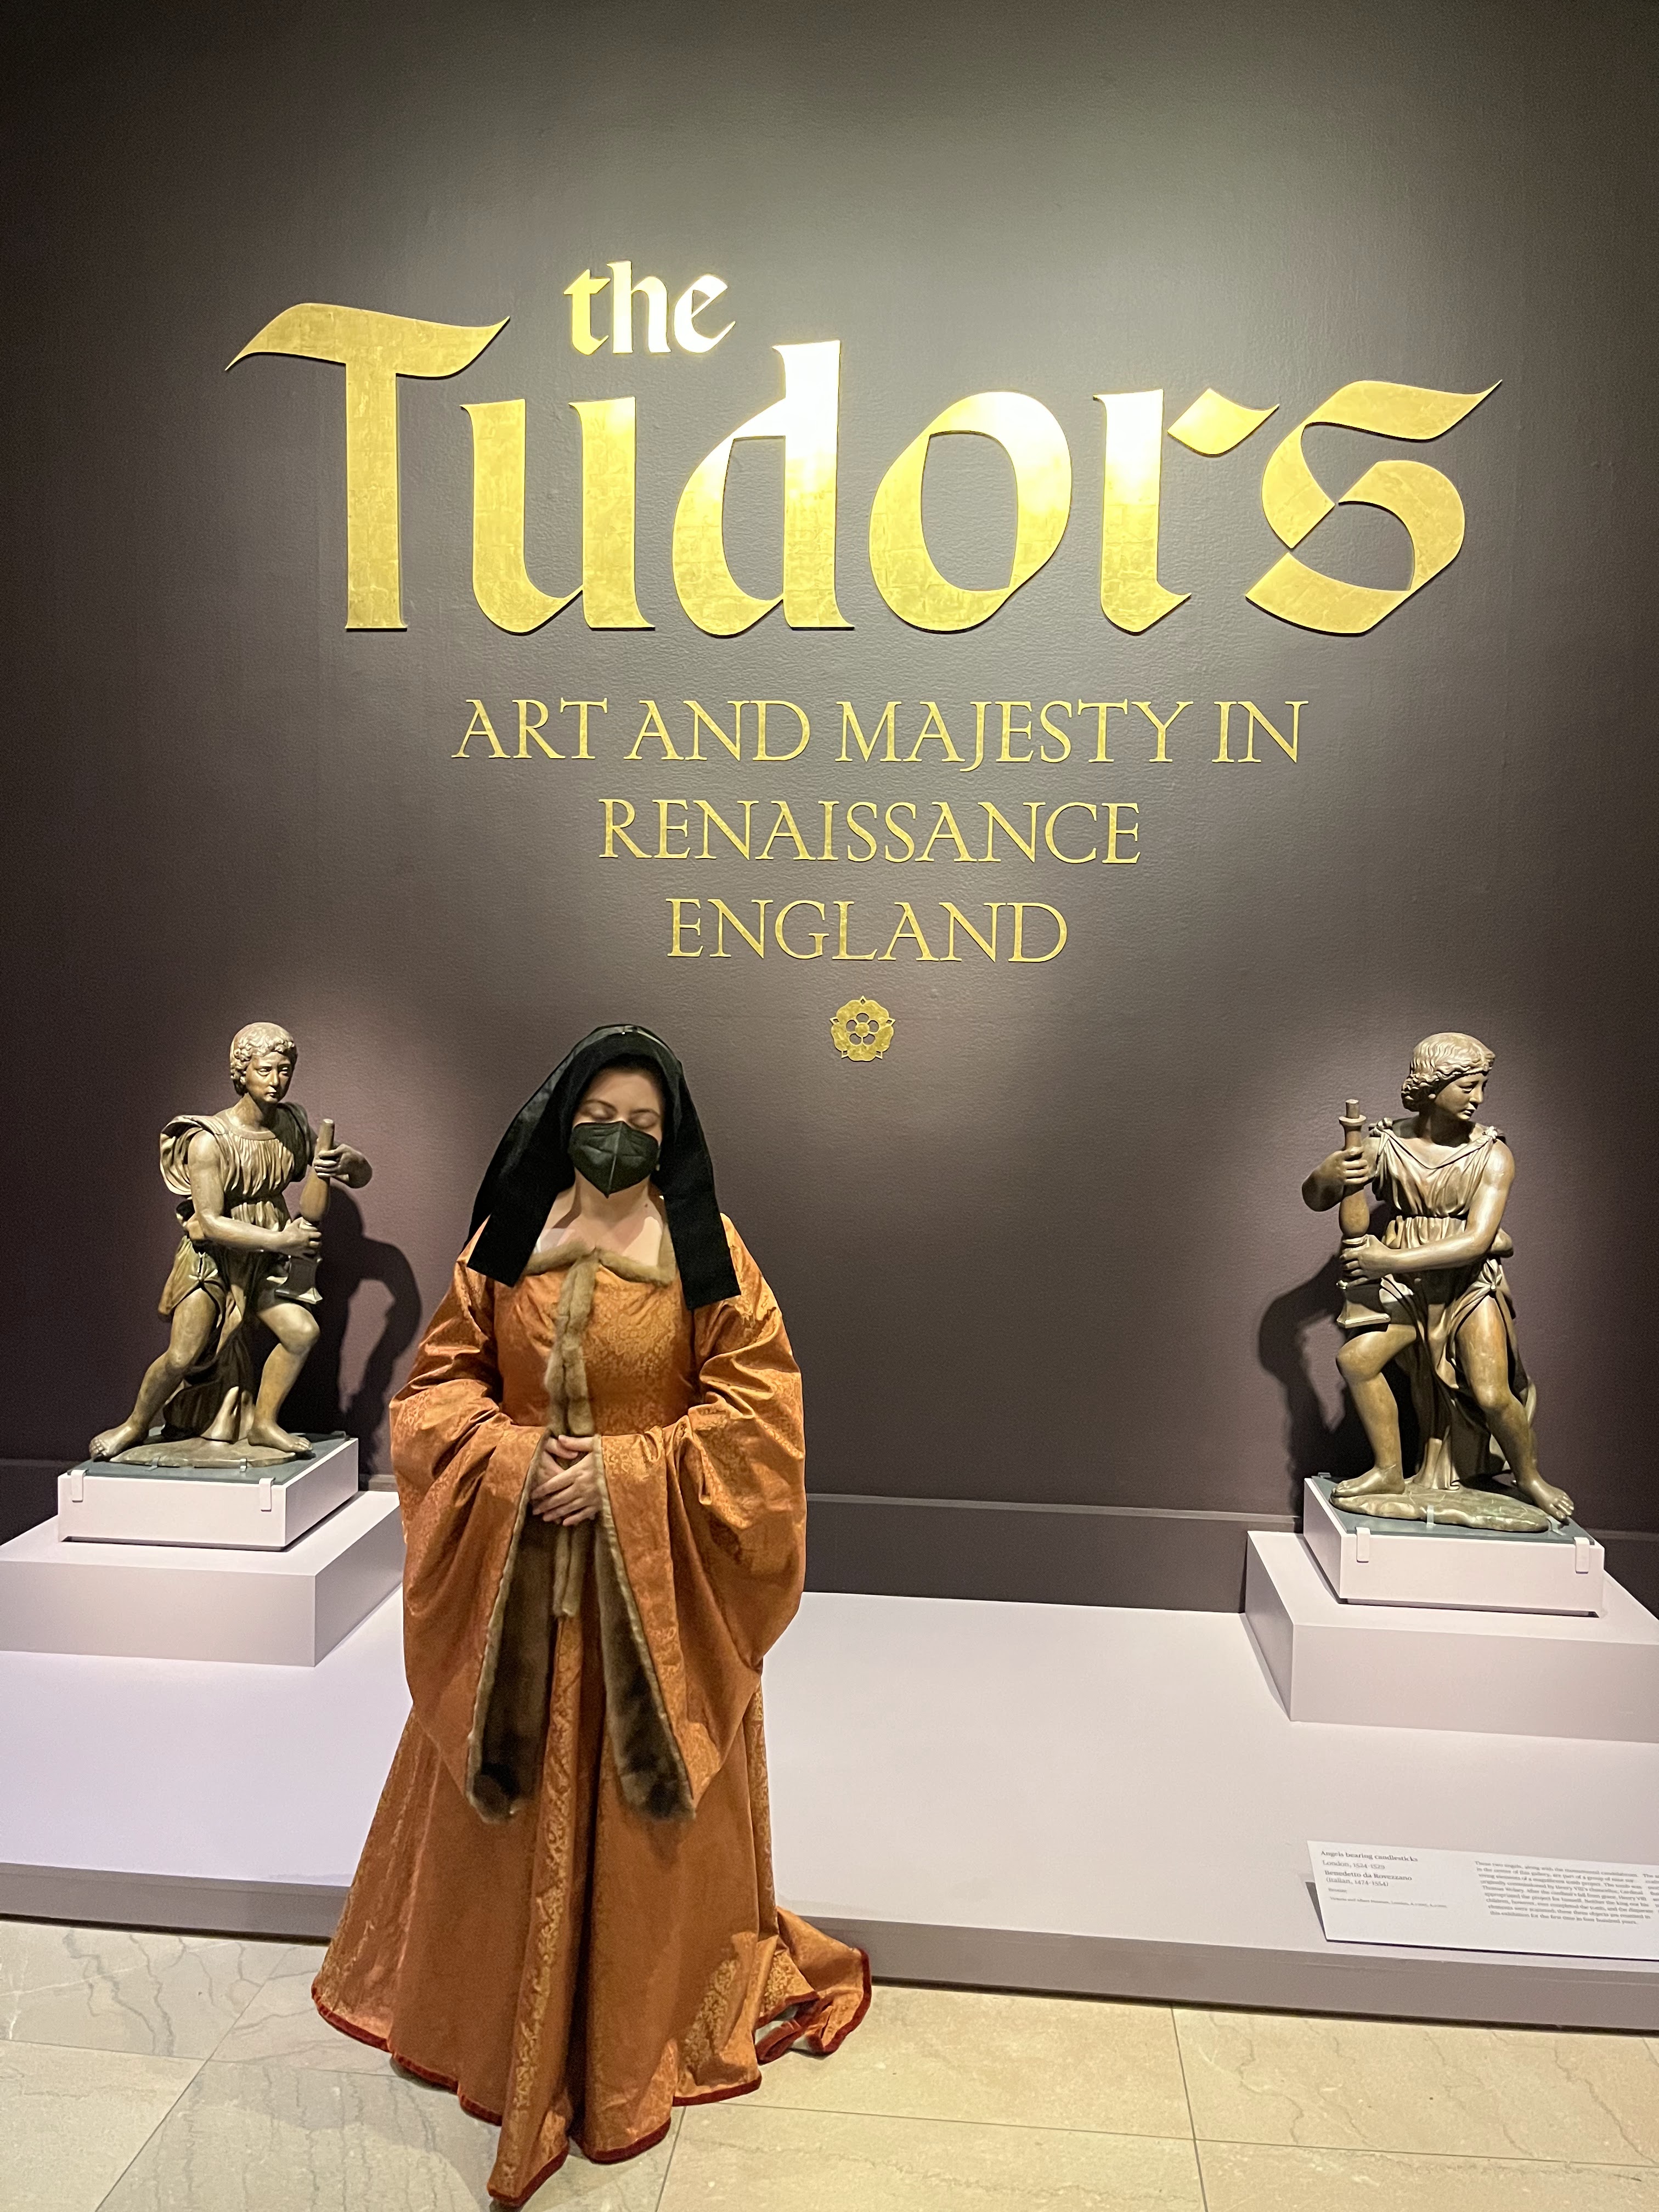
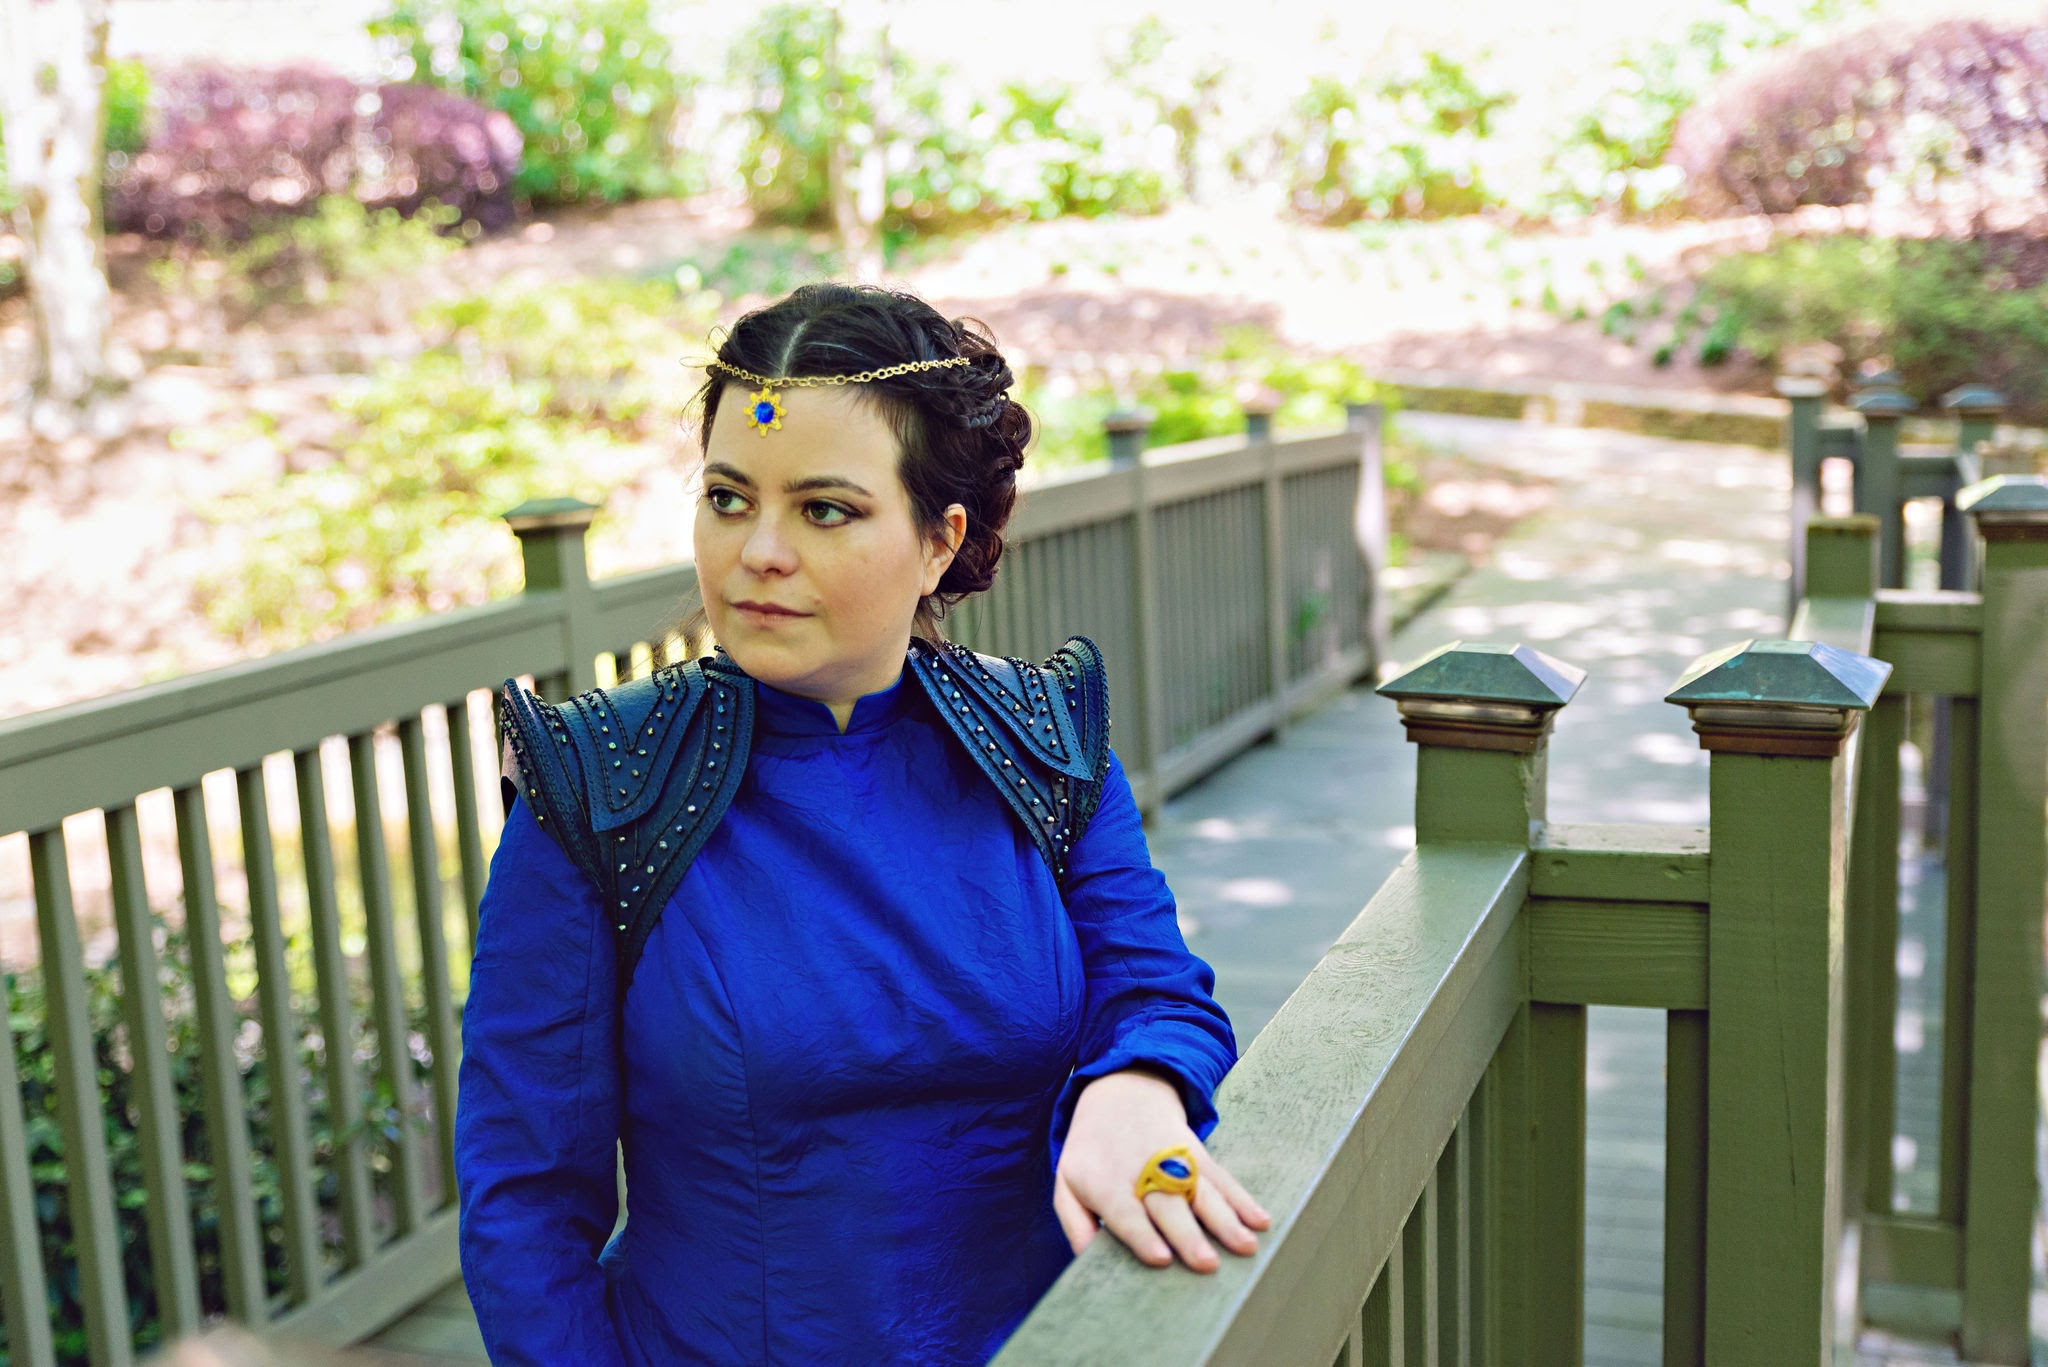
To get the bonnet and frontlet on, I taped up my hair and used big pins to pin the bonnet directly to my braids (I should make some kind of under-coif one of these days). The frontlet is pinned onto the bonnet in a hopefully attractive fashion. I need to do some more digging into portraits because I think at this point they start getting a little bit fancier (before evolving into what becomes a gable hood [if you stick a buckram structure underneath] or a French hood).

But look what a shiny bathrobe it is!

I love this dress so so much. If you don’t know the period it’s kindof a strange look (aka shiny bathrobe) but it really feels like clothing of the era and not a costume when I put it on.

me so pious. (I mean this was the appropriate era of dress for Katherine of Aragon’s wedding!)

And some of my musings on historical accuracy with this dress – sometimes I care a whole lot and sometimes I really truly don’t :p For example, I was agonizing over the fact that my sleeves and neckline were trimmed with fur, but my hemline was bound with velvet. While this is entirely plausible (as we have evidence of dresses hemmed in velvet as well as fur), it was never documented to see them at the same time on the same dress. Unfortunately I didn’t have enough of either the velvet or the fur to use entirely one or the other. I thought about cutting up a beaver fur coat I nabbed from goodwill in order to have enough, but I really wanted to use the mink (both for the connection to my grandmother, and because mink is documentable as a trim used for this era of gowns.

I also agonized over the sleeve lining. Again looking at what was documented, a matching silk satin would likely be used if the sleeve was bound with velvet. If fur was used, the gown was lined entirely with fur (although sometimes a cheaper fur was used for the inside and a fancier fur like mink was used where visible). Of course, since I live in Northern California during the era of climate change and not England during a mini ice age, lining the gown entirely in fur was right out. And I used what I had in my stash, which was a coordinating taffeta, rather than rush ordering any expensive silk.

On the other hand, my skirt is lined with cotton sateen in the front and a silk/cotton (I think) sateen in the back, and one of the cotton sateen pieces is the wrong side out because I didn’t want to deal with piecing. 🤷

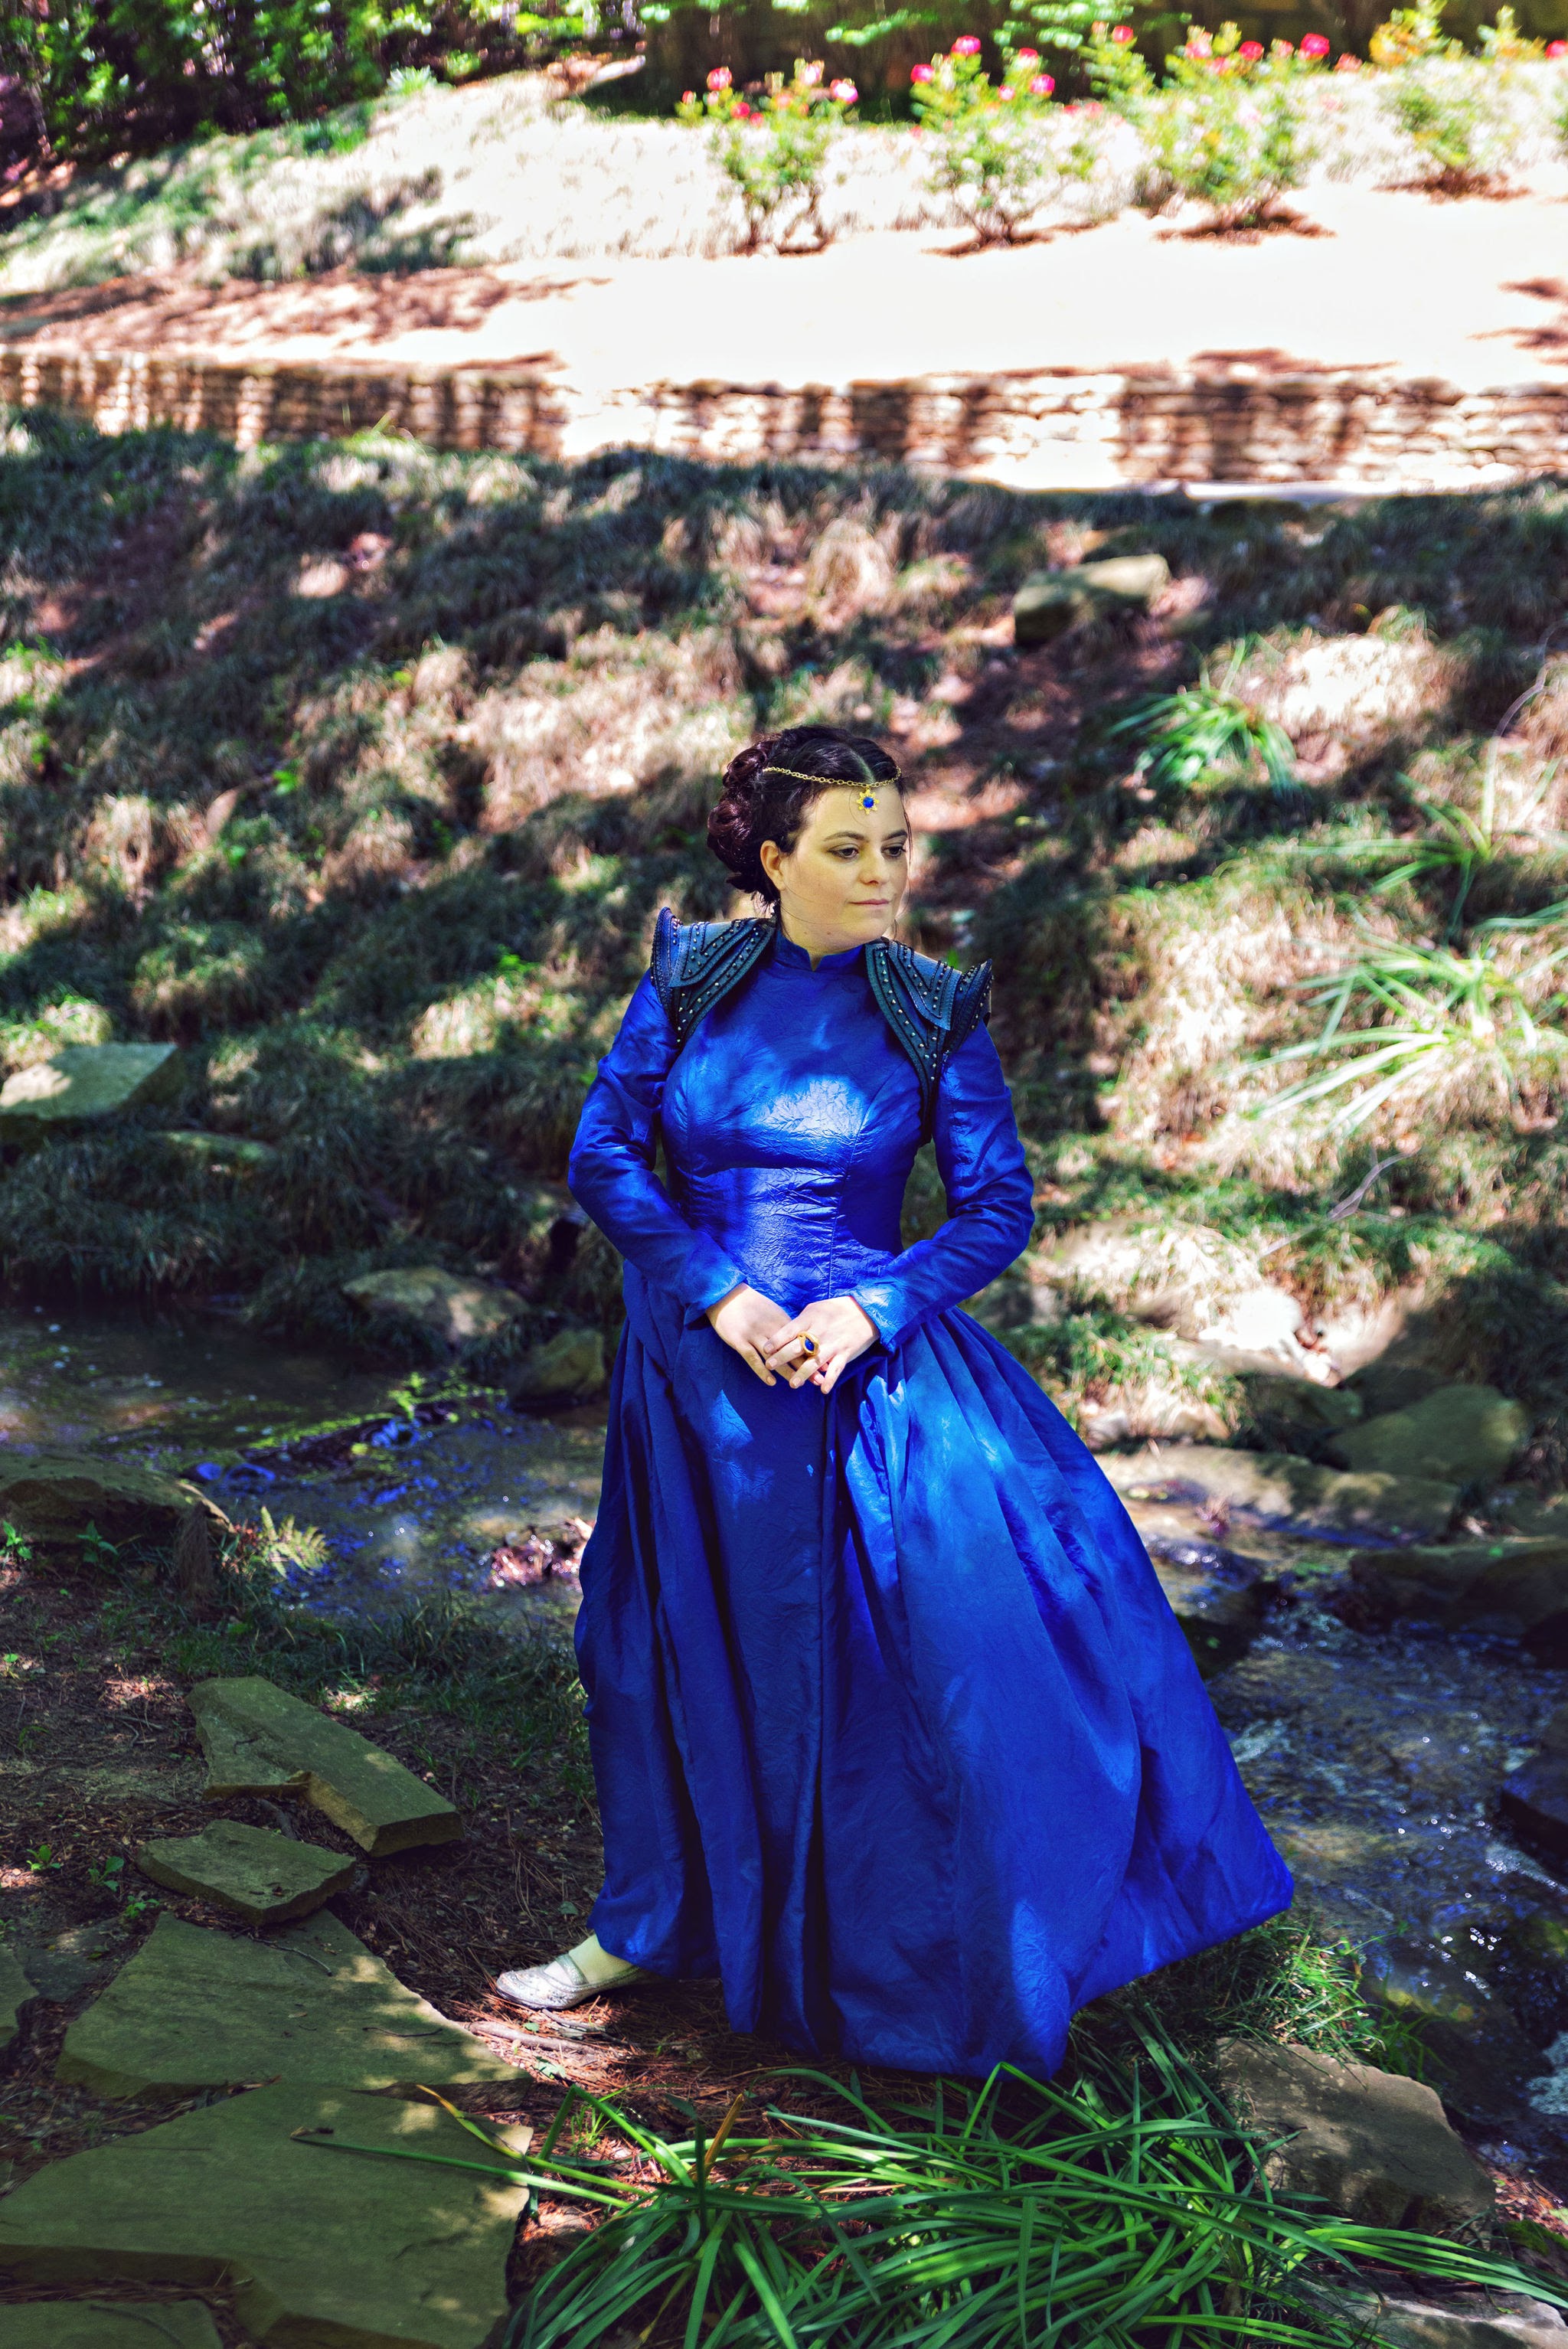
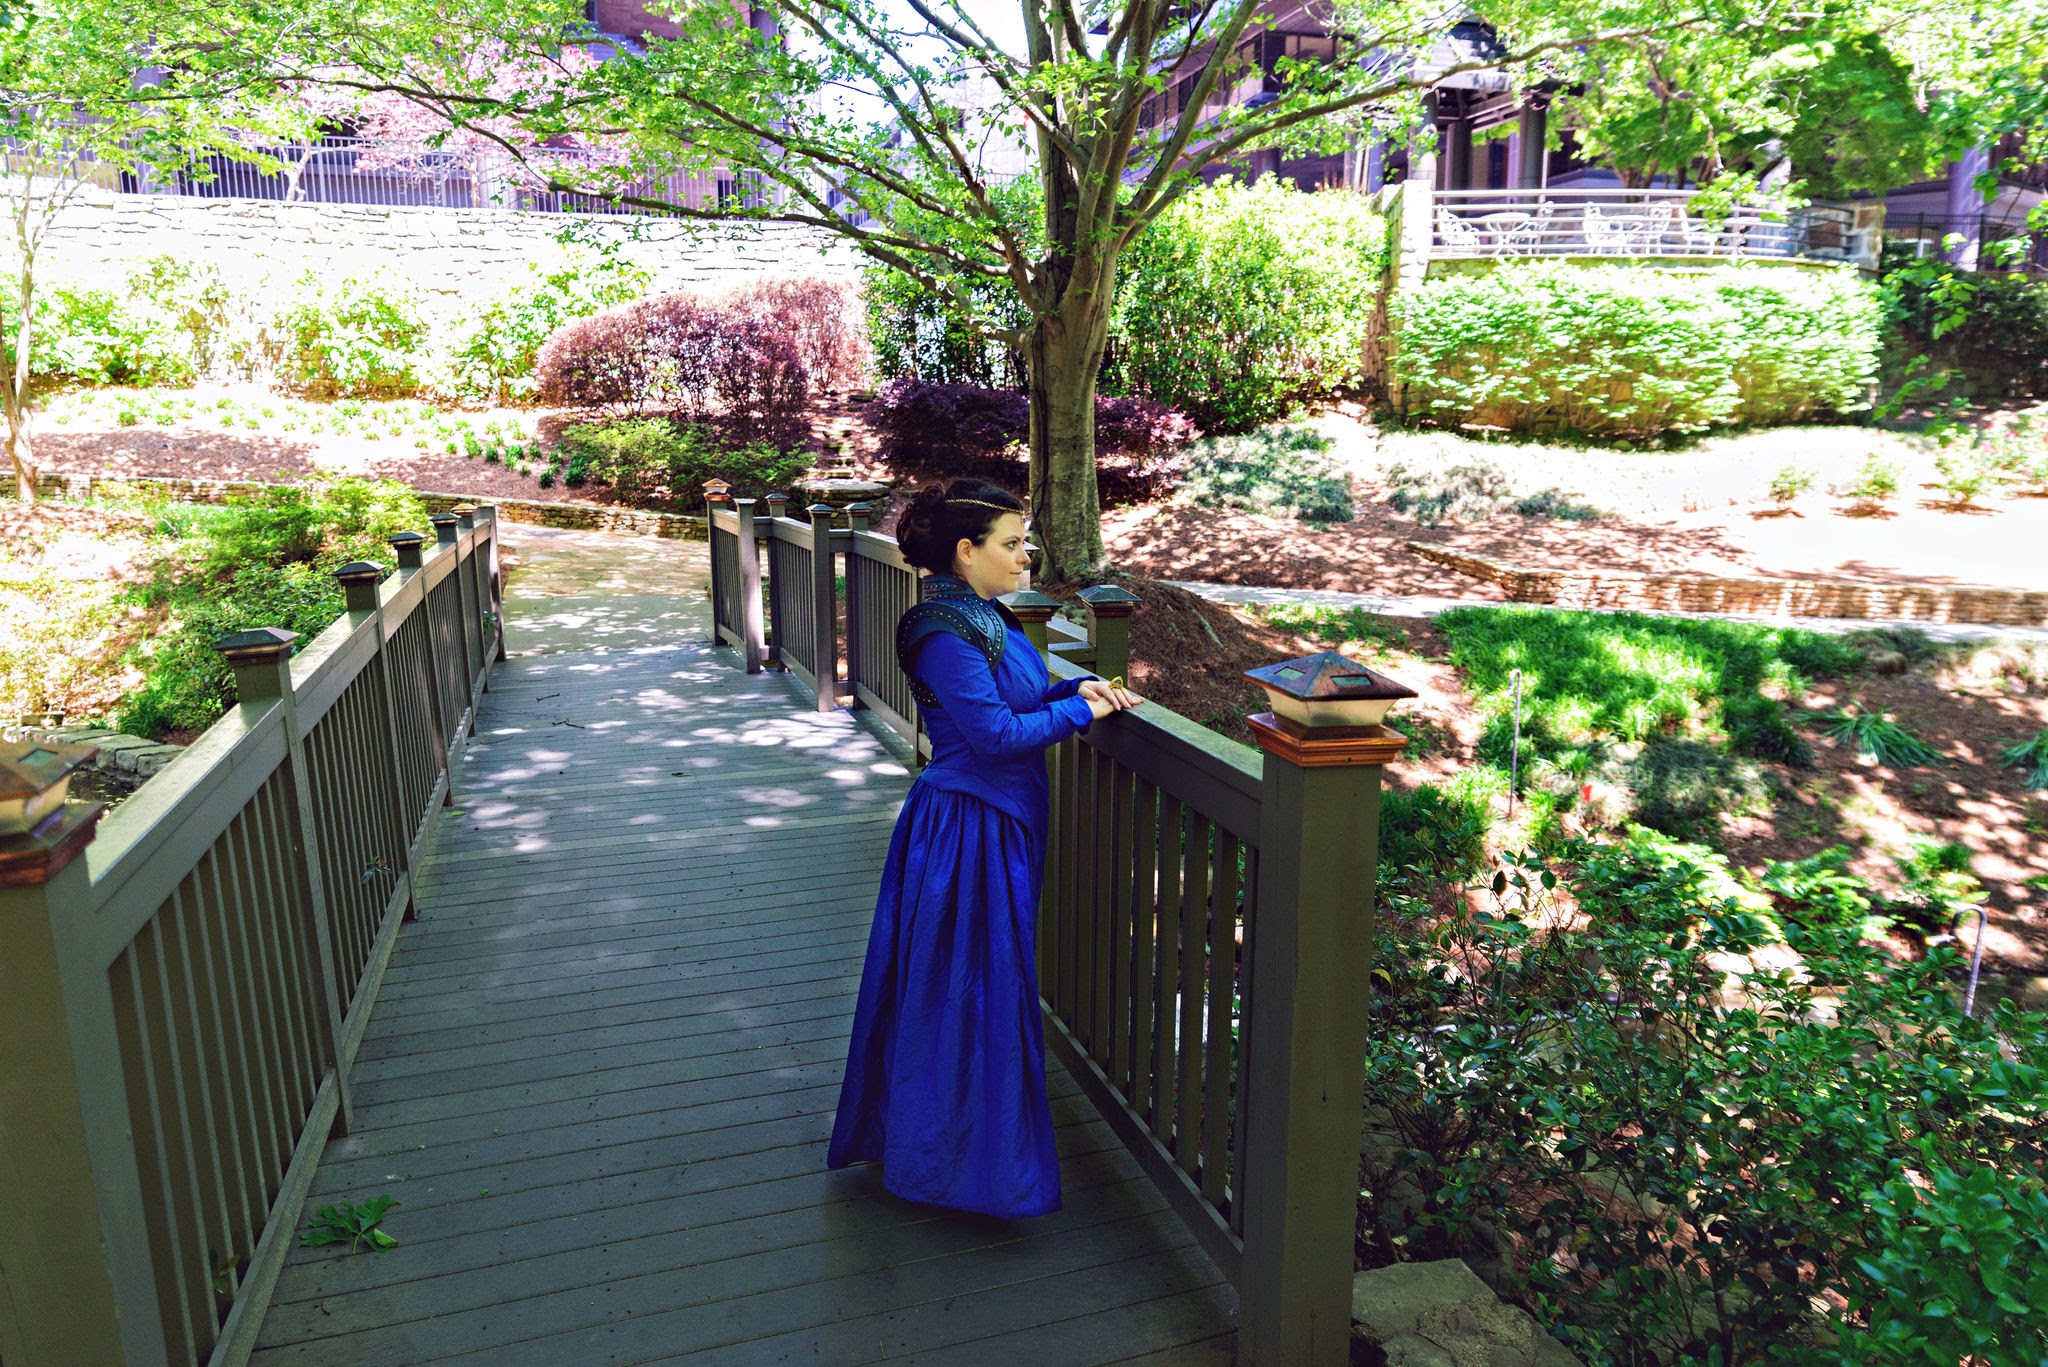
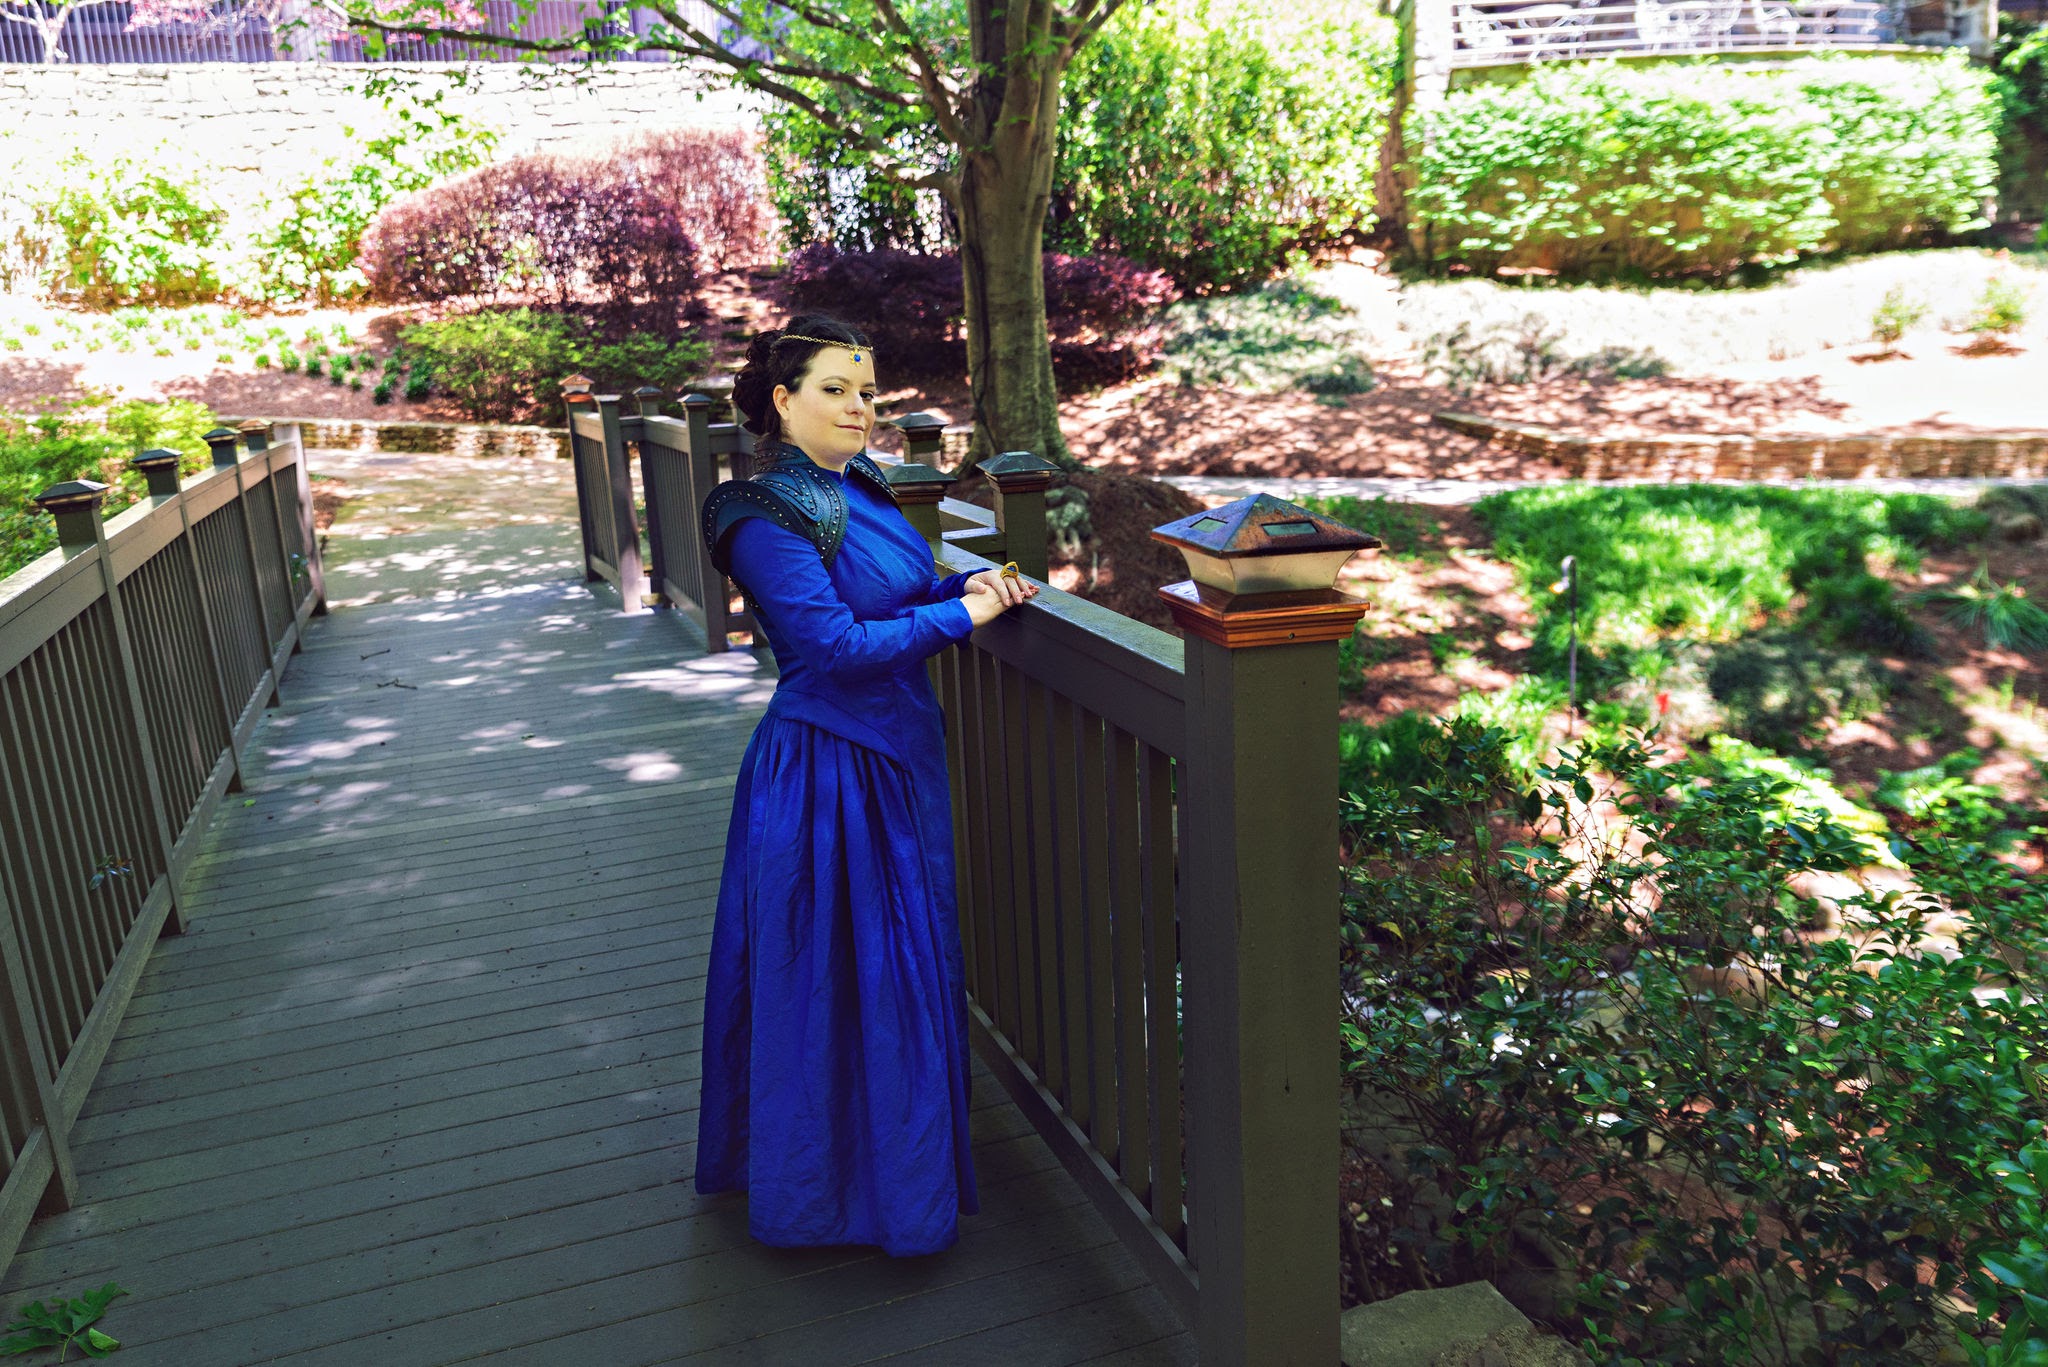
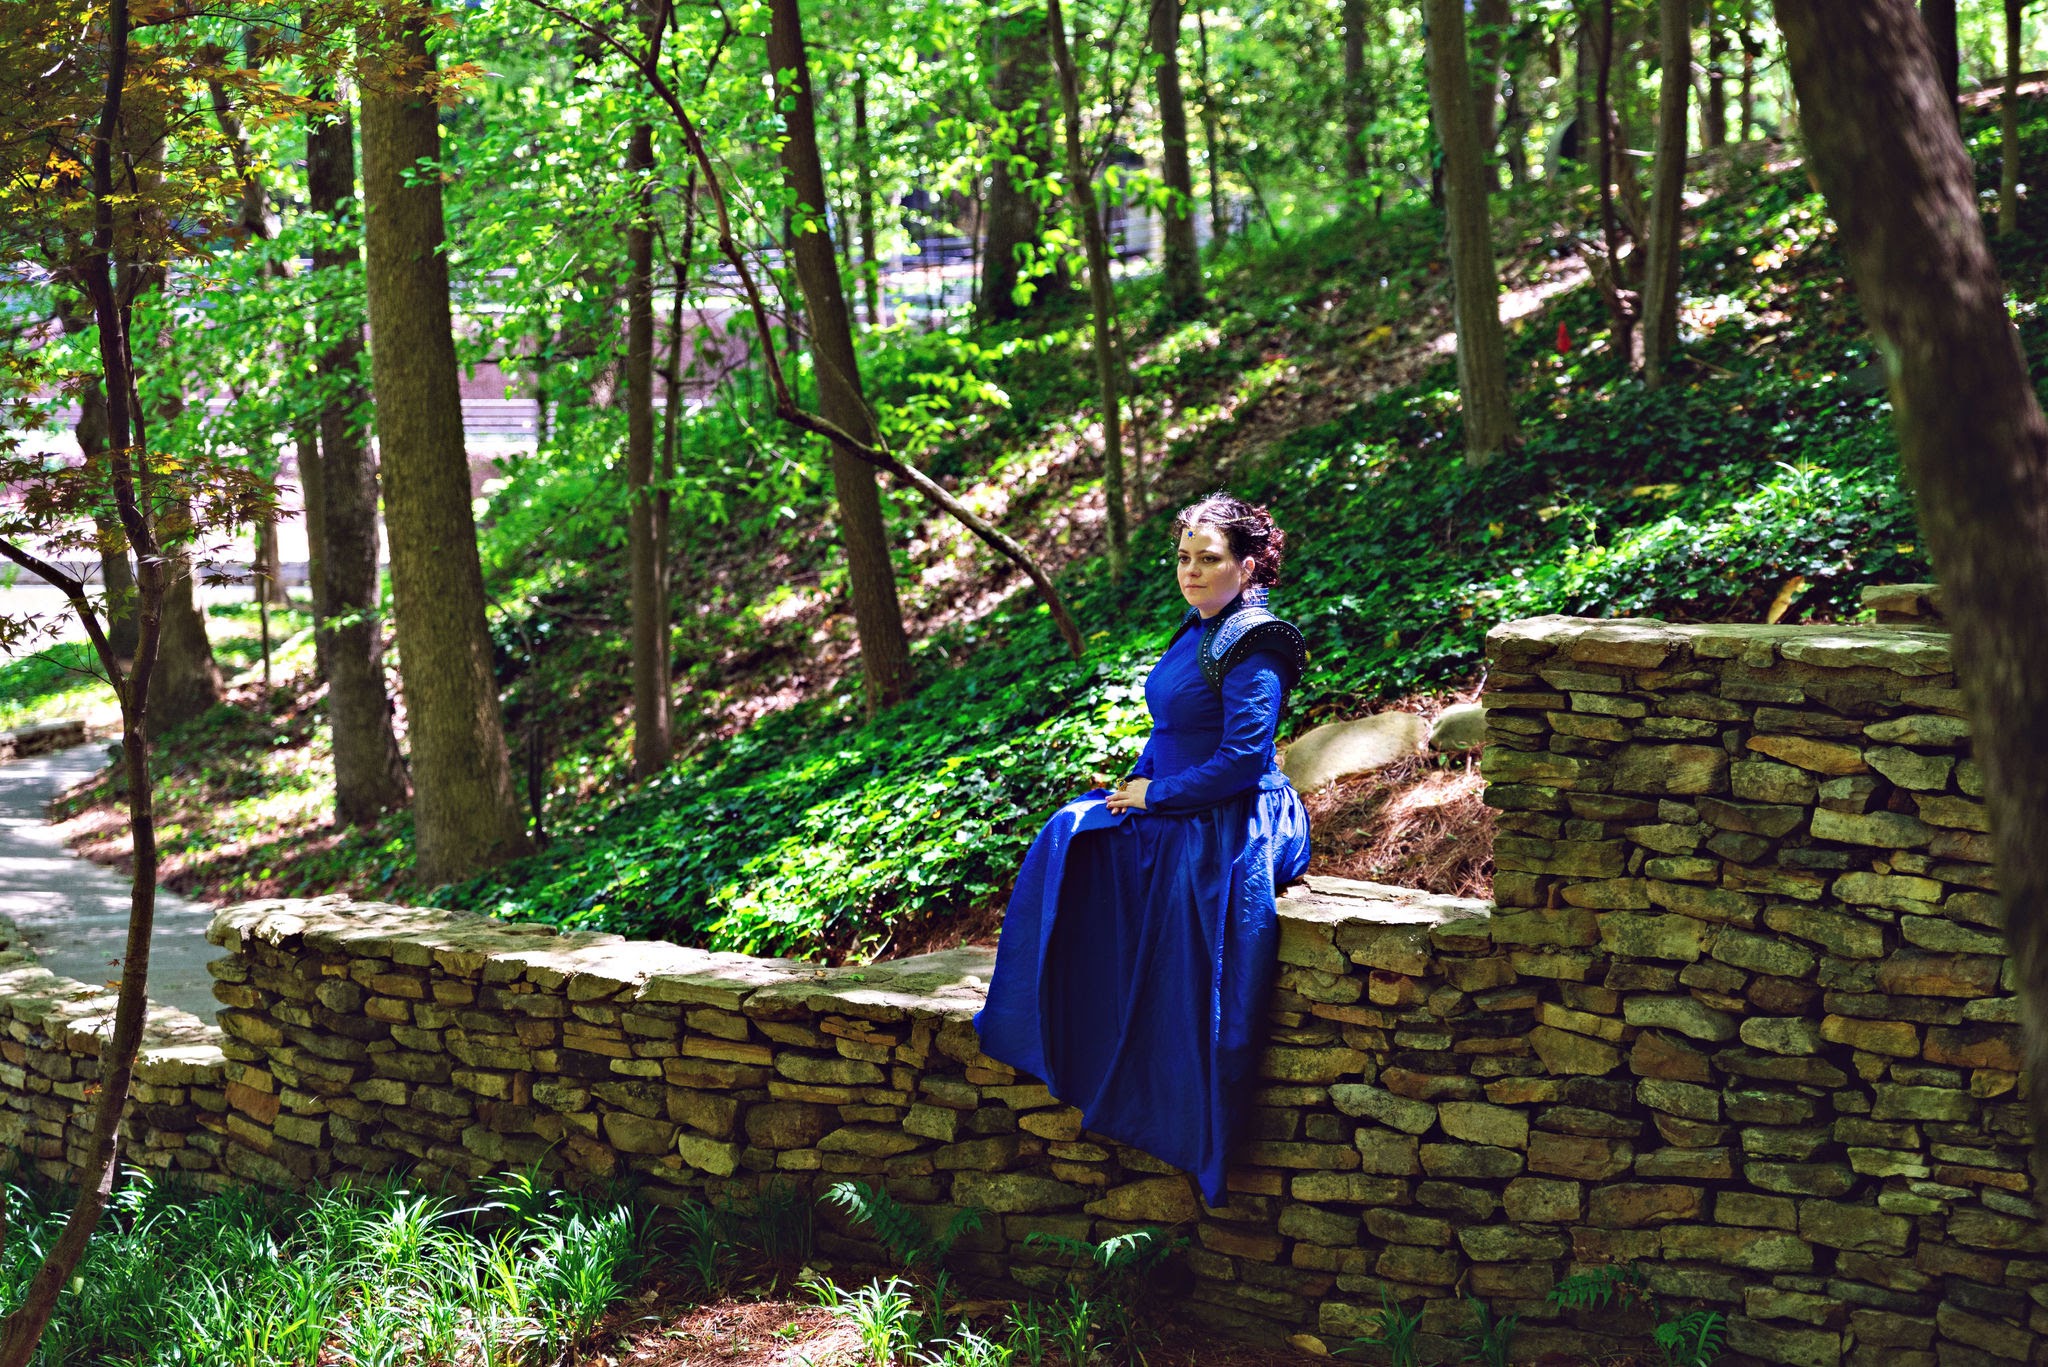
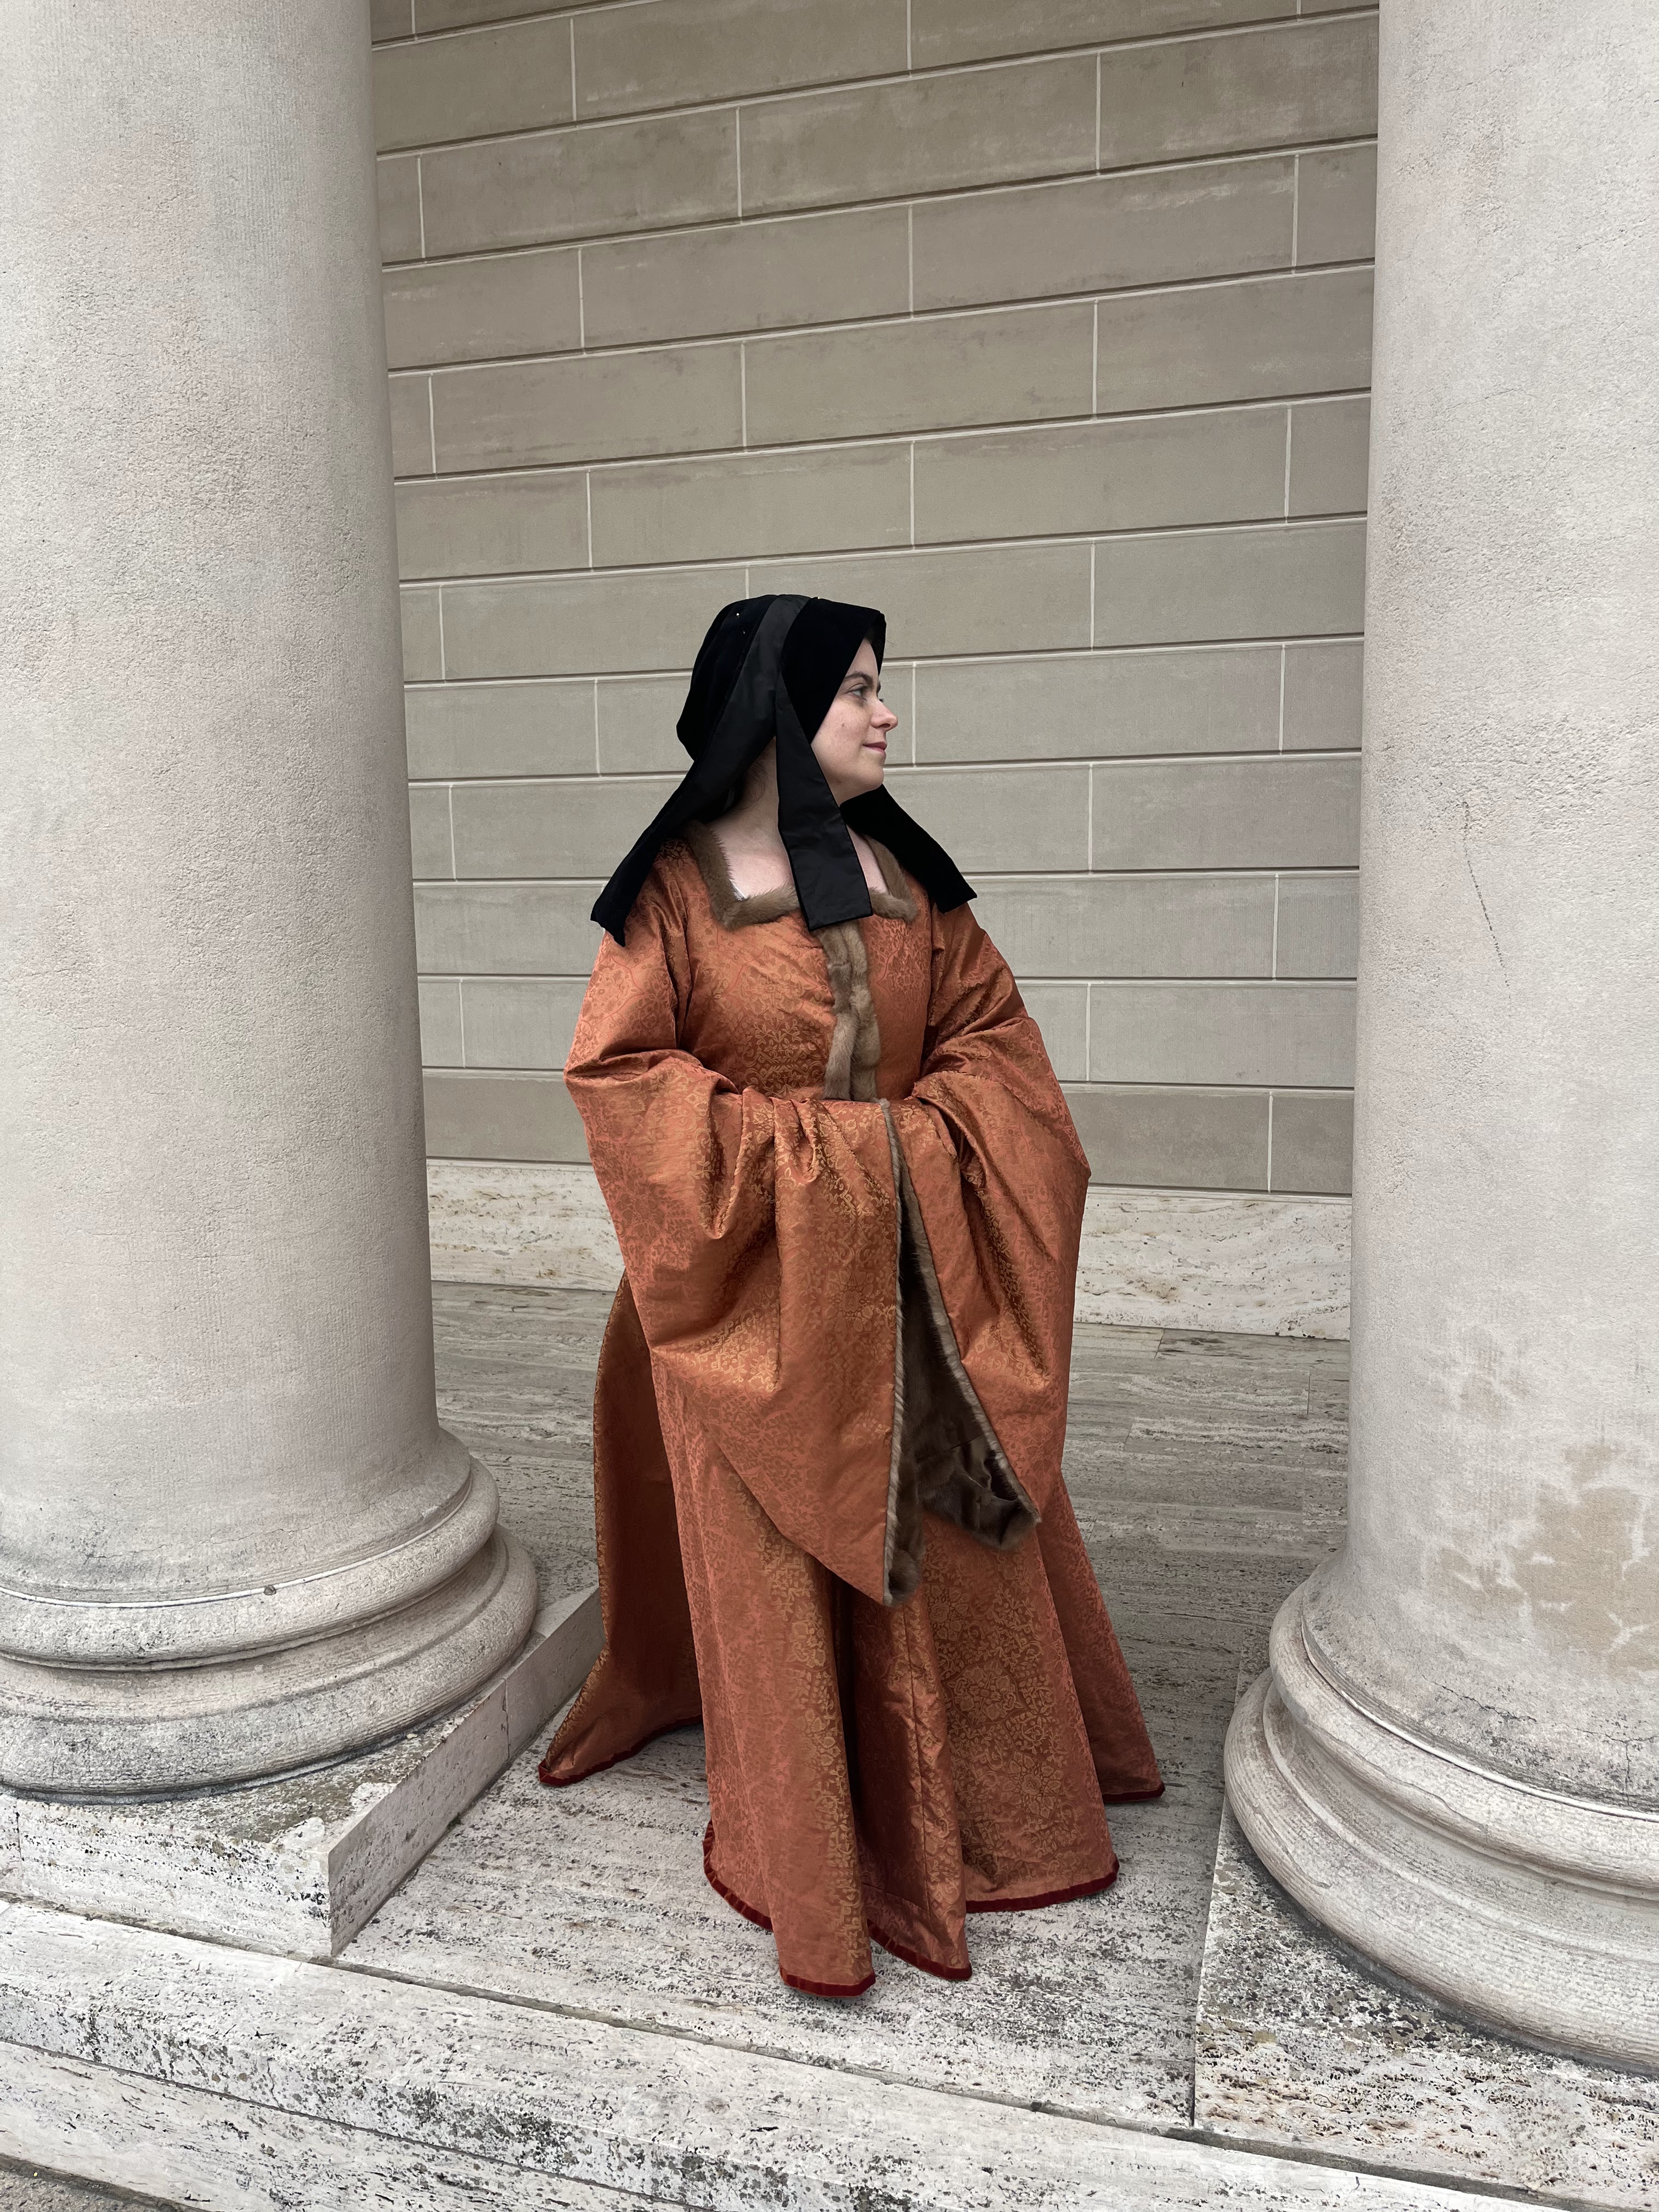
To end this, being contemplative in the columns:

Bibliography

  • Johnson, Caroline, et al. The Queen’s Servants: Gentlewomen’s Dress at the Accession of Henry VIII: A Tudor Tailor Case Study. Fat Goose Press., 2016.
Posted in Medieval, Renaissance, Tawny Transitional Tudor Gown | 7 Comments

Moiraine Sedai blue gown pictures

Finally me and my photographer friend A Life Condensed were back at Jordan Con together. I originally planned to buy her 5-image mini photo package, but then she sent me back SO MANY GOOD PROOFS that I had to buy the full set of 10.

So no commentary, just the amazing photos she took of a 6 month 100+hour costume!

(Also, it’s astounding that this forest oasis is actually the back of the hotel in Atlanta.)

The Source is the river; the Aes Sedai, the waterwheel.
You don’t listen to the wind. It’s the wind that listens to you.”

Ok a wee bit of commentary. After entering the Jordan Con costume contest for the first time in 2015 and nearly every subsequent year after that, getting every variation of award except the top, I finally FINALLY managed to score the Best in Show award!

Posted in Fantasy/Scifi/Cosplay, TV show Moiraine Damodred | 1 Comment

Moiraine Damodred Leather Bolero

It’s time! The whole reason I learned leatherworking!

This all started with Hazariel posting a video on Youtube of her leather Moiraine bolero. While I pretty much ignored her construction process, she did offer something invaluable – a free pattern! That gave me a base to alter and start fitting.

I started with paper to get the general gist of what what happening, and to my shock it was already pretty close (and I have extremely narrow shoulders, so I’m still baffled as to how close this was).

the front, with just a bit of underarm gapping
The back, really astoundingly close
The armscye needed the most altering to bring it in closer.

I took in a few “darts” in the paper to narrow the armscye, although I really wasn’t sure how much wearing ease this thing needed. For my first real mockup, I used some heavy foam interfacing since I already had some, but if I didn’t have any then foam would have been a fine substitute (you need something very substantial to mimic the weight of leather).

Left and right sides, experimenting with where I should pinch out the excess.

I redrafted the collar (first to be way shorter to accommodate my lack-of-neck), but also I have no idea why the provided pattern had that odd curve to it. I’ve never seen a mandarin collar have that shape.

And then I needed to figure out the stamping pattern.

This involved HOURS of poring over grainy screencaps and super dark scenes to try and figure out what was going on. Here’s the problem – there are two main boleros shown in the show. One is the undyed sample bolero used in a behind-the-scenes video where it’s possible to see incredible detail. And then there is the one actually used in the show.

The main way to tell the difference is the sample one has additional couching over the shoulders. This doesn’t end up on the main one.

actual show screencap
behind-the-scenes version – note extra couched cords on shoulders

Some of the other differences:

The sample one has triangles punched out fully, where I think the final bolero has them as stamps, but not full holes.

The sample one looks like it’s whipstitched along all edges in some versions, but the final one just uses a cross-hatched stamp on the edge which ends up looking like stitching from far away.

So the final order of embellishment from outside to inside of the bolero is:

  1. diamond shaped holes (a very standard kind of leather punch. 6mm is also a pretty standard spacing distance for hole punches, so I bought a 6mm punch set).
  2. equilateral triangles (which did not exist anywhere as a punch, and I had to buy one special from etsy)
  3. a couched cord. The actual one used a hole on each side of the couching, but for ease (aka lazyness) I went with one hole because that meant half the number of punches necessary
  4. a stamp of 4 concentric circles with a pearl chip in the middle. Turns out concentric circle stamps also don’t exist, so I ordered this custom from etsy as well (to avoid doing 4 separate stamps for each circle)
  5. another couched cord
  6. a stamp with lines in a shell shape applied randomly to add some texture

In order to make sure my spacing between all those elements was good and to get some practice, I made some arm bracers in the same pattern as a wearable mockup.

Ok I forgot to include the shell texture as background on these

Then I cut out all my leather pieces and began the very slow process of doing the punching and stamping on each. For pieces that attached, I was very careful to match up my pieces to have a matching number of holes (man did I miss working with Dieselpunk patterns which do all this work for you…)

Dying time! I used navy dye with just a smidge of black to darken it. I think I ended up doing three coats. I covered my dress forms in a plastic bag and pinned the pieces on to dry in the right shape, since leather curves and shapes very easily when wet and will stay that way when dry.

Then each piece had the edges waxed and burnished. I applied resolene to the inside (a liquid plastic) to seal it so the dye wouldn’t come off on my dress. On the outside I used mink oil to finish and condition it while keeping it shiny.

Couching on the cord took hours of meetings. I should have used a narrower thread (like a buttonhole sewing thread) instead of the heavy waxed leather sewing thread because it was too thick and I had to use a plier to pull it through the hole each time (and it was a pain to thread the needle).

not every needle could take it

At the corners where the cord ended I punched an extra large hole and just poked the cords through:

Here’s the progression of embellishment on the same shoulder piece from beginning to end:

outer holes are punched, you can see faint lines where I drew in where the triangles and couching holes will be punched
round hole punched for outer couching cord
inner holes punched
triangles and cross hatch ovals stamped on
circles are stamped on, the center of each is punched out where a bead will go, and the textural stamp in the middle
big jump forward for a piece that was dyed, had the edges burnished, and the cords couched on
last step, make it extra shiny with beads

The pearl beads caught on absolutely everything. I wonder if the tv show had a version with painted dots when Moiraine had her hair down, because I had to unwind hair from them at the end of the day!

Sewing pieces together in progress.

Somewhere around this point I hit the “this looks absolutely awful and I hate it” stage, but once the shoulders and beads were on it turned back around into “!!! did I actually make this?!?”

Next up, professional photos, because if any costume deserves it, this one did.

Posted in Fantasy/Scifi/Cosplay, TV show Moiraine Damodred | Tagged , , | 2 Comments

Moiraine Damodred Wheel of Time blue dress

…I’ve made a lot of Moiraine dresses.

(tldr; Moiraine Damodred, Aes Sedai of the Blue Ajah, a very popular character from The Wheel of Time series by Robert Jordan).

The first Moiraine dress was my first “advanced” sewing project and it predates this blog (to the point where I’ve started taking it apart for fabric).

The second was a book-accurate Moiraine, aka a historically accurate 18th century robe a la francaise, with a non-historical petticoat and stomacher that I swap out for historical ones depending on the event.

So when Amazon Prime produced a Wheel of Time tv show, I hadn’t planned to make another Moiraine gown. And then this series of events happened:

  1. Her formal dress is interesting, but the main feature of it is a leather bolero and I know nothing about leatherworking
  2. Hazariel comes out with a Youtube video of making the bolero, and it looks…strangely accessible?

  3. … I decide I’m actually doing this, proceed to watch dozens of hours of leatherworking videos, spend a ton of money at Tandy Leather, and make a leather pouch as my practice piece.

But this post is actually going to be about the dress, because that’s a lot more straightforward.

To start – yes, I know Bernadette Banner made the dress. It was strange to see my Historical Costume hobby suddenly collide with my Wheel of Time fandom hobby. It was great that she made it first, because she included a whole bunch of screencaps in her videos, which prevented me from needing to pore over grainy dark screens on my own (seriously Amazon, did you own any set lights?)

The dress is not too complicated (although I made some choices that made my life more difficult later on). It is a high neck princess seam dress where the front panel extends to the floor, an attached gathered skirt underneath, and some hip fins.

(the costume designer describes Cairhien dress as a cross between Chinese fashion and 18th century France. This dress bears no resemblance to either, and I can invite you to my rant on the tv show costume design choices another time if you wish).

It was fairly straightforward to change my two-dart moulage into a princess seam dress, while extending the front panel to be floor length (with a slight flair at the bottom). If you want to do the same, I can’t recommend Patternmaking for Fashion Design by Helen Joseph Armstrong enough.

If this was going to be a sleeveless dress I would have taken in the fabric under the arm, but since this is getting long sleeves I left the extra fabric to keep some movement.
A large separating zipper is extremely helpful for fitting a back closing dress yourself

Please note there is literally not a single image of this dress sans bolero, so we don’t know if these are shoulder princess seams or armscye princess seams. I went with armscye because I find that aesthetically more pleasing.

The fabric is some shade of blue, but it changes in every shot. It also seems to have been tie-dyed in some way. (On the behind the scenes the costume designer references Shibori dyeing techniques which are beautiful. This looks more like what I did at summer camp than professional shibori dyeing, but once again I digress).

Since I had already spent redacted on leatherworking supplies, I didn’t really want to spend $30/yd on blue silk taffeta, so I decided to take a chance on dying some white silk taffeta I acquired for $7(!)/yd from Fabmo.

Double double toil and trouble, in my stockpot from Ross. 7 yards was really pushing the limit of what this pot could handle.

Drying in the bathroom:

And the final results!

Unfortunately, this is after ironing. Silk taffeta really hates water, and it pretty much gets these indelible wrinkles after being submersed in hot water. We’re gonna hand wave it and call it a purposeful textural element to try and mimic the tv-show tie-dye?

The fabric was only 36″ wide so I needed to get creative about pattern placement (and only cut single layer).

The princess seams in front and back reminded me of Victorian dress construction, so I flatlined the each piece with blue cotton sateen (leftover from Captain America), serged around the edges, and sewed it together (treating each flatlined-pieces as a single piece).

The show dress closes with an invisible zipper.

(Nothing exemplifies how little budget this show was given compared to Rings of Power than this. You don’t see any invisible zippers on Galadriel’s dresses).

I didn’t want a zipper on my dress, so as a nod to the books, I had the back close with tiny blue pearly buttons (as many many dresses in the books do, despite this not being a particularly good choice for back-closing dresses since it’s not very strong. Robert Jordan was an excellent author, less so a seamstress!)

I didn’t want the buttons to deal with any tension, so I constructed this like bridal gowns with decorative outside buttons – there is a strength lining layer with a separate closure underneath, and then the outer layer just lays over the top.

I cut the back pieces and side back out of the cotton sateen an extra time, and treated all the layers as one at the side seam and shoulder seams:

The inside layer closes with an extra long zipper, so that I can (theoretically) zip up this layer by myself while still fitting over my hips. In a bridal gown you’d probably see this with hooks and eyes (which would have made the skirt way easier, had I thought that far ahead…)

The outer back layers covering up the zipper, and will eventually close with loops and buttons.

And then it was time for sleeves.

I’ve learned my lesson about sleeves and hand-basted one in for the first try on:

It laid weird!

And my careful seam matching did not line up!

So unpicking it and basting it in even more carefully this time, making more certain to align my princess seams with the sleeve seams at front and back:

So.
Much.
Better.

I also chose to hand-sew the sleeves in, because every time I do it by machine I get puckers or catch a bit underneath and this ends up faster in the end.

Also I think this picture is from the hour long train ride on one of the few days I went into my actual San Francisco office

Starting to look like a dress! (looks like I added the collar somewhere in there as well. Why is it I keep making outfits with mandarin collars when I hate how they look on me?!?)

And then hip fins which also seemed simple, but were a bit of a hair pulling exercise. At first I stuffed one with poly fiberfill, because it’s what I had. This ended up being too bulky and bumpy and making the fin not lie smoothly (see the right fin below).

Luckily a friend of mine got very into quilting during Covid, and happily passed me some scraps of her quilt batting to use!

Fiberfill on the right, two layers of quilt batting on the left

Then it took me hours of futzing and minute tweaks to get the fins to lay at a nice angle that *looked* angular and not too horizontal at the front, along with making them match each other. It definitely involved arc-ing them and not matching seam allowance with the side pieces. Yay for dress forms that let you mess with 3D draping!

And a shot of the insides. Fins are sewn on, the seam allowance was herringbone stitched down to lie flat. You can see the boning on the seams and the hidden inner back layer.

Then it just needed a skirt! I cut rectangular panels and hemmed them, and leveled the skirt by pleating it down higher or lower on the inside. I discovered some parts of the silk had been too balled up in the dye pot and didn’t take color, but I did my best to cut around them, hide them under the front panel, or where necessary put them in the back where they would hopefully be less noticeable. The skirt is unlined to give it a lot of movement and lightness.

I hate knife pleats (I’m a cartridge pleat gal) but I wanted the flatness of them. I did a divide-and-conquer method pinning at halfway points until I got to small enough sections to do some pleats (totally not measuring in any way).

Here’s where that choice to have the two back layers with the long zipper caused me problems. If I attached the pleats to the inner layer, the zipper wouldn’t have been covered at center back. But the inner back layer was too long at the side seam, so I ended up hopping the fabric from the inner to the outer layer where I had a seam in the skirt fabric. If the inner layer had been an inch shorter this would have been a non-issue and I could have easily just attached everything to the outer layer. Lesson learned.

No pictures apparently, but once I had all the pleats pinned to my liking I folded the top down on the inside, and very carefully whipped that fold to just the lining of the bodice, not going through to the outer layer (and snipping and redoing stitches in multiple places where it turned out I had caught the silk…)

Last up, sewing a bajillion buttons onto the back.

Isn’t this better than an invisible zipper?

Dress was done, and it’s time for the scary part, but also the only reason I made this dress. Leather bolero time!

Posted in Fantasy/Scifi/Cosplay, TV show Moiraine Damodred | Leave a comment

Wearing History Leslie skirt

This is technically a 1950s pattern, so we’ll sneak it under the historical/vintage umbrella yes?

So I rarely buy patterns; these days I mostly draft my own or work off existing ones I have. But Wearing History came out with a 1950s pattern that for some reason ate my brain, and I decided to buy the PDF:

This made very little sense for me to buy for several reasons:

  • I’m pretty sure I haven’t worn a skirt since I started working from home permanently when Covid shut down offices in March 2020
  • This skirt is clearly designed for someone who has some distance between the bust and the waist (I do not) and some kind of hourglass figure (I do not. I am in fact shaped like the World’s Fastest Hourglass).
  • The stash fabric I had in mind for this was a heavy wool crepe, and I started working on this in the middle of the summer.

Oh well, you have to go where the sewing muse takes you, regardless of thinks like “sense”.

Even though this pattern was very simple, I made a full mockup because I have a bad habit of half-assing modern clothing, and then having it not fit (wearing ease scares me. Just let me fit things skin tight over a corset for consistent sizing ok?)

The two changes I made before making the mockup were:

  • shortening the waistband height by 3/4″ (I think. It’s been a while). I asked the pattern maker where this skirt was supposed to sit, and the hip gathers are supposed to hit at the natural waist, while the rest of the waistband sits *above* the waist. Well that would stick the top of the waistband straight into underbust territory, especially as I’ve been living in nursing bras since February 2022 which don’t provide as much lift.
  • shortening the length of the skirt overall. I’m 4’11”, me and tea length are not friends. That’s an instant invitation into frumpy-stumpy-ville.

Bonus, shortening the skirt meant that I was able to get it out of ~2 yards of 60″ wide fabric (especially since I used a cotton/silk satin as the waistband lining, instead of a self lining since I had some notion of wearing this with a cropped top).

The muslin showed that I needed to take a bit of width out of the top of the waistband, because I am 100% shaped like a cylinder (and not the upside-down-triangle shape provided here. Remember, the waistband here is actually sitting above the waist, and the original 1950s pattern probably assumed a girdle).

Next picture shows blue thread tacks marking the spot of each button, and the orangey-brown wool crepe cut out for a pattern piece.

Wool crepe is an interesting fabric. On the one hand it’s quite friendly as it doesn’t fray a ton, and wool is extremely malleable and easy to iron out wrinkles. On the other hand, this is a *heavy* crepe. To actually press things like seams you need a clapper, otherwise it just bounces back. The thread tacking was also out of necessity and not just couture-aspirations, because no chalk or pen would leave a marking on it.

I made self-covered buttons because nothing was going to match this. After that, it was pretty quick to sew together (after I came to my senses and made regular buttonholes, and not bound buttonholes. You don’t make bound buttonholes the first time you make a pattern and don’t know how it will turn out…)

Then it went onto my dress form to hang for a couple days, because something like this will absolutely stretch on the bias, and you want all the hem to stretch out from gravity before hemming it.

I went to try it on, and siiiiiigh it was too big. As I mentioned in the previous post, when making a skirt that is supposed to fit at the natural waist, you can’t have wearing ease. Otherwise that wearing ease just makes the skirt sit lower. (Note, this was the first skirt I discovered this on. But I did not internalize the lesson and then literally made the same mistake on the sparkly formal skirt too…) And since I had already topstitched the waistband this would be a HUGE PAIN to fix, plus I was completely out of the matching thread except for a bit left in the bobbin.

And that’s when this skirt went into the naughty pile because at that point I really needed to start working on the corset of that gothy fae outfit previously discussed (in May 2022).

In the beginning of November 2022, the gothy fairy outfit was done, and I had a brief window of time before needing to work on my JordanCon costume! I decided to finally fix and finish this dratted skirt to wear out to dinner in New York for Thanksgiving (which is a yearly tradition with my family). Wool crepe is actually a weather-appropriate fabric for New York in November.

Which meant opening up the waistband where I had whipped it over the seam allowances, opening it up on the sides, taking the waistband in ~1″, pulling the gathers tighter in that space, and then sewing it back on. I did so quite grumpily! As I’ve said in previous posts, part of the benefit of shapewear is that it keeps your waist the same size when sitting/standing/eating etc, which makes a difference for how tight to make a skirt with no stretch that you want to sit at the waist. In order to sit comfortably in it, the skirt feels a little too loose when standing up.

Then it was time to deal with the hem (which did sit very unevenly at that point due to bias stretch). The pattern instructions call for the front to be faced and then the hem folded up, which ends up with 4 layers at front with a single fold, and a whopping 6 layers if you double fold the hem. This would be bulky on most regular fabrics, let alone this super bouncy crepe. Instead of doing that, I used rayon seam binding to cover the raw edge and whipped it on. (It might have made more sense to fold up the hem and then whip the front facing over it, but I had topstitched the edge already which meant it had to be folded first). The double fold also doesn’t work well on an A-line, because you have to ease in the fabric at the top of the fold. Since this is wool I could have gathered it up and shrunk it with the iron, but I was definitely past the point of making this as couture as possible.

why catch stitches on the bottom and whip stitches on top? I have no idea, I just felt like it.

I don’t subscribe to the cult that every garment must have pockets (they don’t look good in pencil skirts, change my view), but when you have a big gathered skirt there’s no reason not to add them! I also made the facing out of a silk/cotton scrap left in my stash because I had some notion of wearing this with a crop top and wool crepe doesn’t feel great against the skin.

And after all that, I finally wore the skirt in February 2023 during a work product summit where every actually flew out and I sat in an office building 3 days in a row for the first time in years!

yes this picture is in my baby’s room, I was in a rush before heading to the train.

I’m pretty pleased with how this turned out! This makes something like the 5th [relatively] modern item in my wardrobe! I still have some notion of making the full length version out of something like a green hammered silk satin for all those formal occasions I totally definitely have on the calendar…

Posted in clothing from this century? | 1 Comment

A leather hip pouch

Wait what?

So yeah, I added leatherworking to my arsenal of crafting. It had a reason – I decided to make Moiraine’s formal outfit – leather bolero included – for the JordanCon costume contest. But rather than start with the competition entry as my first piece, I needed something to practice with first.

I basically watched Youtube videos and demos until I got bored – aka I felt like I knew what the next steps were going to be.

My recommendations:

  • Weaver Leather has amazing intro videos broken down into very basic topics
  • Dieselpunk has detailed videos demo-ing how he makes his patterns step by step.

So I bought this Dieselpunk hip pouch pattern, proceeded to spend way too much on supplies (this is not a cheap hobby), and got started.

My very first punch into any leather!

Here I was punching just on a cutting board on my costco craft table, and sometimes it would take a couple hits to get everything to go through. For my next project, I spent the money on the Tandy poundo board and quartz slab to put under what I was punching, and moved the setup to my heavy wooden dining table, and that helped a lot.

All the pieces cut and punched:

there is something very satisfying about seeing all these pieces together and ready.

This took forever because I could only work on it during the day, because I wasn’t about to risk waking up children while pounding punches with a hammer.

Then I dyed all the pieces. I didn’t actually use the right product for this; I had something called “leather antiquing gel” in my dragon-like-hoard of a craft-stash and figured that would work as leather dye. It did work, but it’s not really meant for a full dye job which is why it looks pretty streaky. We’re just gonna call that a feature to make it look “rustic” and buy the correct dye next time.

Remember to wear gloves when dying leather, for you too are made of leather.

My favorite step – sewing the pieces together (I think it’s pretty obvious by now that I enjoy hand sewing. And this is handsewing on easy mode since all the holes are there for you alread).

I was all set to have this done SEVERAL DAYS before a GBACG event, when I realized I had screwed up a couple things:

  • the straps I cut to go around my waist and hips were orders of magnitude too big. The pattern just said “cut to measurements” but didn’t specify subtracting the length of the buckle pieces attached to the bag.
  • I had fully missed cutting out a small strap piece. So had to get that cut/punched/dyed/edges burnished/waxed and rivet it on.

My last minute setup – pounding rivets in the master bathoom with a baby monitor because that’s the most soundproof room relative to my sleeping children:

Sliced off the end of the belt and using it as a template for the holes in the now-shorter belt:

And the finished pouch!

Forget pockets, this thing can hold so much

Just in time for the GBACG Witcher event! I threw together a vaguely fantasy woods ranger outfit, since the event included a sword fighting class.

The only me-made part of this is the pouch, the fake leather leggings and harness are both from Amazon, the shirt I got off ebay ages ago for vaguely Victorian undershirt, and the hat is from the Southern California Renaissance Faire.

So if you too want to learn leatherworking, the internet is a fantastic place! I seriously went from zero knowledge to making something just by watching videos over the course of a couple months.

And now I have way too many leather projects on deck fighting for time with my sewing projects. Such is the crafty life…

Posted in Fantasy/Scifi/Cosplay, Leatherworking | 1 Comment

A fantasy fairy outfit – part two skirt fail but then a pretty great result

Per my usual, the last post was in January about an outfit I worked on in September/October to wear in November. Par for the course around here, I’d rather spend time sewing than blogging about sewing, sorry loyal readers.

A glittery sparkly gathered rectangle skirt to go under a corset. How hard could this be?

Anyways, I spent a couple days on AliExpress looking for a not-too-expesnive silver and black glittery lace before I realized I already had one in my stash. Very pleased to have figured this out before buying something new at least!

Shown here under fabric samples. This lace was a gift from my dad years ago when he went on a trip to Australia. He would not tell me how much it cost, but given that all these sequins are sewn on and not glued, I’m pretty sure I don’t want to know. Thanks dad!

At first I planned on a circle skirt to have maximum floof at the bottom and reduce bulk at the waist, but I finally did some math and realized that with only 2 meters of lace (which absolutely had to be a gathered rectangle) a circle skirt would be impossible if I wanted the bottom circumference of the lace to be greater than the bottom circumference of the skirt underneath.

I had some silver/gold satin (I think a silk/rayon blend, but never did a burn test to be sure) that I bought off someone ages ago intended to be a Tudor forepart and sleeves, but this was a fine repurposing since I kindof want a patterned damask for when I eventually make that gown.

I planed to make the underskirt be A-line with the gathered lace over it (once again, for maximum width at the bottom while minimizing waist bulk).

Can I draft an a-line skirt? Yes. Do I like drafting skirts? Hell no. Skirts are a PITA to draft, especially long ones, since even for this shorty I need the side seams to be longer than my yardstick. So I went into my stash and pulled out Simplicity 5561 which I bought ages ago figuring the lines were good for some kind of fantasy gown.

Clearly intended as both a bridesmaid AND mother of the bride pattern, and my god do the fabrics make that obvious…

At this point I could either do the narrower full length skirt and make it shorter and wider, or use the shorter poofier skirt and make it longer and less-poofy. For whatever reason I elected to go with the second option, and did some math to make sure that the bottom would be narrower than my 2m of lace.

Normally I’m a tracer not a cutter, but when a pattern has been in my stash for 15+ years and is readily draftable, I said fuck it and started cutting.

This was not a pleasant fabric to work with. It wrinkled and frayed as soon as you looked at it, and I didn’t use a press cloth which accidentally turned it into diy-moire. Hey, at least that wouldn’t be visible under lace, so I didn’t take too much care on future pieces.

We’re gonna call this a feature

Cut it out, sewed it together with french seams because part of the reason I sew is to make higher quality things than what you find in stores.

Tried it on, and HOUSTON WE HAD A PROBLEM

Covid + having a kid + french seams making it easy to be off a couple millimeters times 6 seams equaled it was about an inch too small for my waist. I threw the skirt into the naughty corner while pondering my options:

  • try and let out the french seams enough to get more space (have I mentioned that this fabric definitely showed every stitch and liked to fray?)
  • Re-cut the back panels to be wider and replace them
  • Add a gusset (which would have been basically a triangle to just add width in the waist, because I didn’t have extra room at the hem without messing up the lace to underskirt width ratio)
  • Throw the whole damn thing away and start over with the rest of my silver fabric as just a gathered rectangle, because honestly that would be faster than fixing what I had

So I ended up going with option 4 of starting over, but not with the same fabric?!? That’s right, I remembered I had a silver/lavender dupioni petticoat I used for a costume back in 2011. Old enough that it predates this blog, and I’ve already started taking the overdress apart for the fabrics and trim.

Baby Molly! This was a vaguely 17th century inspired dress and I really want to make a real one some day…

The petticoat was both a little too wide at the bottom, and also didn’t fit at the waist. Luckily it was pleated, so this was an easy fix to take off the waistband and cut off a chunk at the back.

Looks like I had previously made the waistband on the cross grain? It wasn’t visible, so I guess it didn’t matter.

Looking back on old sewing it’s wild to see how much I’ve improved. Why did I line the waistband with linen making it super thick? Sure a waistband needs to be sturdy, but there are ways to do that while avoiding bulk.

Removing that promptly.

Conquering my fears and put in an invisible zipper for the back closure! I found a new tutorial which makes the process way easier than my previous methods.

I undid the previous double-folded hem and used some of the cut off excess to make a facing which some crinoline stuffed in there to make a much stiffer hem.

With the skirt basically done, it was time for the terrifying part – cutting the lace to size.

I did a truly immense amount of math to figure out how long the lace should be, taking into account that I wanted it just slightly longer than the solid underskirt, seam allowance at the top, and the 2″ heels I planned to wear. Then I thread-traced the cutting line since it’s not possible to see a marking on black net.

orange thread on the 18″ line. I now have a bunch of pretty silver flowers on an edge which will hopefully be corset decoration some day.

Due to paranoia, I basted the lace onto the dupioni skirt, popped it on the dress form, pinned it to simulate gathers, and HOUSTON WE HAVE ANOTHER PROBLEM

So the lace ended up a couple inches longer than the underskirt. This meant you couldn’t see the details at the bottom because of black-on-black floral pattern; it needs some kind of lighter backing. But I didn’t have extra dupioni since this petticoat is a decade old.

See how you can’t pick out details at the bottom, that’s not just the photograph

But this actually had a very happy ending! A friend mentioned that it looked a little bulky at the waist (which it did, because I was just planning on gathering to a narrow tcowaistband) and I figured I could fix that by having a yoke at the top, or a shaped wide waistband (at 3″ it’s debatable which it is). This would also let the underskirt be longer since it got to start 3″ below my natural waist.

After careful measuring, it also turned out that I hadn’t been as off measuring the lace vs petticoat length – while it measured the correct length on the table, the beaded motifs actually dragged lower when dealing with gravity – a full two inch difference!

So after very very very carefully checking my math again, I cut another two inches of netting off the top of the skirt, and cut the last of the dupioni excess to be a shaped waistband (funnily enough on the cross grain again, but since it has black netting over it from the cut off lace you can’t tell).

Aaand after sewing it together it still ended up too big – I once again forgot that you can’t have ease in a waistband that is supposed to sit at the natural waist because it will fall down. Your waist is also generally different sizes depending on whether you are sitting or standing, how much you’ve eaten, hormonal bloating… There’s a reason corsets and shapewear can be awesome and it’s not just for appearance; it makes sizing more consistent.

So seam ripped open some of the waistband, pulled the gathers more closely together at the side seams, took the waistband in, and popped it back on. The size is still a little bigger than I prefer, but at least for the first planned outing it was always going to have a corset over it to hold it up.

The yoke closes with two large snaps (part of the notions I inherited from my grandmother). This pulls a bit showing the waistband lining, but I had installed the zipper before planning on a wide waistband. Maybe one day I’ll replace this with a zipper that goes up all the way in addition to making the skirt slightly smaller, but eh who knows.

basically impossible to tell that the waist and main skirt are cut on different grains!
Lace closeup. It really needs the light background to pop.

Skirt done! And hey technically everything about it was from the stash or repurposed. Feels great to start making inroads on my fabric bins.

Then a couple (reasonably) quick accessories to bring the whole dark goth fae thing together:

The cape, aka the piece I designed the whole rest of the garment around. Made the exact same way as previous fantasy cape.

Tulle is a great option to avoid having to hem drapey sheer fabrics!

And conveniently a friend posted a tutorial video they found for wire-wrapped elf ears which both spawned A Mighty Need, and the beginnings of a jewelry stash as I decided I needed them in nearly every color…

The fun part of this outfit is it can move from “normal” to “costume” by progressively adding accessories. So by starting with bodycon dress from ThredUp + skirt:

adding midbust victorian corset

Then it was wedding time!

Thank you to my friend who made me this bustle era hair piece in exchange for homemade kumquat jam – I do not do hair and this is my new go-to formal hair piece.

wheee I’m a dramatic cape
The Cooks is a tradition among this lovely group of friends

Despite all the sewing shenanigans, I love love love how this outfit turned out. Dear friends, please more themed weddings for me to attend!

Posted in clothing from this century?, Fantasy/Scifi/Cosplay | 1 Comment

A fantasy fairy outfit – part one corset fail

I had some sewing plans. Then I got invited to a wedding with a dress code “fantasy dress encouraged”

hold up it’s new outfit time!!!!

I pretty much based the outfit off of wanting another fantasy cape, because they are so much fun to swish around in. I spent a ton of time looking around fantasy corsets on etsy, was hugely inspired by Sparklewren and Royal Black, and wanted to be a gothy fairy so I settled on a pink and black color scheme.

I started on the corset because obviously that’s the hardest part (a gathered skirt to go with it is easy right? Hold that thought for later…). I’ve made mid-bust corsets before, and figured an overbust wouldn’t be that different (oy). Of course I made my life difficult with a Sparklewren pattern that contains no boning layout or instructions…

The best part – fabric shopping! An Instagram poll ended up evenly split between the top three Silk Baron dupionis shown here on top of the skirt lace. I ended up going with the light pink, since I planned to cover it with black lace decorations.

alas poor salmon pink, no one liked you…

Before cutting I did my usual pattern adjustments – shortening the length (both above and below the waist) and also letting the waist out slightly. Turns out I am shaped like the world’s fastest hourglass (aka a cylinder) and can’t get much waist compression because my rib cage and hip bone are bffs and hang out next to each other, so all these lovely pattern curves needed to be straightened out.

In canvas, my practicing my first ever single layer hip gusset!

not quite even seam spacing all the way around, but not bad for a practice round
uglier from the back and I didn’t catch the top point, but again first ever attempt

The way I generally do my corset mockups is doing a giant basting stitch to sew the seam allowance down and add bones to those channels. I also have pre-made lacing strips which get basted onto the back.

It’s…a look? Despite wanting cleavage of doom, this was a bit much. And the shape of the flappy bits was odd. (Unfortunately I couldn’t find any pictures of the made-up corset pattern, so I was also going blind on what the flappy bits should look like on a person).

no I’m not that short, strange camera angles doing their thing here
Back is touching from waist down, so this is too big.

Between mockups one and two I tweaked the shape of the flappies, raised the center front, made the front bottom shape into a way more flattering V point, and took things in a bit to try and fix the back lacing to make it more even.

V1 on the left, v2 on the right:

Also I put bones in the middle of panels so I could get a better sense of what was going on

Closer, but still not there. For the final version, I let out the top of the back a bit more, and also totally changed the shape of the bust. I chopped off the flappy bits (which I like the idea of, but could not make look good) and went for more of a V. I also split the front panel into two, so I could more easily tweak the shape over the bust.

According to my notes this is mockup #4, I don’t even remember what happened to number 3

Unfortunately, to truly make a corset mockup, you have to make a corset. Since I wanted the pink corset to be the couture fantasy corset of my dreams, I decided to make a wearable mockup first with absolutely zero shortcuts (rather than spending all that time on plain boring canvas). And since the only appropriate extra fabric I really had was some dark red leftover silk taffeta, I would hopefully end up with a second goth AF corset?

I used various techniques I learned from the Royal Black patreon about working with two fabrics (this is the only Patreon I actually pay $10 a month for, and I cannot emphasize enough how much it is worth it. Truly a bargain for the tutorials and knowledge you get from a professional). The outside is silk taffeta from Renaissance Fabrics, the strength layer is a cotton twill from Dharma Fabrics. It’s nowhere near as strong as a coutil, but when layered with the silk and all the boning it ends up strong enough.

System win for saving all these super narrow pieces of fabric over the years!

And when I said couture, I meant it. For each piece of the corset I basted across the waist and the middle to hold them together. Then carefully holding it over a tailors ham, I basted the sides in order to build in the curve that it needs over the body. I also bent over the seam allowance as if it was ironed down and basted just outside of it.

Hard to see, but those slight wrinkles when the panel is right side up are meant to be there. They go away when the fabric goes over a body.
All that practice with single layer gores paid off!

I ended up sewing the whole thing together – including boning channels which cover the trimmed seam allowance – except the channel over the seam closest to the busk. I figured that would leave me enough wiggle room to alter the bust shape if needed.

Then I tried it on –

eww ew nope uggo uggo uggo UGH.

From the front and back it’s not awful, but from the side profile you I ended up with a conical smashed down completely flat shape instead of a nice curvy shape.

I’ve got some small pads on the hips there to get any semblance of hourglass shape. I just do not get waist reduction and I need to accept that fact…
seriously what in the elizabethan heck is this nonsense.

Looking at the pattern it’s obvious what’s wrong. The top of 1b and 2 are convex curves (that’s how you get space for the bust), but the piece I split into two (which is now pieces 1a and 1b) also needed some convex curve. Instead it’s more or less straight.

In order for this to not be a total waste of time, I eked out as much curve as I could from the seam allowance between those two pieces. (and also took in the top so it laid flatter)

Final results:

The faiiiiintest hint of a curve

So it went from unwearably bad to meh. That’s good enough for me to finish and wear at a later date (especially when I cover it with black lace and bling to distract anyone from the shape) but was not good enough to be the wearable mockup for the intended new corset. And since I was running out of time, it got put in the naughty corner to think about what it’s done, and I planned to wear my regular old Victorian corset as outerwear instead (which uh, I still haven’t put up the final pictures of years later…)

And then onto what surely had to be easier to make – a plain rectangle gathered skirt. Right?!? Dun dun dun to be continued…

Posted in Corsets, Fantasy/Scifi/Cosplay | 1 Comment

1790s open robe photos

So 1790s, with gathering under the bust, is known for making you look rather pregnant. Note, it probably won’t make you look *this* pregnant, but I was 39 weeks pregnant here and literally had a baby the next day. I tossed some fake curls in my hair, pulled out a ribbon, and took pictures stat because I knew there would pretty much be no upcoming chance after that (given this post is coming when baby is now 11 months, I was quite correct).

From the inside out I’m wearing a cami, bra-that-fakes-regency-stays, a strapped petticoat, round gown, the open robe, and my favorite part, the shoes I painted! Necklace and brooch are both Dames a la Mode.

Please caption this regency romance novel cover
Gonna have to keep turning my back to people because the back is the most dramatic and best part of the outfit
actually maybe the shoes are the best part!
(internal thoughts: get the baby out get the baby out I am *done* with this)

I’m still waiting for a place to wear this! Indoor only because a sheer white silk gown and long silk train don’t do so well dragging on the ground, plus warm weather because of sheer silk dress. And with that, a new era is added to my wardrobe!

Posted in 1790s, Regency, Round gown, Warp Print Open Robe | 1 Comment

1790s open robe construction

And we are finally at the reason I started a 1790s project in the first place! (Also, this post has literally been in draft since February. Which is also when I had a baby, which explains everything).

As I posted way over a year ago(!), Burnley and Trowbridge posted a few pictures on their Instagram of dresses made of amazing ikat (or warp print or chiné a la branchefabric.

I went looking to see if I could find anything remotely similar (because I do love a challenge of trying to find historically adequate 18th century fabrics) and came across this one:

My mother in law got me some for Christmas in 2020, and this outfit started coming together in my head.

First, let’s go over the ways that this is not a historically accurate chine/warp print fabric:

  • The way the fabric is made. This fabric is a regular satin (or taffeta? It seems to be somewhere in the middle. Not totally a plain weave, but not quite as smooth as a satin. The weft threads go over ~2 warp threads, rather than a single one for a plain weave). The patterned parts are made like a regular jacquard, except the pattern purposely skips over a thread here and there to make the edges look blurry. This is not the same way a warp print was made historically (which was way more labor intensive). But it’s a clever way to fake it!
  • The scale of the fabric. Those patterned stripe sections are around 6 inches wide, and the purple sections around 8″. It’s clear this is meant to be an upholstery fabric, rather than a garment fabric (compare to the much narrower stripes in the Met open robe, where they alternate ~1″ sections of pattern and plain). This meant I had to be a lot more wasteful with fabric in trying to place stripes where I wanted them or pattern matching, compared to a very fabric-frugal18th century seamstresses mantua maker. I could have used significantly less fabric if I didn’t go for symmetry, but that would have been way less attractive.

For the pattern, I did want it to be a little more earlier-in-the-decade-shaped so I made a new pattern piece by slapping some see-through packing material that acts remarkably like swedish tracing paper over the round gown on my dress form.

Higher at the back, and a less rounded armscye.
Direct comparison over the back piece of the round gown.

A mockup as always, because when you are working with the most expensive fabric you own, you double check the fit:

Using whatever scraps I hand on hand, which was some maroon cotton and some usual muslin
You too can hide a 7.5 month pregnancy with 1790s costume!

It fit!

With that, onto construction! Tldr; it’s basically the same as my round gown, except even easier because it doesn’t have a front to fit, just a band under the bust.

A billion photos ahead!

For the lining, fold down the seam allowance on fronts and straps, whip them down to the back piece

Flip it around, fingerpress + baste the seam allowance to the inside

Testing the train length (despite this ended up too short and I ended up piecing on an 8″ strip at the bottom)

no turning back now!
prepare for so many critical role gifs as I am finally coming up on the end of Campaign 1

I did a test run of pleating with muslin to get to something I approximately liked and to get a sense of how much fabric I needed, then went with the real thing.

Turns out there is a reason these extant gowns always place fabric at an angle at center back – if you pleated a straight rectangle, you would need to waste so much more fabric to get the pleats to go low enough as you travel away from center back. Turn your fabric on an angle, and the extra length is just there! Makes sense for a time when fabric is the most expensive part of a gown.

This is the basis of all 18th century garments – as long as your lining fits, you can do whatever you want with the outer fabric (and they did indeed do whatever they wanted, especially during a particularly transitional fashion time like this).

I ended up doing fewer pleats than this test in order to show off the patterned part of the fabric, which didn’t look as good hiding in the pleats. I even used two pieces of fabric here, you just can’t tell because the seam is hidden under the pleats

See also plain purple band to go under the bust on the left part of the garment

The side piece got a piece of fabric with the pattern once again. The seam allowance is folded under on both sides and topstitched down.

From what I can tell of museum pictures, it doesn’t look like open robe trains at the time actually had a lining or facing. But mine definitely got a facing at the bottom where it touched the ground, because I’m not dragging $$$ silk on the ground kthx! This is actually some purple polyester satin in a similar shade to the purple in the dress dress that I got for dirt cheap in the Costume College bargain basement years ago.

Long rectangle is loooooong. All the sides were turned in and hand whipped on.

Top of the train is pleated up and sandwiched between the lining and fashion fabric of the bodice

There is nothing I hate more than doing knife pleats. At least stripes make it fairly straightforward to be even on both sides. Hold this thought for later…

Raw edge of the lining is turned under and the pleats are whipped to it

Note that fringe-y bit is the selvedge – I decided it was a pretty design element and left that edge to show on the sides of the skirt.

Same happens on the outside

Spot the problem?

2 purple pleats on the left, 3 purple pleats on the right. No I didn’t bother fixing it.

Then figuring out the strap and sleeve pattern! Aka the absolute worst part. Open robes can have any number of sleeve variations; no sleeves, short, medium, long. I decided to go with the most difficult version and go with a full length long sleeve which buttoned at the wrist.

I put the robe on over the round gown to figure out where I needed to add a bit more to my sleeve pattern, because the open robe had the earlier shape of having a very square corner where the strap hits the back.

I stuck pins in the round gown to mark where the open robe hit and transferred that amount to the round gown sleeve pattern.

I’ll be honest, I could not even begin to explain the frankenpatterning that went on below. It was a combination of my open robe sleeve plus the shapes from a Janet Arnold gown while trying to match it to my measurements.

This went through several iterations and mockups.

I think the paper was my round gown sleeve made longer, turned into fabric, then the fabric was cut apart where I wanted to move the seam to?
I think this was me trying to add the forearm bit onto the pattern?

This pattern below is a fairly common shape for an 18th century sleeve, although it looks bizarre to the modern eye. Modern sleeves are often one piece, maybe with a dart at the elbow for a bit of curve. This results in a sleeve which is straight/unwrinkled when the arm is straight down at your side, but will obviously wrinkle up when you bend your arm. Whereas an 18th century sleeve is curved, such that the fabric is unwrinkled when your arm is slightly bent. I have no idea why this is the case.

It somewhat resembles a modern two piece sleeve (generally seen only in coats), except the tops are stuck together and you do the equivalent of a giant dart at the bottom. It’s pretty cool I think!

From shoulder-to-elbow is from my round gown pattern and the elbow-to-wrist part came direct from Janet Arnold
I ended up needing way more height at the shoulder. Making this pattern look exactly like Janet Arnold and nothing at all like the pattern I started with from my round gown, so why did I even bother with my own?!? At least I got there eventually.
Handsewed the dart up to where the buttons would be, and basted down the seam allowance there
what it looks like from the right side with the button overlap
The dart was also sewn into the lining, and the two pieces are put wrong sides together. For some reason I made the button extension a separate piece in the lining. This doesn’t actually save fabric, so I have no idea why I did this.
Pinning them together over a tailor’s ham to keep the curve
Weird-running-whipstitch thing around the button extension edges

And now a nifty way of putting together an 18th century sleeve with no raw edges. Pin the edges together, wrong sides together. But leave out *one* of the fashion fabrics edges. Sew up that seam. Then the fashion fabric that got left out has the seam allowance folded under, and whipped over the top of the seam you just did, to enclose the raw seam inside the sleeve.

Then the part I was dreading the most – handsewn buttonholes. Look, by this point I had literally handsewn everything else in the outfit, it would be silly to pull out the machine for buttonholes now. I practiced with a scrap end of green silk buttonhole twist, and things were looking decent (if not perfect) by the time I did buttonhole test #3 in ivory.

A nifty thing I picked up from Janet Arnold – the buttonholes are angled so that they are sewn on the straight grain. If you sewed the buttonholes parallel to the opening (like a normal buttonhole), they would end up on the bias, which would be a wibbly mess to sew. Sewing them at this angle makes them more stable, and is also a super cool looking design feature.

(Anyone reading this a tailoring expert? I have some very nitpicky questions about how to improve handsewn buttonholes)

Then some tedious button covering using whatever scraps I had left. I used the instructions from this Youtube video.

Small size for the cuffs, larger size for the back detail

Set the sleeves like any 18th century sleeve. The bottom is sewed on right sides together, the top is tacked onto the shoulder lining. Stick some fashion fabric over the top, folding under all the edge and hand sew that on.

It was so close to being the right length, so channeled my inner 18th century tailor and did some piecing on the shoulder strap rather than cut into new fabric.

After trying it on over the round gown, the difference in weights on the gown vs the open robe made the round gown poke out from the bottom of the train when walking which was not attractive.

So I ended up making the train SUPER EXTRA and pieced on an 8 inch extension. Which was teeedious (unpicking the hem, sewing this piece on, cutting another lining piece for the extension, and re-hemming all the sides).

This would have been way less noticeable if it was pieced at the top because it would have gotten somewhat lost in the pleats, but I was not about to redo all my pleating nope nope nope
whipping the old lining facing to the new lining facing together to finish off the inside

To finish it off, I added a narrow gimp trim from Palladia Passementerie around every edge and the cuffs. Matching purples is difficult on the internet, and this is way more blue/purple compared to my red/purple fabric, but pretty sure 18th century folks did not have the same color matching sensibilities as us so I YOLOd and went with it.

Note the pieced bit on the front strap. Or don’t, because it didn’t line up quite as well as I wanted. 5 foot rule is in effect here.
I left the selvedge fringe because it looked purposeful. Expensive fabric can sometimes have a pretty selvedge!
How much trim I had left when I finished! Since the trim had been ordered before adding the train extension, which required an extra 16″ yikes

And a couple of photos of the finally finished robe!

Piecing on both sides of the shoulder straps
long train is looooooong
The back, literally the point of the entire outfit

Ok, since this post is already internet-breakingly long and full of photos, actual photos of me wearing it are gonna have to wait until next time! (whenever that may be. Time is a fake human construct anyways).

Posted in 1790s, Warp Print Open Robe | 1 Comment